1. Introduction
This manual provides instructions for the setup, operation, maintenance, and troubleshooting of your CRUA 27-inch 240Hz QHD IPS Gaming Monitor. This monitor features a 2560x1440 QHD resolution, a 240Hz refresh rate, an IPS panel for wide viewing angles, AMD FreeSync support, a blue light filter for eye protection, and built-in speakers. Please read this manual thoroughly before using the product.
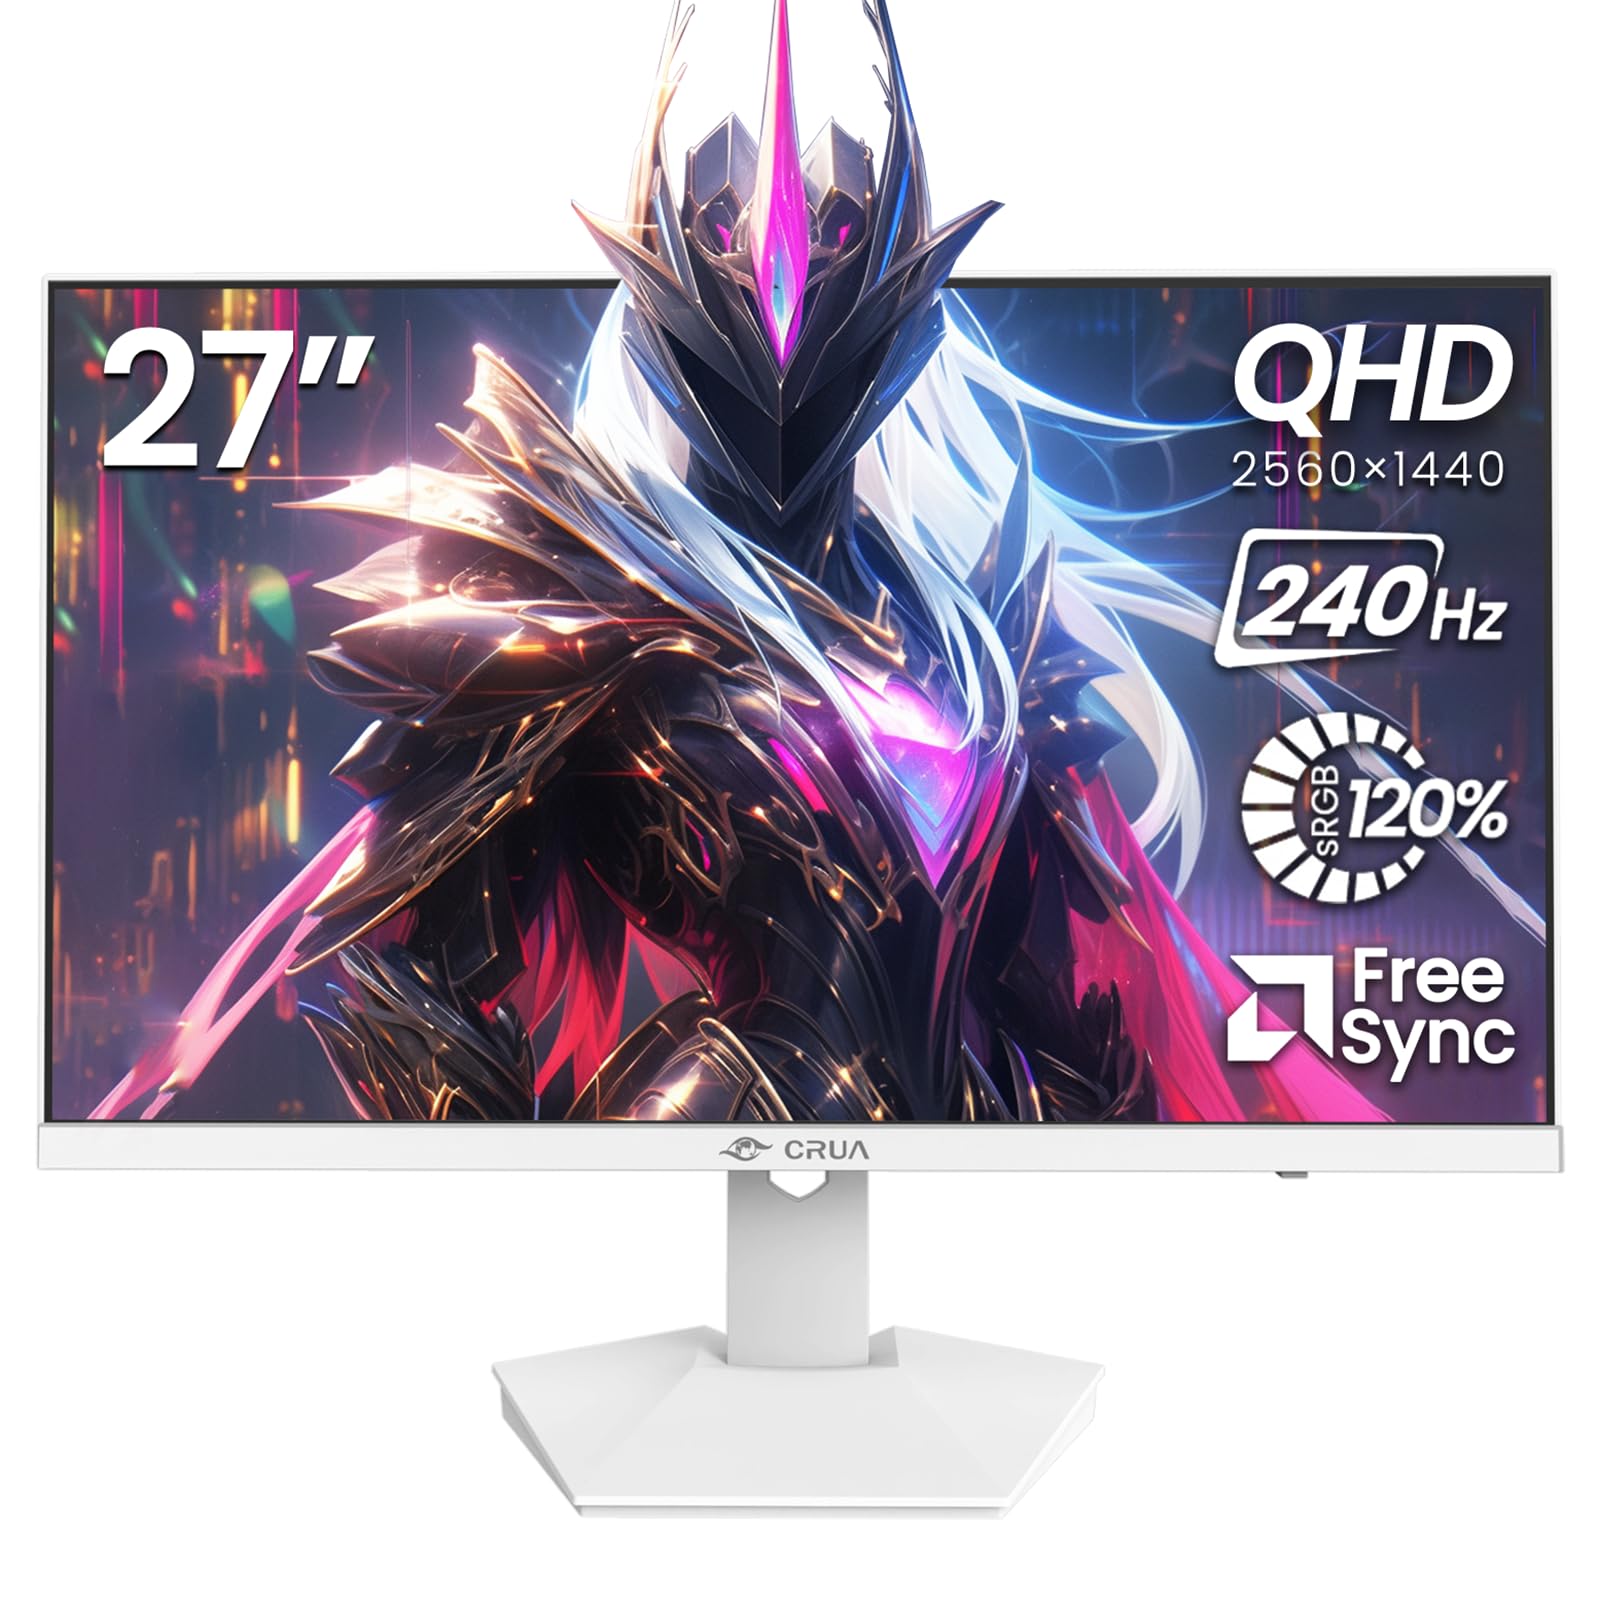
Image: Front view of the CRUA 27-inch 240Hz QHD IPS Gaming Monitor.
2. Package Contents
Verify that all items are present in the package:
- CRUA 27-inch 240Hz QHD IPS Gaming Monitor
- Monitor Stand (Base and Neck)
- Power Adapter and Cable
- HDMI Cable
- DisplayPort (DP) Cable
- User Manual (this document)
3. Setup
3.1 Stand Assembly
- Carefully remove the monitor from its packaging, placing it face down on a soft, clean surface to prevent scratches.
- Attach the stand neck to the monitor panel. Ensure it clicks securely into place.
- Attach the stand base to the stand neck. Tighten any screws if provided.
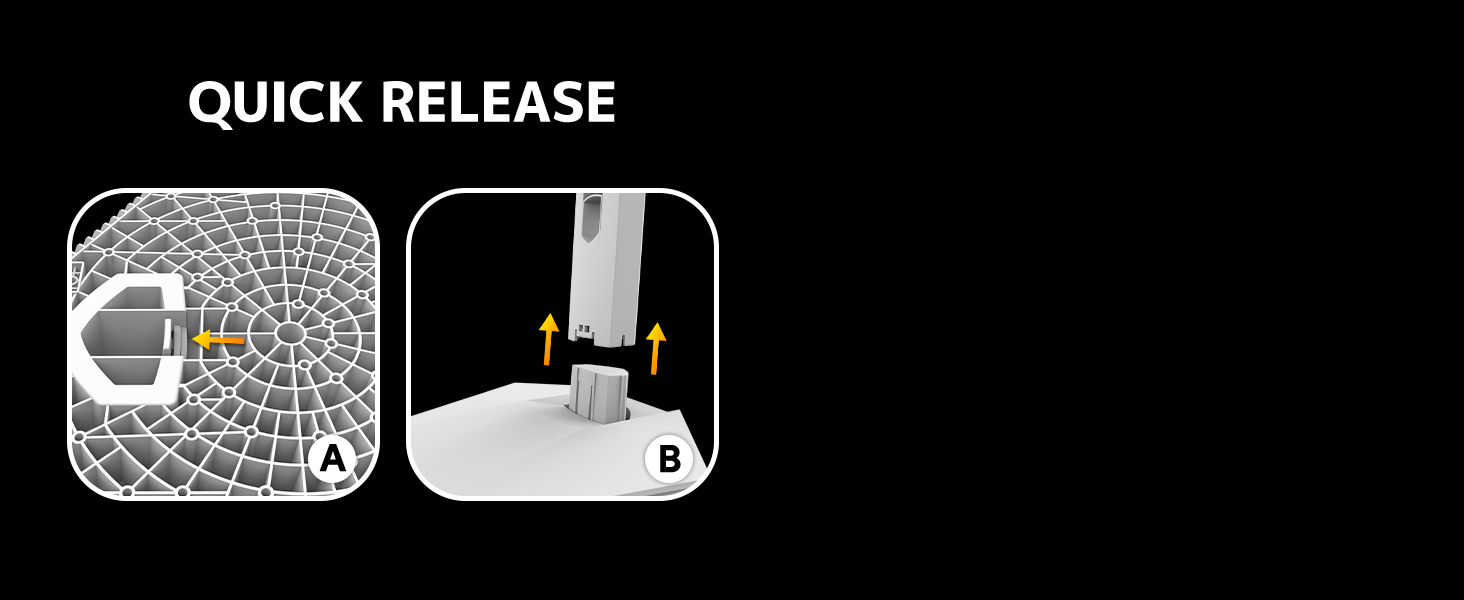
Image: Diagram illustrating the quick release stand assembly.
3.2 Wall Mounting (Optional)
The monitor supports VESA wall mounting (75mm x 75mm). To wall mount:
- Remove the stand from the monitor if it is already attached.
- Attach a VESA-compatible wall mount bracket (not included) to the monitor using appropriate screws.
- Follow the instructions provided with your wall mount for secure installation.

Image: Rear view of the monitor showing VESA mount points (75x75mm) and built-in speakers.
3.3 Connecting to a Computer
Connect the monitor to your computer using one of the following methods:
- DisplayPort (DP 1.4): For optimal performance, especially at 240Hz QHD resolution, use the included DisplayPort cable.
- HDMI (HDMI 2.0): Use an HDMI cable for QHD resolution at up to 144Hz.
Connect the power adapter to the monitor's power input and then plug it into a power outlet.

Image: Rear view of the monitor displaying the input ports, including HDMI and DisplayPort.
4. Operating Instructions
4.1 Power On/Off
Press the power button located on the back of the monitor to turn it on or off. The power button may resemble a joystick for OSD navigation.
4.2 On-Screen Display (OSD) Menu
The OSD menu allows you to adjust various monitor settings. Use the joystick-like button on the back of the monitor to navigate the menu:
- Press the button: Opens the OSD menu.
- Move Up/Down: Navigates through menu options.
- Move Left/Right: Adjusts selected settings or enters sub-menus.
- Press again: Confirms selection or exits a sub-menu.
4.3 Display Settings
Within the OSD menu, you can adjust:
- Brightness/Contrast: Adjust the overall luminance and contrast ratio.
- Color Settings: Fine-tune color temperature, hue, and saturation. The monitor offers 120% sRGB color coverage for accurate and vibrant visuals.
- Input Source: Manually select between HDMI and DisplayPort inputs.

Image: Details on true color accuracy, including 120% sRGB, 8-bit color depth, and 16.7 million colors.
4.4 Gaming Features
- Refresh Rate: The monitor supports up to 240Hz refresh rate for smooth motion. Ensure your graphics card and cable support this rate.
- AMD FreeSync: Enable FreeSync in the OSD menu and on your AMD graphics card settings to eliminate screen tearing and stuttering.

Image: Visual comparison demonstrating the smoothness of 240Hz refresh rate versus 60Hz.

Image: Illustrates the effect of Adaptive Sync (FreeSync) on reducing screen tearing and stuttering.
4.5 Eye Protection
The monitor includes a built-in blue light filter to reduce eye strain during extended use. This feature can be enabled or adjusted through the OSD menu.
5. Maintenance
To maintain your monitor's performance and appearance:
- Cleaning the Screen: Gently wipe the screen with a soft, lint-free cloth. For stubborn marks, use a monitor-specific cleaning solution applied to the cloth, not directly to the screen.
- Cleaning the Casing: Use a soft, dry cloth to wipe the monitor casing. Avoid abrasive cleaners or solvents.
- Power Off: Always turn off the monitor and unplug it from the power outlet before cleaning.
6. Troubleshooting
| Problem | Possible Cause | Solution |
|---|---|---|
| No image on screen | Monitor is off or not receiving signal. | Ensure power cable is connected and monitor is on. Check video cable connection (HDMI/DP) to both monitor and computer. Select correct input source via OSD. |
| Image flickering or tearing | FreeSync not enabled or incompatible settings. | Enable FreeSync in the monitor OSD and your graphics card control panel. Ensure your graphics card drivers are up to date. |
| Poor picture quality (blurry, incorrect colors) | Incorrect resolution, color settings, or faulty cable. | Set display resolution to 2560x1440. Adjust brightness, contrast, and color settings in the OSD. Try a different video cable. |
| No sound from built-in speakers | Volume too low, incorrect audio output selected. | Increase monitor volume via OSD. Ensure the monitor is selected as the audio output device in your computer's sound settings. |
| Dead pixels | Manufacturing defect. | Refer to warranty information for pixel policy. Contact customer support if within warranty. |
7. Specifications
| Feature | Specification |
|---|---|
| Model Number | CR270I |
| Screen Size | 27 Inches |
| Panel Type | IPS |
| Resolution | 2560 x 1440 (QHD) |
| Refresh Rate | 240Hz |
| Aspect Ratio | 16:9 |
| Color Gamut | 120% sRGB |
| Brightness | 300 cd/m² |
| Contrast Ratio | 1000:1 |
| Viewing Angle | 178° (Horizontal/Vertical) |
| Video Inputs | HDMI 2.0, DisplayPort 1.4 |
| Audio | Built-in Speakers |
| VESA Mount | 75mm x 75mm |
| Product Dimensions | 1.78 x 24 x 14 inches |
| Item Weight | 12.62 pounds |
8. Warranty and Support
CRUA provides high-quality computer monitors and premium services. If you have any questions or require assistance, please contact CRUA customer support. Refer to your purchase documentation for specific warranty terms and contact information.


