1. Introduction
Thank you for choosing the QJA EM653 Espresso Machine with Grinder. This manual provides essential information for the safe operation, setup, maintenance, and troubleshooting of your new appliance. Please read it thoroughly before first use and retain it for future reference.
1.1 Important Safety Instructions
- Read all instructions before operating the appliance.
- Do not immerse the appliance, power cord, or plug in water or other liquids.
- Ensure the voltage indicated on the appliance corresponds to your local mains voltage before connecting.
- Close supervision is necessary when the appliance is used by or near children.
- Unplug from the outlet when not in use and before cleaning. Allow to cool before putting on or taking off parts, and before cleaning the appliance.
- Do not operate any appliance with a damaged cord or plug, or after the appliance malfunctions or has been damaged in any manner.
- Use only accessories recommended by the manufacturer.
- Do not place on or near a hot gas or electric burner, or in a heated oven.
- Always ensure the water tank is filled to the appropriate level before brewing.
- Exercise caution when handling hot steam and hot surfaces. The steam wand can cause burns.
2. Product Overview
The QJA EM653 is a professional-grade espresso machine featuring an integrated conical burr grinder, 20 bar pressure pump, and an anti-scalding milk frother steam wand. It offers 30 grinding settings and 5 temperature levels for customized coffee preparation.
2.1 Components
Familiarize yourself with the various parts of your espresso machine and its accessories:

Figure 2.1: Included Accessories. This image displays the QJA EM653 Espresso Machine alongside its comprehensive set of accessories, including various filters, a milk jug, cleaning tools, and the user manual.
- Main Unit: Espresso machine with integrated grinder, control panel, brewing head, and steam wand.
- Water Tank: Detachable for easy refilling and cleaning.
- Bean Hopper: Detachable container for whole coffee beans.
- Portafilter: 58mm professional-grade portafilter.
- Filter Baskets: Single and Double shot filter screens.
- Tamper: For compacting ground coffee in the portafilter.
- Milk Jug: Stainless steel jug for frothing milk.
- Dosing Funnel: Accessory to prevent coffee powder spillage during grinding.
- Cleaning Brushes: For maintaining the grinder, brewing head, and blade disc.
3. Setup
3.1 Unpacking and Placement
- Carefully remove all packaging materials and accessories.
- Place the machine on a stable, level, heat-resistant surface, away from water sources and heat.
- Ensure adequate clearance around the machine for ventilation.
3.2 Water Tank Installation
- Remove the detachable water tank from the back of the machine.
- Fill the tank with fresh, cold filtered water up to the MAX line.
- Carefully place the water tank back into its position, ensuring it is seated correctly.

Figure 3.1: Detachable Water Tank. The image illustrates the easy removal and re-insertion of the large-capacity water tank for refilling and cleaning.
3.3 Bean Hopper Installation
- Place the detachable bean hopper onto the top of the machine, aligning it with the grinder opening.
- Rotate the hopper clockwise until it locks into place.
- Fill the hopper with whole roasted coffee beans.
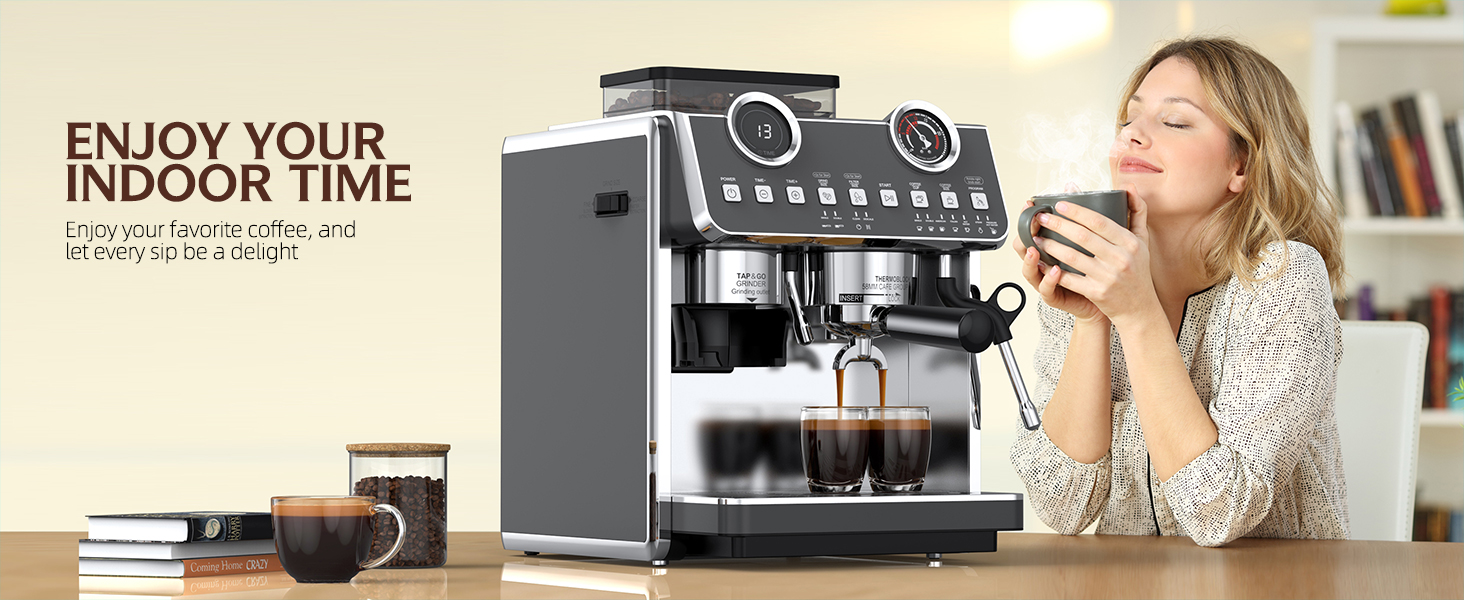
Figure 3.2: Detachable Bean Hopper. This image shows the bean hopper being placed on the machine, highlighting its detachable design for easy cleaning and maintenance of the grinder.
3.4 Initial Cleaning Cycle (First Use)
- Ensure the water tank is filled.
- Place a large container under the brewing head and steam wand.
- Power on the machine. Allow it to preheat.
- Run a cycle of hot water through the brewing head without coffee.
- Activate the steam wand to release hot water for a few seconds.
- Repeat steps 4 and 5 two to three times to clean internal components.
4. Operation
4.1 Grinding Coffee Beans
- Ensure the bean hopper is filled with fresh, whole coffee beans.
- Select your desired grind setting using the dial on the bean hopper. The machine offers 30 grinding choices, from coarse to fine. Finer settings are suitable for espresso, while coarser settings are for filter coffee.

Figure 4.1: Conical Burr Grinder. This image highlights the machine's conical burr grinder with 30 adjustable settings, demonstrating the visual difference between coarse, medium, and fine grinds.
- Insert the portafilter into the grinding outlet. You may use the included dosing funnel to prevent spillage.
- Press the grind button to start grinding. The machine will grind the beans directly into the portafilter.
- Once the desired amount is ground, remove the portafilter.
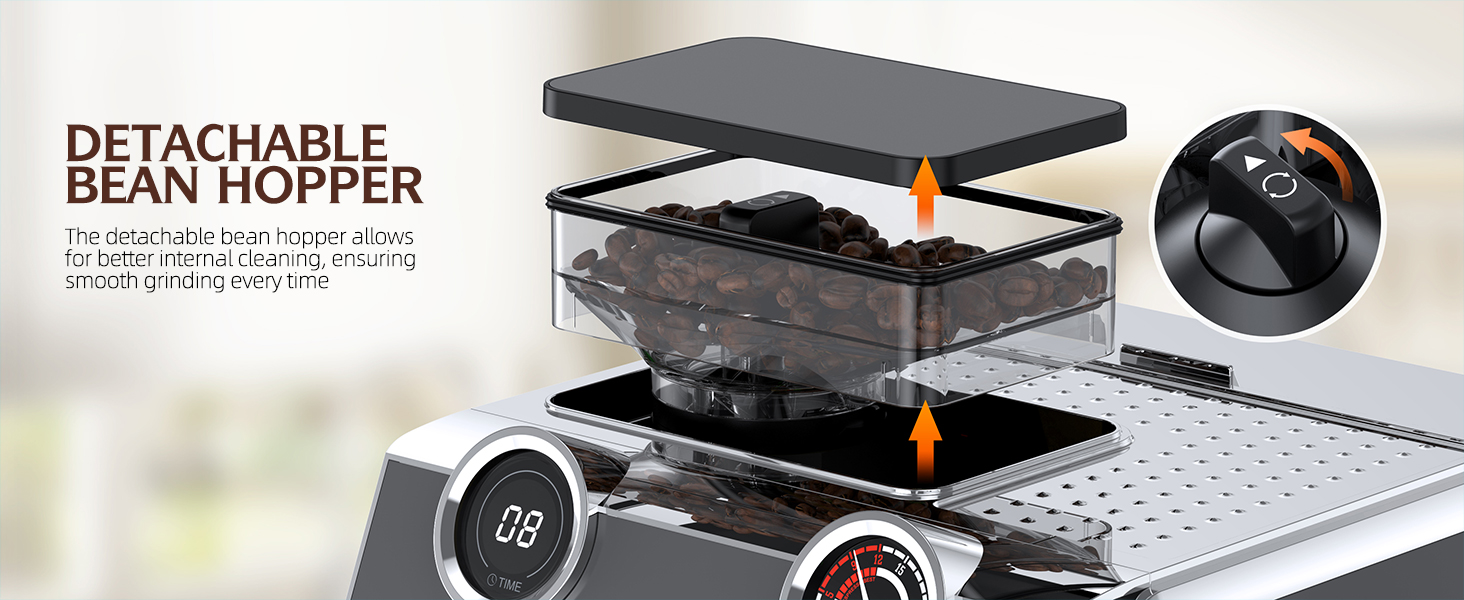
Figure 4.2: 30 Grind Settings & Dosing Funnel. This image focuses on the grinding mechanism, showing how the dosing funnel helps contain coffee grounds during the grinding process, preventing waste and mess.
4.2 Brewing Espresso
- After grinding, ensure the portafilter contains the correct amount of coffee grounds (e.g., 7-9g for single, 14-18g for double).
- Use the tamper to press the coffee grounds firmly and evenly. Wipe any excess grounds from the rim of the portafilter.
- Insert the portafilter into the brewing head and rotate it to lock it securely in place.
- Place your espresso cup(s) on the drip tray beneath the portafilter.
- Select your desired coffee type (e.g., Italian or American) and cup size (single or double) on the control panel.
- Press the START button to begin brewing. The machine will extract espresso at 20 bar pressure.
- The machine will automatically stop when the programmed volume is reached.

Figure 4.3: Brewing Espresso. This image shows the QJA EM653 in action, dispensing two perfect shots of espresso into small glass cups, demonstrating its primary function.
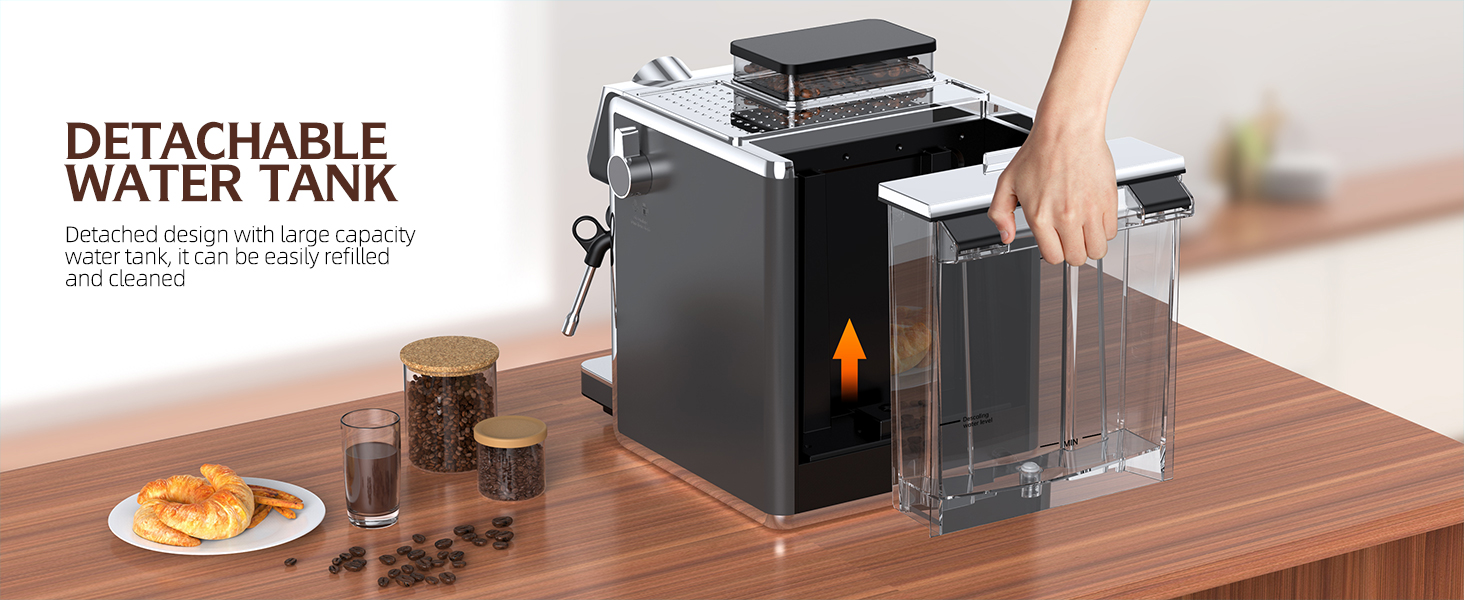
Figure 4.4: How to Make Coffee and Milk Foam. A visual step-by-step guide detailing the process from adding water and adjusting grind to tamping coffee, brewing, and finally frothing milk.
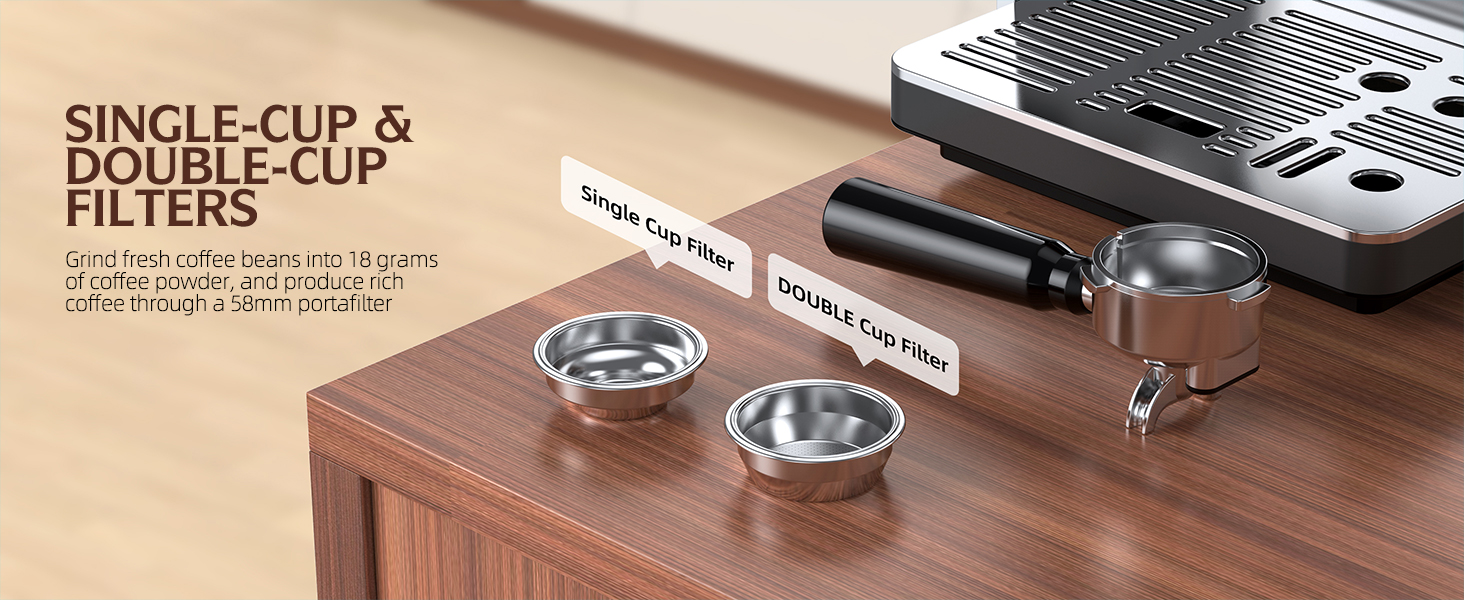
Figure 4.5: Single-Cup & Double-Cup Filters. This image displays the two types of filter baskets provided, allowing for preparation of single or double espresso shots.
4.3 Milk Frothing
- Fill the stainless steel milk jug with cold milk (dairy or non-dairy) to just below the spout.
- Position the steam wand into the milk, just below the surface.
- Activate the steam function on the control panel.
- Rotate the knob to release steam. Move the jug up and down to create foam.
- Once desired texture and temperature are reached, turn off the steam function and remove the jug.
- Wipe the steam wand immediately with a damp cloth to prevent milk residue from drying.

Figure 4.6: Powerful Steam System. The image demonstrates the machine's robust steam system in use, effectively frothing milk for lattes and cappuccinos.
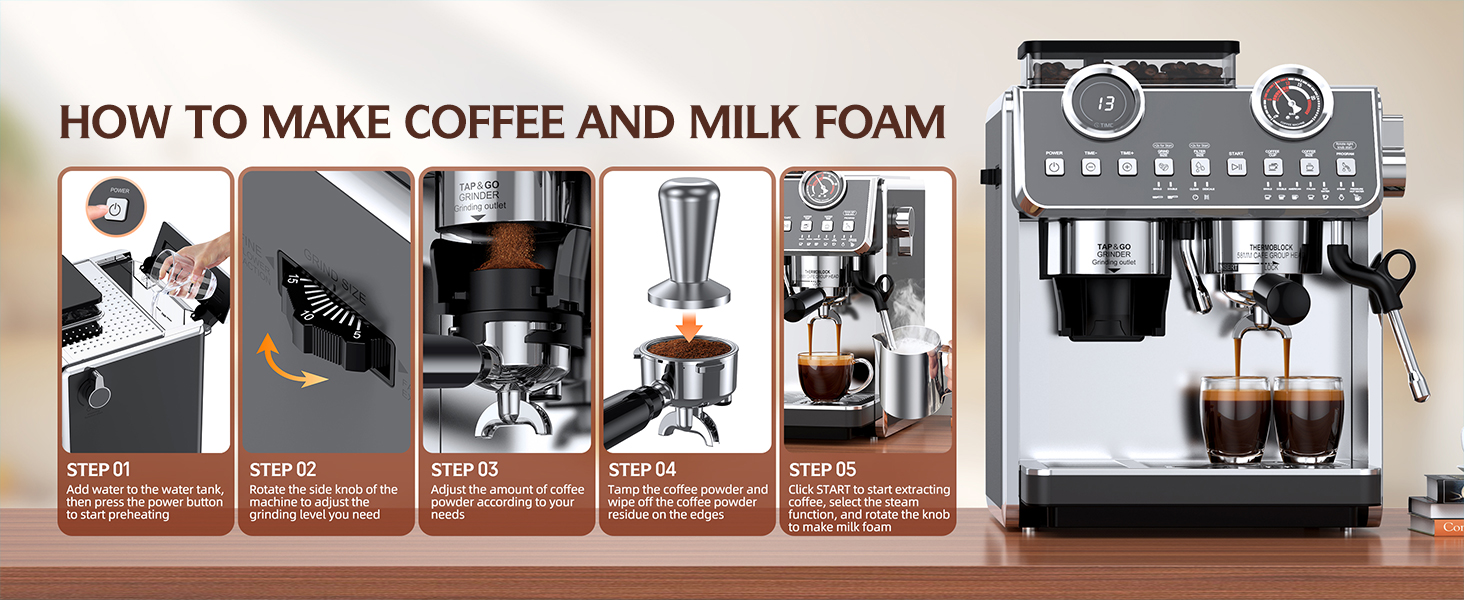
Figure 4.7: Powerful Milking Function. This diagram illustrates the 360-degree adjustable steam wand and the control knob for activating the hot water function, enhancing versatility.
4.4 Adjustable Temperature
The QJA EM653 allows you to adjust the brewing temperature with 5 available levels. After the machine preheats, select the Italian coffee option and then use the temperature adjustment buttons to cycle through the settings. This feature enables you to fine-tune the extraction based on bean type, roast level, and personal preference.
4.5 Self-Cleaning Function
The machine includes a self-cleaning mode to maintain hygiene and ensure consistent coffee quality by removing coffee oils and bacteria. Refer to the control panel for specific instructions on activating this mode.
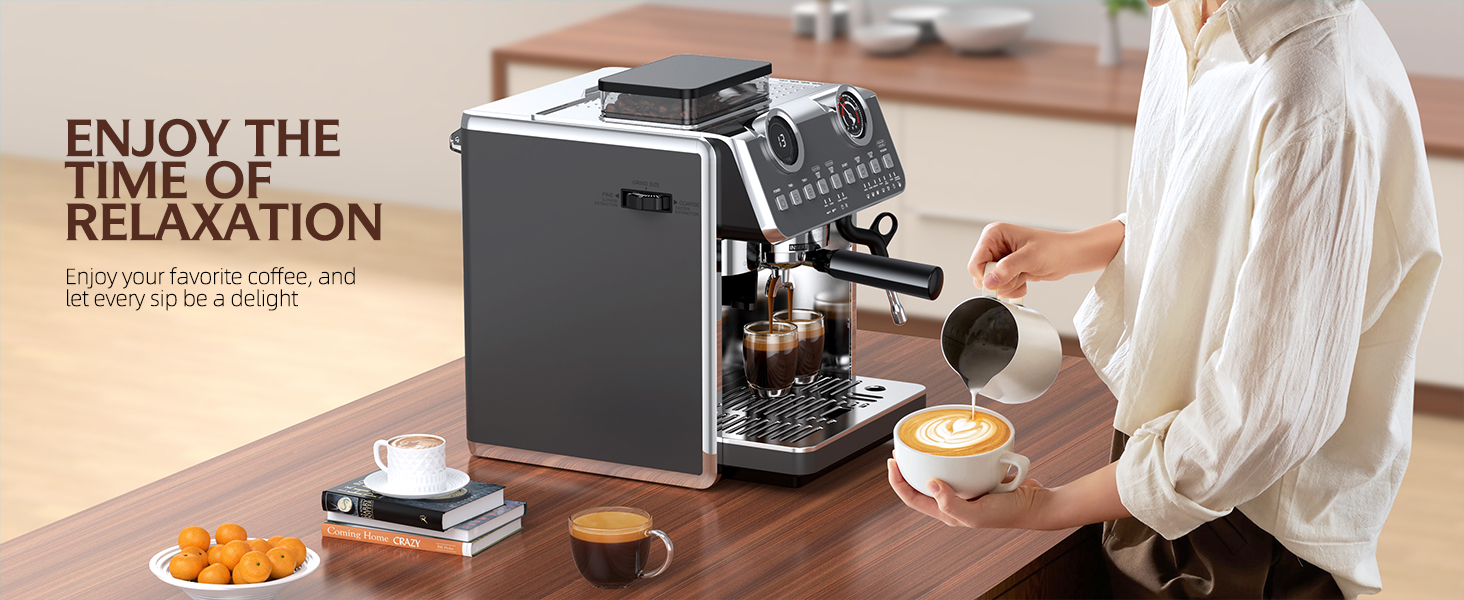
Figure 4.8: Self-Cleaning. This diagram illustrates the internal self-cleaning process, which helps maintain hygiene and ensures consistent coffee flavor by removing residues.
5. Maintenance
5.1 Daily Cleaning
- Portafilter and Filter Baskets: After each use, remove the portafilter, discard the coffee grounds, and rinse the portafilter and filter basket under hot water.
- Steam Wand: Immediately after frothing milk, wipe the steam wand with a damp cloth to remove any milk residue. Purge the wand briefly to clear any internal blockages.
- Drip Tray: Empty and rinse the drip tray daily or when the indicator shows it is full.
- Exterior: Wipe the exterior of the machine with a soft, damp cloth. Do not use abrasive cleaners or scouring pads.
5.2 Descaling
Regular descaling is crucial to prevent mineral buildup and maintain optimal machine performance. The frequency depends on your water hardness and usage. It is recommended to descale every 2-3 months or as indicated by the machine.
- Use a commercial descaling solution specifically designed for espresso machines, following the manufacturer's instructions.
- Fill the water tank with the descaling solution and water mixture.
- Run the solution through the brewing head and steam wand as if making coffee and frothing milk, until the tank is empty.
- Rinse the water tank thoroughly and refill with fresh water.
- Run several cycles of fresh water through the machine to remove any residual descaling solution.
6. Troubleshooting
Refer to the table below for common issues and their solutions.
| Problem | Possible Cause | Solution |
|---|---|---|
| No coffee dispenses / Slow flow | Water tank empty; Portafilter clogged; Coffee ground too fine; Too much coffee in filter; Machine needs descaling. | Refill water tank; Clean portafilter/filter; Adjust grind setting coarser; Reduce coffee amount; Perform descaling. |
| Coffee is watery / Too fast flow | Coffee ground too coarse; Not enough coffee in filter; Insufficient tamping. | Adjust grind setting finer; Increase coffee amount; Tamp more firmly. |
| No steam from wand | Steam wand clogged; Machine not heated to steam temperature. | Clean steam wand hole with a pin; Allow machine to fully preheat for steam function. |
| Machine leaks water | Water tank not seated correctly; Drip tray full; Internal component issue. | Re-seat water tank; Empty drip tray; Contact customer support if issue persists. |
| Grinder not working | Bean hopper empty; Beans jammed; Grinder clogged. | Fill bean hopper; Clear any jammed beans; Clean grinder components. |
7. Specifications
| Feature | Detail |
|---|---|
| Brand | QJA |
| Model Name | EM653 |
| Product Dimensions | 15.55"D x 20.04"W x 16.93"H |
| Item Weight | 36.2 pounds |
| Coffee Maker Type | Espresso Machine |
| Operation Mode | Semi-Automatic |
| Pressure | 20 Bar |
| Grinding Settings | 30 |
| Portafilter Size | 58mm |
| Voltage | 120 Volts |
| Special Features | Adjustable Brew Strength, Cup Warmer, Milk Frother, Removable Tank, Self-Cleaning |
| Included Components | Filter, Milk Frother, Dosing Funnel, Cleaning Brushes |
8. Warranty Information
The QJA EM653 Espresso Machine is covered by a manufacturer's warranty against defects in materials and workmanship. The specific terms and duration of your warranty may vary by region and retailer. Please retain your proof of purchase for warranty claims.
For detailed warranty information, please refer to the warranty card included with your product or contact QJA customer support.
9. Customer Support
If you encounter any issues or have questions regarding your QJA EM653 Espresso Machine that are not addressed in this manual, please contact our customer support team.
Website: Visit the QJA Store on Amazon
Please have your model number (EM653) and purchase date ready when contacting support.