1. Introduction
This instruction manual provides essential information for the safe and effective use, installation, and maintenance of the Generic 115860-01 Ignitor. This component is designed as a replacement part for various All Pro oil fired heaters. Please read this manual thoroughly before attempting any installation or service.
2. Safety Information
WARNING: Risk of Electric Shock and Fire. Improper installation or maintenance can lead to serious injury or death.
- Always disconnect power to the heater before installing, servicing, or removing the ignitor.
- Installation and service should only be performed by a qualified technician.
- Ensure the replacement ignitor matches the specifications of the original part.
- Do not operate the heater with a damaged or improperly installed ignitor.
- Keep flammable materials away from the heater and its components.
3. Product Overview
The 115860-01 Ignitor is an electrical component responsible for generating the high-voltage spark required to ignite the fuel in oil-fired heaters. It is also known by part numbers 2138, 1684, and 2138NR. The unit operates on a standard 120V, 60Hz power supply and provides a 12KV output for ignition.
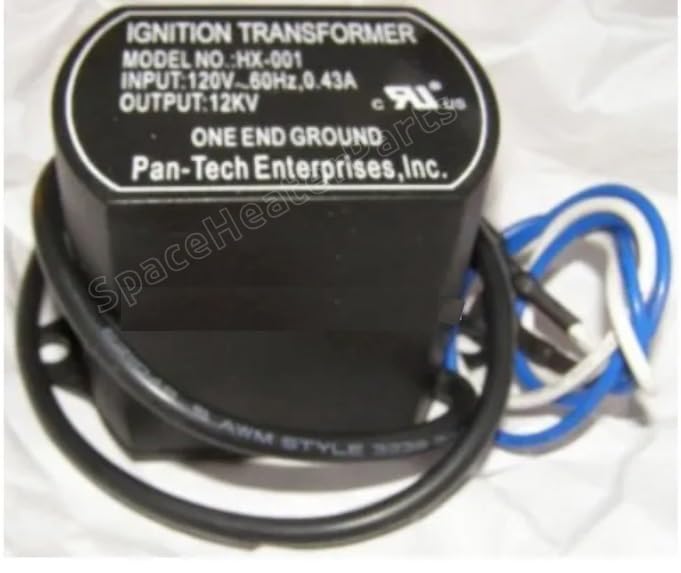
Image: The Generic 115860-01 Ignitor, an ignition transformer. It is a black, oval-shaped component with electrical wires extending from it. The label clearly indicates its model number HX-001, input voltage of 120V~60Hz, 0.43A, and output of 12KV. It is manufactured by Pan-Tech Enterprises, Inc.
4. Specifications
| Feature | Specification |
|---|---|
| Model Number | 115860-01 (also 2138, 1684, 2138NR) |
| Input Voltage | 120V, 60Hz, 0.43A |
| Output Voltage | 12KV |
| Brand | Generic (Pan-Tech HX-001) |
| Product Dimensions | 1"D x 4"W x 5"H |
| Item Weight | 3.2 ounces |
| Fuel Type Compatibility | Kerosene (for compatible heaters) |
| Burner Type | Electric |
5. Setup and Installation
The installation of an ignitor requires careful attention to safety and proper electrical connections. It is strongly recommended that installation be performed by a qualified and certified technician.
- Power Disconnection: Ensure the heater is completely disconnected from its power source before beginning any work. Verify with a voltage tester.
- Access the Ignitor: Locate and carefully open the access panel to the heater's combustion chamber or ignitor assembly. Refer to your heater's specific service manual for exact instructions.
- Remove Old Ignitor: Disconnect the electrical wiring from the old ignitor. Note the position and connection of each wire. Carefully unmount the old ignitor from its housing.
- Install New Ignitor: Mount the new 115860-01 Ignitor in the same position as the old one. Ensure it is securely fastened.
- Connect Wiring: Reconnect the electrical wiring to the new ignitor, ensuring all connections are secure and match the original configuration. Pay close attention to ground connections.
- Secure Access Panel: Close and secure the heater's access panel.
- Test Operation: Reconnect power to the heater and test its operation according to the heater's manufacturer instructions. Observe for proper ignition and operation.
Note: Incorrect wiring can damage the ignitor or the heater, and poses a fire hazard.
6. Operation
Once properly installed, the 115860-01 Ignitor operates automatically as part of the heater's ignition sequence. When the heater calls for heat, the ignitor receives power and generates a high-voltage spark across its electrodes. This spark ignites the atomized fuel (kerosene) in the combustion chamber, initiating the heating process. The ignitor typically operates for a brief period during startup and then deactivates once stable combustion is established.
7. Maintenance
The 115860-01 Ignitor is designed for reliable operation with minimal maintenance. However, periodic inspection is recommended as part of your heater's overall maintenance schedule.
- Visual Inspection: Annually, or as recommended by your heater's manufacturer, inspect the ignitor for any signs of physical damage, corrosion, or excessive carbon buildup on the electrodes.
- Wiring Check: Ensure all electrical connections to the ignitor are tight and free from fraying or damage.
- Cleaning: If carbon buildup is observed, gently clean the electrodes with a soft brush or fine-grit sandpaper, ensuring not to alter the electrode gap. Consult your heater's manual for proper electrode gap specifications.
- Replacement: If the ignitor shows significant wear, damage, or fails to produce a consistent spark, it should be replaced.
Always disconnect power before performing any maintenance.
8. Troubleshooting
If your heater is experiencing ignition issues, the ignitor may be a contributing factor. Always consult your heater's specific troubleshooting guide first.
- No Spark:
- Check power supply to the ignitor.
- Verify all wiring connections are secure.
- Inspect electrodes for damage or incorrect gap.
- The ignitor itself may be faulty and require replacement.
- Intermittent Spark/Delayed Ignition:
- Carbon buildup on electrodes can hinder consistent sparking; clean as per maintenance section.
- Loose connections.
- Weak ignitor, indicating it may be nearing the end of its service life.
- Heater Fails to Start:
- While the ignitor is critical, other components (fuel pump, nozzle, photocell, thermostat) can also cause starting issues. A qualified technician can diagnose the exact cause.
If troubleshooting steps do not resolve the issue, contact a qualified service technician.
9. Compatible Heater Models
The 115860-01 Ignitor is compatible with a range of All Pro oil fired heaters, including but not limited to the following models:
- K50-FA, K100-FA, K150-FA
- SPC-K50, SPC-K100, SPC-K150
- K75, K125, K175
- SPC-K75, SPC-K125, SPC-K175
- K350-FA, K650-FA
- SPC-K350, SPC-K650
Always verify compatibility with your specific heater model before purchase and installation.
10. Warranty Information
Specific warranty details for this Generic 115860-01 Ignitor are not provided in the product information. Please refer to the seller or manufacturer for any applicable warranty terms and conditions at the time of purchase.
11. Customer Support
For technical assistance, troubleshooting beyond this manual, or inquiries regarding parts and service, please contact the retailer or a qualified HVAC technician. Manufacturer-specific support contact information is not available in the provided product details.


