Introduction
This manual provides essential information for the installation, operation, and maintenance of your replacement range oven/stove igniter. This component is designed to replace the original igniter in compatible LG oven/stove models, ensuring proper ignition of the gas burner.
Safety Information
WARNING: Risk of Electric Shock, Fire, or Explosion.
- Always disconnect power to the appliance at the circuit breaker or fuse box before attempting any installation, repair, or maintenance.
- Turn off the gas supply to the appliance before beginning work.
- Gas appliance repair should only be performed by qualified professionals. If you are not comfortable with gas appliance repair, seek professional assistance.
- Ensure all gas connections are secure and leak-free after installation. Use a gas leak detector or soapy water solution to check for leaks.
- Wear appropriate personal protective equipment, such as gloves and eye protection.
- Keep children and pets away from the work area.
Compatibility
This replacement igniter is compatible with various LG range oven/stove models, including but not limited to:
- LG LDG3037ST
- LG LDG4311ST
- LG LDG4313BD
- LG LDG4313ST
- LG LDG3037S
It is crucial to double-check your appliance's model number and the part number of your existing igniter to ensure compatibility before ordering and installing this part. Appliance parts can look similar in many ways.
Package Contents
- One (1) Range Oven/Stove Igniter (Model: Mloan27425-7066)
Setup and Installation
Tools you may need:
- Screwdriver (Phillips and/or Flathead)
- Nut driver or Wrench set
- Pliers
- Gas leak detector or soapy water solution
Installation Steps:
Preparation:
Before starting, ensure the appliance is completely cool. Disconnect the appliance from the electrical power supply by unplugging it or turning off the circuit breaker. Turn off the gas supply valve to the range.
Access the Igniter:
Depending on your specific range model, you may need to remove oven racks, the oven bottom panel, and/or the burner assembly to gain access to the igniter. Refer to your appliance's specific service manual for detailed access instructions.
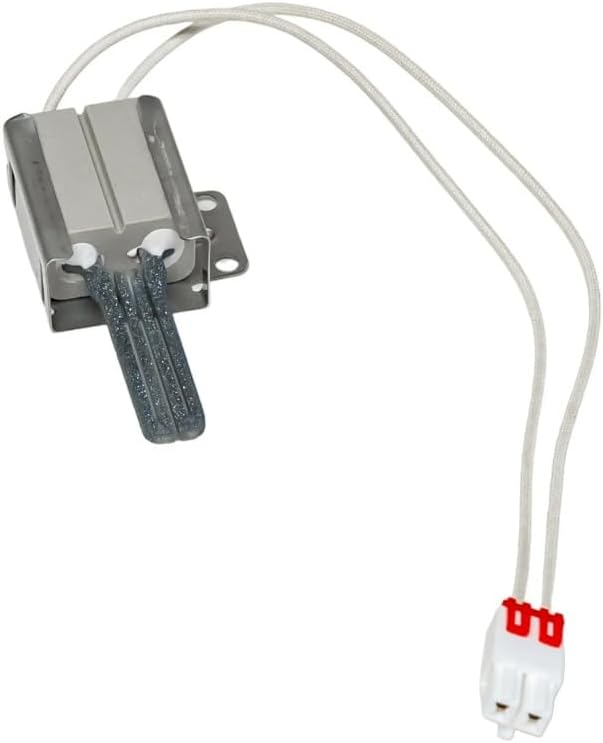
Image: Overview of the replacement range oven/stove igniter, showing the ceramic igniter element, metal bracket, and electrical wires with connector.
Remove the Old Igniter:
Carefully disconnect the electrical wires leading to the old igniter. Note their connection points. Unscrew any mounting screws holding the igniter in place and gently remove it from its position.

Image: Close-up view of the igniter's ceramic heating element and its metal mounting bracket, illustrating its compact design.
Install the New Igniter:
Position the new igniter in the same location as the old one. Secure it with the mounting screws. Connect the electrical wires to the new igniter, ensuring a secure and correct connection. Double-check all connections.
Reassemble and Test:
Carefully reassemble any panels or components that were removed. Turn the gas supply back on. Reconnect the electrical power to the appliance. Test the oven burner by setting it to bake or broil. The igniter should glow and then ignite the gas within a few seconds. Check for any gas leaks around connections using a gas leak detector or soapy water solution (bubbles indicate a leak).
If you encounter any difficulties or are unsure about any step, it is highly recommended to consult a qualified appliance technician.
Operating Instructions
Once installed, the igniter operates automatically as part of your oven's ignition system. When you select a bake or broil function, the igniter will heat up to a high temperature, creating a glow that ignites the gas flowing to the burner.
To ensure proper operation after installation:
- Verify that the igniter glows brightly when the oven is turned on.
- Confirm that the gas ignites smoothly and consistently after the igniter glows.
- Listen for any unusual sounds or detect any gas odors. If a gas odor is present, immediately turn off the gas supply and ventilate the area. Do not operate the appliance.
Maintenance
The igniter itself requires minimal maintenance. However, regular inspection of your oven's components can help prolong its life and ensure safe operation:
- Periodically inspect the igniter for any visible damage, cracks, or excessive carbon buildup.
- Ensure electrical connections remain secure and free from corrosion.
- Keep the oven interior clean to prevent grease and food debris from accumulating near the igniter, which could affect its performance.
Troubleshooting
If your oven is not igniting properly after replacing the igniter, consider the following:
Oven Not Igniting / No Glow:
- Check if the appliance has power.
- Ensure the gas supply valve is open.
- Verify all electrical connections to the igniter are secure and correctly wired.
- Confirm the igniter is properly mounted and not obstructed.
- If the igniter still does not glow, it may be faulty or there could be an issue with the oven's control board or wiring harness.
Slow Ignition / Weak Glow:
- A weak glow can indicate a failing igniter (even if new, rare but possible) or insufficient voltage.
- Ensure the gas pressure to the appliance is adequate.
Gas Smell Without Ignition:
Immediately turn off the gas supply to the appliance and ventilate the area. Do not attempt to operate the oven. Contact a qualified service technician immediately.
For complex issues, it is always best to consult a certified appliance repair technician.
Specifications
| Attribute | Value |
|---|---|
| Manufacturer | Mloan-Parts |
| Part Number | MLOAN-AP-PL-170425-7066 |
| Item Model Number | Mloan27425-7066 |
| Size | Medium |
| Color | White |
| Item Package Quantity | 1 |
| ASIN | B0F7J19B24 |
| Date First Available | May 5, 2025 |
Warranty and Support
Specific warranty information for this replacement part is not provided in the product details. Please refer to the seller or manufacturer (Mloan-Parts) for any warranty claims or technical support inquiries.
For general product inquiries or assistance, you may contact the seller through the platform where the purchase was made.