Introduction
This manual provides detailed instructions for the installation, operation, and maintenance of your Lordear 22"x22"x12" Stainless Steel Drop-In Laundry Sink with Faucet. Please read all instructions carefully before beginning installation and retain this manual for future reference.
Safety Information
- Always wear appropriate personal protective equipment (PPE) such as safety glasses and gloves during installation.
- Ensure all water supply lines are turned off before beginning any plumbing work.
- If you are unsure about any step, consult a qualified professional plumber or installer.
- Do not use harsh chemicals or abrasive cleaners on the sink surface, as this may damage the finish.
Package Contents
Verify that all components are present before beginning installation:
- 22 inch laundry sink
- 304 stainless steel dish grid
- Drain assembly
- Pull-out faucet
- Stainless steel drying rack
Specifications
| Brand | Lordear |
| Model Number | LZHF2-SS-01 |
| Material | T304 16 Gauge Stainless Steel |
| Color | Stainless Steel |
| Installation Type | Drop In (Topmount) |
| External Dimensions (D x W x H) | 22" x 22" x 12" |
| Internal Dimensions (W x D x H) | 20" x 17¾" x 11¾" |
| Bowl Depth | 12 Inches |
| Recommended Opening Size | 21½"W x 21½"D |
| Minimum Base Cabinet | 24 Inches |
| Drain Type | Grid (Standard 3.5 inch) |
| Item Weight | 32 Pounds |
Installation
This section outlines the steps for installing your Lordear drop-in laundry sink. For a visual guide, please refer to the installation video below.
1. Prepare the Countertop
Use the provided template to mark the cutout area on your countertop. Carefully cut the opening according to the template. The recommended opening size is 21½"W x 21½"D. Ensure your base cabinet is at least 24 inches wide to accommodate the sink.

Figure 1: Sink Dimensions and Cutout Guide. This diagram illustrates the external and internal dimensions of the sink, the recommended countertop opening size, and the minimum base cabinet width required for installation.
2. Place and Secure the Sink
Apply a bead of silicone sealant around the perimeter of the countertop opening. Carefully lower the sink into the opening. Ensure the sink is properly aligned. Use the provided mounting clips and screws to secure the sink firmly to the underside of the countertop. Tighten the screws evenly to create a watertight seal.

Figure 2: Installed Sink with Accessories. This image shows the Lordear sink fully installed in a countertop, complete with the faucet, roll-up rack, and bottom grid.
3. Install Drain Assembly
Install the drain assembly into the sink's drain opening. Ensure all gaskets and seals are correctly positioned to prevent leaks. Connect the drain to your plumbing system according to local codes. The sink features an X-shaped diversion water design for efficient drainage.
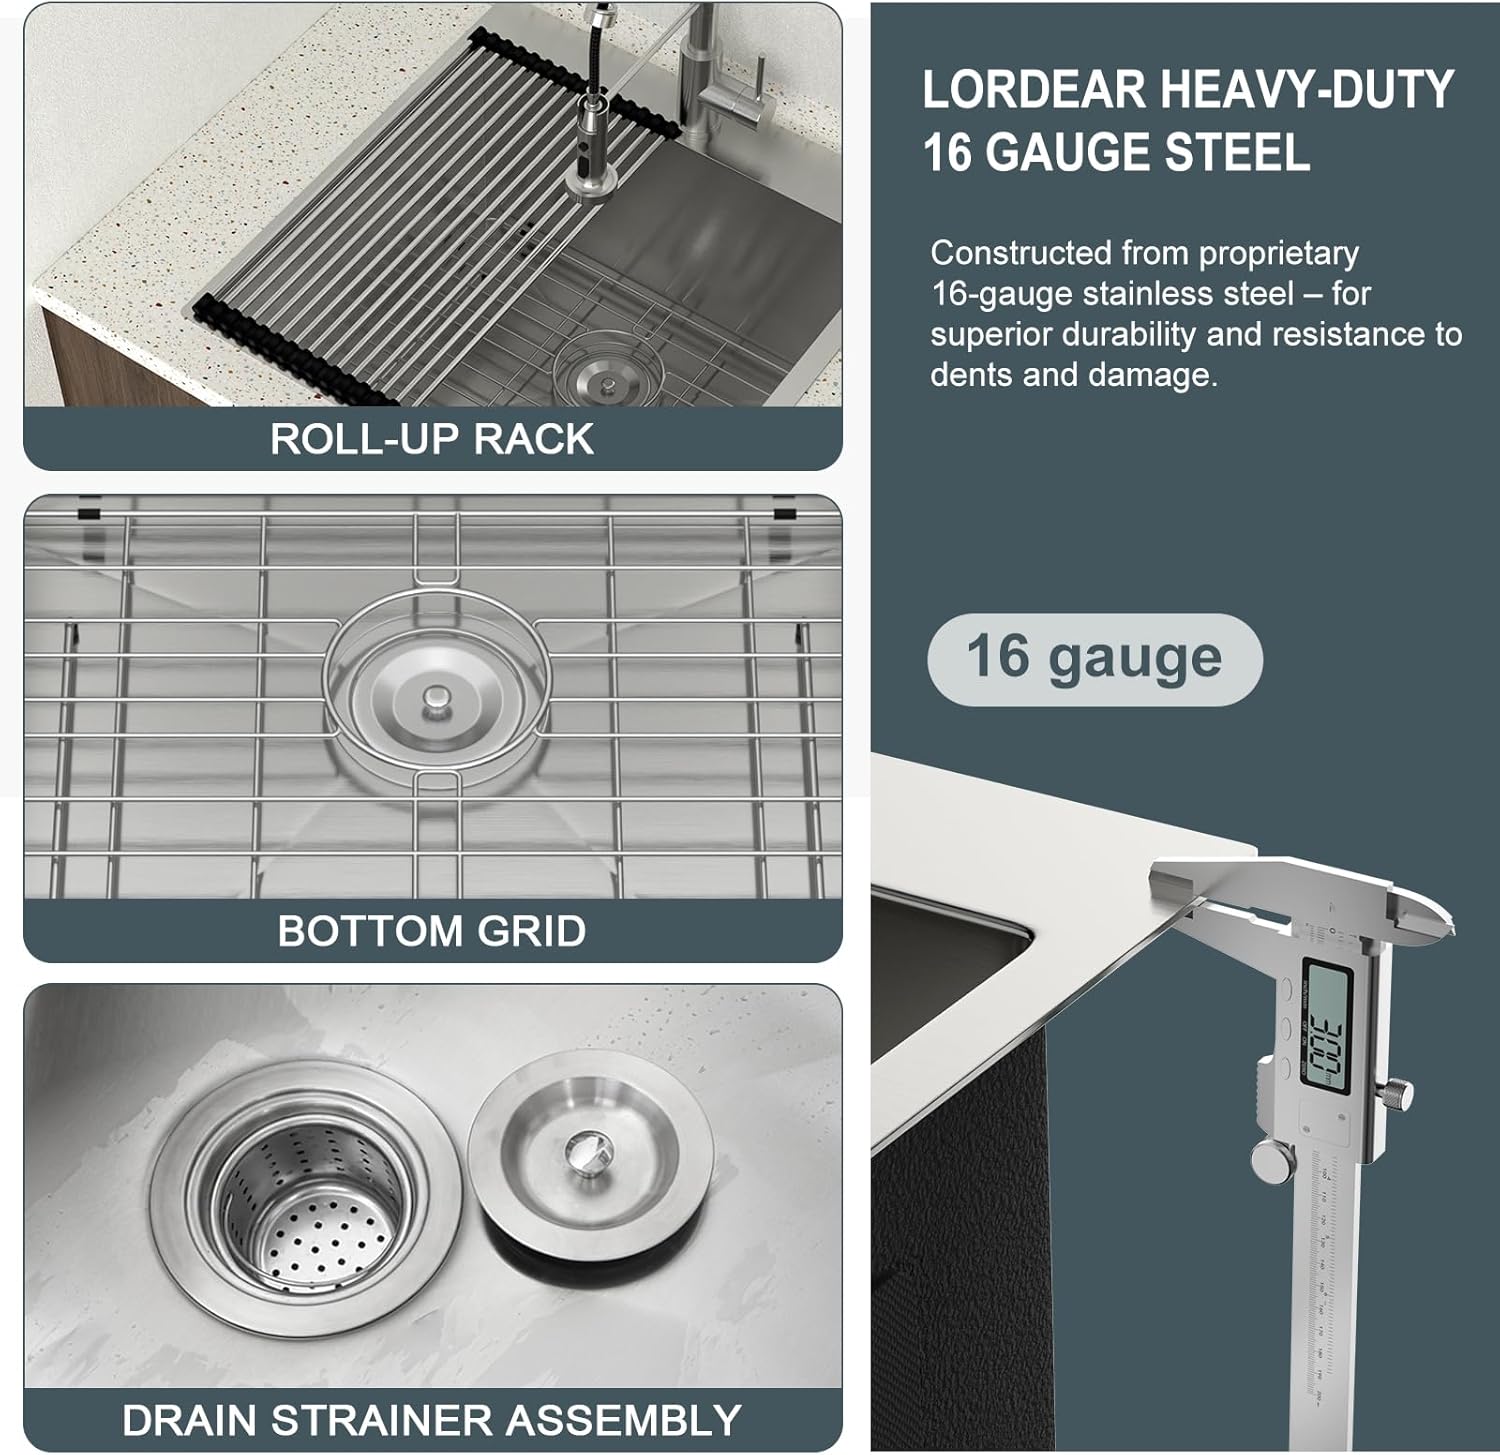
Figure 3: Sink Components. This image highlights the roll-up rack, bottom grid, and the drain strainer assembly, along with a close-up of the 16-gauge stainless steel thickness.
4. Faucet Installation
Install the pull-out faucet into the designated hole on the sink or countertop. Connect the hot and cold water supply lines to the faucet. Test all connections for leaks once water supply is restored.
Installation Video Guide
Video 1: Lordear Drop-In Sink Installation Guide. This video provides a visual guide for installing the Lordear drop-in sink, demonstrating the steps for preparing the countertop, placing the sink, and securing it.
Operation
Using the Pull-Out Faucet
Your Lordear sink includes a versatile pull-out faucet with three distinct water flow patterns:
- Powerful Mode: Provides a strong, concentrated stream for heavy-duty cleaning.
- Spray Mode: Offers a wide spray pattern, ideal for rinsing dishes or the sink basin.
- Stream Mode: Delivers a steady, aerated flow for general tasks.
Switch between modes by pressing the button on the faucet head. The 360-degree swivel nozzle allows for flexible use.
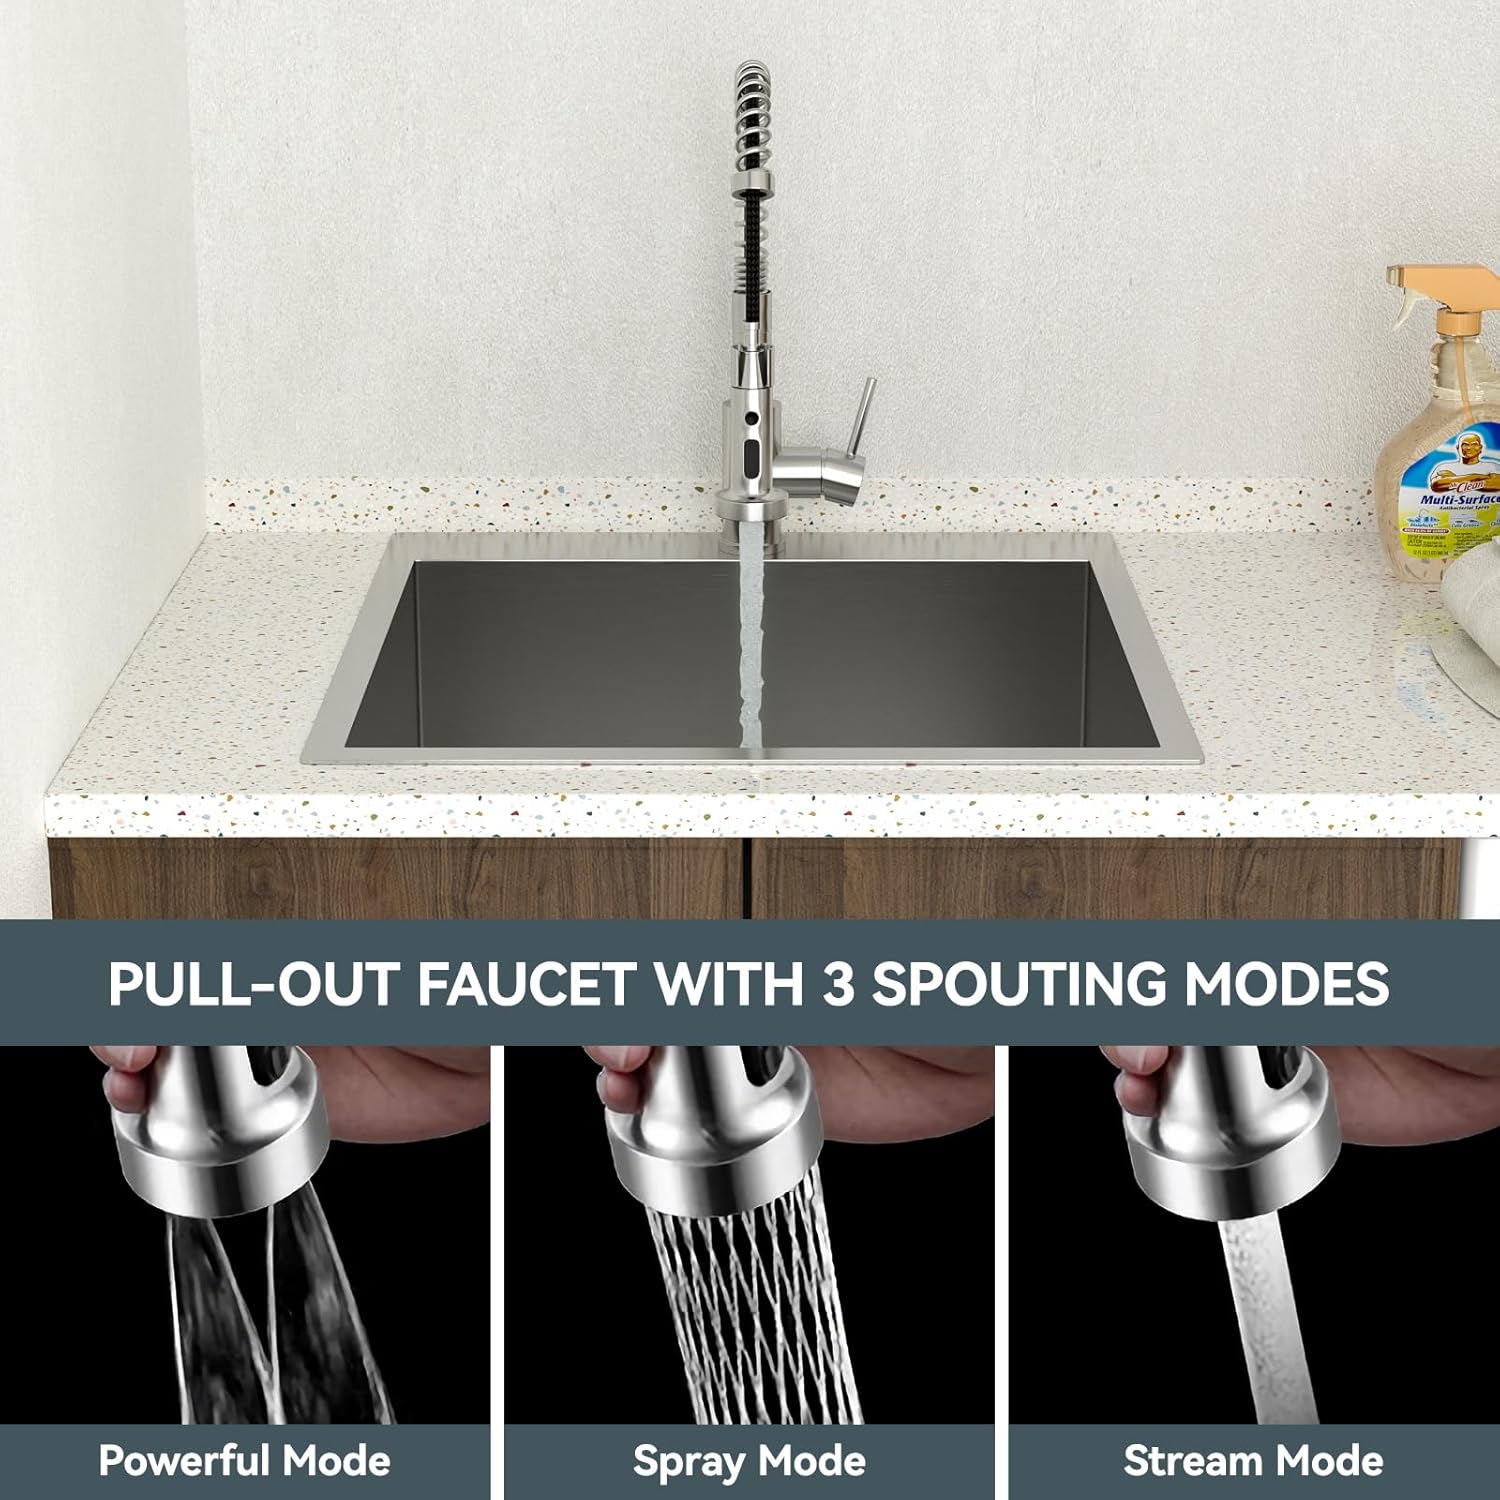
Figure 4: Faucet Spouting Modes. This image displays the three available water flow modes of the pull-out faucet: Powerful, Spray, and Stream.
Maintenance
General Care
To maintain the appearance and longevity of your stainless steel sink, wipe it with a damp cloth after each use. Avoid leaving acidic foods or harsh chemicals in the sink for extended periods.
Cleaning Stainless Steel
For routine cleaning, use a mild soap and warm water. Wipe in the direction of the grain to prevent streaking. For stubborn stains, a non-abrasive stainless steel cleaner can be used. Rinse thoroughly and dry with a soft cloth to prevent water spots. The heavy-duty sound guard padding and anti-condensation spray undercoating help protect against noise and condensation buildup.

Figure 5: Sound Guard and Anti-Condensation Features. This diagram illustrates how the sink's undercoating prevents condensation dripping and reduces operational noise.
Troubleshooting
- Slow Drainage: Check the drain strainer for debris. Ensure the plumbing connections are clear and not obstructed.
- Leaks Around Sink Edge: Re-check the mounting clips for tightness. If necessary, apply additional silicone sealant around the sink's perimeter.
- Faucet Drips/Leaks: Ensure all faucet connections are tight. If dripping persists, the internal cartridge may need inspection or replacement by a qualified professional.
- Water Spots on Stainless Steel: These are common with hard water. Use a stainless steel cleaner or a mixture of vinegar and water, then rinse and dry thoroughly.
Warranty and Support
Lordear is committed to providing high-quality products. For any inquiries or assistance regarding your sink, please contact our dedicated after-sale department. We are available to provide prompt and satisfactory solutions.
Please refer to your purchase documentation for specific warranty terms and contact information.