1. Introduction
This manual provides comprehensive instructions for the BREDASINX Automatic Chicken Coop Door. This device is designed to automate the opening and closing of your chicken coop door, offering convenience and enhanced security for your poultry. It features multiple operating modes, solar charging capabilities, and an advanced anti-pinch mechanism.
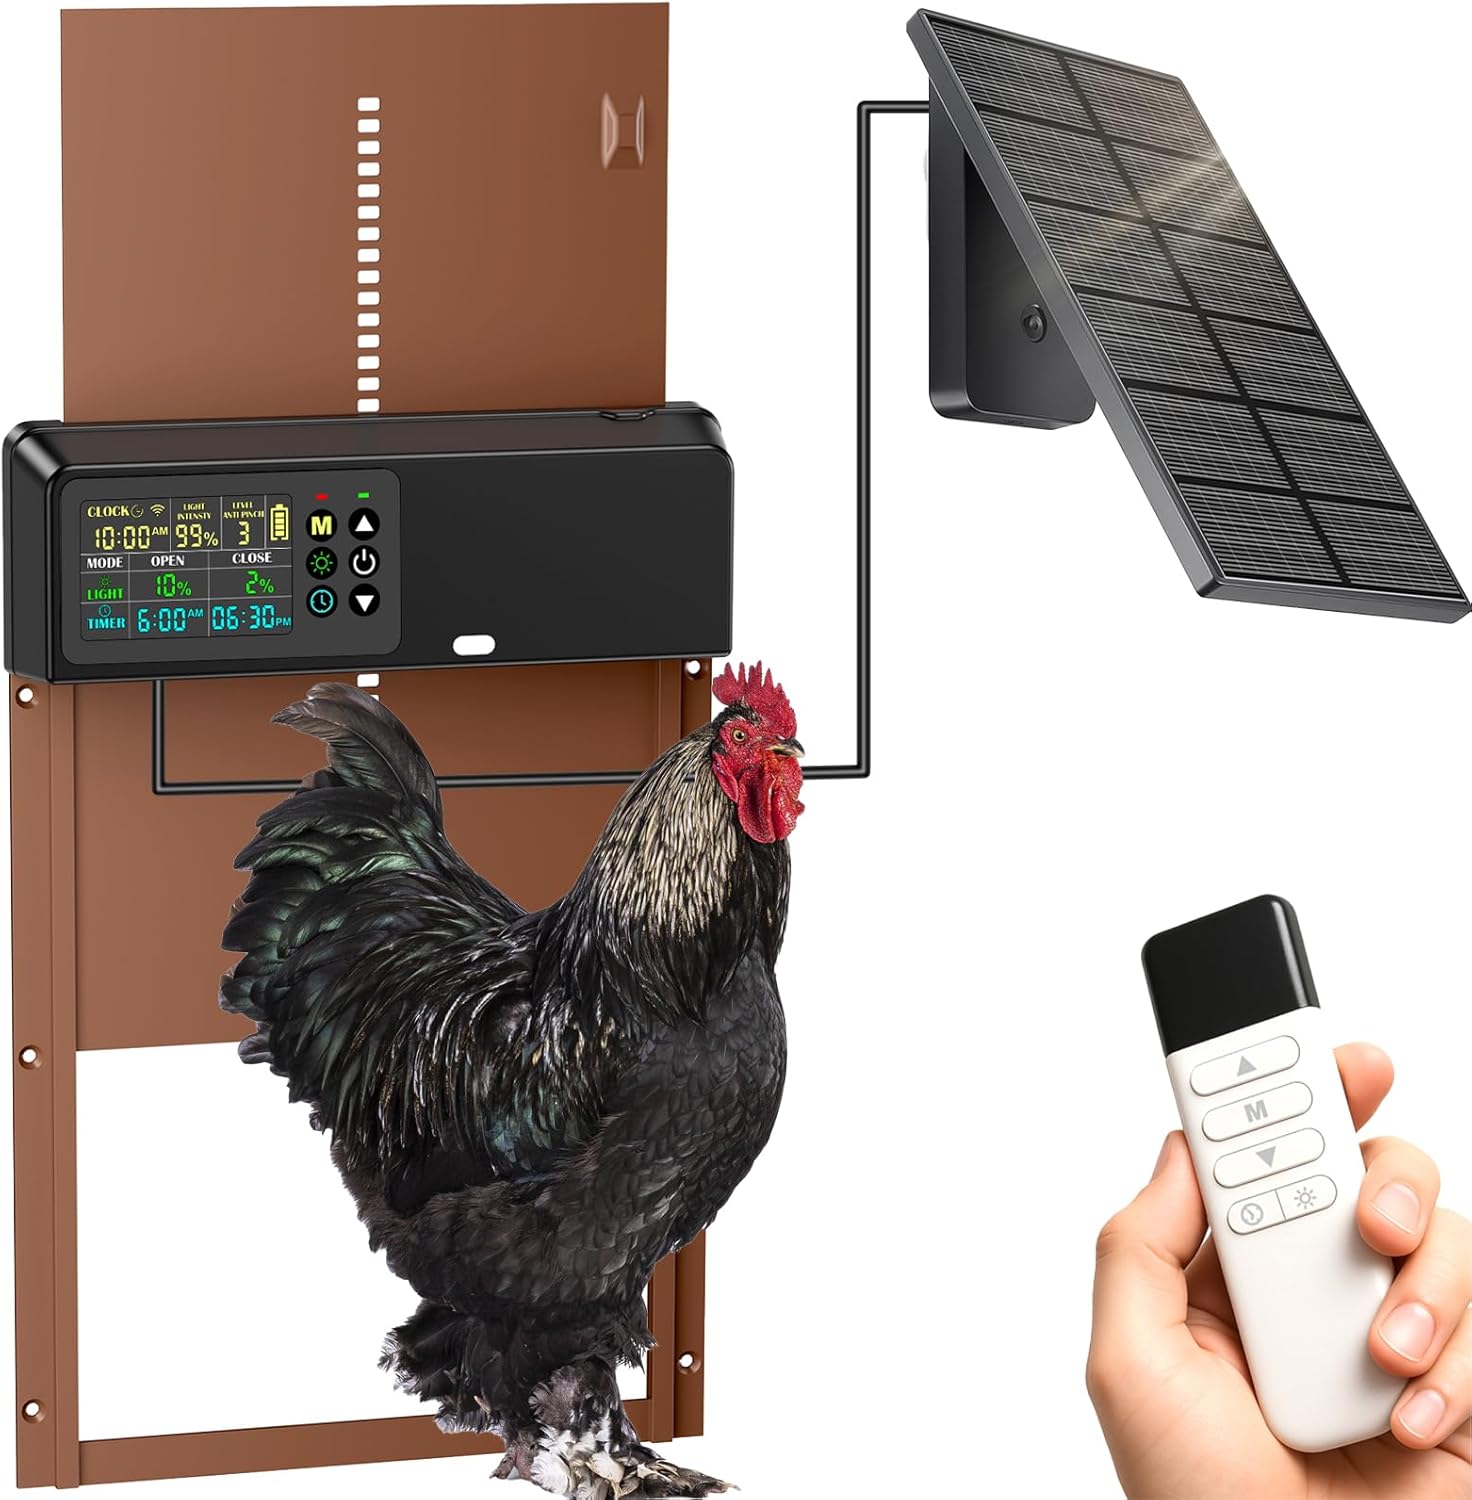
Image 1: BREDASINX Automatic Chicken Coop Door with solar panel and remote control.
2. Key Features
- High-Efficiency Solar Power System: Equipped with a 2000mAh low-temperature-resistant battery, supporting solar panel (IP65 waterproof) and USB charging for eco-friendly operation.
- Four Operation Modes: Light Sensor Mode (opens at dawn, closes at dusk), Timer Mode (customizable schedules), Hybrid Mode (combines light sensor and timer), and Manual Mode (emergency intervention).
- Smart Anti-Pinch Mechanism: Advanced technology detects resistance during closure, stopping and reopening the door to prevent injury to poultry. Adjustable closing strength (1-9 levels).
- Oversized Color LCD Display: Features magnified digital readouts for easy settings overview and intuitive on-screen instructions.
- Premium Aircraft-Grade Aluminum Construction: Weatherproof design for durability in rain, wind, snow, and dust.
- Spacious Access: 10in(H) x 7.9in(W) opening accommodates chickens of all sizes.
- 100ft Remote Control: Allows one-touch door operation from a distance.
3. Package Contents
Verify that all components are present in the package:
- 1 Chicken Coop Door Unit
- 1 Remote Control
- 1 Solar Panel
- 1 USB-C Charge Cable
- Mounting Hardware (screws, anchors)
- Instruction Manual
4. Setup and Installation
Before installation, ensure the door unit is fully charged using either the solar panel or the provided USB-C cable. The solar panel is IP65 waterproof and designed for outdoor use.
4.1 Mounting the Door Unit
- Choose a suitable location on your chicken coop for the door. Ensure the opening is clear and allows for smooth operation.
- Position the door unit over the coop opening. Mark the screw holes.
- Drill pilot holes if necessary. Secure the door unit using the provided mounting hardware.
4.2 Connecting the Solar Panel
- Mount the solar panel in a location that receives maximum direct sunlight throughout the day.
- Connect the solar panel cable to the designated port on the main door unit.
- Ensure the cable is securely routed and protected from damage.

Image 2: Solar panel and USB charging options for the coop door.
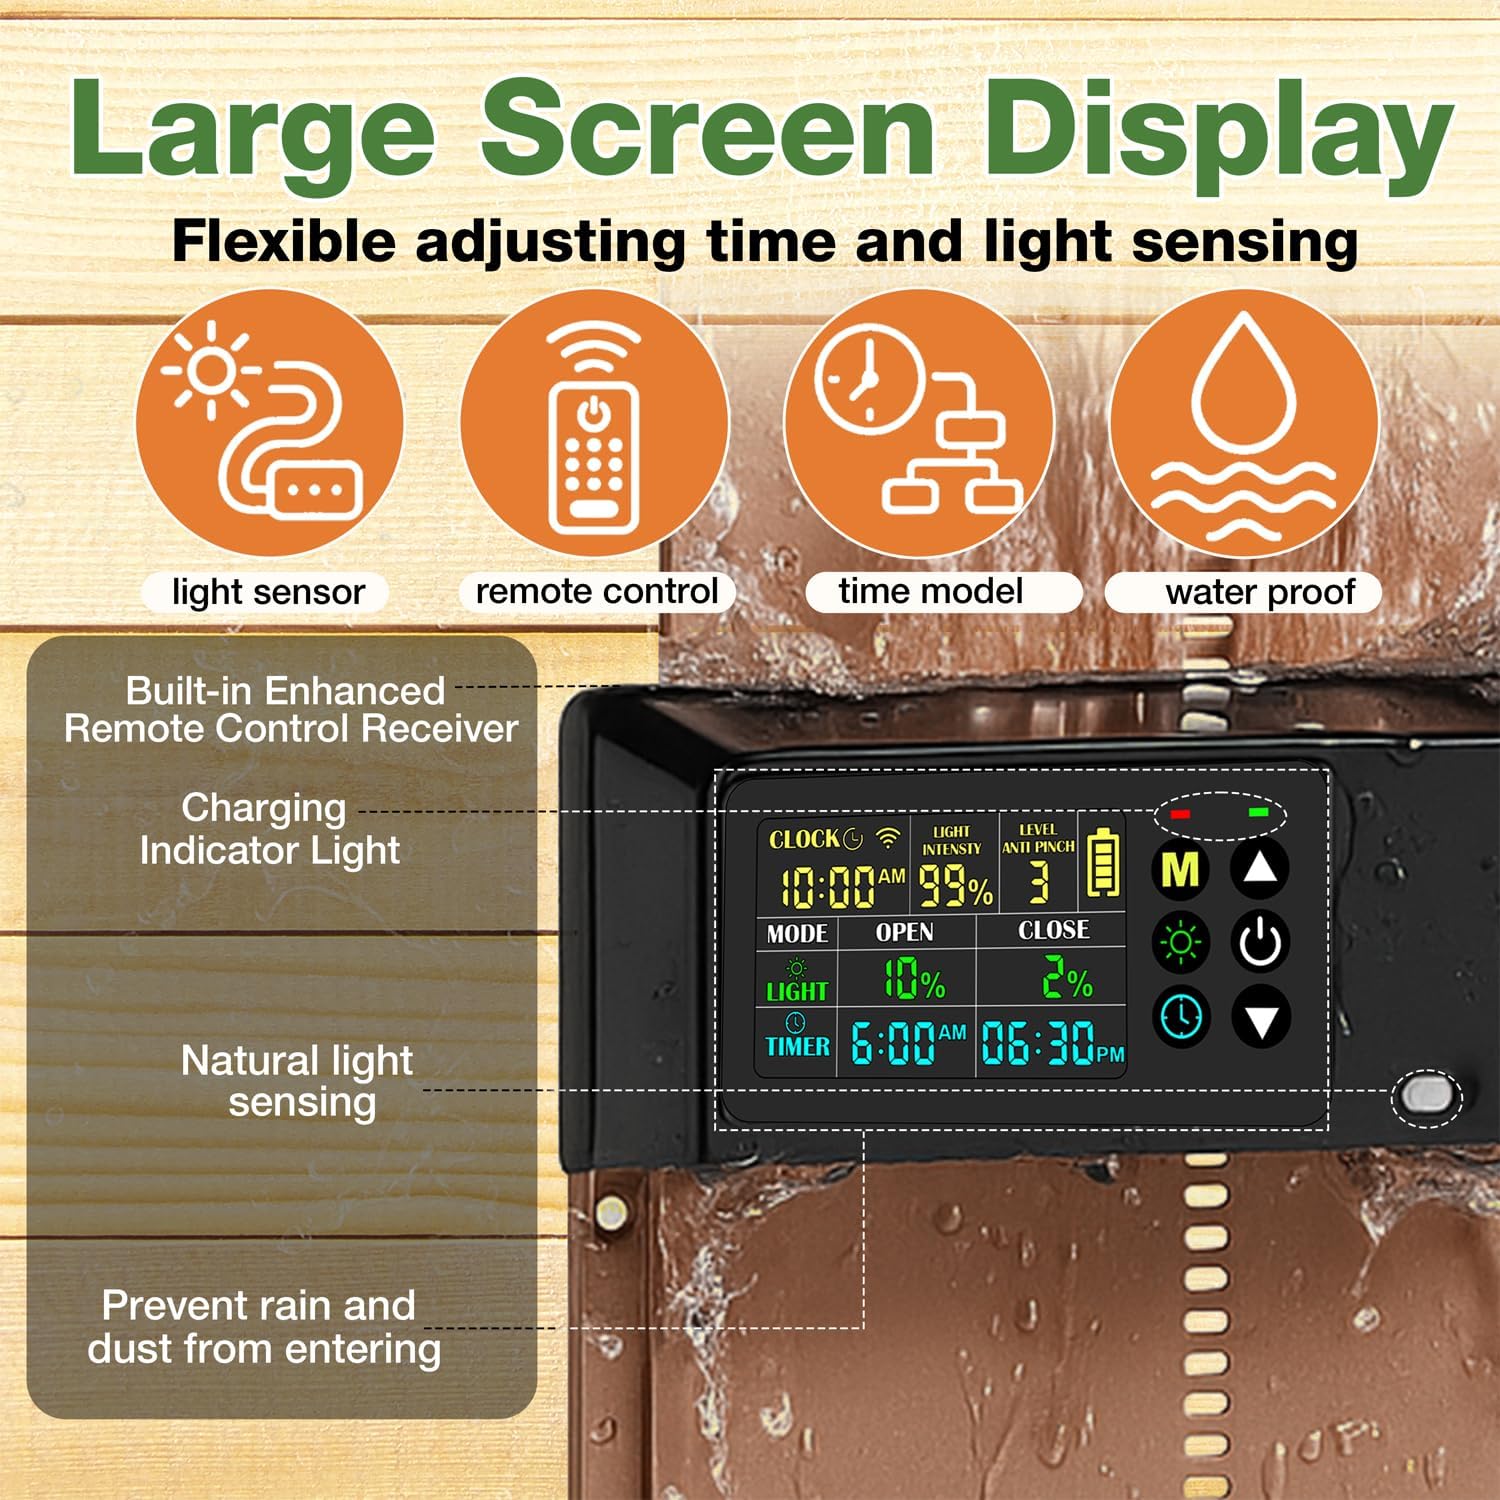
Image 3: Detailed view of the large LCD display and control interface.
5. Operating Modes
The BREDASINX Automatic Chicken Coop Door offers four distinct operating modes to suit your needs:
- Light Sensor Mode: The door automatically opens at dawn and closes at dusk based on ambient light levels.
- Timer Mode: Set specific times for the door to open and close. This allows for precise scheduling regardless of light conditions.
- Hybrid Mode: Combines both light sensor and timer functions, offering flexibility and redundancy. For example, open by light, close by timer.
- Manual Mode: Allows you to open or close the door instantly using the control panel buttons or the remote control. This is useful for immediate access or emergency situations.

Image 4: Visual representation of the four available operating modes.
Video 1: A seller demonstrates the automatic chicken coop door's features and safety.
6. Anti-Pinch Mechanism
The door is equipped with an intelligent anti-pinch system. If an obstruction (such as a chicken) is detected during closure, the door will immediately stop and reverse direction to prevent injury. The closing strength can be adjusted from 1 to 9 levels to optimize safety for your flock.

Image 5: Anti-pinch design ensures poultry safety during door closure.
Video 2: A seller demonstrates the ease of setup and the clear display of the automatic chicken coop door.
7. Remote Control
The included remote control allows for convenient manual operation of the door from up to 100 feet away. This is ideal for opening or closing the door without needing to approach the coop directly.
8. Display and Controls
The oversized color LCD display provides clear information on the current time, battery level, light intensity, and selected operating mode. Intuitive buttons allow for easy navigation and adjustment of settings.
9. Durability and Weather Resistance
Constructed from premium aircraft-grade aluminum, the door unit is designed to withstand various weather conditions, including rain, wind, snow, and dust. It operates reliably in temperatures ranging from -26°C to 60°C.

Image 6: The door is built for durability and weather resistance.
10. Maintenance
- Cleaning: Periodically clean the solar panel and the door unit's display with a soft, damp cloth to ensure optimal performance. Avoid abrasive cleaners.
- Battery Check: Monitor the battery level on the LCD display. Ensure the solar panel receives adequate sunlight for continuous charging. If needed, use the USB-C cable for supplementary charging.
- Door Path: Keep the door's path clear of debris, bedding, or any obstructions that could hinder its movement or trigger the anti-pinch mechanism unnecessarily.
11. Troubleshooting
- Door Not Opening/Closing:
- Check battery level. Recharge if low.
- Verify selected operating mode and settings (timer, light sensitivity).
- Ensure no obstructions are in the door's path.
- Remote Control Not Working:
- Check remote control batteries.
- Ensure you are within the 100ft operating range.
- Confirm line of sight to the door unit's receiver.
- Inaccurate Light Sensor Operation:
- Clean the light sensor on the door unit.
- Adjust the light sensitivity setting on the display.
12. Specifications
| Feature | Specification |
|---|---|
| Item Weight | 2.48 pounds |
| Manufacturer | BREDASINX |
| Item Model Number | 2 |
| Item Package Dimensions L x W x H | 14.61 x 9.96 x 1.85 inches |
| Product Dimensions L x W x H | 9.4"L x 1.6"W x 14"H |
| Material | Acrylonitrile Butadiene Styrene (ABS), Aluminum |
| Special Feature | Anti-pinch protection, Color LCD large screen, Set light sensing mode & time mode, Solar charging, Waterproof |
| Included Components | 1 Chicken Coop Door, 1 Remote control, 1 Solar Panel, 1 USB-C Charge Cable |
| Breed Recommendation | Chicken, Duck, Goose, Rabbits and Poultry Under 10 Pounds |
13. Warranty and Support
For warranty information and customer support, please refer to the contact details provided with your purchase or visit the BREDASINX official website. Keep your proof of purchase for any warranty claims.