1. Introduction
This manual provides detailed instructions for the safe and effective installation, operation, and maintenance of your Holamys Retractable Side Awning. Designed to offer privacy, sun protection, and a wind barrier, this awning is suitable for patios, gardens, and balconies. Please read this manual thoroughly before assembly and use, and retain it for future reference.
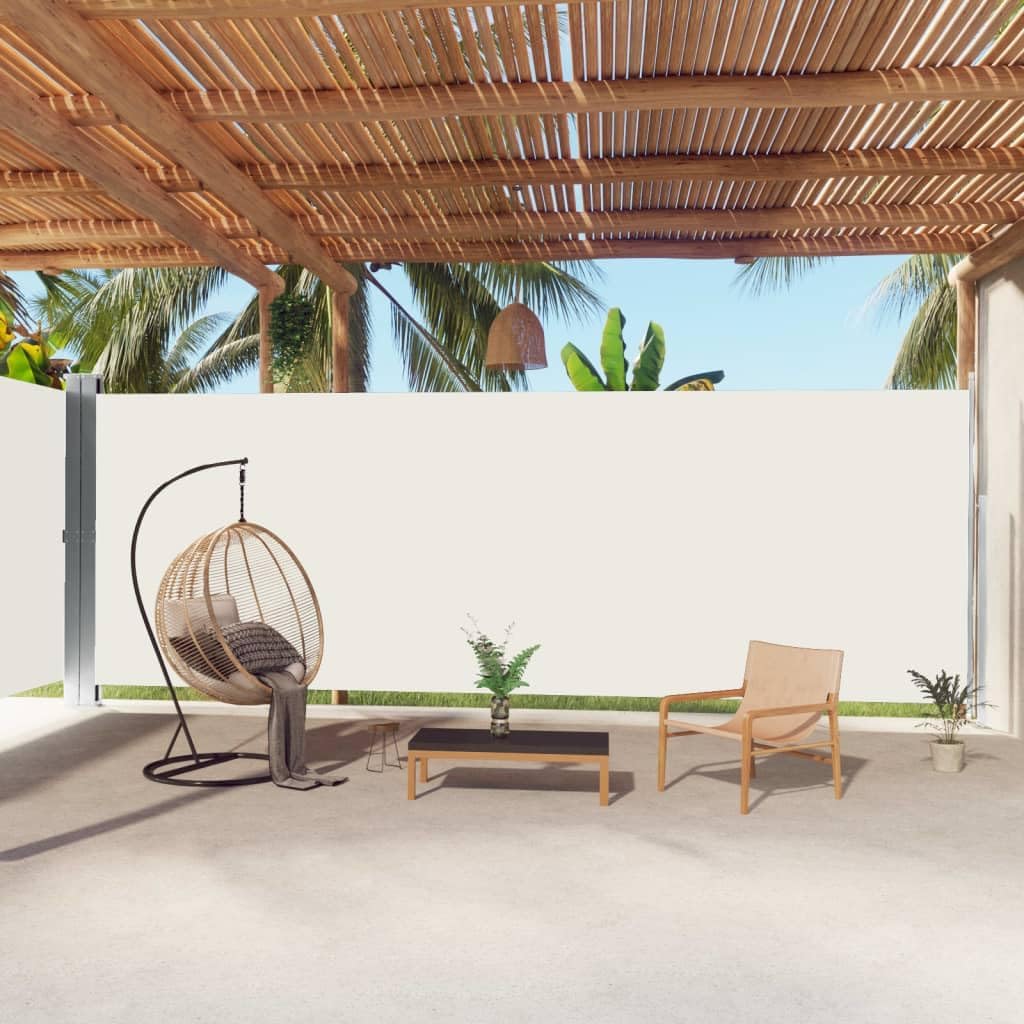
Image 1.1: Holamys Retractable Side Awning providing privacy on a patio.
2. Safety Information
- Always read and understand all instructions before assembly and use.
- Assembly requires two people for safety and ease of installation.
- Ensure the awning is securely mounted to a stable and appropriate surface. Improper installation can lead to injury or damage.
- Retract the awning during strong winds, heavy rain, or other severe weather conditions to prevent damage to the product and potential hazards.
- Keep children and pets away from the awning during operation.
- Do not hang objects from the awning or its components.
3. Package Contents
Verify that all components are present and undamaged before beginning assembly. If any parts are missing or damaged, contact customer support.
- Main Awning Unit (with retractable fabric screen)
- Receiving Post
- Mounting Brackets and Base Plates
- Mounting Hardware (screws, anchors)
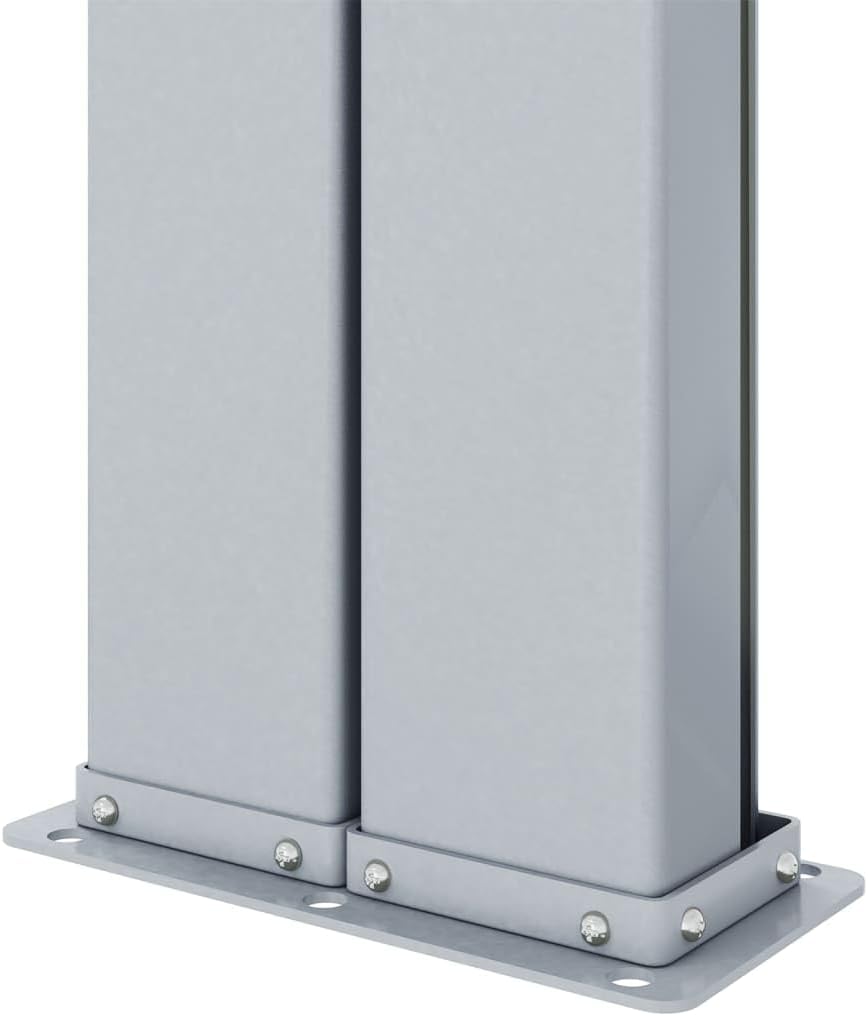
Image 3.1: Main Awning Unit.
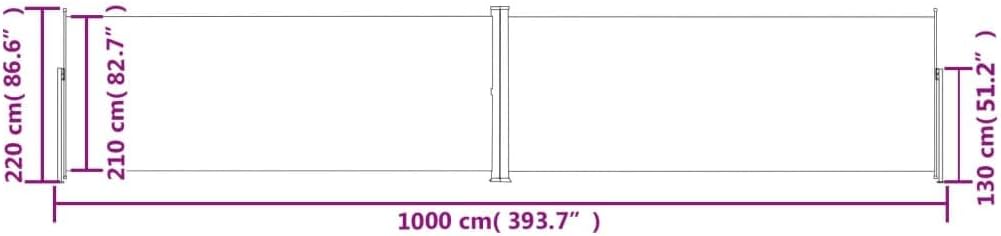
Image 3.2: Mounting Hardware.
4. Setup and Installation
This section outlines the general steps for installing your retractable side awning. Specific details may vary based on your mounting surface. Always ensure the mounting surface is structurally sound.
4.1 Choose Location
Select a suitable location on your patio, deck, or balcony. Ensure there is enough clear space for the awning to extend fully (393.7 inches) and that the mounting surface can support the unit.
4.2 Mount the Main Awning Unit
- Position the main awning unit against the wall or post where it will be installed. Mark the drilling points for the mounting brackets.
- Drill pilot holes at the marked locations. Use appropriate drill bits for your mounting surface (e.g., masonry bit for concrete, wood bit for wood).
- Secure the main awning unit's mounting brackets using the provided screws and anchors. Ensure it is level and firmly attached.

Image 4.1: Detail of the mounting bracket for the main awning unit.
4.3 Install the Receiving Post
- Measure the desired extension distance (up to 393.7 inches) from the main awning unit.
- Position the receiving post's base plate at this distance. Mark the drilling points for the base plate.
- Drill pilot holes and secure the base plate to the ground or deck using the provided hardware.
- Attach the receiving post to the secured base plate.
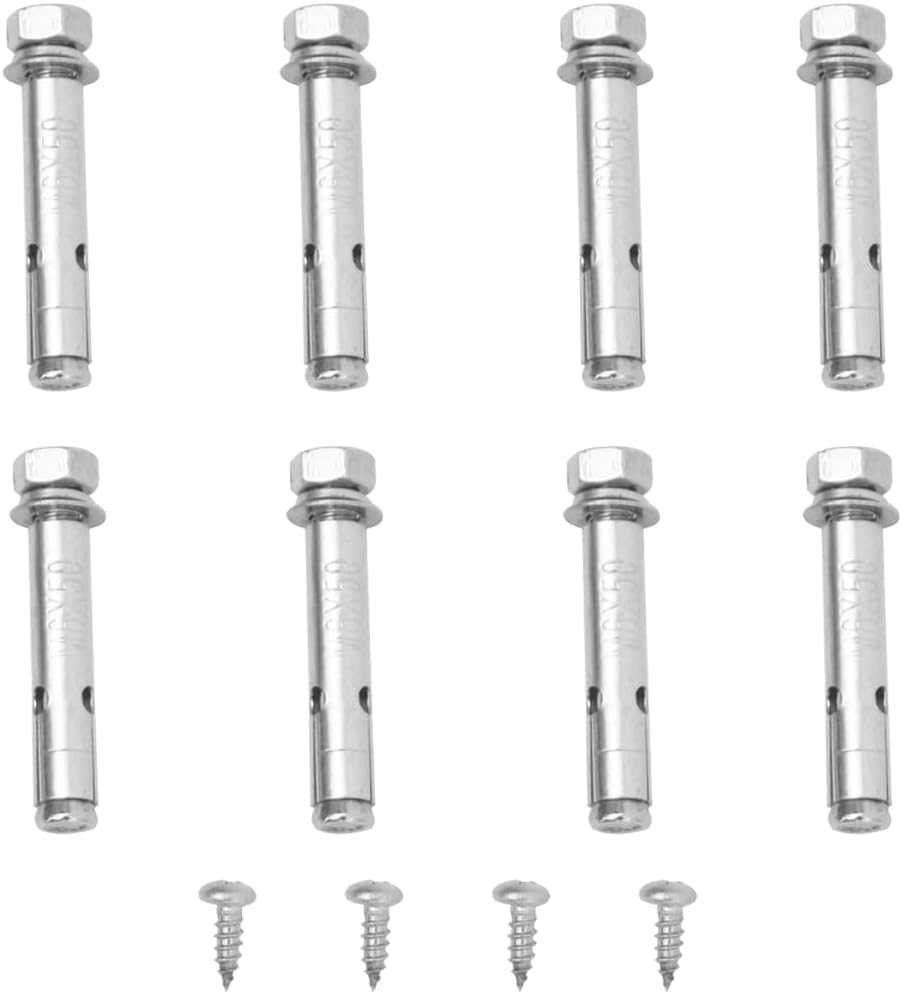
Image 4.2: Base plate for the receiving post.
4.4 Final Checks
After installation, gently extend and retract the awning to ensure smooth operation and verify that all components are securely fastened.
5. Operating Instructions
The Holamys Retractable Side Awning features an adjustable retraction mechanism for easy use.
5.1 Extending the Awning
- Grasp the handle on the leading edge of the awning fabric.
- Gently pull the handle horizontally away from the main awning unit. The fabric will extend from its housing.
- Guide the leading edge of the awning into the receiving post. Secure it in place using the locking mechanism on the receiving post.
5.2 Retracting the Awning
- Release the locking mechanism on the receiving post.
- Gently guide the awning back towards the main unit. The spring-loaded mechanism will retract the fabric smoothly into its housing.
- Ensure the fabric is fully retracted and secured within the main unit when not in use, especially during adverse weather.
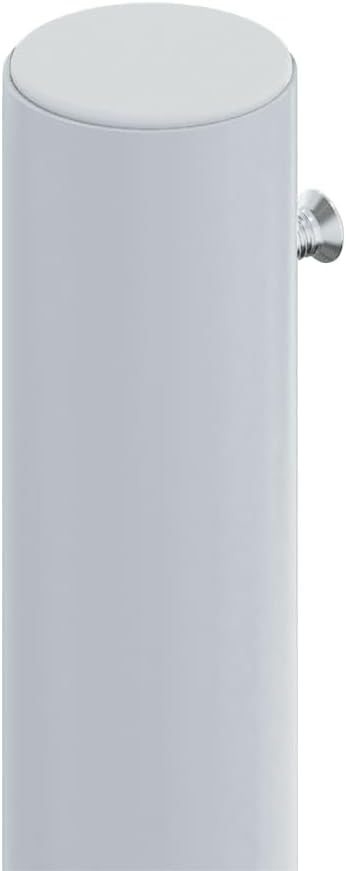
Image 5.1: Awning in retracted position.
6. Maintenance
Regular maintenance will prolong the life and appearance of your awning.
- Cleaning: The water-resistant polyester fabric can be cleaned with mild soap and water. Use a soft brush or cloth to gently scrub away dirt. Rinse thoroughly with clean water and allow to air dry completely before retracting. Do not use harsh chemicals or abrasive cleaners.
- Inspection: Periodically inspect all mounting points, screws, and the fabric for any signs of wear, damage, or loosening. Tighten any loose fasteners.
- Weather Protection: Always retract the awning during strong winds, heavy rain, snow, or other severe weather conditions to prevent damage.
7. Troubleshooting
If you encounter issues with your awning, refer to the following common troubleshooting tips:
- Awning not retracting smoothly: Check for any obstructions in the path of the fabric. Ensure the fabric is clean and free of debris. The spring mechanism may require professional adjustment if the issue persists.
- Awning not extending fully: Verify that the main unit is securely mounted and not obstructed. Check the fabric for tears or damage that might prevent full extension.
- Awning feels unstable: Re-check all mounting screws and anchors on both the main unit and the receiving post. Ensure they are tightened securely and the mounting surface is stable.
For issues not covered here, please contact Holamys customer support.
8. Specifications
| Feature | Specification |
|---|---|
| Model | 3012345_us |
| Dimensions (Extended) | 39.4 inches (Height) x 393.7 inches (Length) |
| Color | Cream |
| Fabric Material | Water-resistant Polyester |
| Manufacturer | Holamys |

Image 8.1: Awning Dimensions Diagram.
9. Warranty and Support
For warranty information, product support, or to inquire about replacement parts, please contact Holamys customer service directly. Refer to your purchase documentation for specific contact details or visit the official Holamys website.