1. Introduction
This manual provides detailed instructions for the safe installation, operation, and maintenance of your Generic Modern Nordic Geometry LED Chandelier, Model KWHWNAWAC-L170CM. Please read this manual thoroughly before installation and retain it for future reference.

Figure 1: Overview of the Modern Nordic Geometry LED Chandelier (L170cm model).
2. Safety Information
WARNING: To reduce the risk of fire, electric shock, or personal injury, always follow these safety precautions:
- Always disconnect power at the main circuit breaker or fuse box before beginning installation or performing any maintenance.
- Installation must be performed by a qualified electrician or a person with adequate knowledge of electrical wiring.
- Ensure the mounting surface can support the weight of the fixture.
- Do not connect the fixture to an ungrounded electrical system.
- Do not attempt to modify the fixture. Any modifications may void the warranty and create a safety hazard.
- Handle the fixture with care to avoid damage to the LED components or acrylic parts.
3. Package Contents
Verify that all components are present and undamaged before proceeding with installation. If any parts are missing or damaged, contact customer support.
- LED Chandelier Fixture (L170cm)
- Ceiling Canopy
- Mounting Bracket
- Mounting Hardware (screws, wire nuts)
- Instruction Manual (this document)
4. Setup and Installation
Follow these steps carefully for proper installation:
- Turn off Power: Locate the circuit breaker controlling the light fixture's power supply and turn it off. Verify power is off using a voltage tester.
- Prepare Mounting: Attach the mounting bracket to the junction box in the ceiling using the provided screws. Ensure it is securely fastened.
- Adjust Height: The chandelier features an adjustable hanging cable. Determine the desired hanging height and adjust the cable length accordingly. Secure the cable at the canopy.
- Wiring: Connect the fixture's wires to the household electrical wires.
- Connect the black (Live) wire from the fixture to the black (Live) wire from the ceiling.
- Connect the white (Neutral) wire from the fixture to the white (Neutral) wire from the ceiling.
- Connect the green or bare copper (Ground) wire from the fixture to the green or bare copper (Ground) wire from the ceiling.
- Mount Fixture: Carefully lift the chandelier and attach the ceiling canopy to the mounting bracket, securing it with the provided screws or nuts. Ensure no wires are pinched.
- Restore Power: Once installation is complete, turn the power back on at the circuit breaker.

Figure 2: Key dimensions of the L170cm chandelier, showing length and adjustable height.
5. Operating Instructions
Your LED Chandelier is designed for ease of use and offers multiple lighting options.
- Power On/Off: Use your standard wall switch to turn the chandelier on or off.
- Changing Light Color: This fixture supports three light color temperatures. Each time you toggle the wall switch OFF and then ON within a few seconds, the light color will cycle through the following options:
- White Light (6000K): Bright, cool white light.
- Neutral Light (4000K): Balanced, natural white light.
- Warm Light (3000K): Soft, warm yellow light.
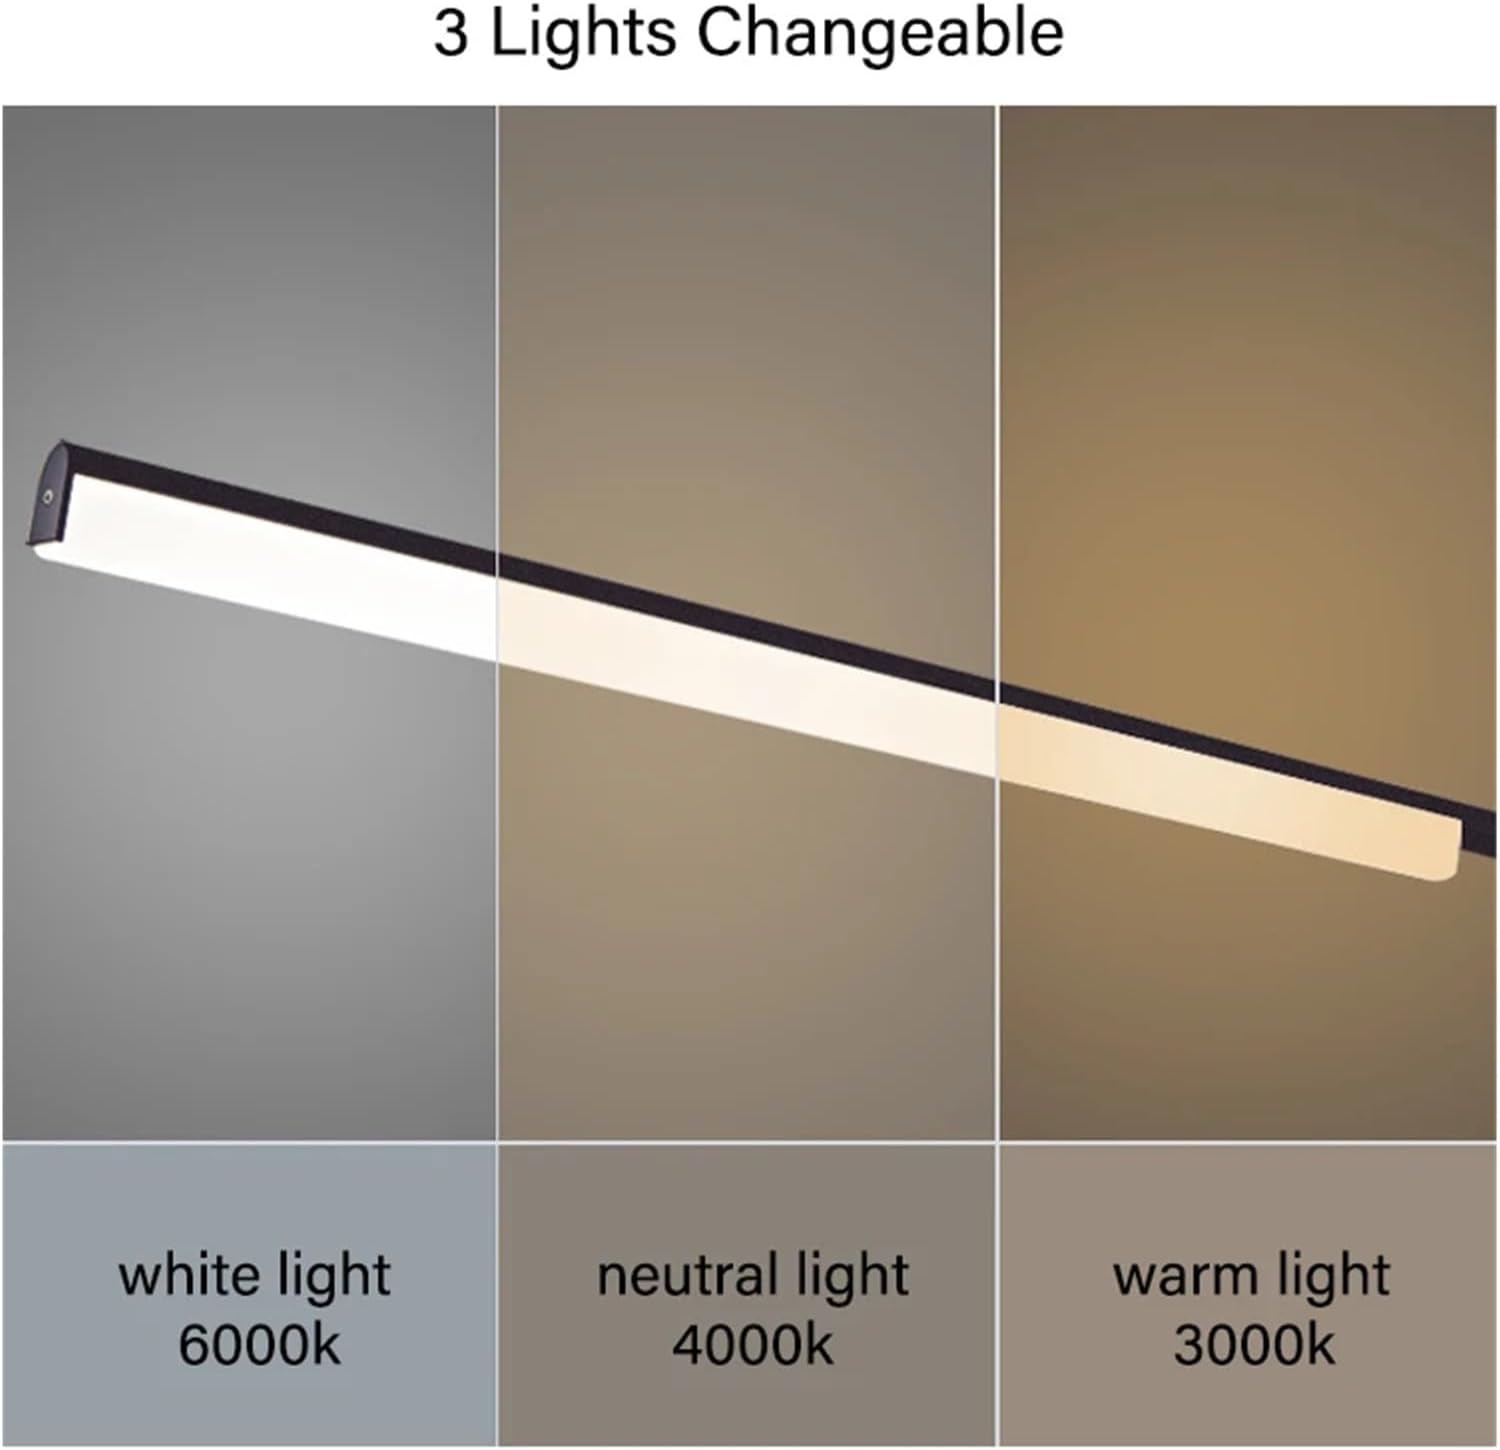
Figure 3: Illustration of the three available light color temperatures.
6. Maintenance
Regular maintenance ensures the longevity and appearance of your chandelier.
- Cleaning: Before cleaning, ensure the power is turned off at the circuit breaker. Use a soft, dry, or slightly damp cloth to wipe the fixture. Do not use abrasive cleaners, solvents, or polishes as they may damage the finish or acrylic components.
- Bulb Replacement: This fixture uses integrated LED lighting, which is designed for long-term use and does not require bulb replacement. If the LED light source fails, professional service may be required.
7. Troubleshooting
If you encounter issues with your chandelier, refer to the following common problems and solutions:
| Problem | Possible Cause | Solution |
|---|---|---|
| Light does not turn on. |
|
|
| Light flickers or dims. |
|
|
| Cannot change light color. |
|
|
If troubleshooting steps do not resolve the issue, please contact customer support for further assistance.
8. Specifications
| Model | KWHWNAWAC-L170CM |
| Brand | Generic |
| Material | Iron / Acrylic |
| Light Source | Integrated LED |
| Size (Length) | L170cm |
| Voltage | 110-220V AC |
| Color Temperature | 3000K (Warm), 4000K (Neutral), 6000K (White) |
| Fixture Color | Black |
| Indoor/Outdoor Usage | Indoor |
| Item Weight | 1.76 ounces (approx. 50 grams) |
9. Warranty and Support
This product is covered by a standard manufacturer's warranty against defects in materials and workmanship. Please refer to your purchase documentation for specific warranty terms and duration.
For technical support, missing parts, or warranty claims, please contact the retailer or manufacturer directly. Keep your purchase receipt as proof of purchase.