1. Important Safety Information
Please read this manual thoroughly before operating your Ströme TDW55C01 compact dishwasher. Keep this manual for future reference. Always follow basic safety precautions to reduce the risk of fire, electric shock, or injury.
- Ensure the dishwasher is properly grounded.
- Do not operate the dishwasher if it is damaged.
- Keep children away from the dishwasher during operation.
- Use only detergents and rinse aids specifically designed for dishwashers.
2. Product Overview
The Ströme TDW55C01 is a compact countertop dishwasher designed for small households, offering efficient cleaning with a 6 place setting capacity. It features an intuitive LED display, multiple wash programs, and a quiet operation.

Image: The Ströme TDW55C01 compact dishwasher positioned on a kitchen countertop.
Key Features:
- Compact Design: Ideal for small apartments or single households.
- 6 Place Settings: Sufficient capacity for daily dishwashing needs.
- 6 Wash Programs & 5 Temperatures: Versatile options for various cleaning requirements.
- LED Display: Clear indication of program status and remaining time.
- Delayed Start Timer: Schedule wash cycles up to 24 hours in advance.
- Quiet Operation: Operates at a low noise level of 49 dB.
3. Setup and Installation
3.1 Unpacking
Carefully remove all packaging materials. Inspect the dishwasher for any damage during transit. Retain packaging for potential future transport or service.
3.2 Placement
Place the dishwasher on a stable, level surface near a water supply, drain, and electrical outlet. Ensure adequate ventilation around the unit. The dimensions are 50D x 55W x 44H cm.

Image: Side view of the dishwasher, illustrating the hose connections at the rear.
3.3 Water Connection
Connect the inlet hose to a cold water tap with a 3/4-inch thread. Ensure the connection is secure to prevent leaks. The inlet hose length is 1.45 meters. Position the drain hose into a sink or a dedicated drain connection, ensuring it is not kinked or obstructed.

Image: A hand securing the water inlet hose connection at the rear of the dishwasher.
3.4 Electrical Connection
Plug the dishwasher into a grounded electrical outlet. Ensure the voltage and frequency match the specifications on the rating label of the appliance.
4. Operating Instructions
4.1 Control Panel
The dishwasher features an intuitive LED display and control buttons for easy operation. The display shows the selected program, remaining time, and error indicators.

Image: Detailed view of the dishwasher's control panel, showing the LED display and program selection buttons.
4.2 Loading the Dishwasher
Arrange dishes to allow water to reach all surfaces. Place larger items in the lower rack and smaller items, glasses, and cups in the upper rack. The dishwasher includes two wine glass holders for delicate stemware and a cutlery basket for utensils.
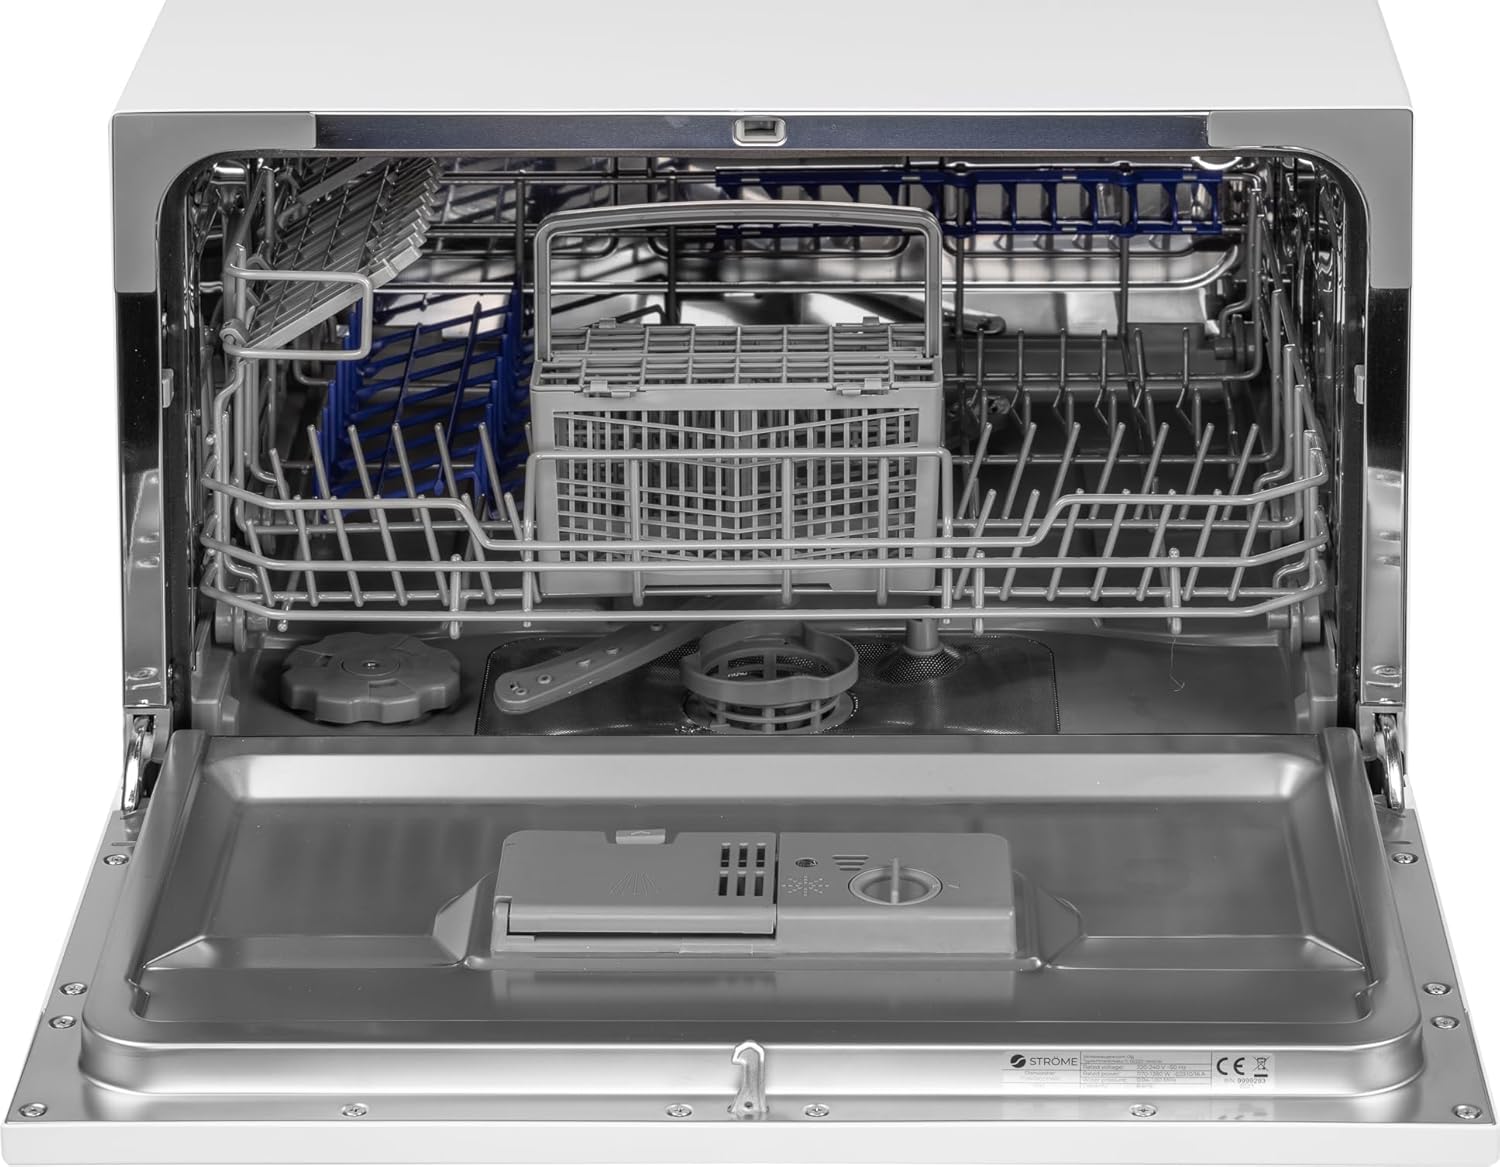
Image: The interior of the dishwasher, showing the arrangement of racks and the cutlery basket.

Image: A detailed view of the cutlery basket, designed to hold various utensils.
4.3 Adding Detergent and Rinse Aid
Open the detergent dispenser and add the recommended amount of dishwasher detergent. Close the dispenser lid securely. Fill the rinse aid dispenser with rinse aid to ensure streak-free drying.

Image: A close-up of the detergent and rinse aid dispenser inside the dishwasher door.
4.4 Program Selection
Select one of the six available wash programs based on the soil level of your dishes. Programs include Economy, Intensive, Normal, Quick, and Delayed Start. Each program has specific temperature settings.
4.5 Starting a Wash Cycle
Close the dishwasher door firmly. Press the Start button to begin the selected wash cycle. The LED display will show the program progress and remaining time.
4.6 Delayed Start Function
To delay the start of a wash cycle, select your desired program, then use the timer button to set a delay from 1 to 24 hours. The dishwasher will start automatically after the set delay.
5. Maintenance and Cleaning
Regular maintenance ensures optimal performance and longevity of your dishwasher.
5.1 Cleaning Filters
The filter system should be cleaned regularly to prevent food particles from clogging the spray arms and affecting wash performance. Remove the filter assembly, rinse it under running water, and brush away any debris. Reassemble correctly.

Image: The empty interior of the dishwasher, highlighting the filter system at the bottom.
5.2 Cleaning Spray Arms
Check the spray arm nozzles for blockages. If any holes are clogged, remove the spray arm and clear the blockages using a thin object like a toothpick. Ensure the spray arms rotate freely after reinstallation.
5.3 Cleaning the Interior and Exterior
Wipe the exterior of the dishwasher with a damp cloth. For the interior, periodically run a dishwasher cleaning cycle with a specialized cleaner or a cup of white vinegar to remove grease and limescale buildup.
6. Troubleshooting
Before contacting customer service, refer to the following table for common issues and their solutions.
| Problem | Possible Cause | Solution |
|---|---|---|
| Dishwasher does not start | Power cord not plugged in; Door not closed properly; Fuse blown/circuit breaker tripped | Ensure power cord is connected; Close door firmly; Check household fuse/circuit breaker |
| Poor cleaning results | Improper loading; Clogged spray arms; Insufficient detergent; Incorrect program selection | Reload dishes correctly; Clean spray arm nozzles; Add appropriate detergent; Select suitable program |
| Water not draining | Clogged drain hose; Clogged filter; Drain pump malfunction | Check and clear drain hose; Clean filter system; Contact service if pump is faulty |
| Dishwasher leaks | Loose hose connections; Damaged door seal; Too much detergent causing excessive suds | Tighten hose connections; Inspect and replace door seal if damaged; Use correct amount of detergent |
7. Specifications
Detailed technical specifications for the Ströme TDW55C01 compact dishwasher.
| Feature | Specification |
|---|---|
| Model | TDW55C01 |
| Dimensions (D x W x H) | 50D x 55W x 44H cm |
| Place Settings | 6 |
| Noise Level | 49 dB |
| Wash Programs | 6 (Economy, Intensive, Normal, Quick, etc.) |
| Temperature Settings | 5 |
| Energy Consumption | 61 kWh / 100 cycles |
| Inlet Hose Length | 1.45 meters |
| Special Features | Digital Display, Remaining Time Indicator, Compact, Quick Wash, Timer Delay |
| Color | White |
8. Warranty and Support
For warranty information, please refer to the warranty card included with your product or contact your retailer. For technical support or service inquiries, please reach out to Ströme customer service through their official website or the contact details provided at the point of purchase.