1. Introduction
Thank you for choosing the BENNTOP Vertical Bike Parking Stand. This manual provides detailed instructions for the assembly, operation, and maintenance of your new bike stand. Please read these instructions carefully before use to ensure proper setup and safe operation. This stand is designed to offer a space-saving solution for storing bicycles vertically or horizontally.

Figure 1: Overview of the BENNTOP Vertical Bike Parking Stand highlighting its space-saving design, 66 lbs (30 kg) maximum capacity, and compatibility with tires up to 2.5 inches wide.
2. Product Features
- Space-Efficient Dual Storage: This stand allows for vertical or horizontal bike positioning, saving up to 4 sq.ft of floor space. Ideal for compact areas like apartments, dorms, and garages.
- Wide Bike Compatibility: Accommodates 20"-29" bikes, including kids' bikes (20"-24"), mountain bikes (26"-29"), and road bikes (650c-700c). Supports tires up to 2.5" wide.
- Sturdy Triangular Structure: Features a reinforced triangular base and non-slip rubber feet for enhanced stability. Constructed from heat-treated steel with a rust-resistant coating for durability.
- Tool-Free Installation: Designed for quick and easy assembly without the need for drilling. Includes clear instructions and pre-assembled components.
- Floor Protection: The scratch-resistant base protects floors, making it suitable for various indoor environments.

Figure 2: Examples of the BENNTOP Bike Stand effectively utilized in tight spaces such as apartment hallways, garage corners, dorm rooms, and bike shops, demonstrating its versatility.
3. Package Contents
Please verify that all components listed below are present in your package before beginning assembly. If any parts are missing or damaged, please contact customer support.

Figure 3: Detailed view of all included components for the BENNTOP Vertical Bike Parking Stand, showing various bolts (M6*16, M6*35), nuts (M8, M12), wrenches, and the main frame parts.
Components include:
- Main Base Frame
- Vertical Support Arm
- Adjustable Upper Arm with Rubber Top Hook
- V-Frame Bike Holder
- Anti-Slip Feet (pre-installed or separate)
- Assembly Hardware (various bolts, nuts, and wrenches as shown in Figure 3)
4. Setup and Installation
The BENNTOP Vertical Bike Parking Stand is designed for tool-free installation. Follow these steps for quick assembly:
- Unpack Components: Carefully remove all parts from the packaging and lay them out on a clean, flat surface. Refer to Figure 3 to identify each component.
- Assemble Base: Connect the main base frame components. Ensure all connections are secure.
- Attach Vertical Support: Secure the vertical support arm to the assembled base.
- Install Adjustable Upper Arm: Attach the adjustable upper arm to the vertical support. The 4-inch threaded upper arm allows for height adjustment.
- Secure V-Frame Holder: Position and secure the V-frame bike holder to the base. This adjustable V-frame accommodates various bike frames.
- Check Stability: Once assembled, gently shake the stand to ensure all connections are tight and the stand is stable. The non-slip rubber feet should provide firm contact with the floor.

Figure 4: Key specifications and adjustable features of the BENNTOP Bike Stand, including overall height (45.2in/115cm to 49.2in/125cm), base dimensions (20.8in/53cm), rubber top hook, and 4-inch threaded upper arm for extension/shortening.

Figure 5: Detail of the anti-slip feet and dual ground contact points, illustrating the design for enhanced stability of the bike stand.
5. Operating Instructions
The BENNTOP Bike Parking Stand offers both vertical and horizontal storage options.
5.1 Vertical Parking
- Ensure the stand is on a stable, level surface.
- Lift the front wheel of your bicycle and guide it into the V-frame holder at the base of the stand.
- Continue to lift the bike until the rear wheel is off the ground and the top wheel (front wheel for most setups) rests securely in the rubber top hook. The gravity locking system will engage.
- Adjust the height of the upper arm if necessary to ensure a snug fit for your bike's wheel.
5.2 Horizontal Parking
- Place the stand on a stable, level surface.
- Roll your bicycle into the V-frame holder at the base of the stand, allowing both wheels to remain on the ground.
- Ensure the bike is balanced and stable within the holder.
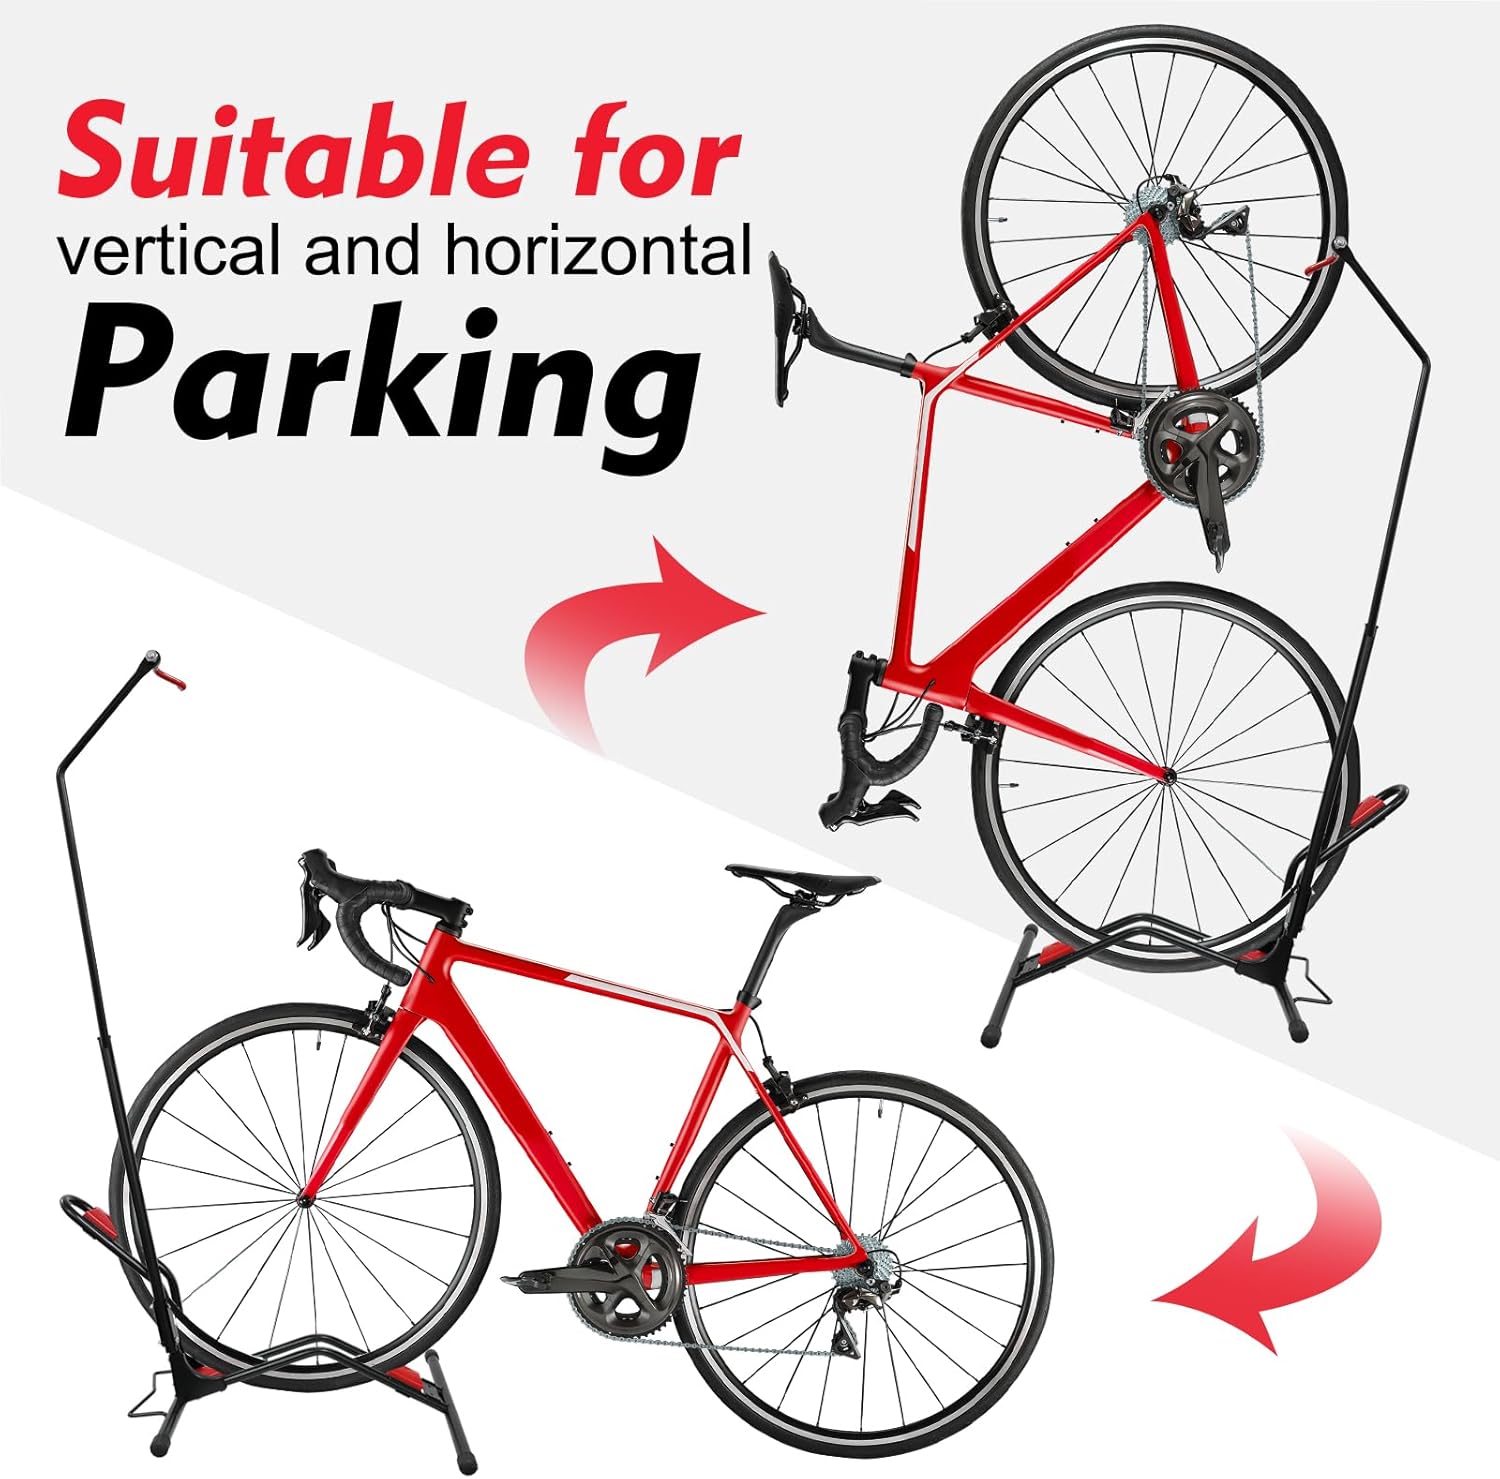
Figure 6: Visual representation of a bicycle parked both vertically and horizontally using the BENNTOP Bike Stand, demonstrating its dual parking capabilities.
6. Bike Compatibility
The BENNTOP Vertical Bike Parking Stand is designed for broad compatibility with various bicycle types and sizes:
- Wheel Sizes: Fits bikes with wheel diameters ranging from 20 inches to 29 inches.
- Bike Types: Compatible with Youth Bikes (20"-24" wheels), Mountain Bikes (26"-29" wheels), and Road Bikes (650c-700c wheels).
- Tire Width: Supports tires up to 2.5 inches wide.
- Mudguards: Can accommodate bikes with full mudguards in horizontal mode, or shorter mudguards in vertical mode.

Figure 7: Illustration showing the BENNTOP Bike Stand accommodating various bike types, including a 20" bike with 2.1" tires, a 29" MTB with thick mudguards, and a 700C Road Bike with drop bars.
7. Maintenance
To ensure the longevity and optimal performance of your BENNTOP Bike Parking Stand, follow these simple maintenance guidelines:
- Regular Cleaning: Wipe down the stand with a damp cloth periodically to remove dust and dirt. Avoid abrasive cleaners.
- Check Connections: Periodically inspect all bolts and connections to ensure they remain tight. Re-tighten if necessary.
- Inspect Rubber Parts: Check the rubber top hook and anti-slip feet for any signs of wear or damage. Replace if compromised to maintain bike security and floor protection.
- Rust Prevention: While the stand has a rust-resistant coating, avoid prolonged exposure to extreme moisture or harsh outdoor conditions to prevent corrosion.
8. Troubleshooting
If you encounter any issues with your BENNTOP Bike Parking Stand, refer to the following common solutions:
- Stand Instability:
- Ensure the stand is placed on a flat, level surface.
- Verify all assembly bolts are securely tightened.
- Check that the anti-slip feet are intact and making full contact with the floor.
- Bike Not Fitting Securely:
- Confirm your bike's wheel size and tire width are within the specified compatibility range (20"-29" wheels, up to 2.5" tire width).
- Adjust the height of the upper arm using the threaded mechanism (refer to Figure 4) to ensure the wheel sits snugly in the top hook.
- Ensure the V-frame holder is correctly positioned for your bike's frame.
- Scratches on Bike Frame/Wheel:
- Ensure the rubber top hook and V-frame padding are properly in place and not damaged. These are designed to protect your bike.
- Always lift and place the bike carefully into the stand to avoid scraping.
9. Specifications
| Material | Metal (Heat-treated steel with rust-resistant coating) |
| Color | Red (Accents) / Black (Frame) |
| Product Dimensions (Approx.) | 24"D x 5"W x 7"H (Base dimensions: 20.8" x 20.8" / 53cm x 53cm; Height: 45.2"-49.2" / 115cm-125cm adjustable) |
| Special Feature | Lightweight, Portable, Adjustable Height, Tool-Free Assembly |
| Shelf Type | Sliding Shelf (Refers to adjustable V-frame) |
| Max. Weight Capacity | 66 lbs (30 kg) |
| Tire Width Compatibility | Up to 2.5 inches |
| Wheel Diameter Compatibility | 20" - 29" (Youth, MTB, Road Bikes) |
10. Warranty and Support
BENNTOP stands behind the quality of its products. For specific warranty information, please refer to the product packaging or contact BENNTOP customer support directly through the retailer where the product was purchased. Our customer service team is available to assist with any questions, concerns, or issues you may have regarding your Vertical Bike Parking Stand.