1. Introduction
This manual provides essential information for the installation, operation, and maintenance of your YSVQHHDV Universal LCD TV Logic Board. This logic board is designed as a replacement component for various 32-inch LCD TV screens, enhancing performance and compatibility. Please read this manual thoroughly before attempting any installation or operation.
2. Safety Precautions
- Always disconnect the TV from the power source before beginning any installation or maintenance.
- Electronic components are sensitive to static electricity. Use appropriate anti-static measures (e.g., anti-static wrist strap) when handling the logic board.
- If you are not experienced with TV repair or electronic component installation, it is highly recommended to seek professional assistance.
- Avoid touching the surface of integrated circuits and connectors directly with bare hands.
- Ensure all connections are secure and correctly oriented before reapplying power.
3. Setup and Installation
The installation of the universal LCD TV logic board requires careful handling and technical knowledge. Follow these general steps:
- Prepare the TV: Disconnect the TV from all power sources and external devices. Place the TV face down on a soft, clean surface to protect the screen.
- Access the Existing Board: Carefully remove the TV's back cover. Locate the existing logic board.
- Disconnect Cables: Gently disconnect all cables connected to the old logic board, including LVDS cables, power cables, and any other signal cables. Note their orientation and connection points for reassembly.
- Remove Old Board: Unscrew and remove the old logic board from the TV chassis.
- Install New Board: Position the YSVQHHDV Universal LCD TV Logic Board in the same location. Secure it with the appropriate screws.
- Connect Cables: Reconnect all cables to the new logic board. Ensure the LVDS cable (typically a wide ribbon cable) is correctly seated and locked into its connector. Verify all power and signal cables are firmly attached.
- Initial Power-On (Testing): Before fully reassembling the TV, temporarily connect the power cable and turn on the TV to verify basic functionality (e.g., display, backlight). If the display is incorrect or absent, power off immediately and recheck all connections.
- Reassemble TV: Once functionality is confirmed, disconnect power, replace the TV's back cover, and secure it.

Figure 3.1: Top view of the YSVQHHDV Universal LCD TV Logic Board, model ST3151A07-5, highlighting its integrated circuits and connection points. This image illustrates the general layout of the board for installation reference.

Figure 3.2: A detailed view of the YSVQHHDV Universal LCD TV Logic Board, model PT320AT02-5, showing the arrangement of its electronic components and connectors. This image can assist in identifying specific connection areas during installation.
4. Operating Instructions
Once the YSVQHHDV Universal LCD TV Logic Board is correctly installed, its operation is integrated with the television's existing controls and functions. The logic board itself does not require separate operational steps.
- Power On: Turn on your television using its remote control or power button.
- Verify Display: Confirm that the TV displays an image correctly and that all functions (e.g., input switching, menu navigation) are working as expected.
- Picture Settings: If necessary, adjust the TV's picture settings (brightness, contrast, color) through the TV's on-screen menu to optimize display quality.
5. Maintenance
The YSVQHHDV Universal LCD TV Logic Board is designed for durability and requires minimal maintenance. Adhering to these guidelines can help ensure its longevity:
- Keep Dry: Ensure the TV environment is dry and free from excessive humidity to prevent damage to electronic components.
- Avoid Dust Accumulation: Periodically clean the interior of the TV (when powered off and unplugged) to prevent dust buildup on the logic board, which can lead to overheating or short circuits. Use compressed air or a soft brush.
- Temperature Control: Operate the TV within its recommended temperature range to prevent stress on the electronic components. Ensure proper ventilation around the TV.
- Professional Servicing: For any internal cleaning or inspection beyond basic dust removal, consult a qualified technician.
6. Troubleshooting
If you encounter issues after installing the logic board, refer to the following troubleshooting steps:
- No Display/Black Screen:
- Verify that the TV is receiving power and the power indicator light is on.
- Ensure all cables, especially the LVDS cable and power connectors, are securely attached to the logic board and the display panel.
- Check if the backlight is working (you might see a faint image with a flashlight). If not, the issue might be with the backlight driver or the panel itself.
- Incorrect or Distorted Display:
- Power off the TV and recheck the LVDS cable connection. A loose or improperly seated cable can cause image distortion.
- Ensure the logic board is compatible with your specific LCD panel model. Incompatibility can lead to incorrect resolutions or distorted images.
- If the image is inverted or has incorrect colors, check for any jumpers or settings on the logic board that might need adjustment for your panel type (consult a professional if unsure).
- No Sound:
- Verify that the TV's internal speakers or external audio system are properly connected and configured.
- Check the TV's audio settings and volume levels.
- TV Not Turning On:
- Ensure the power supply unit (PSU) is functioning correctly and providing the necessary voltages to the logic board.
- Double-check all power connections to the logic board.
If these steps do not resolve the issue, professional diagnosis and repair may be necessary.
7. Specifications
| Feature | Description |
|---|---|
| Product Type | Universal LCD TV Logic Board |
| Brand | YSVQHHDV |
| Compatible Screen Size | 32 Inch LCD Screens |
| Compatible Models | PT320AT02-5, PT320AT01-4-XC-1, PT320AT03-4, HV320WHB, ST3151A07, TE315HA0-X3.0 |
| Connector Type | 60P (for TE315HA0-X3.0 and similar panels) |
| Item Weight | 1.76 ounces (approximately 50 grams) |
| Package Dimensions | 0.39 x 0.39 x 0.39 inches (1 x 1 x 1 cm) |
| Key Features | Improved performance, enhanced smart features, broad compatibility, energy-saving technology, increased stability and reliability. |
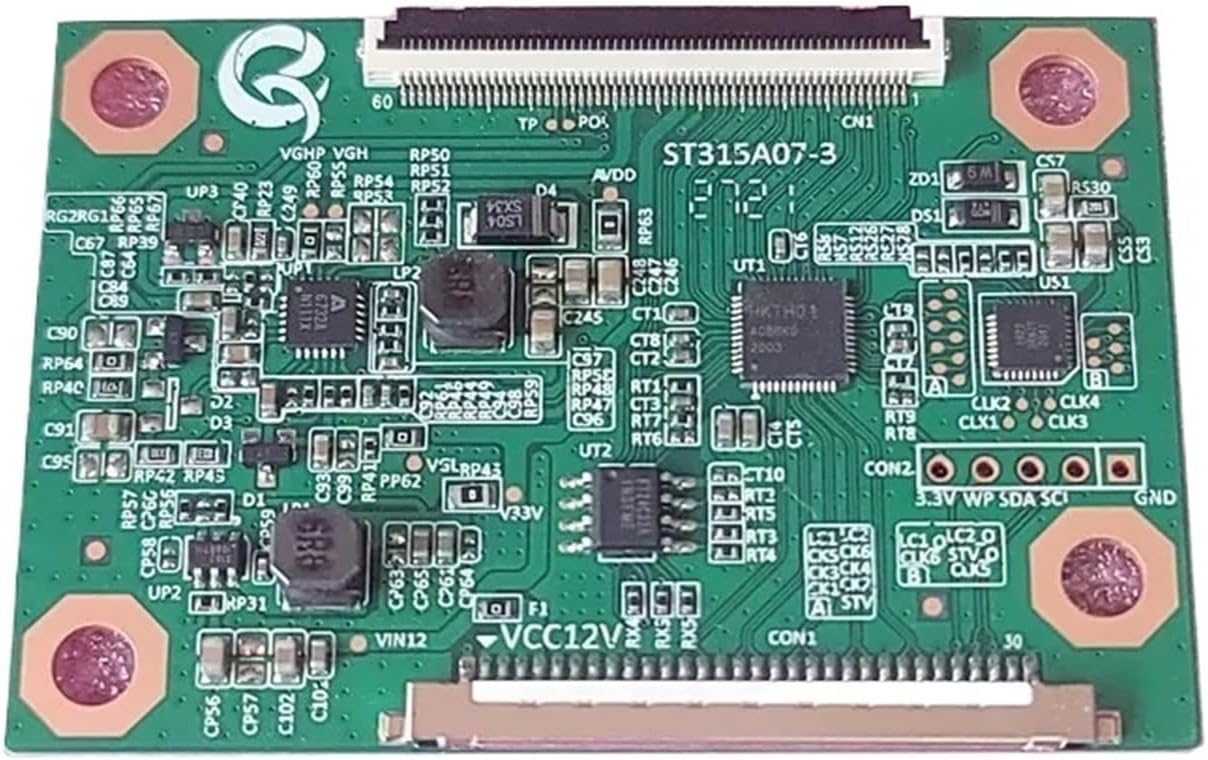
Figure 7.1: View of the YSVQHHDV Universal LCD TV Logic Board, model ST3151A07-3, illustrating the layout of components and connectors on one side of the board.

Figure 7.2: Another perspective of the YSVQHHDV Universal LCD TV Logic Board, highlighting the power input (12V, 3.3V) and various signal lines (SDA, SCL, GND).

Figure 7.3: A compact variant of the YSVQHHDV Universal LCD TV Logic Board, featuring multiple integrated circuits and connectors for various display applications.
8. Warranty and Support
For warranty information and technical support, please refer to the documentation provided with your purchase or contact the seller directly. Keep your proof of purchase for any warranty claims.