
Introduction
This instruction manual provides essential information for the safe and effective operation of your TowerTop 25A Max Pro Battery Charger. Please read this manual thoroughly before use and retain it for future reference. This device is designed for charging and maintaining 12V lead-acid and lithium (LiFePO4) batteries found in various vehicles and equipment.

Image: The TowerTop 25A Max Pro Battery Charger, showcasing its compact design, integrated handle, and the included battery clamps and accessory cables for versatile connectivity.
Key Features
- Efficient and Fast Charging: Offers 4 adjustable current settings (3A/15A/25A/AUTO) for diverse charging needs, with a maximum current of 25A.
- Smart and Fully Automatic Charging: Utilizes advanced SMPS technology and an MCU chip for 85% charging efficiency. Supports automatic battery detection, desulfation, and repair.
- Plug-and-Play Operation: Automatically detects battery status and begins charging within 30 seconds. Switches to maintenance mode after full charge to prevent overcharging.
- Multi-Mode Compatibility: Supports 6 professional charging modes: STD, GEL, AGM, Deep Cycle, Calcium, and LI (LiFePO4). Also compatible with Wet, MF, and EFB batteries.
- Engine Start Aid: Delivers 100A to assist in starting vehicles within 100 seconds (requires AC 120V power).
- DC Power Supply Function: Provides stable 14V with up to 25A current (max 350W) for 12V DC-powered devices and vehicle maintenance tasks.
- HD LCD Screen: Clear display shows charging stages and parameters for easy monitoring.
- 8-Stage Intelligent Charging: Features Desulfation, Soft Start, Bulk Charge, Absorption, Analyze, Recondition, Float, and Pulse Maintenance stages to extend battery life.
- Battery Repair & Winter Mode: Independent buttons for manual desulfation and repair to restore battery health. Winter mode adds 0.2V for improved cold-temperature charging.
Package Contents
Verify that all items are present in the package:
- TowerTop 25A Max Pro Battery Charger x 1
- Cigarette Lighter Adapter x 1
- M10 Terminal Cables x 1
- Instruction Manual x 1

Image: The complete package contents, showing the main charger unit, battery clamps, cigarette lighter adapter, and M10 terminal cables.
Safety Information
The TowerTop 25A Max Pro Battery Charger is ETL certified and incorporates multiple safety features to protect both the user and the battery. Always adhere to the following safety guidelines:
- Sparkproof: Designed to prevent sparks during connection.
- Reverse Polarity Protection: Prevents damage if clamps are connected incorrectly.
- Over Voltage Protection: Safeguards against excessive voltage input.
- Overheating Protection: Monitors internal temperature to prevent damage.
- Overtime Charging Protection: Automatically stops charging to prevent battery damage.
- Anti Current Backflow: Prevents current from flowing back from the battery to the charger.
- Over Current Protection: Monitors and limits output current.
- Short Circuit Protection: Automatically shuts off in case of a short circuit.

Image: Visual representation of the comprehensive safety features built into the charger, ensuring safe operation.
Setup
Before operating the charger, ensure you are in a well-ventilated area and that the battery terminals are clean.
- Connect the clamps to your battery: Ensure correct polarity (red clamp to positive terminal, black clamp to negative terminal).
- Connect the 120V AC power outlet: Plug the charger into a standard wall outlet.
The charger has a memory function. If you're using the charger for the first time, it will automatically charge in the "3A & GEL & Precise Mode". Therefore, we recommend that you initially set the charging mode (current and battery type) based on your battery type. Afterward, no need to repeat the setup; the charger will remember your last charging settings and charge automatically.

Image: Steps for automatic charging, highlighting the simple connection process.
Operating Instructions
Manual Charging
For manual control over charging parameters:
- Connect the clamps to your battery.
- Connect the 120V AC power outlet.
- Press the "Precise / Standard Mode" button to select the charging mode (Precise for 8-stage, Standard for 4-stage).
- Press the "Battery Type" button to choose your battery type (STD, GEL, AGM, Deep Cycle, Calcium, LI).
- Press the "AMPS" button to select your desired charging rate (3A, 15A, 25A). Note: In AUTO mode, the current is 3A.
- Finally, press the "START" button to initiate the charging process.

Image: Detailed steps for manually configuring the charger settings.
Charging Modes
The charger offers two main charging modes:
- Precise Mode: Uses an 8-stage charging process for detailed maintenance and optimal battery health.
- Standard Mode: Uses a faster 4-stage charging process for quicker charging and basic maintenance.

Image: The 8-stage smart charging process, detailing each step from desulfation to pulse maintenance.
Engine Start Aid
The engine start function provides a temporary boost to help start your vehicle. It delivers 100A current for up to 100 seconds. This feature requires the charger to be connected to an AC 120V power source.

Image: The charger providing engine start assistance to a vehicle.
DC Power Supply Function
The DC power supply mode provides a stable 14V with up to 25A current (max 350W). This mode is ideal for powering 12V DC devices such as air pumps, car vacuums, or portable fridges. It can also be used for vehicle maintenance tasks like ECU programming, module replacement, fault diagnostics, and as a memory saver during battery replacement.

Image: The charger functioning as a DC power supply for various automotive applications.
Maintenance
Battery Repair & Desulfation
Separate Desulfation and Repair buttons allow you to manually restore battery health and extend battery life. This is particularly useful for old or idle batteries. If your battery won't charge, try the Repair mode. Note: This function cannot repair completely dead batteries.
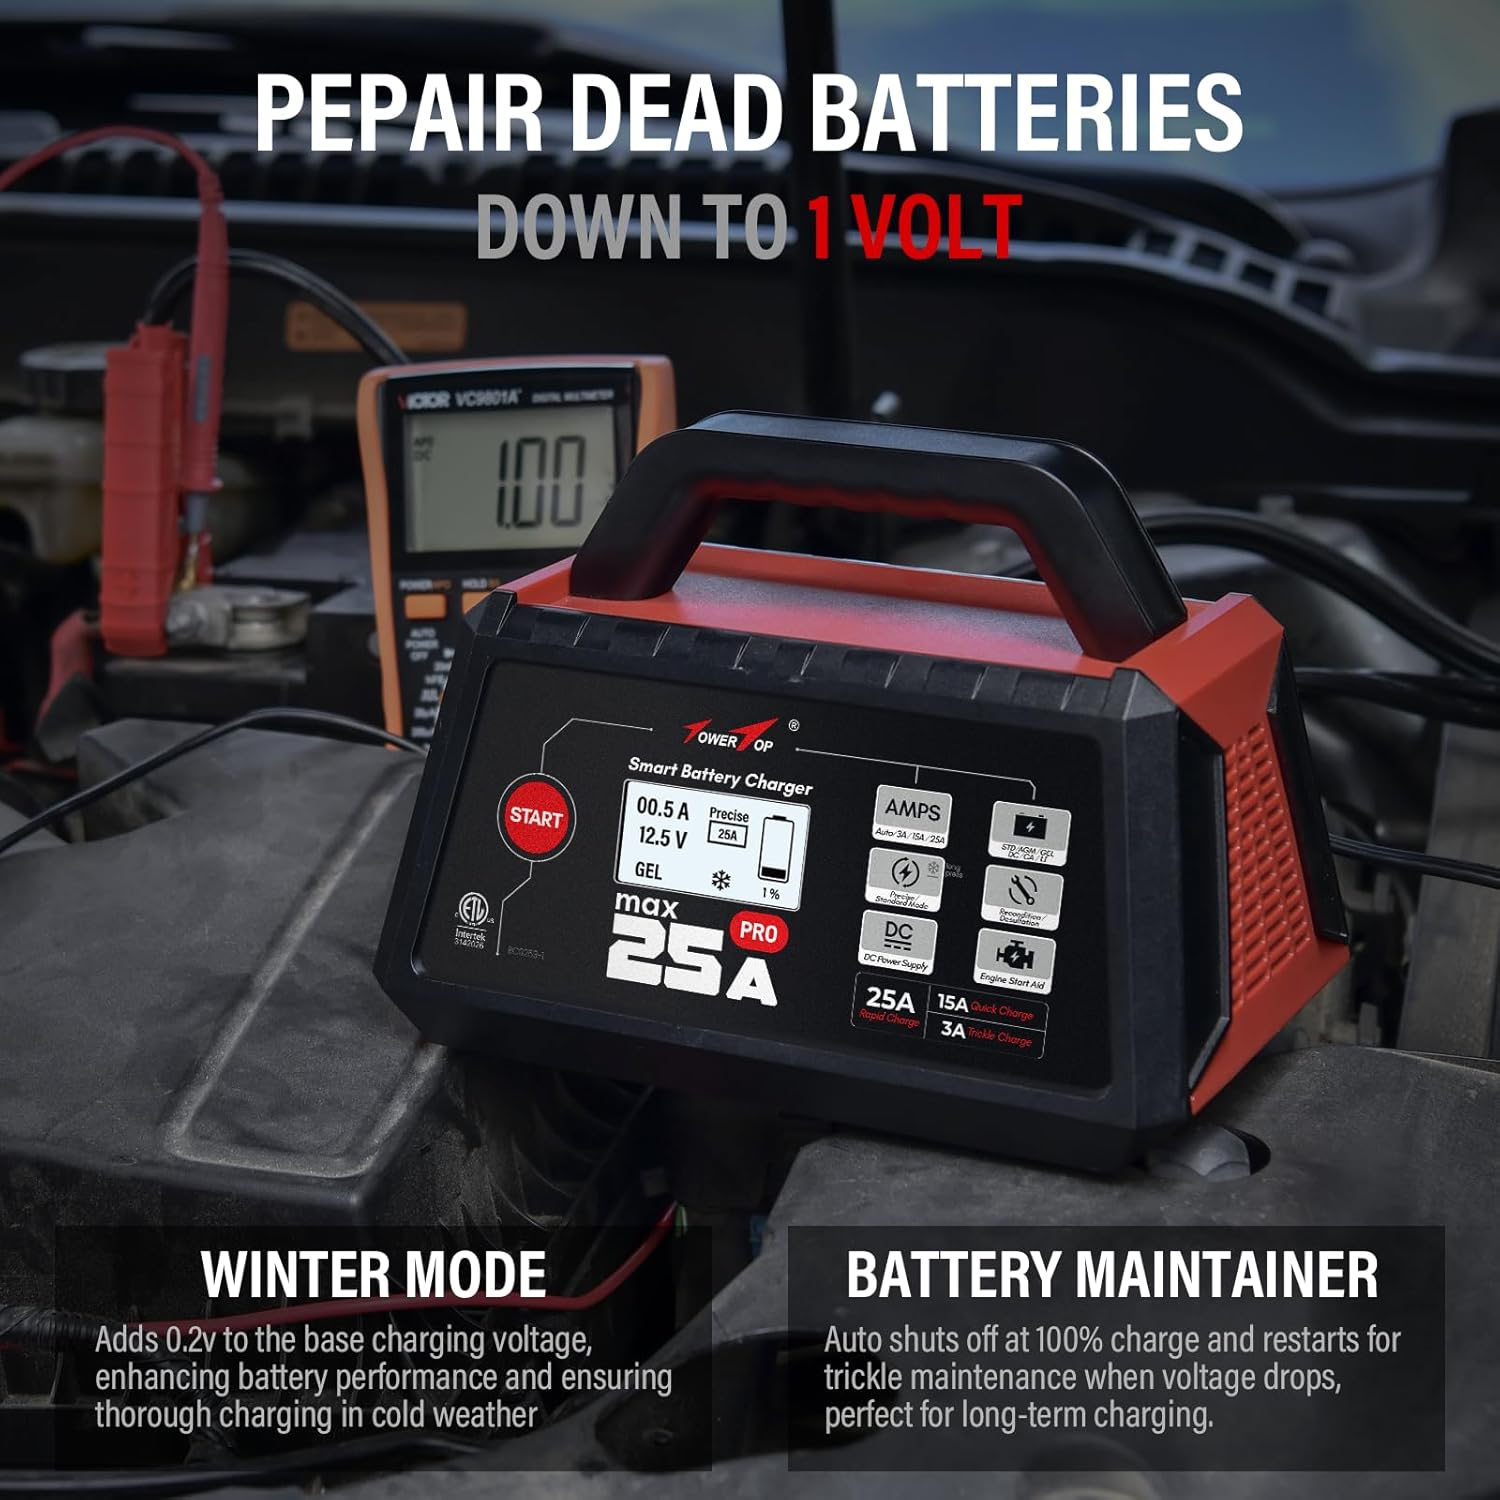
Image: The charger's battery repair capabilities, including desulfation and reconditioning.
Winter Mode
Winter mode adds 0.2V to the standard charging voltage, enhancing battery activity and charging performance in cold temperatures.

Image: The charger operating in Winter Mode for optimal performance in cold conditions.
Troubleshooting
"Please Put the Clamps On" Error
If the charger displays the "PLEASE PUT THE CLAMPS ON" error message, consider the following solutions:
- Solution One: Upon first use, the charger defaults to 'Precision Charging' mode. The charger will automatically detect the battery's status and connection. If the battery is severely discharged (voltage < 1V) or if the clamps are not properly connected, the charger will display an error message. If no action is taken for 30 seconds, the charger will automatically start charging and display the interface.
- Solution Two (for severely discharged batteries): If the battery voltage is too low (below the charger's startup voltage), the charger can't recognize the battery and won't begin charging. The screen will display "PLEASE PUT THE CLAMPS ON". To resolve this:
- Press the Recondition/Desulfation button. It will start automatically after a 10-second countdown (or press START immediately).
- After the reconditioning process, the charger starts charging in your previous mode within 30 seconds. If it's your first time using the charger, it defaults to settings (3A, GEL, and Precise charging mode) for battery identification and charging. However, you can also manually select the charging mode after the reconditioning and press START to begin charging immediately.
- Solution Three (for batteries inside a vehicle): If the battery is located inside a vehicle, the vehicle's protective panel may affect the battery's voltage signal. As a solution, you can first remove the battery from the vehicle and then attempt charging. If this procedure proves effective, the issue may be related to the vehicle's protective panel. If the problem persists, please proceed to step 2.
Note: If you are using a lithium battery or if the "PLEASE PUT THE CLAMPS ON" error persists after three cycles in Solution 1, please follow Solution 2.
Note: In Standard Charging mode, the charger will not detect the battery's status or connection. It will directly use the 4-stage charging program to charge the battery.
Specifications
| Attribute | Value |
|---|---|
| Brand | TowerTop |
| Model Number | BC-025 MAX PRO |
| Item Weight | 3.95 pounds |
| Product Dimensions | 6.1 x 8.46 x 6.89 inches |
| Output Voltage | 12 Volts |
| Color | 25A Max Pro |
Warranty and Support
Register your product to extend your warranty to 24 months. Scan the QR code provided on the quick start guide or visit the official TowerTop website.
For further assistance, you can contact TowerTop support:
- Website: www.towertop.net
- YouTube: www.youtube.com/@-TowerTop
- Support Email: support@towertop.net


