1. Introduction
This manual provides detailed instructions for the installation, operation, maintenance, and troubleshooting of your AIMADI Wall Mount Kitchen Faucet, Model AM14233B. Please read this manual thoroughly before installation and use to ensure proper function and longevity of your faucet.
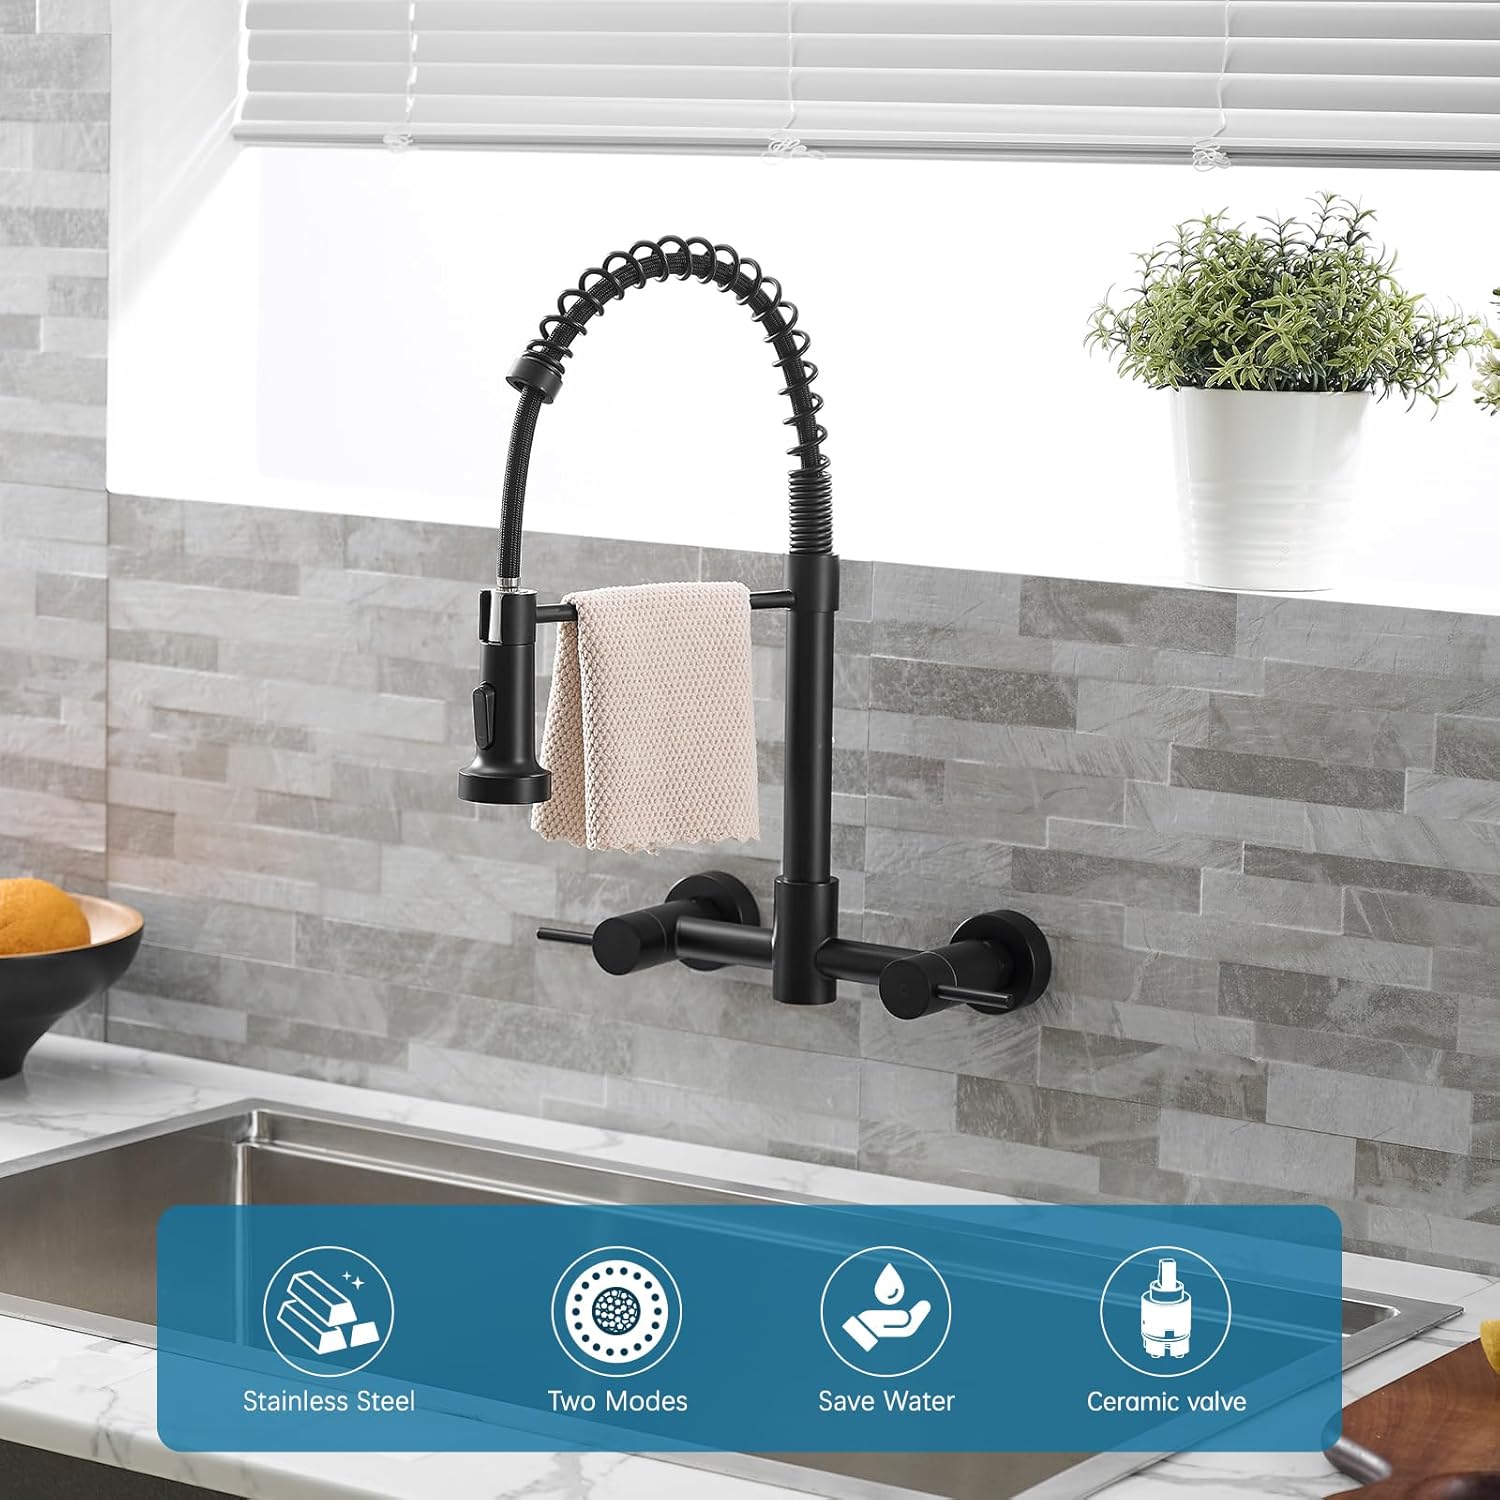
Image 1.1: Overview of the AIMADI Wall Mount Kitchen Faucet, highlighting key features such as stainless steel construction, dual spray modes, water efficiency, and a ceramic valve.
2. Safety Information
- Always turn off the main water supply before beginning any installation or maintenance.
- Wear appropriate personal protective equipment, such as safety glasses and gloves, during installation.
- Ensure all connections are secure to prevent leaks. Do not overtighten.
- If you are unsure about any part of the installation process, consult a qualified plumber.
- Keep children away from the installation area and tools.
3. Package Contents
Verify that all components are present before beginning installation:
- Faucet Body with Pull-Down Sprayer
- Hot and Cold Water Handles
- Wall Mounting Hardware (Adjustable Feet, Decorative Covers)
- Installation Aperture Components
- Hex Wrench
- Washers and Seals

Image 3.1: Exploded view of the faucet and its accessories, including the main body, handles, mounting hardware, and tools for installation.
4. Specifications
| Brand | AIMADI |
| Model Number | AM14233B |
| Material | Stainless Steel (SUS304) |
| Finish Type | Matte Black |
| Mounting Type | Wall Mount |
| Number of Handles | 2 (Dual Lever) |
| Hole Count | 2 |
| Special Feature | 360° Swivel, Pull Down Sprayer (2 Modes) |
| Flow Rate | 1.8 Gallons Per Minute |
| Valve Type | Ceramic Cartridge Valve |
| Spout Design | Pull Down |
| Spout Height | 18 Inches (approx.) |
| Spout Reach | 8.5 Inches (approx.) |
| Mounting Hole Diameter | 1.38 Inches |
| Hose Length | 20 Inches |

Image 4.1: Dimensional drawing of the faucet, illustrating key measurements for installation planning.
5. Setup and Installation
This faucet is designed for standard US 2-hole wall-mounted configurations with an adjustable center distance of 8 inches.
- Prepare the Wall: Ensure the wall surface is clean and clear of obstructions. Mark the desired installation points for the two mounting holes, ensuring an 8-inch center-to-center distance.
- Install Adjustable Feet: Thread the adjustable NPT1/2 feet into your wall's water supply lines. Use thread sealant tape to ensure a watertight connection. Adjust the feet to ensure they are level and the correct distance apart.
- Attach Decorative Covers: Slide the decorative covers over the adjustable feet, flush against the wall.
- Mount the Faucet Body: Align the faucet body with the adjustable feet. Secure the faucet body to the feet using the provided nuts and washers. Ensure the faucet is level and tightened securely.
- Connect Water Lines: Connect the hot and cold water lines from the wall to the corresponding inlets on the faucet body. Ensure all connections are tight to prevent leaks.
- Test for Leaks: Slowly turn on the main water supply and check all connections for leaks. If leaks are detected, tighten the connections as necessary.

Image 5.1: Illustration of the ceramic valve, emphasizing its role in precise water control and leak prevention.
6. Operating Instructions
6.1. Water Flow and Temperature Control
The faucet features two independent lever handles for precise control over water temperature and flow. The left handle controls hot water, and the right handle controls cold water. Turn the handles to adjust the desired temperature and flow rate.

Image 6.1: Hot and Cold Dual Control Faucet, demonstrating the independent operation of each handle.
6.2. Pull-Down Sprayer and Spray Modes
The flexible pull-down sprayer offers two distinct spray modes for versatile kitchen tasks:
- Powerful Spray Mode: Ideal for rinsing stubborn food particles from dishes.
- Aerated Stream Mode: Suitable for filling pots and general washing.
To switch between modes, press the button located on the sprayer head. The sprayer can be pulled down and extended for increased reach and flexibility.

Image 6.2: Dual Mode sprayer, showing the difference between spray and stream functions.
6.3. 360° Swivel Spout
The faucet features a 360-degree swivel spout, allowing you to direct water flow to all corners of your sink for maximum convenience and cleaning coverage.

Image 6.3: Swivel Spout, illustrating its full range of motion for comprehensive sink coverage.
7. Maintenance
7.1. Cleaning the Faucet
To maintain the matte black finish and prevent water spots or scratches, clean the faucet regularly with a soft cloth and mild soap. Avoid abrasive cleaners, harsh chemicals, or scouring pads, as these can damage the finish.
7.2. Cleaning the Sprayer Head/Aerator
Over time, mineral deposits can accumulate in the sprayer head or aerator, affecting water flow. To clean:
- Unscrew the sprayer head from the hose.
- Disassemble the aerator if possible (refer to diagrams if available).
- Soak the components in a solution of equal parts white vinegar and water for 30 minutes to dissolve mineral deposits.
- Rinse thoroughly with clean water and reassemble.
7.3. Ceramic Valve Care
The faucet is equipped with a durable ceramic cartridge valve designed for long-lasting, leak-free performance. No regular maintenance is typically required for the valve itself. If you experience persistent dripping or difficulty controlling water flow, the valve cartridge may need replacement. Contact customer support for assistance.
8. Troubleshooting
| Problem | Possible Cause | Solution |
|---|---|---|
| Low Water Flow | Clogged aerator or sprayer head; partially closed shut-off valves. | Clean the aerator/sprayer head (see Section 7.2). Ensure hot and cold water shut-off valves are fully open. |
| Faucet Leaks | Loose connections; worn O-rings or ceramic cartridge. | Check and tighten all connections. If leaking persists, the ceramic cartridge or O-rings may need replacement. Contact customer support. |
| Sprayer Not Retracting Properly | Obstruction in the hose path; insufficient weight on the hose. | Check for any items obstructing the hose under the sink. Ensure the counterweight (if applicable) is correctly positioned on the hose. |
| Difficulty Switching Spray Modes | Mineral buildup in the sprayer mechanism. | Clean the sprayer head as described in Section 7.2. |
| Finish Deterioration | Use of abrasive cleaners; exposure to harsh chemicals. | Only use mild soap and a soft cloth for cleaning. Avoid harsh chemicals. If damage has occurred, contact customer support for options. |
9. Warranty and Support
9.1. Warranty Information
For specific warranty details regarding your AIMADI Wall Mount Kitchen Faucet, please refer to the warranty card included with your purchase or contact AIMADI customer support directly. Warranty terms typically cover manufacturing defects under normal use.
9.2. Customer Support
If you have any questions, require technical assistance, or need to order replacement parts, please contact AIMADI customer support. You can typically find contact information on the AIMADI website or through the retailer where you purchased the product.