1. Introduction
This manual provides comprehensive instructions for the safe and efficient operation of your DreamFair HY300Ultra Mini Projector. Please read this manual thoroughly before using the product and retain it for future reference.

Image: The DreamFair HY300Ultra Mini Projector, a compact white cylindrical device with a black front lens, shown alongside its black remote control.
2. Product Features
- Upgraded Design: Compact and lightweight (0.8 pounds) with a base-mounted stereo speaker design. Includes a screw hole for tripod mounting.
- WIFI 6 Connectivity: Built-in WiFi6 for fast and stable wireless connection to smartphones, laptops, and other devices.
- Bluetooth 5.4 & Speaker Function: Integrated Bluetooth 5.4 chip allows pairing with external audio devices. Features built-in speakers for direct audio output.
- HD Projection Display: Native resolution of 1280x720, 10,000:1 High Dynamic Contrast Ratio, supports Full HD 4K and 1080P video. Projects screen sizes from 25 to 110 inches.
- Auto Keystone Correction: Manual focus and automatic keystone correction with high-precision sensors for faster and more accurate image adjustment. Vertical auto-correction is supported. Side projection adjustment requires the remote control.
- Wide Compatibility: Equipped with HDMI, USB, and 3.5mm headphone ports for connection to TV Sticks/Box, Game Consoles, PCs, Smartphones, Tablets, Laptops, DVD Players, and USB Flash Drives.
- 210° Rotatable Projection: Allows for flexible projection angles.
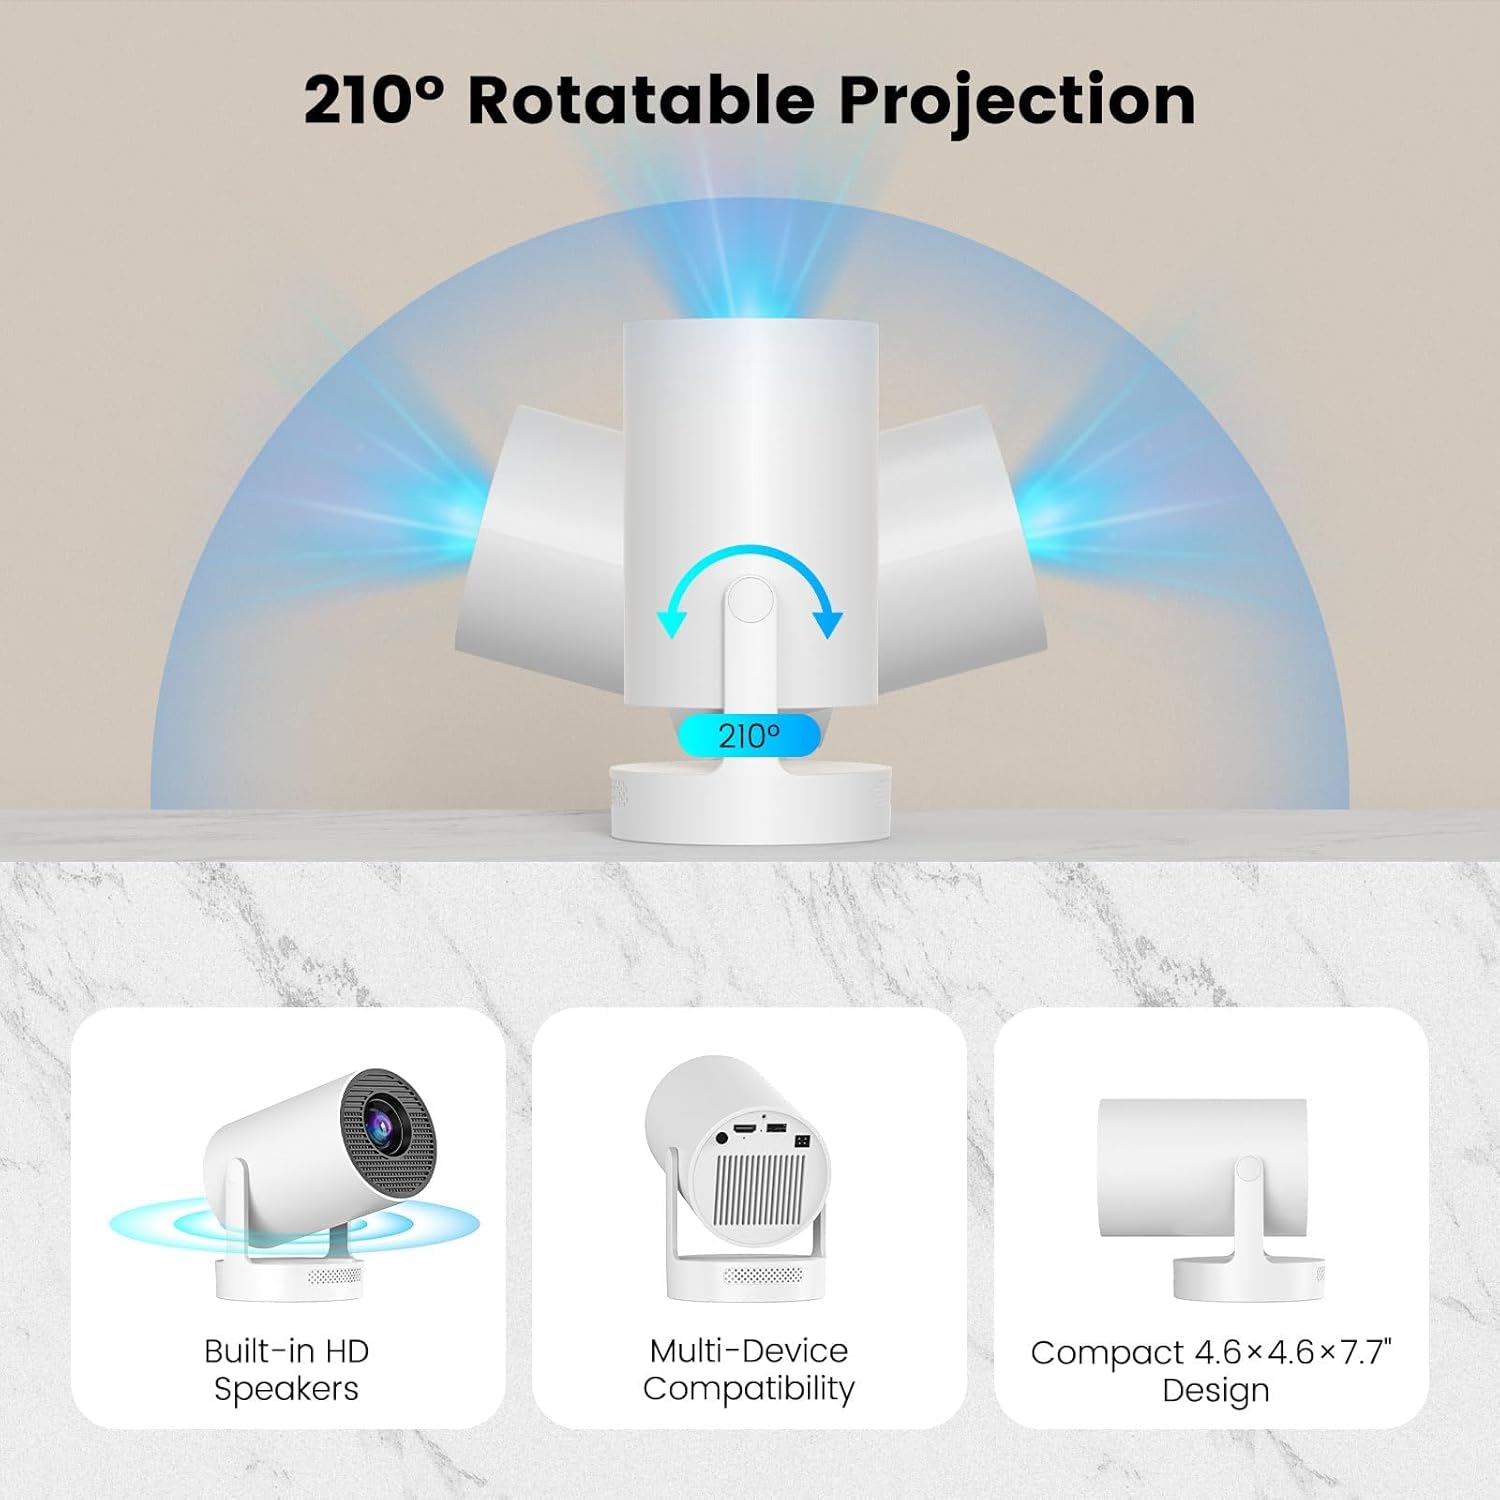
Image: A visual representation of the projector's 210-degree rotatable projection feature, highlighting its built-in HD speakers, multi-device compatibility, and compact dimensions (4.6x4.6x7.7 inches).
3. Package Contents
Verify that all items are present and in good condition upon opening the package:
- DreamFair HY300Ultra Mini Projector
- Remote Control
- Power Cord
- User Manual (this document)

Image: An illustration showing the projector, its remote control, the user manual, and the power cord, representing the typical contents found within the product box.
4. Product Diagram
Familiarize yourself with the various components and ports of your projector.

Image: A detailed view of the projector's rear, highlighting the USB, HDMI, and Audio input/output ports for connecting various external devices.
- Front: Projection Lens
- Rear: USB Port, HDMI Port, 3.5mm Audio Jack
- Bottom: Tripod Screw Hole, Speaker Grille
- Side: Power Input
5. Setup Guide
5.1 Initial Setup
- Place the projector on a stable, flat surface.
- Connect the power cord to the projector and then to a power outlet.
- Press the power button on the projector or remote control to turn it on.
5.2 Placement and Projection Distance
For optimal viewing, position the projector at an appropriate distance from the projection surface. The recommended optimal projection distance for a 25-110 inch screen is 5.51 feet.

Image: A visual guide illustrating the ideal projection distances for achieving 80-inch (5.2ft), 100-inch (6.5ft), and 130-inch (8.5ft) screen sizes.
5.3 Focus and Keystone Correction
- Manual Focus: After powering on the projector, manually adjust the focus ring on the lens until the image is clear.
- Auto Keystone Correction: The projector features built-in high-precision sensors for automatic vertical keystone correction. This will automatically correct the image's vertical distortion.
- Side Projection Adjustment: For adjusting horizontal or side projection, use the remote control to manually correct the image.

Image: A visual representation of the projector's motorized focus and keystone correction, showing how it automatically calibrates to an ideal focus position, eliminating manual adjustments for vertical alignment.
5.4 Connecting Devices
- WiFi Connection:
- Navigate to the network settings on the projector.
- Select your WiFi network and enter the password.
- Once connected, you can mirror content from compatible smartphones or laptops.

Image: A depiction of the projector's fast WiFi 6 and Bluetooth 5.2 capabilities, demonstrating seamless, buffer-free streaming from a smartphone to the projected display.
- Bluetooth Connection:
- Go to Bluetooth settings on the projector.
- Enable Bluetooth and search for devices.
- Select your Bluetooth headphones or speaker to pair.
- HDMI/USB Connection:
- Connect your device (e.g., TV Stick, game console, laptop) to the projector's HDMI port using an HDMI cable (not included).
- Insert a USB flash drive into the USB port to play media files directly.
- Select the corresponding input source from the projector's menu.
6. Operating Instructions
6.1 Power On/Off
- Power On: Press the power button on the projector or the remote control.
- Power Off: Press the power button again. Confirm shutdown if prompted.
6.2 Navigation (Remote Control)
Use the provided remote control to navigate the projector's interface and settings.
- Arrow Keys: Navigate through menus and options.
- OK Button: Confirm selection.
- Back Button: Return to the previous screen.
- Home Button: Go to the main home screen.
- Volume Buttons: Adjust audio volume.
- Source Button: Select input source (HDMI, USB).
6.3 Media Playback and Smart Features
The HY300Ultra projector supports various media playback options and smart features.
- Streaming Apps: Access pre-installed streaming applications (e.g., Netflix, YouTube, Prime Video) via the smart interface. Ensure a stable internet connection.
- Local Media: Play videos, photos, and music directly from a USB flash drive.
- Screen Mirroring: Wirelessly mirror content from your smartphone or laptop using the built-in WiFi.

Image: The projector displaying its smart interface, featuring popular streaming applications such as Netflix, YouTube, and Prime Video, indicating access to a wide range of entertainment content.
7. Maintenance
7.1 Cleaning
- Lens: Use a soft, lint-free cloth specifically designed for optical lenses. Do not use abrasive cleaners or solvents.
- Exterior: Wipe the projector's exterior with a soft, dry cloth. For stubborn marks, a slightly damp cloth can be used, followed by a dry cloth.
- Ventilation: Ensure the ventilation openings are clear of dust and debris to prevent overheating. Do not block the vents during operation.
7.2 Storage
When not in use for extended periods, store the projector in a cool, dry place, away from direct sunlight and extreme temperatures. It is recommended to use the original packaging or a protective case.
8. Troubleshooting
| Problem | Possible Cause | Solution |
|---|---|---|
| No image displayed | Power not connected; Incorrect input source; Lens cap on. | Ensure power cord is securely connected. Select the correct input source (HDMI, USB, etc.). Remove lens cap. |
| Image is blurry | Focus not adjusted; Projector too close/far from screen. | Manually adjust the focus ring. Adjust projection distance as per section 5.2. |
| Image is distorted (trapezoid shape) | Keystone correction needed. | Allow auto keystone correction to function. For side projection, use the remote control to manually adjust keystone. |
| No sound | Volume too low; Muted; External audio device not connected/paired. | Increase volume. Check if muted. Ensure Bluetooth device is paired or 3.5mm cable is connected properly. |
| Cannot connect to WiFi/Bluetooth | Incorrect password; Device out of range; Interference. | Verify password. Move projector closer to router/device. Reduce interference from other wireless devices. |
9. Specifications
| Feature | Detail |
|---|---|
| Brand Name | DreamFair |
| Model Number | HY300Ultra |
| Item Weight | 13.4 ounces (approx. 0.8 lbs) |
| Package Dimensions | 6.65 x 5.71 x 5 inches |
| Display Resolution | Native 1280 x 720 (supports 4K, 1080P) |
| Contrast Ratio | 10,000:1 |
| Projection Screen Size | 25-110 inches |
| Connectivity Technology | Bluetooth 5.4, HDMI, USB, Wi-Fi 6 |
| Special Features | Digital Keystone Correction, Portable, 210° Rotatable Projection |
| Recommended Use | Home Cinema |
10. Warranty and Support
DreamFair is committed to providing quality products and customer satisfaction.
- Warranty: Please refer to the product packaging or the official DreamFair website for specific warranty terms and conditions.
- Customer Support: For technical assistance, troubleshooting, or any inquiries regarding your DreamFair HY300Ultra projector, please contact DreamFair customer service. Contact information can typically be found on the product packaging or the brand's official website.


Image: Icons indicating 24-hour reply to messages, a 30-day no-questions-asked return policy, and lifetime after-sales support provided by DreamFair.