CAILESER robot aspiradora y trapeador
CAILESER Robot Vacuum and Mop 3-in-1 User Manual
Model: robot aspiradora y trapeador | Brand: CAILESER
1. Introduction
Thank you for choosing the CAILESER 3-in-1 Robot Vacuum and Mop. This intelligent cleaning device is designed to simplify your home cleaning routine by sweeping, vacuuming, and mopping simultaneously. With its powerful 4000Pa suction, ultrathin design, and smart features, it effectively cleans various floor types, including hardwood, tiles, laminate, and short-pile carpets. This manual provides detailed instructions for setup, operation, maintenance, and troubleshooting to ensure optimal performance and longevity of your robot cleaner.

Figure 1.1: CAILESER 3-in-1 Robot Vacuum and Mop, showcasing its sleek design and included mop pads.
2. What's in the Box?
Please check the contents of your package to ensure all items are present and in good condition:

Figure 2.1: Diagram showing all components included in the CAILESER Robot Vacuum and Mop package.
- CAILESER Robot Vacuum and Mop
- Charging Base
- Power Adapter
- Detergent Container (Empty Bottle)
- 2 x Mop Pads
- 2 x Side Brushes
- Cleaning Brush
- User Manual
3. Important Safety Information
Before using your CAILESER Robot Vacuum and Mop, please read all safety instructions carefully to prevent injury or damage. Keep this manual for future reference.
- Do not allow children to operate the robot. Supervise children and pets when the robot is operating.
- Ensure the power adapter and charging base are placed in a dry, safe area, away from water or moisture.
- Do not use the robot on wet surfaces or to clean up spilled liquids.
- Remove any loose cables, small objects, or fragile items from the floor before cleaning to prevent entanglement or damage.
- Do not block the robot's air vents or brushes during operation.
- Only use the original power adapter and charging base provided with the robot.
- If the robot is not functioning correctly, do not attempt to repair it yourself. Contact customer support.
4. Setup Guide
4.1 Initial Charging
Before first use, fully charge the robot. Place the charging base against a wall in an open area, ensuring there are no obstacles within 1 meter (3 feet) to the front and 0.5 meters (1.5 feet) to the sides. Connect the power adapter to the charging base and plug it into a power outlet. Place the robot on the charging base, aligning its charging contacts. The indicator light will show charging status.

Figure 4.1: The robot automatically returns to its charging base when battery is low or cleaning is complete.
4.2 Installing Side Brushes
Gently press the left (L) and right (R) side brushes into their corresponding slots on the bottom of the robot until they click into place.
4.3 Connecting to the App (Optional)
For advanced control and scheduling, download the official CAILESER app from your smartphone's app store. Follow the in-app instructions to connect your robot to your home Wi-Fi network. This enables remote control, voice transmission, and real-time cleaning status updates.

Figure 4.2: The smartphone app provides intelligent control, including scheduling, mode changes, and remote operation.
5. Operating Instructions
5.1 Starting a Cleaning Cycle
Press the power button on the robot or use the app to start a cleaning cycle. The robot will automatically select a cleaning path based on its environment.
5.2 Cleaning Modes
The robot offers multiple cleaning modes to suit different needs:
- Auto Clean: The robot intelligently plans a zigzag path for comprehensive cleaning.
- Edge Clean: Cleans along walls and furniture edges.
- Spot Clean: Focuses on a specific dirty area.
- Mop Mode: For wet cleaning with the water tank and mop pad installed.

Figure 5.1: Various cleaning methods including automatic, edge, spot, and zigzag cleaning.
5.3 Suction Power Adjustment
The robot features a super suction power of up to 4000Pa, with 4 adjustable levels: Silent, Standard, Strong, and Super. Adjust the suction via the app or remote control to match your cleaning requirements.

Figure 5.2: The robot offers four adjustable suction levels, from silent to super, with up to 4000Pa power.
5.4 Anti-Fall and Anti-Collision Sensors
Equipped with advanced sensors, the robot intelligently detects and avoids stairs, drops, and obstacles, ensuring safe and continuous cleaning.
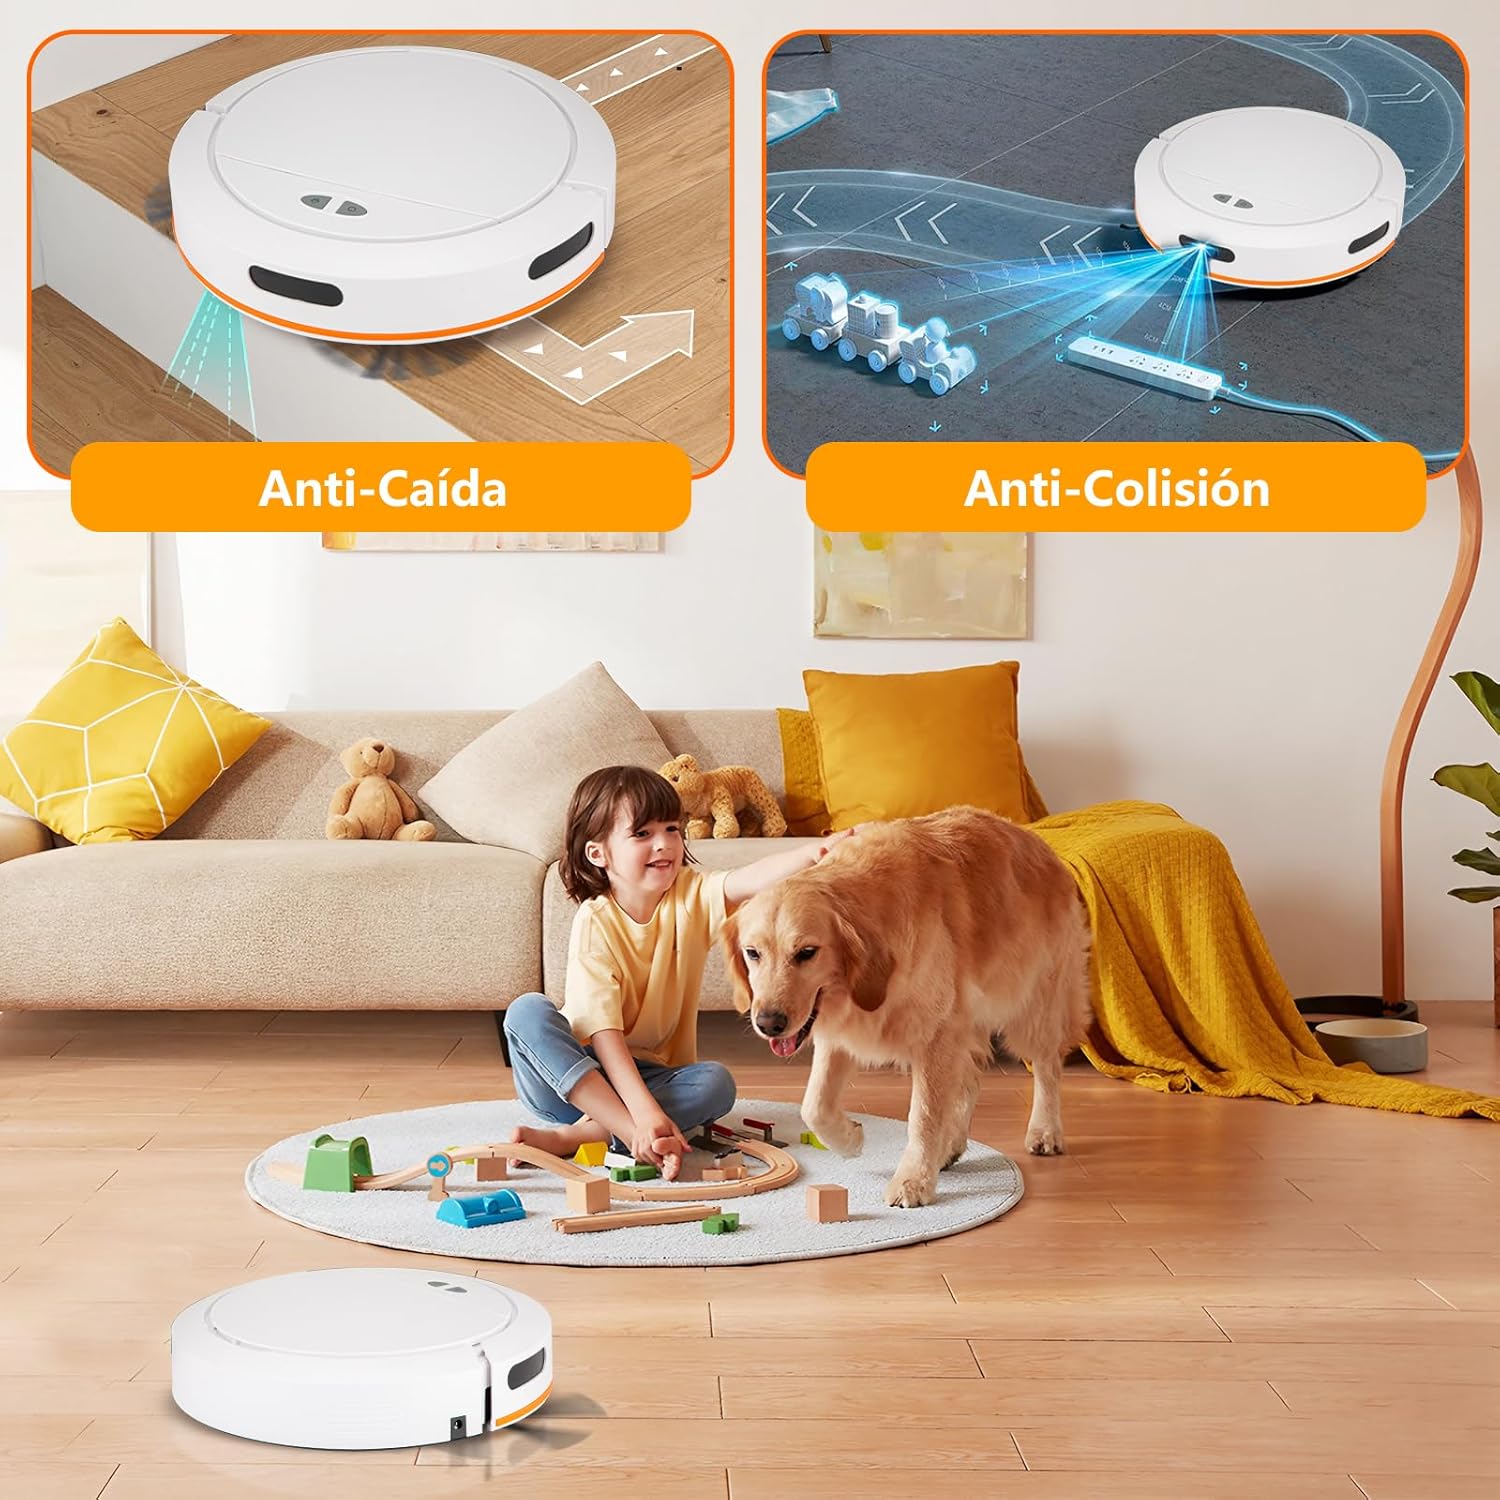
Figure 5.3: The robot's anti-fall sensors prevent drops from stairs, while anti-collision sensors help navigate around furniture.
5.5 Mopping Function
To use the mopping function, fill the 100ml water tank and attach a mop pad. The robot will then sweep, vacuum, and mop simultaneously. Ensure the mop pad is properly attached for effective mopping.

Figure 5.4: The robot features a 335ml dustbin and a 100ml integrated water tank for comprehensive cleaning.
6. Maintenance
Regular maintenance ensures your robot operates efficiently and extends its lifespan.
6.1 Emptying the Dustbin
Empty the 335ml dustbin after each cleaning cycle or when full. Press the dustbin release button, remove the dustbin, and discard debris. Clean the filter regularly with the provided cleaning brush.
6.2 Cleaning the Water Tank and Mop Pad
After mopping, empty any remaining water from the 100ml water tank. Remove and clean the mop pad. Mop pads can be hand-washed or machine-washed and air-dried.
6.3 Cleaning Side Brushes and Main Brush
Periodically check and clean the side brushes and main brush for tangled hair or debris. Use the cleaning brush to remove any obstructions.
6.4 Cleaning Sensors and Charging Contacts
Wipe the anti-fall sensors, anti-collision sensors, and charging contacts on both the robot and the charging base with a clean, dry cloth to ensure proper function.
7. Troubleshooting
If you encounter issues with your robot, refer to the following common problems and solutions:
| Problem | Possible Cause | Solution |
|---|---|---|
| Robot does not turn on. | Low battery; Power switch off. | Charge the robot fully; Ensure the main power switch is ON. |
| Robot does not charge. | Charging contacts dirty; Charging base not powered. | Clean charging contacts on robot and base; Ensure charging base is plugged in. |
| Suction power is weak. | Dustbin full; Filter clogged; Obstruction in suction path. | Empty dustbin; Clean or replace filter; Remove any blockages. |
| Robot gets stuck frequently. | Too many obstacles; Loose cables. | Clear the cleaning area; Secure loose cables. |
| Mopping function is ineffective. | Water tank empty; Mop pad dirty or not properly attached. | Refill water tank; Clean or reattach mop pad. |
8. Specifications
| Brand | CAILESER |
| Model Name | robot aspiradora y trapeador |
| Color | White clear |
| Product Dimensions | 31.3L x 31.3W x 8.2H centimeters (approx. 12.3 x 12.3 x 3.2 inches) |
| Package Dimensions | 42.4 x 34.9 x 13.2 cm (approx. 16.7 x 13.7 x 5.2 inches) |
| Item Weight | 2.91 Kilograms (approx. 6.42 lbs) |
| Suction Power | Up to 4000Pa (adjustable 900-4000Pa) |
| Dustbin Capacity | 335 ml |
| Water Tank Capacity | 100 ml (built-in) |
| Recommended Surface | Tiles, Laminate, Short-pile Carpet |
| Automatic Charging | Yes |
| Anti-Fall Sensors | Yes (3 sets) |
| Obstacle Crossing Ability | Up to 10mm (0.4 inches) |
| Control Method | App Control, Voice Transmission, Remote Control |
9. Warranty and Support
CAILESER products come with a standard manufacturer's warranty. For specific warranty terms and conditions, please refer to the warranty card included in your package or visit the official CAILESER website. If you experience any issues or require technical assistance, please contact CAILESER customer support through the contact information provided on the product packaging or website. Please have your model number and purchase date ready when contacting support.
Customer Service Email: Refer to product packaging or official website.
Official Website: Refer to product packaging or official website.
Ask a question about this manual
Ask about setup, troubleshooting, compatibility, parts, safety, or missing instructions. Manuals+ will review the question and use this page’s manual context to help answer it.