1. Introduction
This manual provides comprehensive instructions for the installation, operation, and maintenance of your KETOTEK Smart Thermostat. Designed for boiler and water underfloor heating systems, this thermostat offers advanced features such as Wi-Fi connectivity, app control, voice assistant compatibility, and programmable scheduling to enhance your home's heating efficiency and comfort.

Image: The KETOTEK Smart Thermostat with its digital display alongside a smartphone showing the intuitive control application.
2. Product Features
The KETOTEK Smart Thermostat is equipped with a range of features designed for optimal heating control:
- APP Control: Remote management of your heating system via the Smart Life/Tuya APP.
- Voice Control: Compatible with Amazon Alexa and Google Assistant for hands-free operation.
- Programmable Scheduling: Offers 5-2 (weekday/weekend), 6-1 (Sunday different), and 7-0 (all days same) weekly schedules with 6 time/temperature settings per day.
- Heating/Cooling Mode Selection: Adaptable for different climate control needs.
- Standby Backlight Setting: Adjustable display brightness for comfort, especially at night.
- Child Lock: Prevents unauthorized changes to settings on the device.
- Open Window Detection: Automatically pauses heating if a sudden temperature drop is detected, saving energy.
- Temperature Calibration: Allows for fine-tuning of temperature readings.
- Temperature History Query: View historical temperature data within the app.
- Frost Protection: Maintains a minimum temperature to prevent pipes from freezing.
- Vacation Mode: Set a specific temperature for extended periods away from home.

Image: Visual representation of the key features of the KETOTEK Smart Thermostat, including app control, voice control, scheduling, and smart detection.
3. Compatibility
This thermostat is designed to work with specific heating systems. Please confirm your system's compatibility before installation.
- Compatible with: Boiler systems and Water Underfloor Heating systems.
- Not Compatible with: Electric Underfloor Heating systems.
- The thermostat uses passive dry contacts (NO and COM ports) to control the boiler's operation (start/stop). Ensure your boiler supports dry contact control.

Image: A visual guide illustrating that the thermostat is suitable for water underfloor heating and boiler systems, but not for electric underfloor heating.
4. Setup and Installation
Proper installation is crucial for the thermostat's performance. It is recommended that installation be performed by a qualified electrician.
4.1 Mounting
The thermostat can be wall-mounted with screws or placed on a 503 back box stand. It is not designed for flush mounting.

Image: The thermostat's front panel detached, showing the rear wiring connections for installation.
4.2 Wiring
The thermostat requires a 220V AC mains power supply (AC 90-240V 50/60Hz). A live wire and a neutral wire are required to power the thermostat. This thermostat cannot replace battery-powered thermostats.
The output is a maximum of 5A. The NO and COM ports are dry contacts for boiler control.

Image: A detailed diagram illustrating the wiring connections for the thermostat, including live, neutral, and boiler control wires.

Image: Schematic diagram for connecting the thermostat to a boiler using dry contacts (NO and COM).

Image: Wiring diagrams demonstrating connections for both Normally Closed (NC) and Normally Open (NO) actuators.
5. Operating Instructions
5.1 Initial Setup and Wi-Fi Connection
To connect your thermostat to your home network and enable remote control:
- Download the "Smart Life" or "Tuya Smart" app from your smartphone's app store.
- Register or log in to your account.
- Follow the in-app instructions to add a new device. Ensure your Wi-Fi network is 2.4GHz, as 5GHz networks are not supported.
- Once connected, the Wi-Fi symbol on the thermostat display will illuminate.

Image: A user interacting with the thermostat via the mobile application, demonstrating remote control capabilities.
5.2 Control Modes
The thermostat offers several operating modes to suit your lifestyle:
- Program Mode: Allows for weekly scheduling with up to 6 time/temperature settings per day. Choose from 5-2 (weekday/weekend), 6-1 (Sunday different), or 7-0 (all days same) schedules.
- Manual Mode: Set a constant temperature that the thermostat will maintain until changed.
- Holiday Mode: Set a specific temperature for an extended period, ideal for when you are away from home.

Image: A visual representation of the weekly programming feature, showing how different temperatures can be set throughout the day and week.

Image: A family departing their home in winter, illustrating the convenience of Holiday Mode for energy saving when away.
5.3 Voice Control
Integrate your thermostat with Amazon Alexa or Google Assistant for convenient voice commands. Refer to the respective voice assistant's setup guide for connecting smart home devices.
5.4 Display and Controls
Understand the symbols and buttons on your thermostat's display for direct control.

Image: An annotated diagram explaining each icon and indicator on the thermostat's digital display.
Key controls include ON/OFF, Menu key, Confirm key, Increase key, and Decrease key.
5.5 Advanced Features
- Standby Backlight Setting: Adjust the backlight brightness (Half, Low, Off) for comfortable viewing, especially at night.
- Child Lock: Activate this feature to prevent accidental changes to settings via the thermostat's physical buttons. This can typically be enabled or disabled through the app or a specific button combination on the thermostat.
- Open Window Detection: If a rapid drop in room temperature is detected (e.g., due to an open window), the thermostat will temporarily pause heating to conserve energy. Heating resumes automatically after a set period or when the temperature stabilizes.
- Temperature History: The Smart Life/Tuya app allows you to view average temperatures by hour, day, or month within a year, providing insights into your heating patterns.
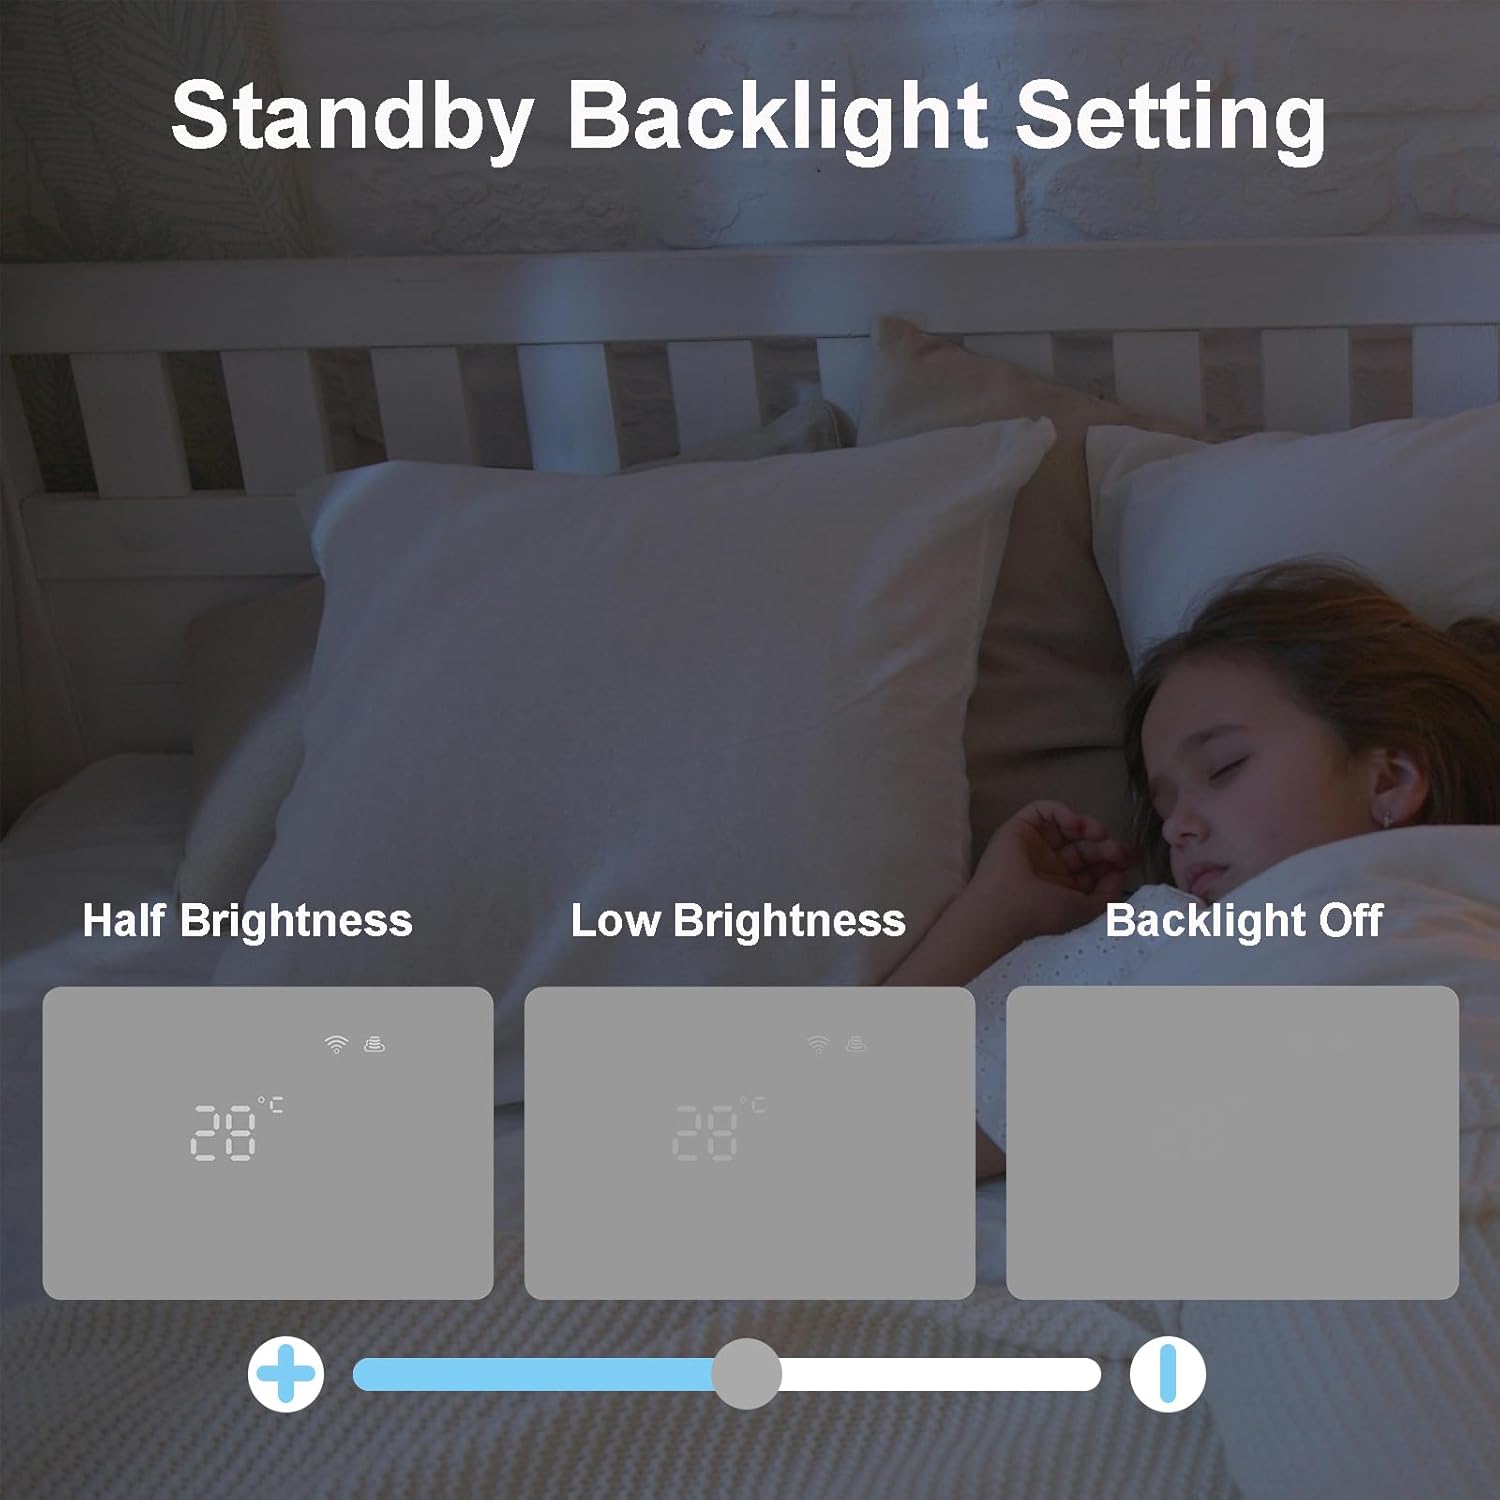
Image: Comparison of the thermostat display at different backlight levels: half brightness, low brightness, and off.

Image: A room with an open window, demonstrating the thermostat's ability to detect sudden temperature drops.

Image: The thermostat and its accompanying app showing a graph of historical temperature data.
6. Maintenance
The KETOTEK Smart Thermostat requires minimal maintenance. To ensure optimal performance and longevity:
- Regularly wipe the display and casing with a soft, dry cloth to remove dust and fingerprints.
- Do not use abrasive cleaners, solvents, or chemical sprays, as these can damage the surface and internal components.
- Ensure the thermostat's vents (if any) are not obstructed to allow for proper air circulation and accurate temperature sensing.
7. Troubleshooting
If you encounter issues with your KETOTEK Smart Thermostat, please refer to the following common troubleshooting steps:
| Problem | Possible Cause | Solution |
|---|---|---|
| Thermostat not powering on | No power supply; incorrect wiring. | Check mains power supply (AC 90-240V). Verify live and neutral wire connections are secure and correct. Consult a qualified electrician if unsure. |
| Cannot connect to Wi-Fi | Incorrect Wi-Fi password; 5GHz network used; thermostat too far from router; router issues. | Ensure correct 2.4GHz Wi-Fi network and password. Move thermostat closer to router. Restart your Wi-Fi router. |
| Boiler not responding to thermostat | Incorrect dry contact wiring; boiler not compatible with dry contact control; thermostat in wrong mode. | Verify NO and COM wiring to the boiler. Confirm your boiler supports dry contact control. Check if the thermostat is in heating mode and the set temperature is above the current room temperature. |
| Inaccurate temperature reading | Thermostat placed near heat source/draft; calibration needed. | Relocate thermostat away from direct sunlight, drafts, or heat sources. Use the temperature calibration feature in the app or thermostat settings to adjust. |
| App control not working | No internet connection; app not updated; thermostat offline. | Check your home internet connection. Ensure the Smart Life/Tuya app is updated to the latest version. Verify the thermostat is connected to Wi-Fi (Wi-Fi symbol on display). |
If problems persist, please contact KETOTEK customer support for further assistance.
8. Specifications
| Feature | Detail |
|---|---|
| Brand | KETOTEK |
| Model Number | KTF017802 |
| Colour | White |
| Product Dimensions | 2.7 x 13 x 9 cm |
| Item Weight | 210 g |
| Voltage | AC 90-240V 50/60Hz |
| Output | Max 5A |
| Temperature Range | 5℃~35℃ |
| Connectivity Technology | Wi-Fi (2.4GHz only) |
| Controller Type | Amazon Alexa, Smart Life/Tuya App, Google Assistant, Hand Control |
| Specific Uses | Boiler, Water Underfloor Heating |
| Included Components | 1*Thermostat; 2* Screws; 1*Manual |

Image: Detailed dimensions of the KETOTEK Smart Thermostat, including its overall size and mounting specifications.
9. Warranty and Support
For warranty information and technical support, please refer to the documentation included with your product or contact the KETOTEK Store directly through your purchase platform. Ensure you have your model number (KTF017802) and purchase details ready when seeking support.
You can visit the official KETOTEK store on Amazon for more information: KETOTEK Store