1. Important Safety Instructions
WARNING: Before using this product, please read all instructions carefully. Failure to follow these instructions may result in injury or damage to the product.
- Always consult with a physician before starting any exercise program.
- Keep children and pets away from the treadmill during operation.
- Place the treadmill on a flat, stable surface with adequate clearance around it.
- Ensure all bolts and nuts are securely tightened before each use.
- Do not operate the treadmill if it has a damaged cord or plug, or if it is not working properly.
- Wear appropriate athletic footwear and clothing.
- The maximum user weight capacity is 100 kg (220 lbs). Do not exceed this limit.
- The treadmill will automatically stop after 40 minutes of continuous operation to cool the motor. It is recommended to rest for approximately 0.5-1 hour before resuming use.
- Use the safety rope/clip feature. Attach the safety clip to your clothing before starting the treadmill. In case of an emergency, pulling the safety clip will immediately stop the machine.
- Hold onto the handrails for balance, especially when starting or stopping the treadmill.

Image: Manufacturer contact information and a warning label emphasizing reading instructions before use.
2. Package Contents
Carefully unpack all items and ensure you have received the following:
- 1x Generic Walking Treadmill
- 1x English Instruction Manual
- All necessary accessories for installation (tools, screws, etc.)

Image: The Generic Walking Treadmill, showing its overall design with full-length handrails.
3. Setup and Assembly
Assembly is required for this treadmill. Please follow the detailed assembly instructions provided in the separate English Manual included in your package. Ensure all components are correctly installed and tightened before first use.
3.1 Unfolding the Treadmill
- Place the treadmill on a flat, stable surface.
- Carefully lift the running deck until it locks into the upright position.
- Secure any locking pins or knobs as indicated in the assembly manual.
3.2 Connecting Power
- Ensure the treadmill is switched off before plugging it into a power outlet.
- Connect the power cord to the treadmill and then to a standard 110V electrical outlet.
4. Operating Instructions
4.1 Control Panel Overview
The control panel features an LCD display and various buttons for controlling speed, mode, and viewing workout data.

Image: Detailed view of the treadmill's control panel, showing the LCD screen, speed controls, and other function buttons.
- LCD Display: Shows time, speed, distance, calories, and heart rate.
- Start/Stop Buttons: Initiate and cease treadmill operation.
- Speed Adjustment: Buttons to increase or decrease the running belt speed (0.3-3.7 mph).
- Mode Button: Select different workout modes or display metrics.
- Heart Rate Sensors: Integrated into the handrails to measure pulse.
4.2 Starting a Workout
- Stand on the side rails of the treadmill.
- Attach the safety clip to your clothing.
- Press the "Start" button. The belt will begin moving at a low speed.
- Carefully step onto the running belt.
- Adjust the speed using the speed adjustment buttons to your desired pace.
- For heart rate monitoring, grip the heart rate sensors on the handrails.
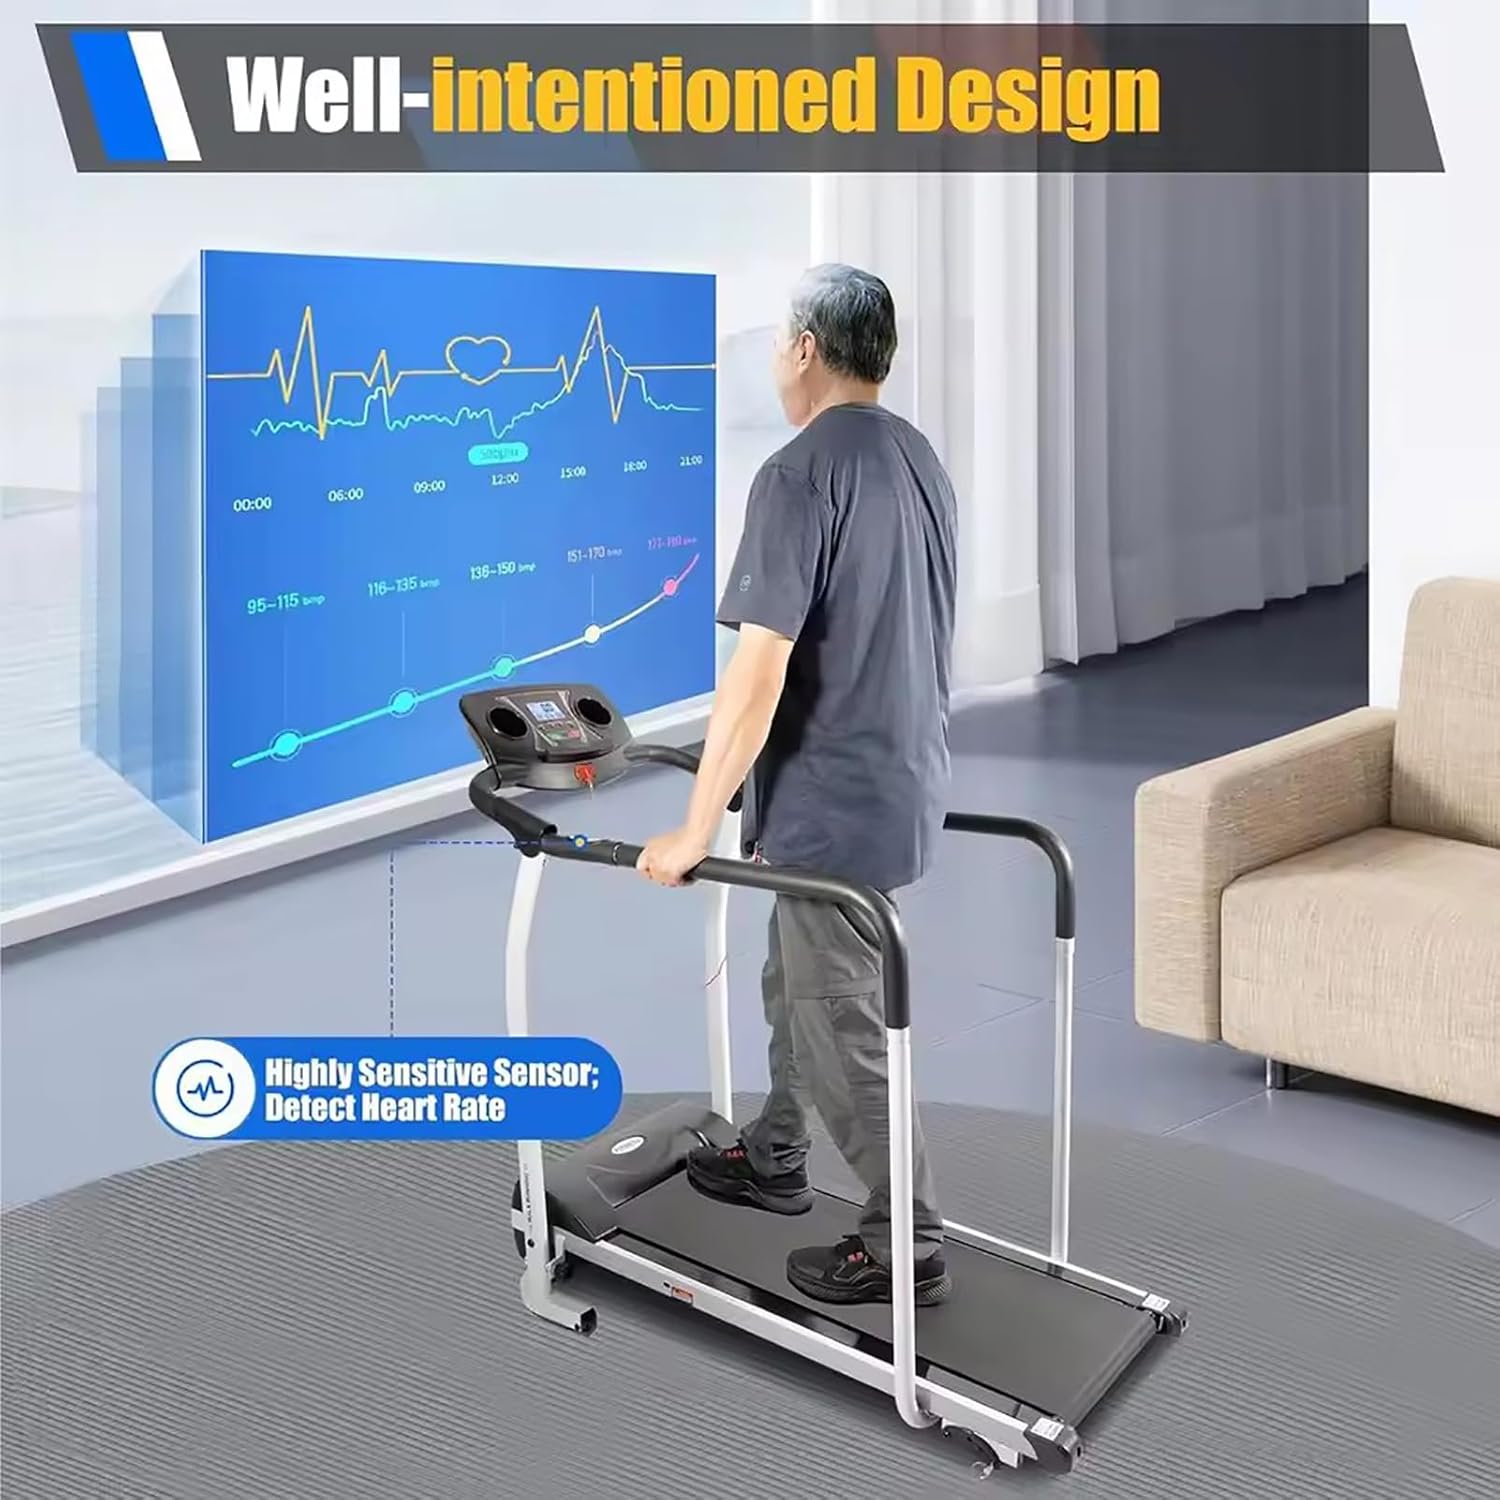
Image: A person walking on the treadmill, demonstrating the use of heart rate sensors on the handrails and the display showing heart rate data.
4.3 Adjusting Speed and Slope
- Speed: Use the '+' and '-' buttons on the control panel to adjust the speed between 0.3 and 3.7 mph.
- Slope: The treadmill features 3 manual slope adjustment gears. To change the slope, stop the treadmill, adjust the mechanism at the rear of the running deck to your desired incline (Equal to Flat, Climbing, or Mountaineering Mode), and then restart your workout. Refer to the assembly manual for detailed instructions on manual slope adjustment.

Image: Illustration of the treadmill's adjustable features, including speed control on the display and the three manual slope settings (flat, climbing, mountaineering).
4.4 Ending a Workout
- Press the "Stop" button. The running belt will gradually slow down and stop.
- Once the belt has completely stopped, step off the treadmill.
- Remove the safety clip.
- Unplug the power cord from the wall outlet when not in use for extended periods.
5. Maintenance and Care
Regular maintenance ensures the longevity and safe operation of your treadmill.
- Cleaning: Wipe down the treadmill surfaces with a damp cloth after each use. Avoid using abrasive cleaners or solvents.
- Lubrication: Periodically check the running belt for proper lubrication. Refer to your assembly manual for specific lubrication instructions and recommended lubricants.
- Belt Tension and Alignment: Inspect the running belt for proper tension and alignment. Adjust as needed according to the assembly manual.
- Storage: The treadmill is foldable for convenient storage. To fold, ensure the treadmill is off and unplugged. Carefully lift the running deck and secure it in the folded position. Store in a dry, clean area.

Image: The treadmill in its folded configuration, illustrating how it can be stored under a bed or beside furniture to save space.
6. Troubleshooting
If you encounter issues with your treadmill, refer to the following common problems and solutions:
| Problem | Possible Cause | Solution |
|---|---|---|
| Treadmill does not start. | Power cord not plugged in; Safety key not in place; Power switch off. | Ensure power cord is securely plugged in; Insert safety key; Turn on power switch. |
| Running belt slips or hesitates. | Belt too loose; Belt needs lubrication. | Adjust belt tension (refer to manual); Lubricate belt (refer to manual). |
| Unusual noise during operation. | Loose components; Motor issue. | Check and tighten all bolts and screws; If noise persists, contact customer support. |
| Heart rate monitor inaccurate. | Hands not properly placed; Dry hands. | Ensure full hand contact with sensors; Lightly moisten hands if dry. |
For issues not listed here, please refer to the full English Manual or contact customer support.
7. Product Specifications
| Model Number | 66418913 |
| Brand | Generic |
| Color | Black |
| Plug Voltage | 110V |
| Motor Power | 1.0 HP (Industrial Motor) |
| Speed Range | 0.3 - 3.7 mph (0.5 - 6 km/h) |
| Slope Adjustment | 3 Manual Gears |
| Running Belt Dimensions | 39 x 14 x 0.05 inches (L x W x Thickness) |
| Max. Load Capacity | 100 kg (220 lbs) |
| Product Dimensions (Unfolded) | 60 x 128 x 115 cm (23.62 x 50 x 45.27 inches) |
| Net Weight | 26 kg (57 lbs) |
| Power Source | Corded Electric |
| Assembly Required | Yes |
8. Warranty and Customer Support
For warranty information, please refer to the specific terms and conditions provided with your purchase documentation or contact your retailer. For technical support or inquiries, please use the following contact information:
- Manufacturer: Tdferasdw (Generic)
- Manufacturer E-mail: houhuiindianpu@163.com
- EU E-mail: stanistanid@web.de
When contacting support, please have your model number (66418913) and purchase date available.