1. Introduction
This manual provides detailed instructions for the installation, setup, and operation of your WeGoIOT ESP32 WLED LED Strip Controller. This device is designed to manage addressable LED strips, offering extensive control over lighting effects via WiFi and a dedicated application.
Key Features:
- ESP32 Chip Integration: Ensures robust processing power and stable network connectivity.
- Wide Voltage Input: Supports DC 5V-24V power input with a maximum total output current of 16A.
- Addressable LED Compatibility: Compatible with popular addressable LED strip types including WS2811, WS2812B, SK6812, and SM16703P.
- WLED App Control: Seamless control via the WLED app over WiFi, eliminating the need for a separate gateway.
- Dynamic Lighting Modes: Access to over 100 dynamic lighting modes and support for DIY customization.
- Easy Wiring: Features quick-connect ports for simplified and secure wiring.
2. Product Components
The package includes the following items:
- 1x WeGoIOT ESP32 WLED LED Strip Controller (Model DOM-WLE-A)
Please inspect all components upon unboxing. If any items are missing or damaged, contact customer support.

Image 2.1: WeGoIOT ESP32 WLED LED Strip Controller and WLED app interface.
3. Technical Specifications
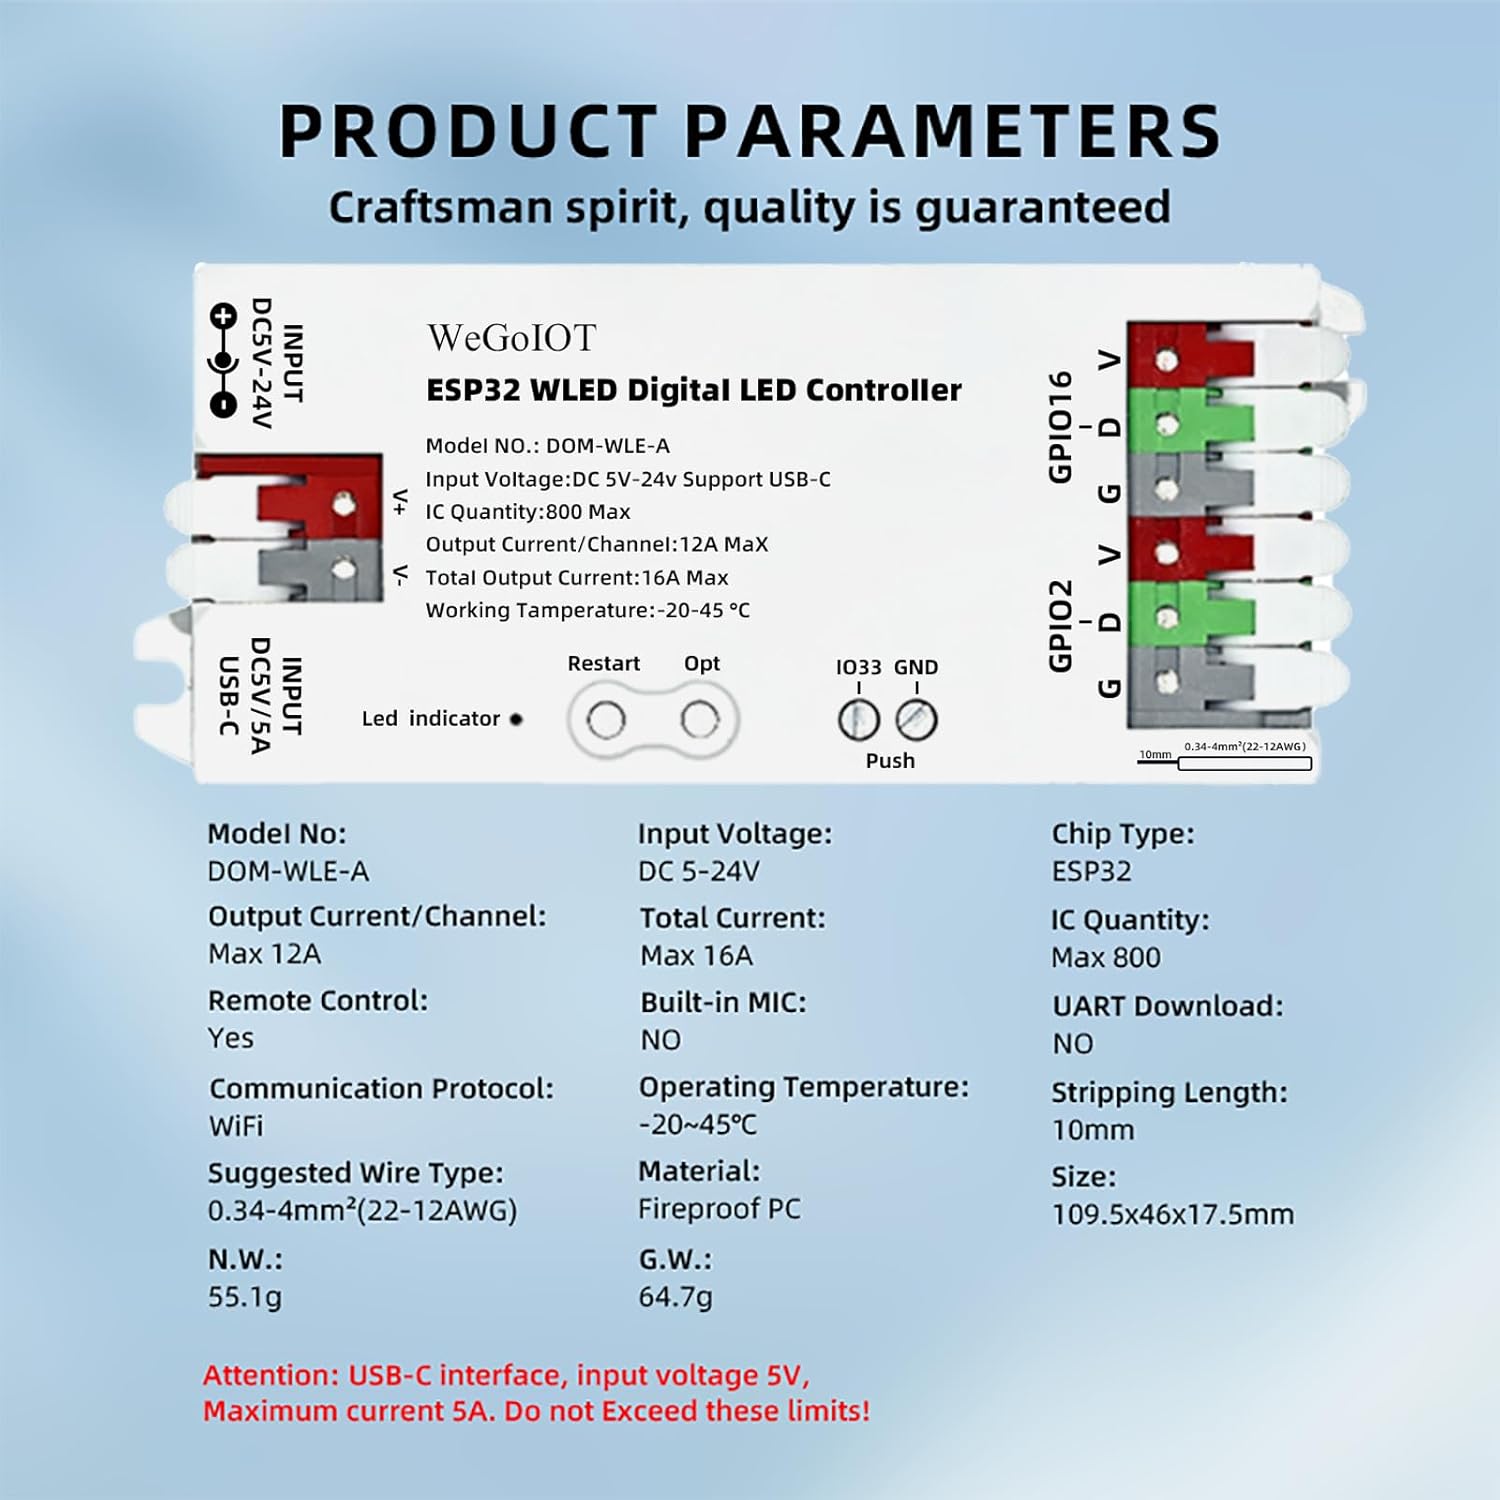
Image 3.1: Detailed product parameters of the controller.
| Parameter | Value |
|---|---|
| Model No. | DOM-WLE-A |
| Input Voltage | DC 5V-24V (USB-C supports 5V) |
| Chip Type | ESP32 |
| Output Current/Channel | 12A Max |
| Total Output Current | 16A Max |
| IC Quantity | 800 Max |
| Communication Protocol | WiFi |
| Operating Temperature | -20~45°C |
| Material | Fireproof PC |
| Dimensions (L x W x H) | 109.5 x 46 x 17.5 mm |
| Net Weight | 55.1g |
| Water Resistance Level | Not Water Resistant (Indoor Use Only) |
Note: The USB-C interface supports 5V input only, with a maximum current of 5A. Do not exceed these limits.
4. Installation and Wiring
Proper wiring is crucial for the safe and correct operation of the LED strip controller. Ensure power is disconnected before making any connections.
4.1. Power Supply Connection
The controller supports two methods for power input:
- DC 5V-24V Barrel Jack: Connect a compatible DC power adapter to the barrel jack input.
- USB-C 5V/5A: For 5V power, you can use a USB-C cable connected to a 5V/5A power source.
Important: Ensure your power supply voltage matches the requirements of your LED strip. The total output current should not exceed 16A. If using USB-C, ensure the power source provides 5V and does not exceed 5A.

Image 4.1: Connecting the controller via USB-C for 5V power.
4.2. LED Strip Connection
The controller features quick-connect terminals for easy wiring. The default output group for LED strips is GPIO16. An additional GPIO2 output is available and can be configured via the app.
- Prepare Wires: Strip approximately 10mm (0.39 inches) of insulation from the ends of your LED strip wires. The suggested wire type is 0.34-4mm² (22-12AWG).
- Open Connector: Gently push down the lever on the quick-connect terminal to open the port.
- Insert Wires: Insert the corresponding wires from your LED strip into the terminals:
- V: Connect to the VCC (positive power) wire of your LED strip.
- D: Connect to the DATA wire of your LED strip.
- G: Connect to the GND (ground) wire of your LED strip.
- Secure Connection: Release the lever to secure the wire. Ensure the connection is firm.

Image 4.2: Wiring instructions for the LED strip to the GPIO16 port.

Image 4.3: Quick connect port design for convenient wiring.
4.3. Maximum IC Quantity
The controller supports a maximum of 800 ICs (integrated circuits) on the LED strip. If your LED strip has a higher IC count, ensure the power supply is adequate to prevent overloading the controller.
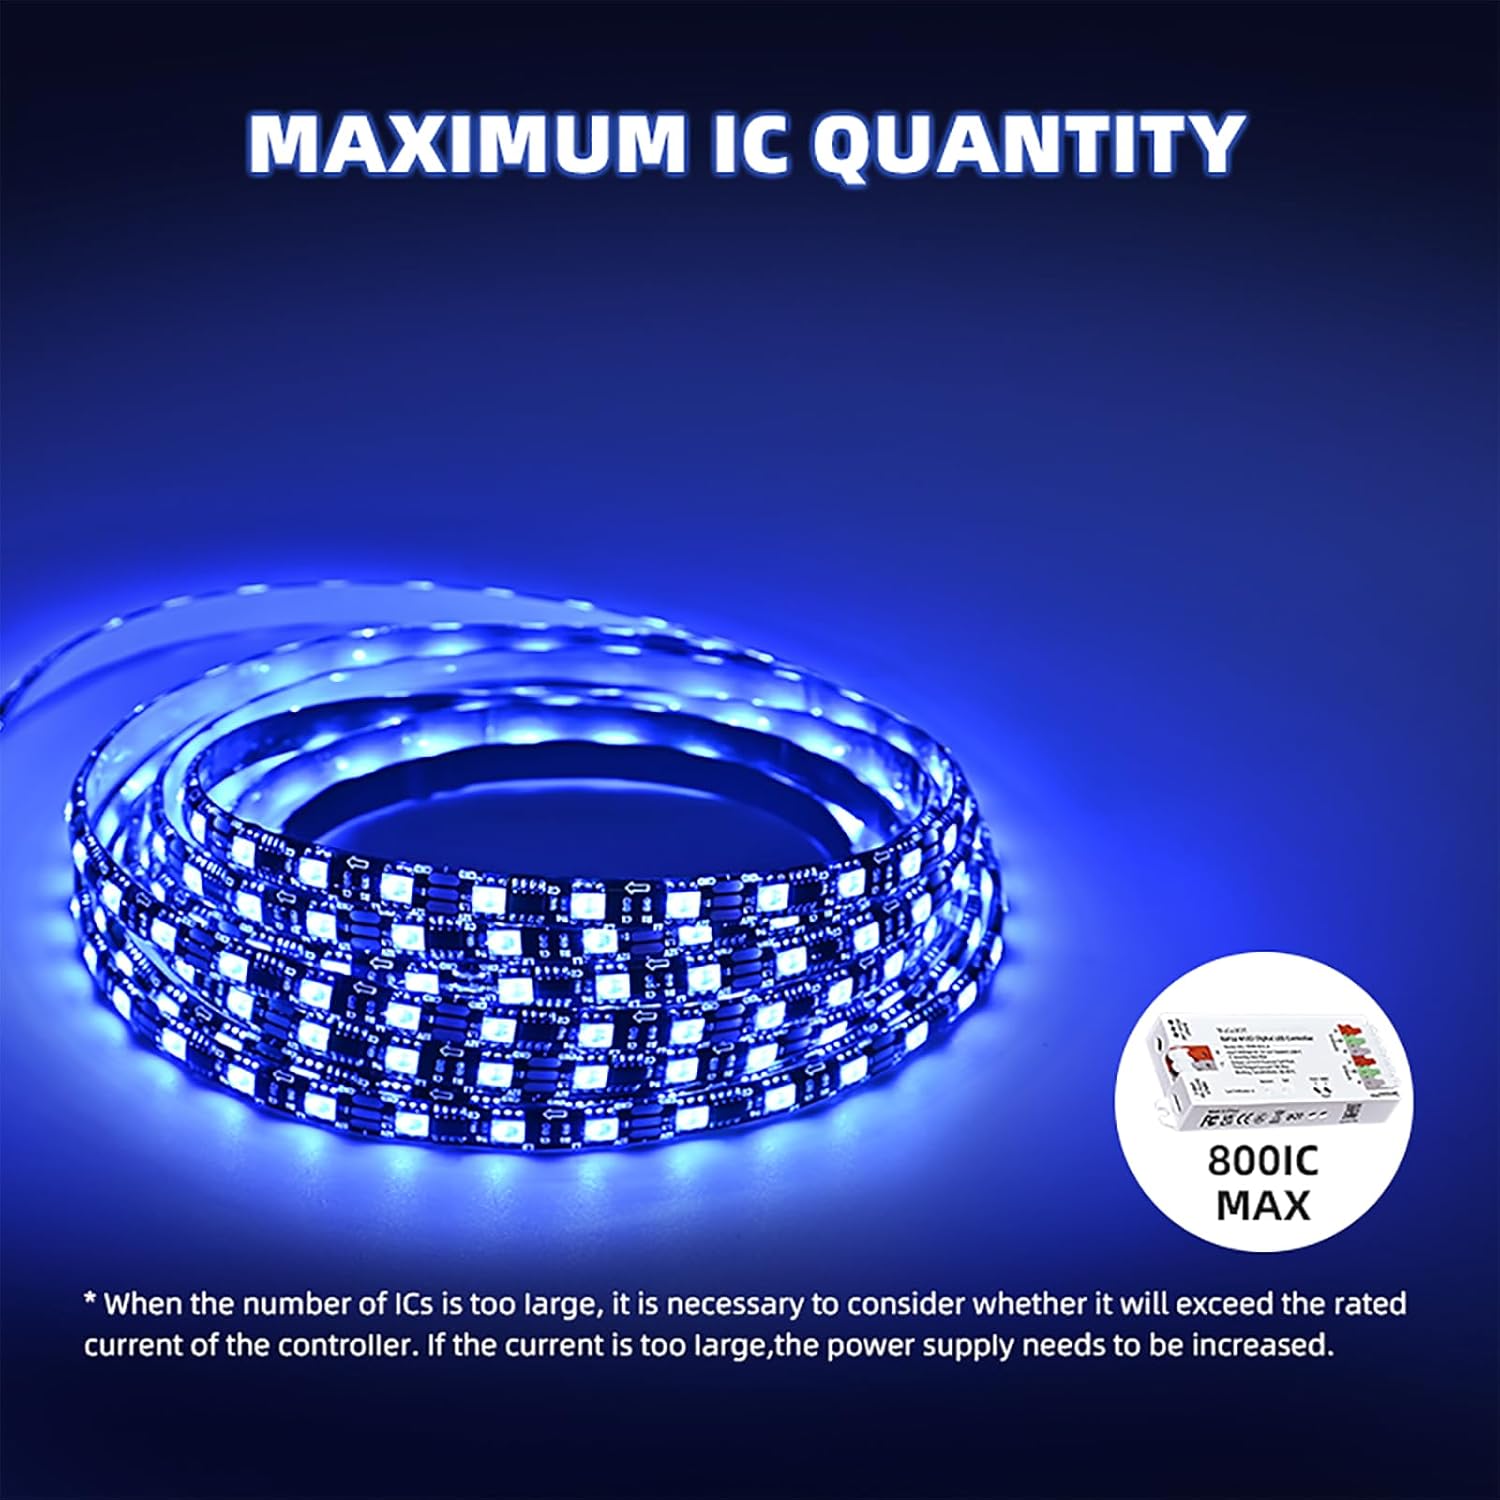
Image 4.4: The controller supports up to 800 ICs on the LED strip.
5. Initial Setup (WLED App Control)
The WeGoIOT controller uses the WLED software, which can be controlled via a web interface or a dedicated app.
5.1. Connecting to the Controller's WiFi Hotspot
Upon first power-up, the controller broadcasts its own WiFi network (Access Point mode).
- Power On: Connect the controller to a power source. The LED indicator will light up.
- Connect to WiFi: On your mobile phone or computer, go to WiFi settings and search for a network named "WLED-AP".
- Enter Password: Connect to "WLED-AP" using the default password "wled1234".
- Access Web Interface: After successful connection, your device should automatically redirect to the WLED configuration page. If not, open a web browser and navigate to http://4.3.2.1.
- Proceed to Controls: Click "TO THE CONTROLS!" to access the WLED interface.

Image 5.1: Steps for initial WiFi connection and accessing the WLED interface.
5.2. Connecting to Your Home WiFi Network
For seamless control, connect the controller to your existing 2.4GHz home WiFi network.
- Access WiFi Setup: From the WLED interface, navigate to the "Config" menu, then select "WiFi Setup".
- Scan for Networks: The controller will scan for available 2.4GHz WiFi networks.
- Select Network: Choose your home WiFi network from the list.
- Enter Password: Input your WiFi password and save the settings.
- Reconnect: Your phone or computer will disconnect from "WLED-AP". Reconnect your device to your home WiFi network.
- Access WLED: Open the WLED app or a web browser and enter the IP address of your controller (found in the WLED interface under "Info" or by scanning your network).

Image 5.2: Detailed steps for configuring the WLED app and connecting to your home WiFi.
5.3. Downloading the WLED App
For convenient control, download the WLED app or WLED Native app.
- iOS: Search for "WLED" or "WLED Native" in the App Store.
- Android: Download from the official WLED GitHub releases page: https://github.com/Aircoookie/WLED-App/releases

Image 5.3: Application download methods for WLED.
6. Operation
6.1. Using the WLED App
The WLED app provides comprehensive control over your LED strips.
- Color Selection: Use the color wheel to choose from 16 million colors.
- Dynamic Modes: Select from over 100 built-in dynamic effects to create various lighting scenes.
- Segmented Control: Divide your LED strip into multiple sections and apply unique colors and effects to each segment independently.
- Sync Effects: Synchronize lighting effects across multiple WLED controllers on the same WiFi network.
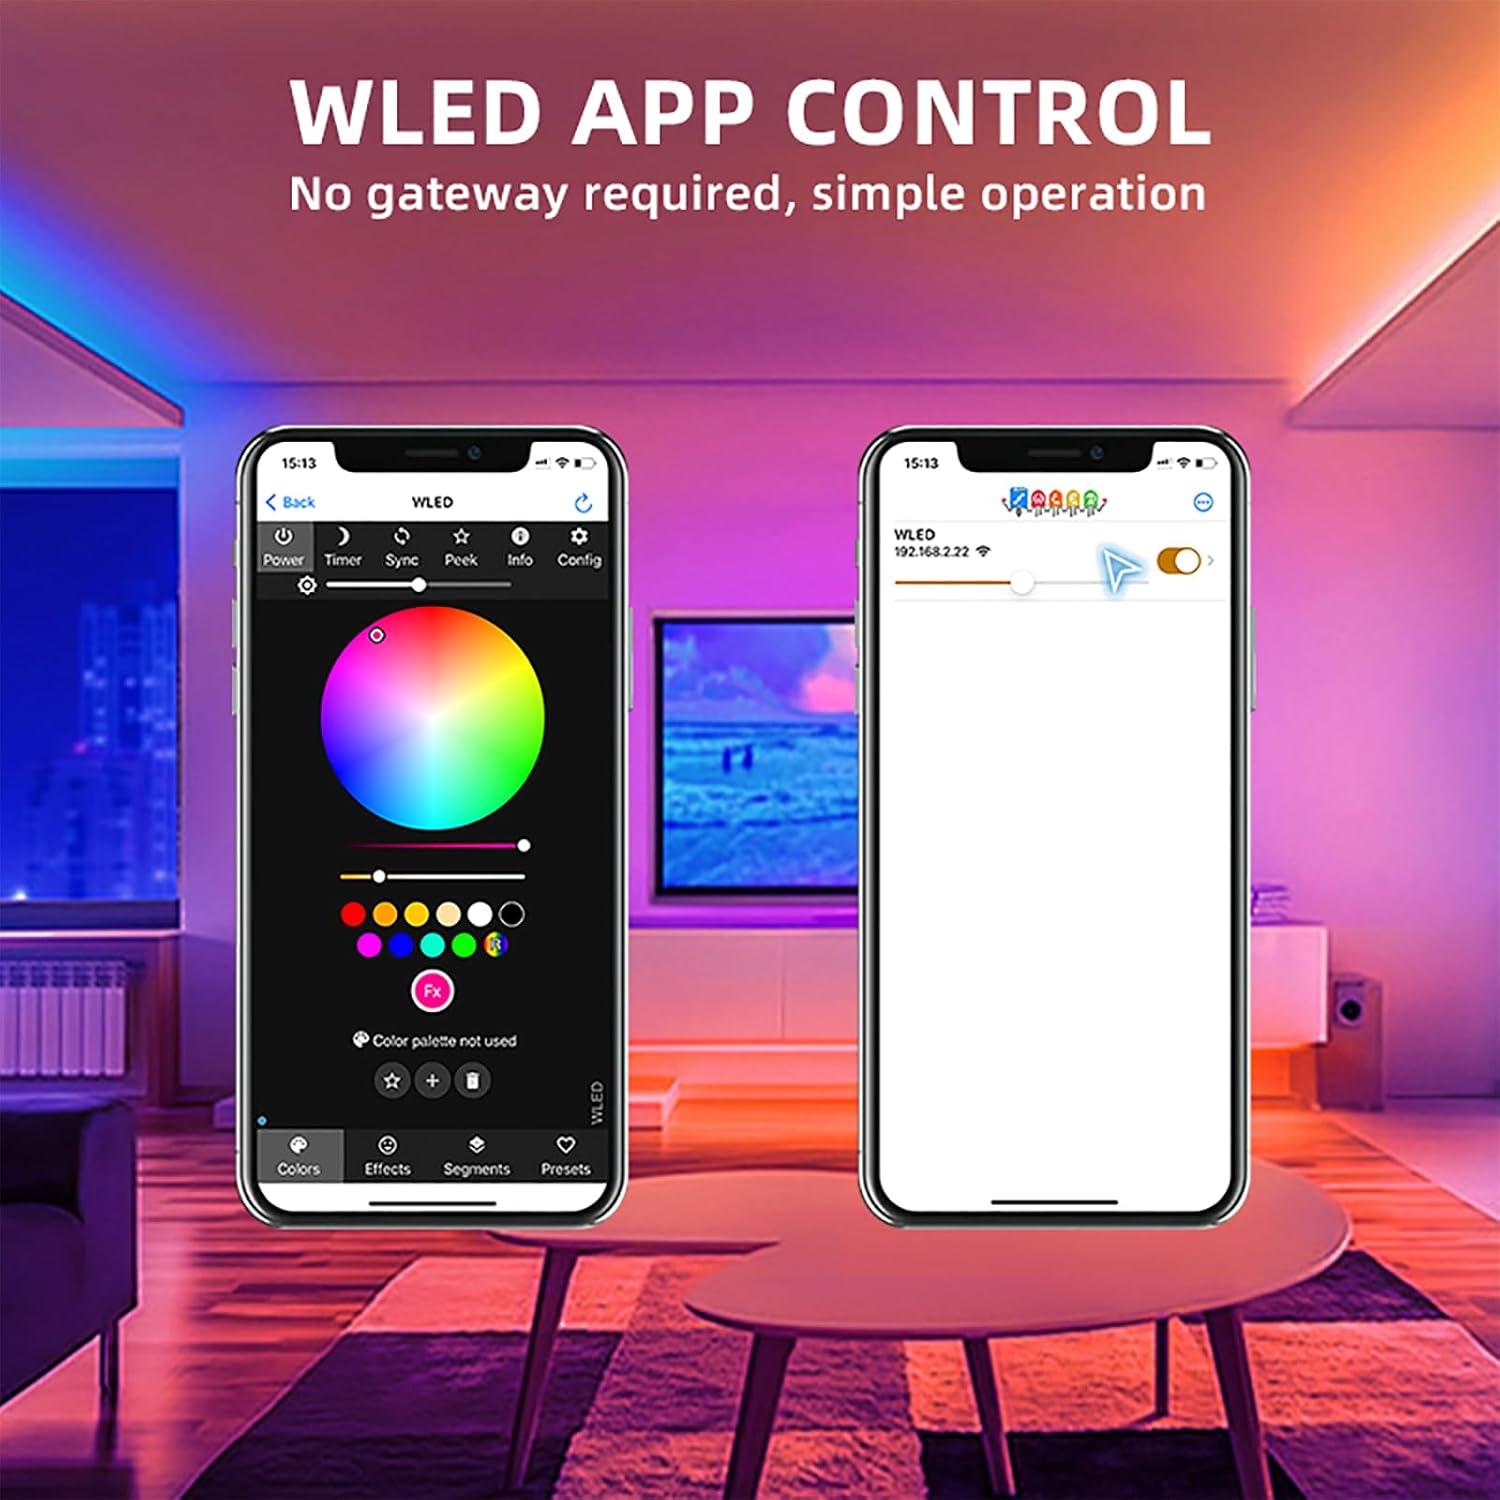
Image 6.1: WLED app interface for color selection.

Image 6.2: WLED app interface displaying various dynamic lighting effects.
6.2. Physical Button Functions
The controller includes physical buttons for basic control and troubleshooting.
- Restart Button: Pressing this button will power off and then power on the controller module. Useful for restarting the device.
- Opt Button (GPIO0):
- Short press: Power on/off.
- Long press (1s): Adjust color.
- Long press (10s): Enter WiFi-AP mode (hotspot "WLED-AP"). This will reset factory settings and restore the WLED-AP hotspot.
- Push Button (IO33):
- Short press: Adjust mode.
- Double-tap: Adjust color in mode.
- Long press: Adjust brightness.

Image 6.3: IO33 port functionality and button operations.
6.3. Alexa Integration
The controller supports integration with Amazon Alexa for voice control.
- Access WLED Settings: In the WLED controller's web interface, click the "Config" button in the top right corner to enter settings.
- Navigate to Sync Interfaces: Scroll down to "Sync Interfaces".
- Enable Alexa: Find "Alexa Voice Assistant", check the box next to "Emulate Alexa device", and then save.
- Power Cycle: Power cycle the WLED controller by turning it off and on.
- Discover Devices in Alexa: Open the Amazon Alexa app. Go to the "Devices" page, click the "+" sign, and select "Add Device". Choose "Other", then "Wi-Fi", and finally "Discover Devices" to search for your lights.

Image 6.4: Steps for connecting the WLED controller with Amazon Alexa.
7. Maintenance
To ensure the longevity and optimal performance of your WeGoIOT ESP32 WLED LED Strip Controller, follow these maintenance guidelines:
- Cleaning: Gently wipe the controller with a dry, soft cloth. Avoid using liquid cleaners or solvents, as they may damage the device.
- Environment: Use the controller in a dry, indoor environment. It is not water-resistant. Avoid exposure to extreme temperatures or humidity.
- Firmware Updates: Periodically check for WLED software updates. Updating the firmware can improve performance, add new features, and fix bugs. Instructions for updating are typically found on the official WLED project website.
- Power Supply: Always use a power supply that matches the voltage and current requirements of your LED strip and the controller. Overloading can cause damage.
8. Troubleshooting
If you encounter issues with your WeGoIOT ESP32 WLED LED Strip Controller, refer to the following common troubleshooting steps:
8.1. LED Strip Not Lighting Up
- Check Power: Ensure the controller is receiving power and the power supply is correctly connected and functional. Verify the voltage and current capacity of your power supply are adequate for your LED strip.
- Verify Wiring: Double-check all connections between the controller and the LED strip (VCC, Data, GND). Ensure wires are securely seated in the quick-connect terminals.
- Correct GPIO Pin: Confirm that the LED strip is connected to the correct GPIO pin (default is GPIO16). If using GPIO2, ensure it is configured correctly in the WLED settings.
- WLED Configuration: Access the WLED web interface or app and verify that the LED strip type and number of LEDs are correctly configured under "LED Preferences".
- Test LED Strip: If possible, test your LED strip with another known-working controller to rule out a faulty strip.
8.2. WiFi Connection Issues
- 2.4GHz Network: Ensure your home WiFi network is 2.4GHz. The ESP32 does not support 5GHz networks.
- Correct Password: Verify that you have entered the correct WiFi password during setup.
- Signal Strength: Ensure the controller is within range of your WiFi router.
- Reset WiFi Settings: If you cannot connect, perform a long press (10 seconds) on the "Opt" button to reset the controller to its factory settings and re-enter WiFi-AP mode. Then, repeat the initial setup steps.
8.3. Controller Not Responding
- Power Cycle: Disconnect and reconnect the power to the controller.
- Restart Button: Press the physical "Restart" button on the controller.
- Check for Damage: Inspect the controller for any visible signs of damage or burning smell. If detected, discontinue use immediately and contact support.
9. Warranty and Support
For warranty information or technical support, please refer to the product packaging or contact WeGoIOT customer service through the retailer where the product was purchased. Keep your purchase receipt as proof of purchase.