Antarctic Star Water Cooler Dispenser
Antarctic Star Water Dispenser with Ice Maker User Manual
Model: Water Cooler Dispenser
Introduction
Thank you for choosing the Antarctic Star 3-in-1 Water Dispenser with Ice Maker. This versatile appliance provides instant access to hot, cold, and ice water, making it a convenient addition to any kitchen, office, or living space. Designed for use with 3 or 5-gallon water bottles, it features a built-in ice maker capable of producing up to 33 pounds of bullet ice per day. Please read this manual thoroughly before operation to ensure safe and efficient use of your new appliance.

Image: The Antarctic Star 3-in-1 Water Dispenser, showing its sleek white design, top-loading water bottle, and the ice maker compartment with ice cubes.
Important Safety Information
To reduce the risk of injury or property damage, always follow basic safety precautions when using electrical appliances. Keep this manual for future reference.
- Child Safety Lock: The hot water dispenser is equipped with a child safety lock to prevent accidental scalding. Always engage this lock when not in use, especially in households with children.
- Electrical Safety: Ensure the appliance is plugged into a grounded outlet with the correct voltage. Do not use extension cords. Unplug the unit before cleaning or maintenance.
- Placement: Place the dispenser on a flat, stable surface away from direct sunlight and heat sources. Allow adequate ventilation around the unit.
- Water Quality: Use only potable water. Do not operate the unit without a water bottle installed.
- Maintenance: Do not attempt to repair or disassemble the unit yourself. Refer all servicing to qualified personnel.

Image: A child reaching towards the water dispenser, illustrating the importance of the anti-scald child lock feature.
Product Overview and Features
This Antarctic Star water dispenser combines three essential functions into one compact unit:
- 3-in-1 Functionality: Provides hot water, cold water, and ice cubes from a single appliance, saving space and increasing convenience.
- Efficient Ice Making: The built-in ice maker can produce up to 33 pounds of bullet-shaped ice per 24 hours, with a cycle time of 6-8 minutes for 9 pieces of ice. It automatically stops when the ice bin is full or water is low.
- Child Safety Lock: A dedicated child safety lock for the hot water dispenser ensures safe operation and prevents accidental burns.
- User-Friendly Control Panel: Features LED indicators and soft-touch buttons for easy operation, suitable for all ages.
- High Efficiency & Low Noise: Equipped with a high-performance ice-making compressor, the unit operates efficiently with noise levels below 43dB, minimizing disturbance.
- Compact and Stylish Design: With dimensions of 11.42 x 11.81 x 32.91 inches, its sleek white design complements various home and office decors.
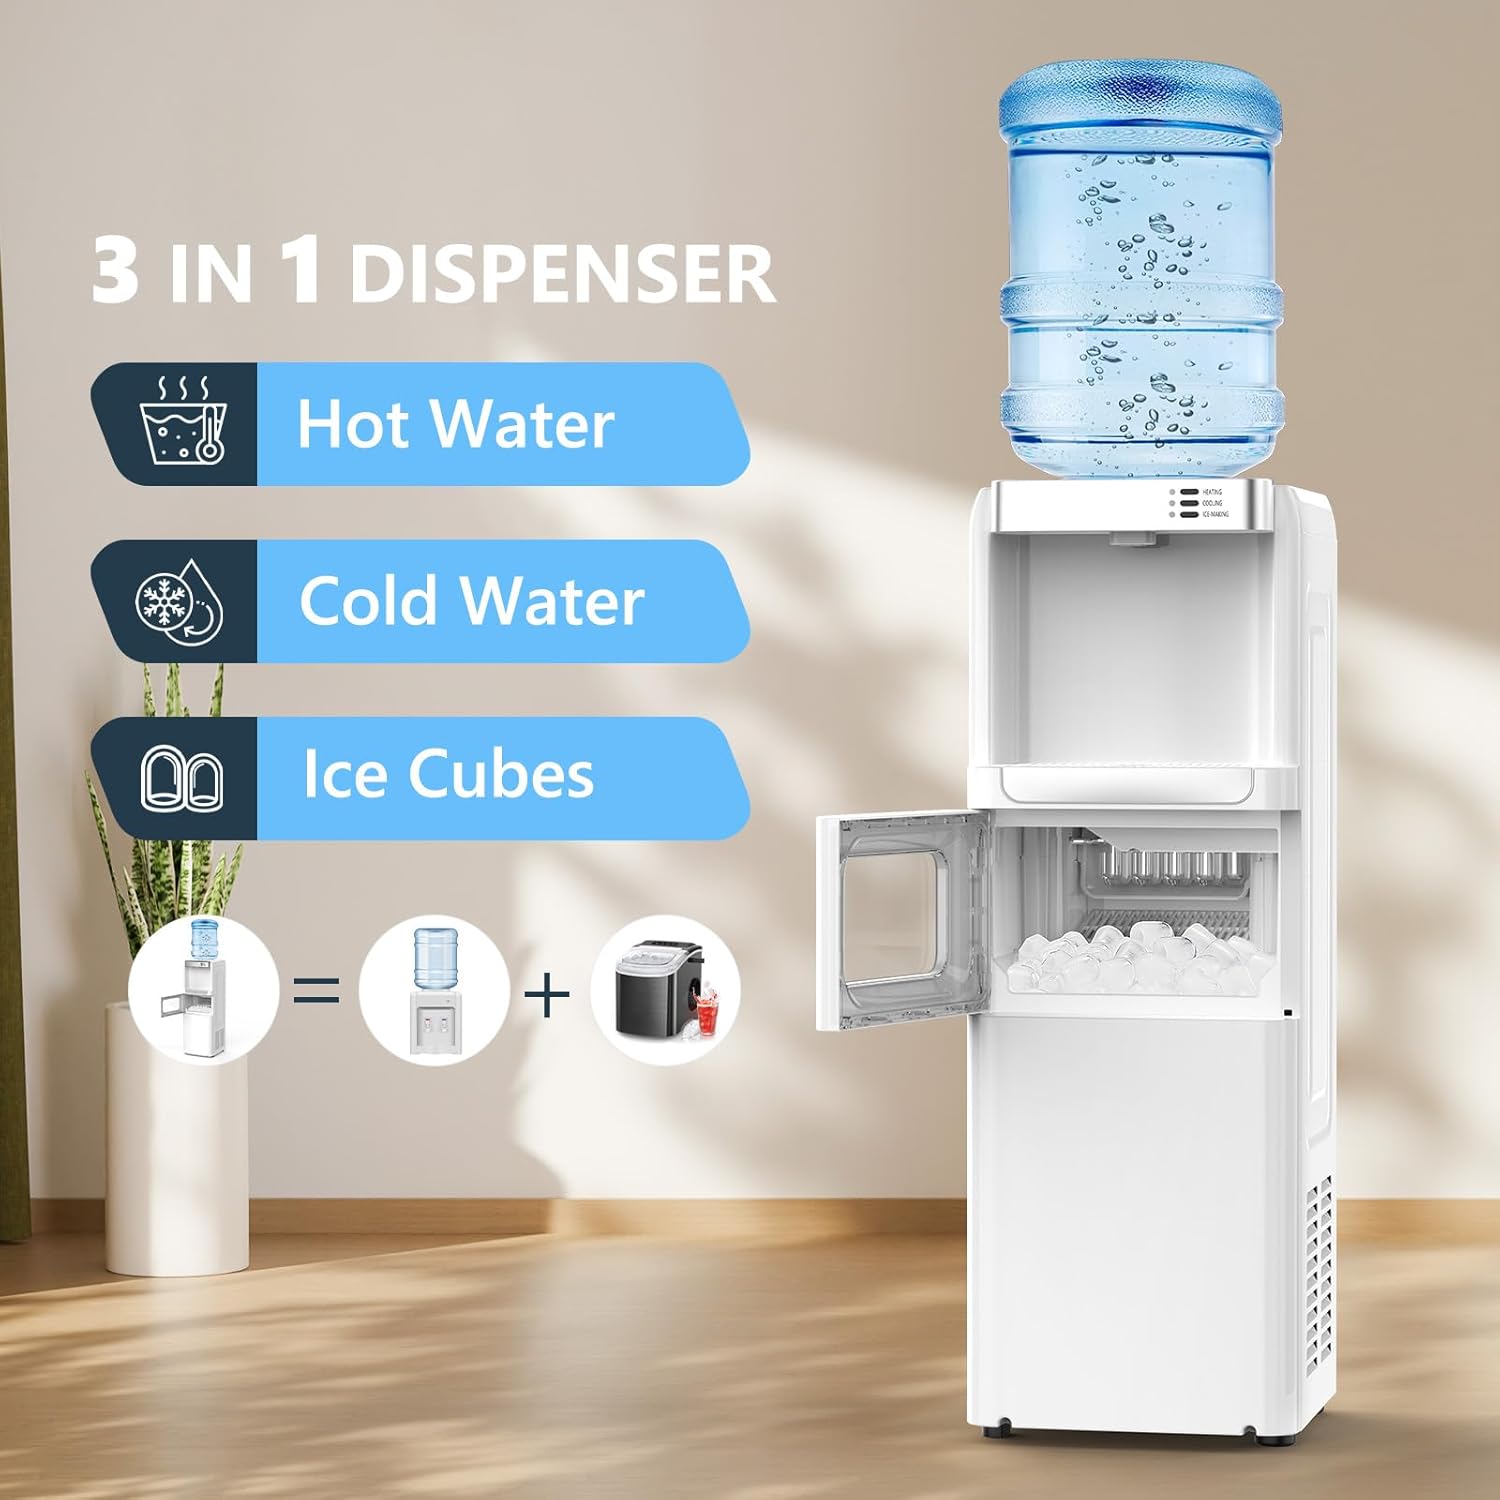
Image: Graphic illustrating the 3-in-1 functionality: Hot Water, Cold Water, and Ice Cubes, with icons for each.

Image: A woman drinking water, with an overlay showing the ice making process, highlighting 6-8 minutes per cycle, 9 pieces per cycle, and 33 lbs/24H capacity.
Parts and Components
Familiarize yourself with the main parts of your water dispenser:
- Water Bottle Support Collar: Located at the top, where the 3 or 5-gallon water bottle is placed.
- Control Panel: Features LED indicators for Power, Add Water, Heating, Cooling, and Ice-Making, along with dispense buttons and child lock.
- Hot Water Dispense Button: Dispenses hot water (requires child lock release).
- Cold Water Dispense Button: Dispenses cold water.
- Drip Tray: Collects any spills from dispensing. Removable for easy cleaning.
- Ice Maker Compartment: Located below the dispensing area, with a clear door to view ice.
- Ice Scoop: Included for convenient ice retrieval.
- Condenser Grille: Located on the side/rear for heat dissipation.
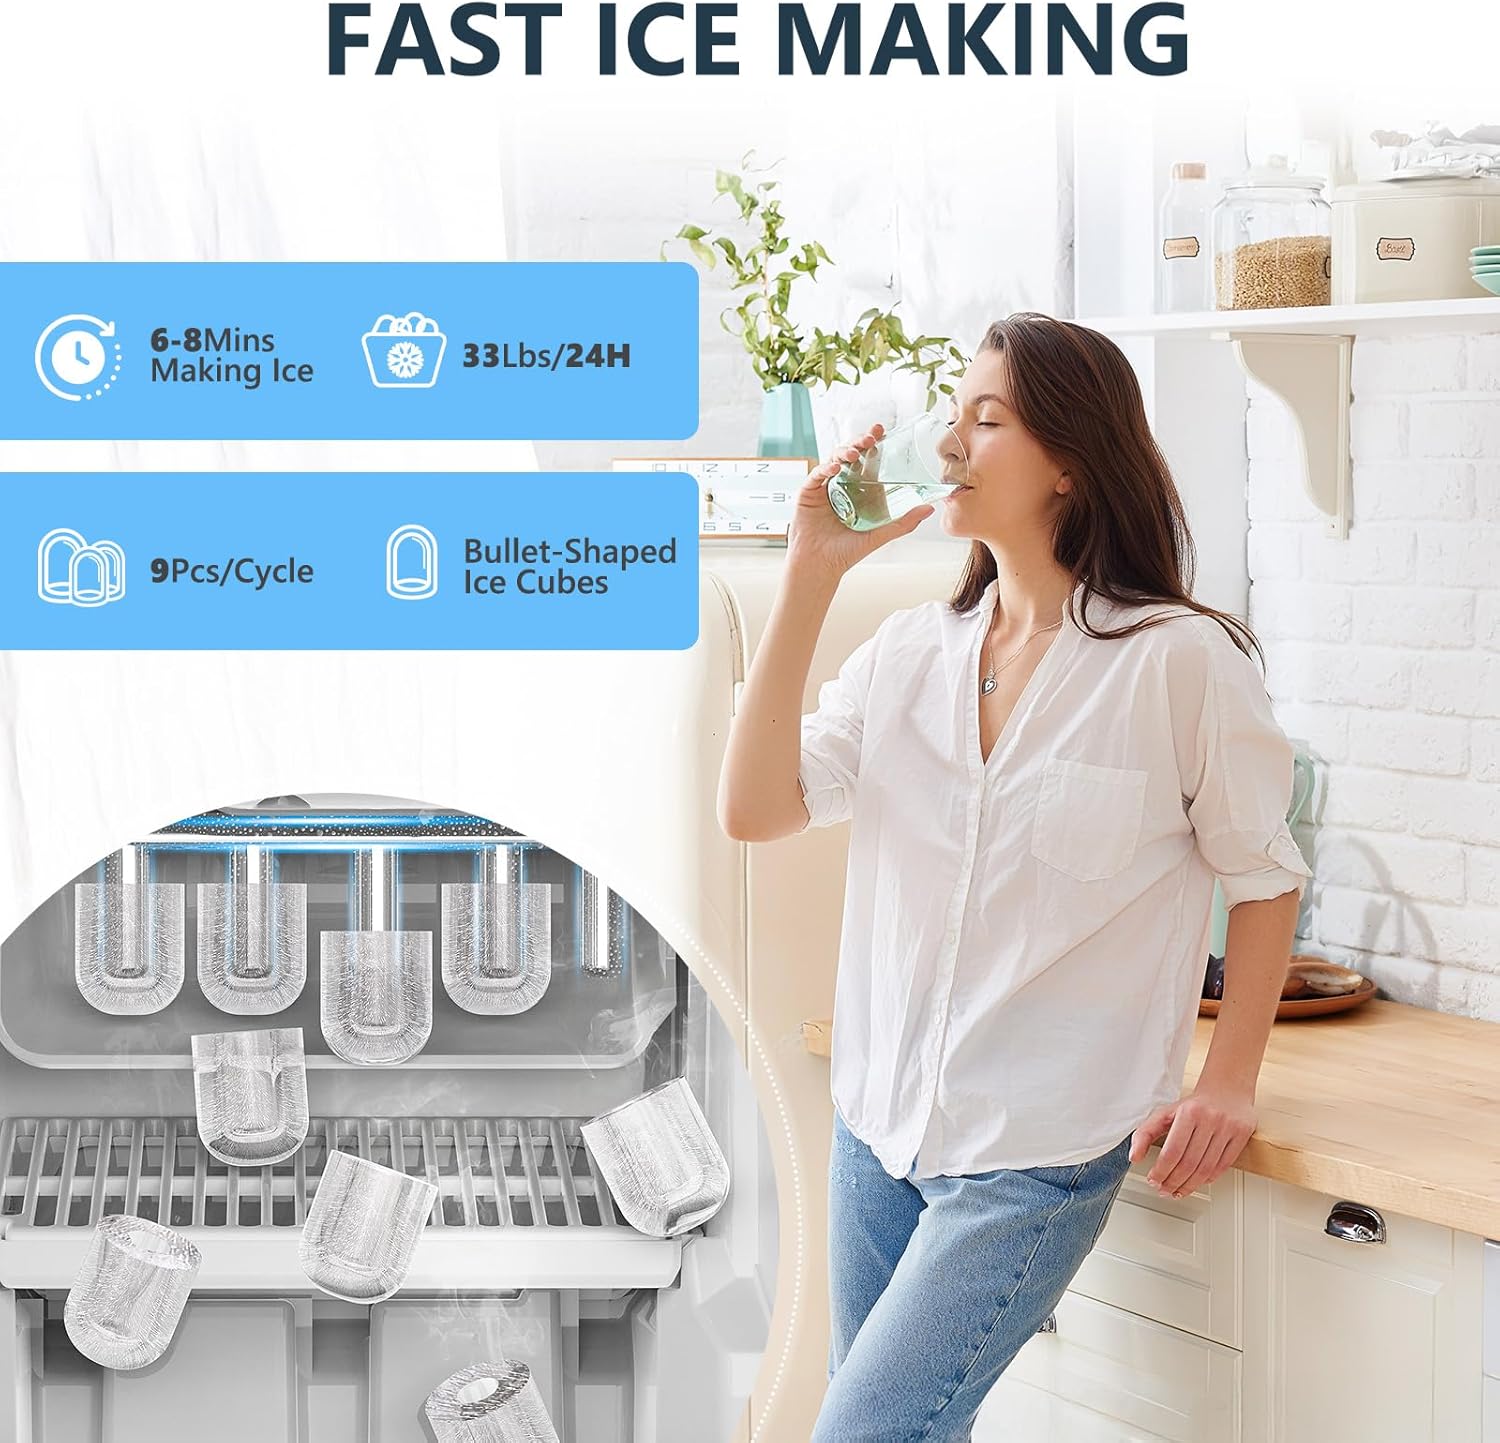
Image: Close-up of the control panel, showing indicators for Power, Add Water, Heating, Cooling, and Ice-Making, along with the Cold Water Dispense, Child Lock, and Hot Water Dispense buttons.

Image: Close-up of the ice maker compartment, showing bullet-shaped ice cubes collected in the bin.
Setup Guide
Follow these steps for initial setup of your water dispenser:
- Unpack: Carefully remove the dispenser from its packaging. Retain packaging for future transport or storage.
- Placement: Place the unit upright on a firm, level surface. Ensure there is at least 4 inches (10 cm) of space from walls or other objects for proper ventilation. Avoid placing near direct sunlight or heat sources.
- Initial Cleaning: Before first use, wipe down the exterior with a soft, damp cloth. For internal cleaning, refer to the 'Maintenance and Care' section.
- Install Water Bottle: Remove the cap from a 3 or 5-gallon water bottle. Carefully lift and invert the bottle, placing it firmly onto the water bottle support collar at the top of the dispenser. Ensure it is seated securely.
- Plug In: Plug the power cord into a grounded electrical outlet.
- Prime the System: Before turning on heating or cooling functions, dispense at least 1 liter of water from both the hot and cold spouts to ensure the internal tanks are filled and air is purged. This prevents dry heating.
- Power On: Turn on the power switch, usually located on the back of the unit. The Power indicator light will illuminate.
- Allow to Cool/Heat: Allow approximately 15-30 minutes for the water to reach optimal cold and hot temperatures, and for the ice maker to begin its first cycle.
Operating Instructions
Your Antarctic Star water dispenser offers three convenient water modes:
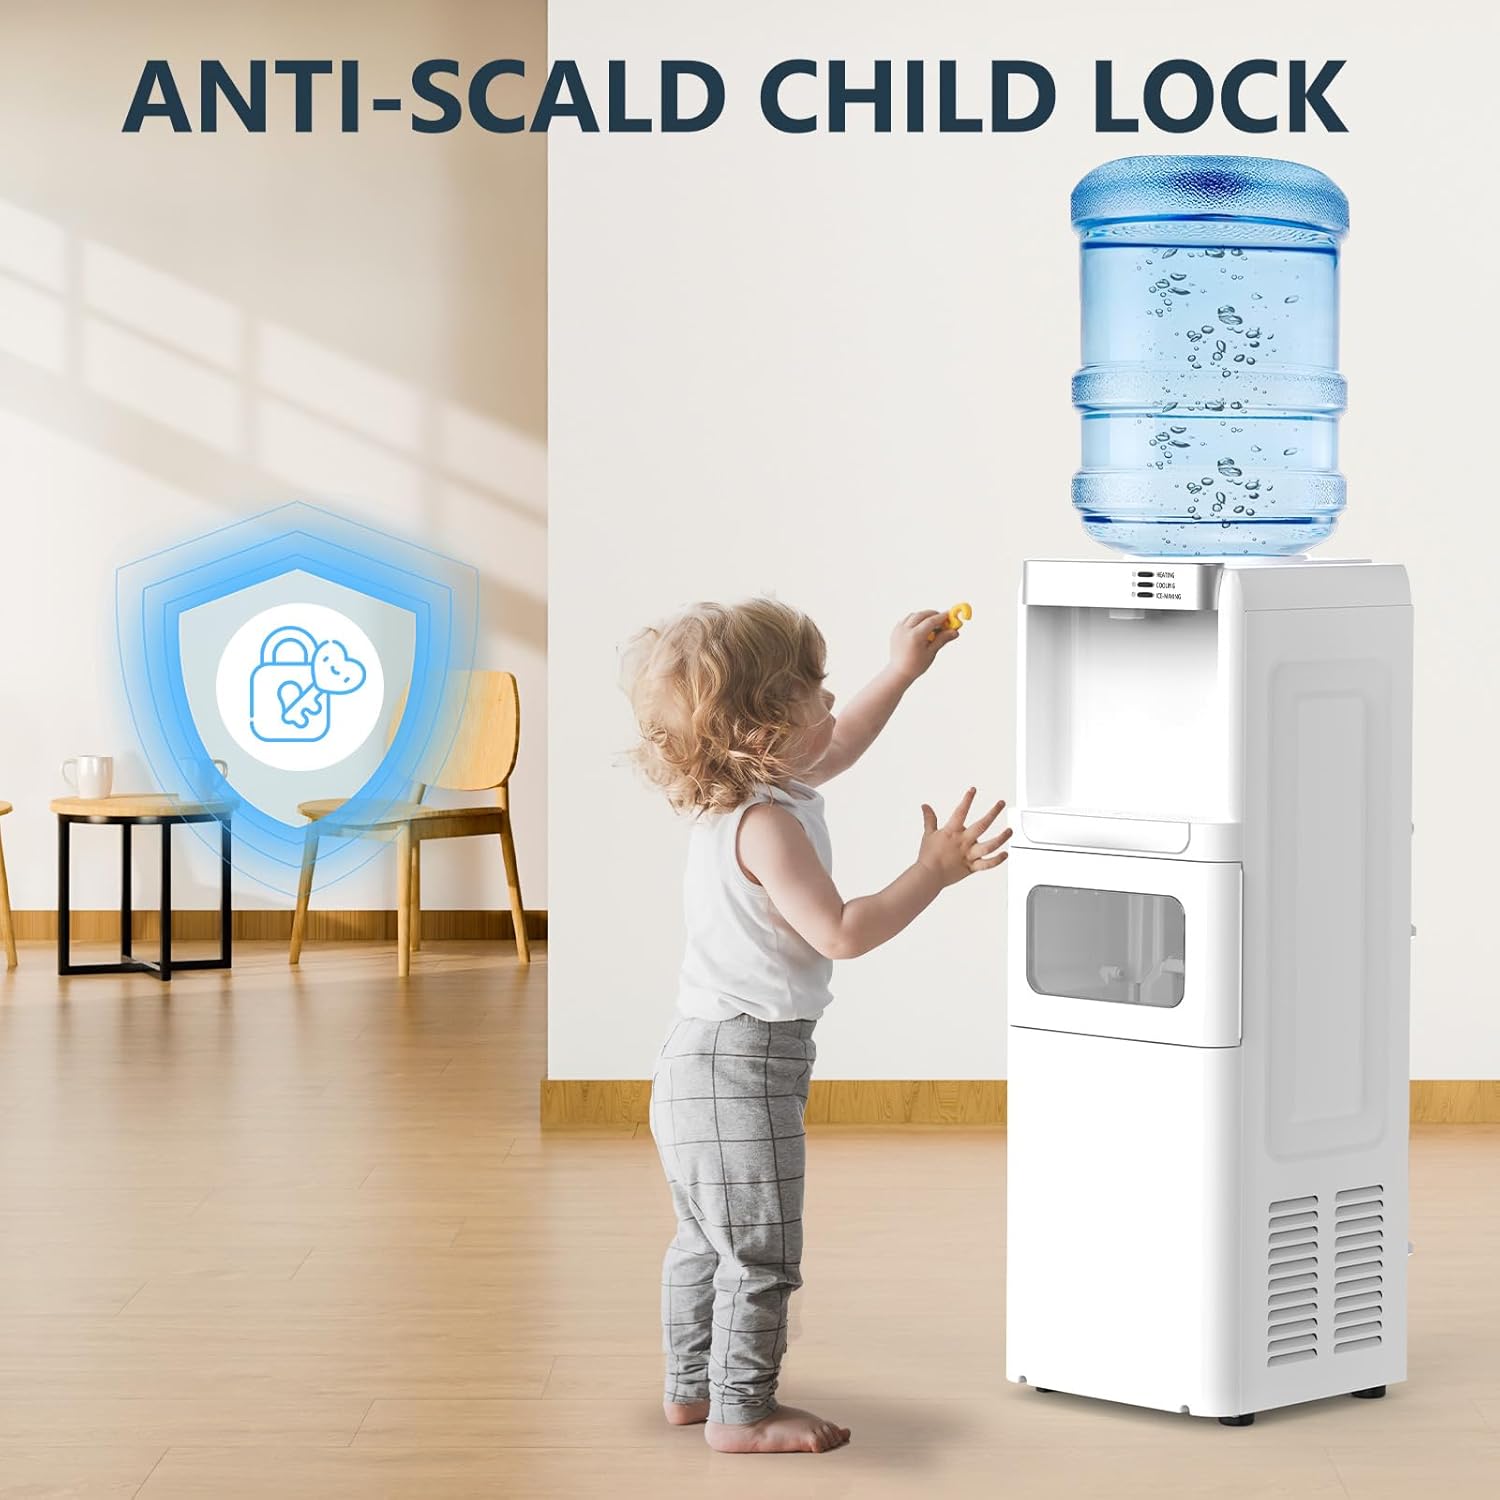
Image: Graphic showing the three water mode options: Hot Water (for coffee), Cold Water (for drinking), and Bullet Ices (for beverages).
Hot Water Dispensing
- Place your cup under the hot water spout.
- To dispense hot water, simultaneously press and hold the child safety lock button (usually located above the hot water dispense button) and then press the hot water dispense button.
- Release the button once the desired amount of hot water is dispensed. The Heating indicator light will be on when the water is heating and off when it reaches temperature.
Cold Water Dispensing
- Place your cup under the cold water spout.
- Press the cold water dispense button.
- Release the button once the desired amount of cold water is dispensed. The Cooling indicator light will be on when the water is cooling and off when it reaches temperature.
Ice Making Function
- Ensure a water bottle is properly installed and the unit is powered on.
- The ice maker will automatically begin producing ice once the water reservoir is filled and the unit is cooling. The Ice-Making indicator light will illuminate.
- Ice production typically takes 6-8 minutes per cycle, yielding 9 bullet-shaped ice cubes.
- The ice maker will automatically stop when the ice storage bin is full or if the water level in the bottle is too low (the 'Add Water' indicator will turn red).
- Open the ice maker compartment door and use the provided scoop to retrieve ice.
Maintenance and Care
Regular cleaning and maintenance will ensure the longevity and optimal performance of your dispenser.
Cleaning the Dispenser
- Exterior: Wipe the exterior surfaces with a soft, damp cloth. Do not use abrasive cleaners or solvents.
- Drip Tray: The drip tray should be emptied and cleaned regularly. Simply slide it out, empty any collected water, wash with mild soap and water, rinse thoroughly, and replace.
- Water Reservoir (Internal): For thorough cleaning of the internal water reservoir and lines, it is recommended to use a water dispenser cleaning kit or a solution of water and white vinegar. Follow the instructions provided with the cleaning kit or flush the system with the vinegar solution, then rinse thoroughly with clean water multiple times. Always unplug the unit before internal cleaning.
- Ice Bin: Periodically remove the ice bin and wash it with mild soap and water. Rinse thoroughly and dry before replacing.
Descaling
Over time, mineral deposits (scale) can build up, especially in the hot water tank. Descaling is recommended every 3-6 months, depending on your water hardness.
- Unplug the dispenser and remove the water bottle.
- Drain all water from the hot and cold tanks using the drain plugs (usually located at the back or bottom of the unit).
- Prepare a descaling solution (e.g., a mixture of white vinegar and water, or a commercial descaling agent).
- Pour the solution into the water reservoir at the top.
- Allow the solution to sit for 30 minutes to an hour.
- Drain the solution completely.
- Rinse the system thoroughly by filling the reservoir with clean water and draining it several times until no vinegar smell remains.
Troubleshooting
If you encounter issues with your dispenser, refer to the table below for common problems and solutions.
| Problem | Possible Cause | Solution |
|---|---|---|
| No hot or cold water | Unit not plugged in; Power switch off; Heating/Cooling switch off; Empty water bottle; Air lock. | Check power connection; Turn on power/heating/cooling switches; Replace water bottle; Prime the system by dispensing water. |
| Water not hot enough | Heating switch off; Insufficient time to heat; Heavy usage. | Ensure heating switch is on; Allow more time; Reduce hot water usage frequency. |
| Water not cold enough | Cooling switch off; Insufficient time to cool; Heavy usage; Poor ventilation. | Ensure cooling switch is on; Allow more time; Reduce cold water usage frequency; Ensure adequate space around unit. |
| Ice maker not producing ice | No water in reservoir; Ice bin full; Ambient temperature too high; Unit not level. | Replace water bottle; Empty ice bin; Ensure proper ventilation; Place on a level surface. |
| Slow water dispensing | Air lock; Mineral buildup; Water bottle cap issue. | Re-prime the system; Perform descaling; Check if water bottle cap is properly vented or if it's a non-spill cap. |
| Unit is noisy | Normal compressor operation; Unit not level; Obstruction near fan. | Ensure unit is on a level surface; Check for obstructions around the condenser grille. Some noise during operation is normal. |
| Water leaking | Water bottle cracked or improperly seated; Drain plug loose; Internal leak. | Check water bottle for cracks and proper seating; Tighten drain plug; Contact customer support for internal leaks. |
Technical Specifications
Detailed specifications for your Antarctic Star Water Dispenser with Ice Maker:
| Specification | Detail |
|---|---|
| Brand | Antarctic Star |
| Model Number | Water Cooler Dispenser |
| Color | White |
| Material | Metal |
| Capacity | 5 Gallons (compatible with 3 or 5-gallon bottles) |
| Product Dimensions (D x W x H) | 11.41" x 11.81" x 32.91" |
| Item Weight | 33.1 pounds |
| Installation Type | Freestanding |
| Access Location | Top |
| Upper Temperature Rating (Hot Water) | Up to 212 Degrees Fahrenheit |
| Lower Temperature Rating (Cold Water) | Down to 46 Degrees Fahrenheit |
| Ice Making Capacity | Up to 33 lbs per 24 hours |
| Ice Type | Bullet Ice |
| Power Source | Corded Electric |

Image: Diagram showing the dimensions of the water dispenser: 11.42 inches depth, 11.81 inches width, and 32.91 inches height.
Warranty and Customer Support
For warranty information, technical assistance, or to inquire about replacement parts, please contact Antarctic Star customer support. Refer to the product packaging or the manufacturer's official website for the most current contact details and warranty terms.
When contacting support, please have your product model number (Water Cooler Dispenser) and purchase date available to expedite service.