1. Introduction
Thank you for choosing the Allstar Appliance Parts CONT2P025024VS Air Conditioner Contactor. This manual provides essential information for the safe and effective installation, operation, and maintenance of your new contactor. Please read this manual thoroughly before attempting any installation or service to ensure proper function and to prevent potential hazards. Keep this manual for future reference.
2. Safety Information
WARNING: Electrical shock hazard. Disconnect all power to the air conditioning unit before installing or servicing the contactor. Failure to do so can result in serious injury or death.
- Installation and servicing should only be performed by a qualified HVAC technician or licensed electrician.
- Ensure that the replacement contactor specifications (voltage, amperage, poles) match the original unit's requirements.
- Always wear appropriate personal protective equipment (PPE), including insulated gloves and safety glasses, when working with electrical components.
- Verify all wiring connections are secure and correct before restoring power.
- Do not operate the air conditioning unit if the contactor appears damaged or faulty.
3. Product Overview
The CONT2P025024VS is a 2-pole, 25-amp, 24 VAC definite purpose contactor designed for use in air conditioning and refrigeration systems. It acts as an electrically controlled switch, allowing the low-voltage thermostat circuit to control the high-voltage compressor and condenser fan motor.
Key Features:
- 2-pole design for switching two lines of power.
- 25 amp resistive rating, 24 VAC coil voltage.
- Replaces various part numbers including C6170004, C6361301, B1360300, and others.
- Durable construction for reliable performance in HVAC applications.
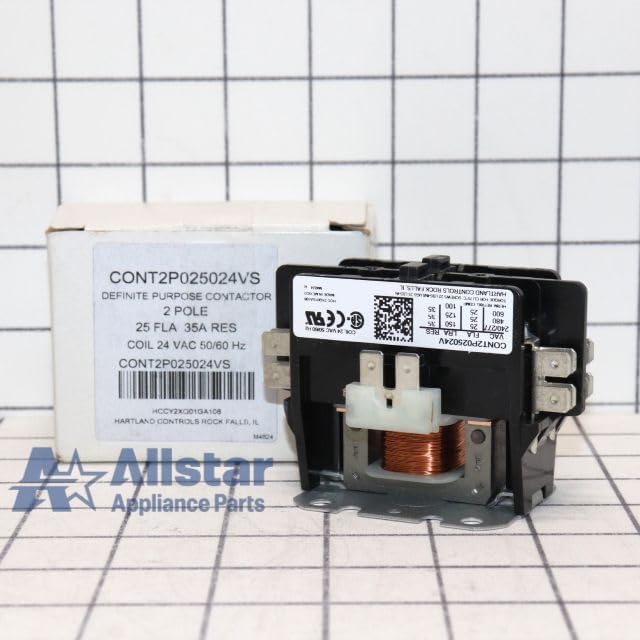
Figure 3.1: Angled view of the Allstar Appliance Parts CONT2P025024VS Air Conditioner Contactor. This image shows the main body of the contactor, including the coil and terminals, providing a clear view of its overall structure.

Figure 3.2: Top-down view of the contactor against a 1-inch grid. This image helps in understanding the physical dimensions and footprint of the contactor for installation planning.
4. Setup and Installation
IMPORTANT: Installation must be performed by a qualified professional. Incorrect installation can lead to equipment damage, fire, or electrical shock.
4.1 Pre-Installation Checks:
- Disconnect Power: Ensure all power to the outdoor unit (condenser) and indoor unit (air handler/furnace) is completely disconnected at the circuit breaker or disconnect switch. Verify with a voltage tester.
- Verify Compatibility: Confirm that the new CONT2P025024VS contactor matches the specifications (2-pole, 25 amp, 24 VAC coil) of the original contactor being replaced.
- Inspect for Damage: Visually inspect the new contactor for any signs of shipping damage.
4.2 Installation Steps:
- Remove Old Contactor: Carefully disconnect all wires from the old contactor, noting their positions and labels. Take photos for reference if necessary. Remove the mounting screws or clips securing the old contactor.
- Mount New Contactor: Position the new CONT2P025024VS contactor in the same location as the old one. Secure it using the existing mounting screws or clips. Ensure it is firmly in place.
- Wire Connections: Connect the high-voltage (line and load) wires to the appropriate terminals on the new contactor. Typically, line voltage connects to the top terminals and load (to compressor/fan) connects to the bottom terminals.
- Coil Connections: Connect the low-voltage (24 VAC) thermostat wires to the coil terminals. These are usually smaller terminals on the sides or front of the contactor.
- Verify Connections: Double-check all wiring connections for tightness and correctness according to the unit's wiring diagram. Ensure no bare wires are exposed.
- Restore Power: Once all connections are secure and verified, restore power to the air conditioning unit at the circuit breaker or disconnect switch.
5. Operating Principles
The CONT2P025024VS contactor operates automatically as part of your air conditioning system's control circuit. When the thermostat calls for cooling, it sends a 24 VAC signal to the contactor's coil. This energizes the coil, creating an electromagnetic field that pulls the contacts together, allowing high-voltage power to flow to the compressor and outdoor fan motor. When the thermostat satisfies the cooling demand, the 24 VAC signal is removed, the coil de-energizes, and the contacts open, interrupting power to the outdoor unit.
There are no user-adjustable settings or direct operating controls on the contactor itself. Its function is entirely dependent on the thermostat and the overall system's electrical signals.
6. Maintenance
Regular inspection of the contactor can help ensure the longevity and efficiency of your air conditioning system. Maintenance should only be performed by a qualified technician with power disconnected.
6.1 Inspection Guidelines (Annual):
- Power Disconnection: Always disconnect power to the unit before inspection.
- Visual Check: Look for signs of pitting, burning, or discoloration on the contact points. Severely pitted or burned contacts indicate wear and potential failure.
- Coil Condition: Inspect the coil for any signs of overheating, such as melted insulation or a burnt smell.
- Wiring: Check all wire connections for tightness and ensure insulation is intact. Loose connections can cause arcing and premature failure.
- Debris: Remove any dust, dirt, or insect nests that may have accumulated around the contactor, as these can impede its operation or cause overheating.
6.2 Replacement:
A contactor is a wear-and-tear component. If contacts are severely pitted, the coil is damaged, or the contactor fails to engage/disengage reliably, it should be replaced. Refer to the installation section for replacement procedures.
7. Troubleshooting
If your air conditioning unit is not functioning correctly, the contactor may be a potential cause. Always ensure power is disconnected before inspecting the contactor. If you are unsure about any troubleshooting steps, contact a qualified HVAC technician.
| Symptom | Possible Cause | Recommended Action |
|---|---|---|
| Outdoor unit not turning on (no compressor or fan) | No 24 VAC to contactor coil; faulty contactor coil; stuck open contacts; tripped circuit breaker. | Check thermostat settings. Verify 24 VAC at coil terminals (with power on, carefully). Inspect contactor for physical damage. Check circuit breaker. Consult technician. |
| Contactor hums loudly but doesn't engage | Low coil voltage; mechanical obstruction; faulty coil. | Verify 24 VAC supply. Inspect for debris. Replace contactor if coil is faulty. |
| Outdoor unit runs continuously | Contactor contacts are welded shut (stuck closed). | Disconnect power immediately. Replace contactor. |
| Intermittent operation of outdoor unit | Loose wiring connections; worn contacts; weak coil. | Check and tighten all wiring. Inspect contacts for pitting. Replace contactor if contacts are worn or coil is weak. |
8. Specifications
- Model Number: CONT2P025024VS
- Part Number: CONT2P025024VS
- Brand: Allstar Appliance Parts
- Poles: 2
- Amperage: 25 FLA (Full Load Amps), 35 RES (Resistive Amps)
- Coil Voltage: 24 VAC, 50/60 Hz
- Manufacturer: Allstar Appliance Parts
- Color: Black
9. Warranty and Support
Allstar Appliance Parts products are manufactured to high-quality standards. For specific warranty information regarding your CONT2P025024VS contactor, please refer to the product packaging or contact Allstar Appliance Parts directly. Keep your proof of purchase for warranty claims.
For technical support, questions, or assistance with installation or troubleshooting, please contact a qualified HVAC professional or reach out to Allstar Appliance Parts customer service through their official website or contact channels.