
VEVOR M0E-19ET-510
VEVOR Cordless Electric Pole Hedge Trimmer User Manual
Model: M0E-19ET-510
1. Introduction
1.1 Product Overview
The VEVOR Cordless Electric Pole Hedge Trimmer (Model: M0E-19ET-510) is designed for efficient and effortless trimming of high branches and garden hedges. Featuring a powerful 20V DC motor and a 510mm (20-inch) double-sided blade, it can cut branches up to 16mm (0.63 inches) in diameter. Its extendable pole allows for a reach of 1.9m to 2.4m (6.2ft to 7.9ft), and the cutting head offers five adjustable angles from 30° to 150° for versatile trimming. The cordless design, powered by a 2Ah high-capacity battery, provides freedom of movement without the need for power outlets.
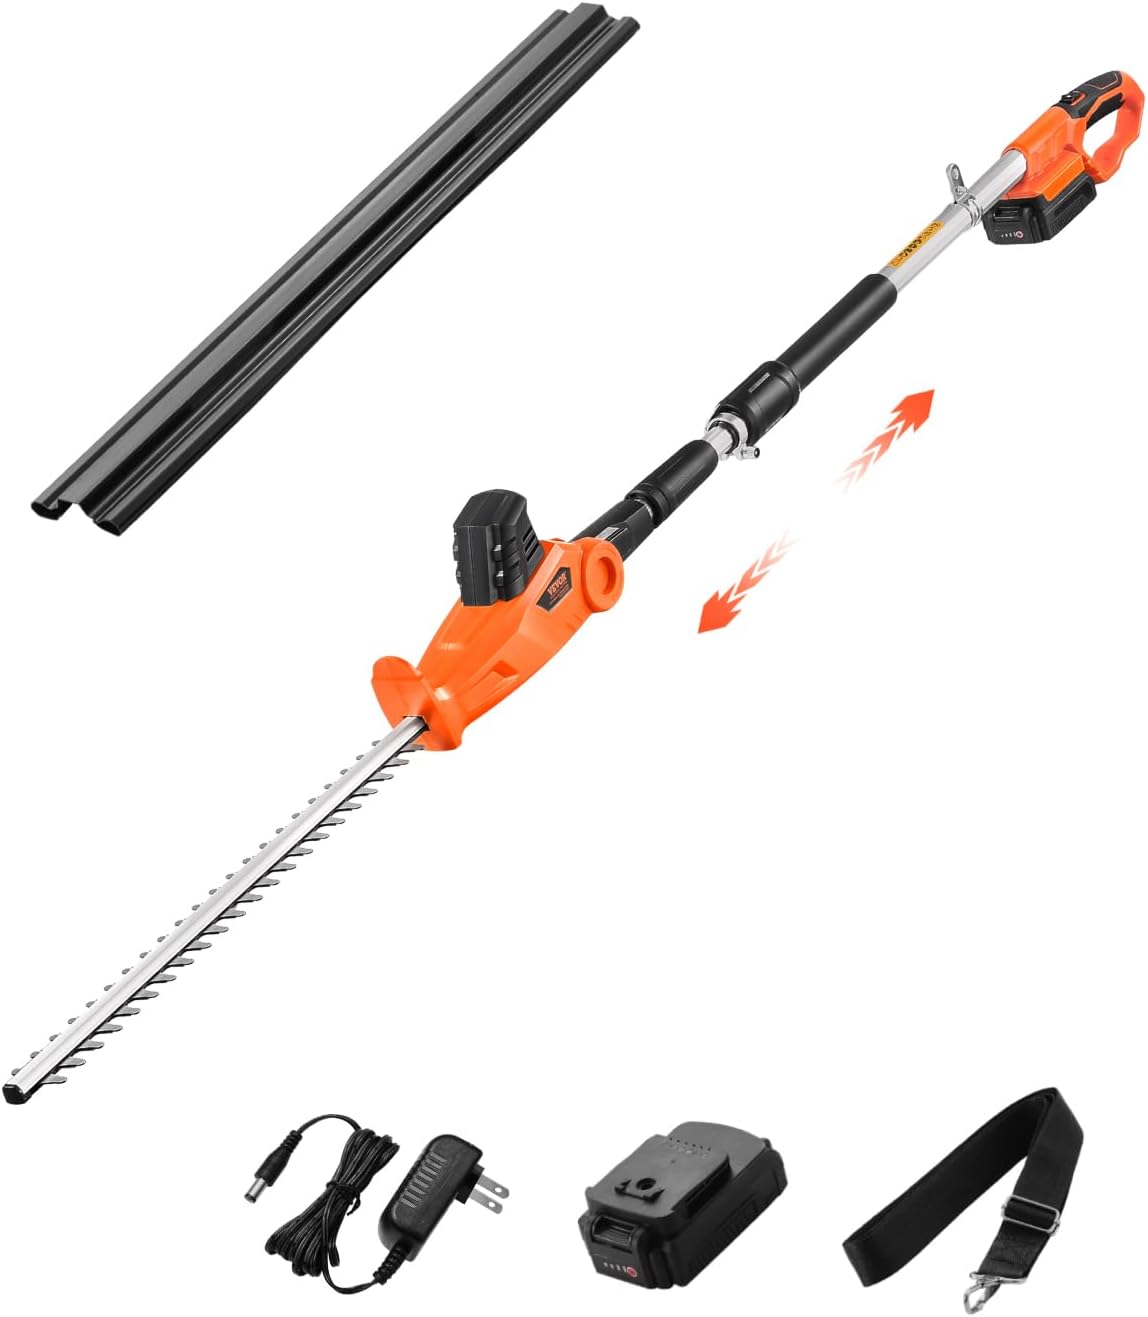
Figure 1.1: VEVOR Cordless Electric Pole Hedge Trimmer and included accessories. This image shows the main unit, blade guard, battery, charger, and shoulder strap.
1.2 Safety Instructions
Always read and understand all safety warnings, instructions, illustrations, and specifications provided with this power tool. Failure to follow all instructions listed below may result in electric shock, fire, and/or serious injury.
- Personal Safety: Always wear appropriate personal protective equipment (PPE) including eye protection, gloves, and sturdy footwear. Avoid loose clothing or jewelry that can get caught in moving parts.
- Work Area Safety: Keep the work area clean and well-lit. Do not operate power tools in explosive atmospheres, such as in the presence of flammable liquids, gases, or dust. Keep children and bystanders away while operating a power tool.
- Electrical Safety: Prevent unintentional starting. Ensure the switch is in the off-position before connecting to battery pack, picking up or carrying the tool. Disconnect the battery pack from the tool before making any adjustments, changing accessories, or storing power tools.
- Tool Use and Care: Do not force the power tool. Use the correct power tool for your application. Maintain power tools and accessories. Check for misalignment or binding of moving parts, breakage of parts, and any other condition that may affect the power tool’s operation.
- Battery Tool Use and Care: Recharge only with the charger specified by the manufacturer. Use power tools only with specifically designated battery packs.
- Hedge Trimmer Specific Safety: Keep all parts of the body away from the cutter blade. Do not attempt to remove cut material or hold material to be cut when blades are moving. Ensure both hands are on the handles when operating the hedge trimmer.
2. Product Components
The VEVOR Cordless Electric Pole Hedge Trimmer comes with the following components:
- Main Hedge Trimmer Unit with Extendable Pole and Blade
- Battery Pack (20V, 2Ah)
- Charger (220-240V AC, 50Hz, EU plug)
- Blade Guard
- Shoulder Strap
- User Manual (this document)

Figure 2.1: Detailed view of the VEVOR hedge trimmer and its included accessories. This diagram labels the battery pack, charger, blade guard, and strap.
3. Setup and Assembly
3.1 Charging the Battery
- Ensure the battery pack is clean and dry before charging.
- Connect the charger to a standard 220-240V AC, 50Hz power outlet.
- Insert the battery pack into the charger. The charger indicator light will show the charging status.
- Allow the battery to fully charge before first use. Charging time may vary.
- Once fully charged, disconnect the battery from the charger and unplug the charger from the outlet.
3.2 Assembling the Unit
- Carefully remove all components from the packaging.
- Attach the main cutting head to the pole section, ensuring it clicks securely into place.
- Insert the charged battery pack into the designated slot on the handle until it locks.
- Attach the shoulder strap to the designated attachment points on the pole for comfortable operation.
3.3 Adjusting the Pole Length
The pole is extendable from 1.9 meters (6.2 feet) to 2.4 meters (7.9 feet) to reach different heights.
- Locate the locking mechanism on the extendable pole.
- Loosen the mechanism, extend or retract the pole to the desired length.
- Securely tighten the locking mechanism to ensure the pole is fixed during operation.

Figure 3.1: The extendable design of the pole hedge trimmer, illustrating its adjustable length for reaching various heights.
3.4 Adjusting the Cutting Angle
The cutting head can be adjusted to five different angles, ranging from 30° to 150°, in 30° increments.
- Locate the angle adjustment button or lever near the cutting head.
- Press the button/lever and adjust the cutting head to the desired angle.
- Release the button/lever, ensuring the head locks firmly into place at the chosen angle.

Figure 3.2: Illustration of the five adjustable cutting angles (30° to 150°) for versatile trimming.
4. Operating Instructions
4.1 Starting and Stopping the Trimmer
The trimmer features a double-switch safety design to prevent accidental activation.
- Ensure the battery is fully charged and properly inserted.
- Hold the trimmer firmly with both hands, ensuring a stable grip.
- To start, simultaneously press the safety lock-off button and squeeze the trigger switch.
- To stop, release the trigger switch.
4.2 Trimming Techniques
Always maintain a safe distance from the cutting blade and ensure stable footing.
- High Branches: Extend the pole to the necessary length. Adjust the cutting head angle to comfortably reach and cut the branches. Use smooth, sweeping motions.
- Hedges: For uniform hedges, use a steady, even motion. Start from the bottom and work your way up for vertical cuts, or from one end to the other for horizontal cuts.
- Avoid cutting branches thicker than 16mm (0.63 inches) to prevent damage to the blade and motor.

Figure 4.1: An individual demonstrating the use of the VEVOR pole hedge trimmer for trimming high branches.

Figure 4.2: The cordless design allows for freedom of movement while trimming hedges.
5. Maintenance
Regular maintenance ensures optimal performance and extends the lifespan of your hedge trimmer. Always disconnect the battery pack before performing any maintenance.
5.1 Blade Care
- Cleaning: After each use, clean the blades with a stiff brush to remove sap, leaves, and debris. Use a resin solvent if necessary.
- Lubrication: Apply a light machine oil or blade lubricant to the blades regularly to reduce friction and prevent rust.
- Sharpening: If the blades become dull, they can be sharpened by a qualified professional or replaced. Refer to the user manual for specific blade replacement instructions.
- Always store the blade with the provided blade guard in place to prevent injury and protect the blade.
5.2 Battery and Charger Care
- Store the battery pack in a cool, dry place away from direct sunlight and extreme temperatures.
- Do not store the battery pack fully discharged. Charge it periodically if not in use for extended periods.
- Keep the charger clean and free from debris. Do not expose the charger to moisture.
5.3 General Storage
- Store the hedge trimmer in a secure, dry place, out of reach of children.
- Ensure the blade guard is always on the blade during storage.
6. Troubleshooting
Before attempting any troubleshooting, ensure the battery is disconnected from the tool.
| Problem | Possible Cause | Solution |
|---|---|---|
| Trimmer does not start | Battery not charged or improperly inserted. Safety lock-off button not pressed. | Ensure battery is fully charged and securely inserted. Press the safety lock-off button simultaneously with the trigger. |
| Battery not charging | Charger not plugged in. Faulty battery or charger. | Check power outlet and charger connection. If problem persists, contact customer support for battery/charger replacement. |
| Blades not cutting efficiently or stalling | Blades are dull or dirty. Cutting material is too thick. | Clean and lubricate blades. Sharpen or replace blades if necessary. Do not attempt to cut branches exceeding 16mm (0.63 inches). |
| Excessive vibration or noise | Loose components. Damaged blade. | Check all connections and ensure they are secure. Inspect the blade for damage; replace if necessary. |
If you encounter issues not listed here or if the problem persists after attempting the solutions, please contact VEVOR customer support.
7. Specifications
| Feature | Detail |
|---|---|
| Model Number | M0E-19ET-510 |
| Product Type | Cordless Electric Pole Hedge Trimmer |
| Operating Voltage | 20V DC |
| Rated Battery Capacity | 2 Ah |
| Charger Compatibility | 220-240V AC, 50Hz, EU Plug |
| Blade Length (Inner Edge) | 510 mm (20 inches) |
| Blade Length (Outer Edge) | 540 mm (21.25 inches) |
| Blade Style | Double-sided cutting teeth |
| Max. Cutting Diameter | 16 mm (0.63 inches) |
| No-load Speed | 1200 RPM |
| Extendable Length | 1.9 m - 2.4 m (78.4 in - 97.6 in) |
| Adjustable Angles | 5 positions, 30° - 150° (30° increments) |
| Product Weight | 3.64 kg (8.02 lb) |
| Product Dimensions (Before Extension) | 1990 x 95 x 165 mm (78.4 x 3.7 x 6.5 in) |
| Product Dimensions (After Extension) | 2480 x 95 x 165 mm (97.6 x 3.7 x 6.5 in) |
| Blade Material | Carbon Steel |
| UPC | 197988508663 |

Figure 7.1: Detail showing the 20-inch blade and 0.63-inch cutting capacity.
8. Warranty and Support
VEVOR products are designed for durability and performance. For specific warranty information regarding your VEVOR Cordless Electric Pole Hedge Trimmer, please refer to the warranty card included with your purchase or visit the official VEVOR website.
For technical support, spare parts, or any inquiries, please contact VEVOR customer service. You can find contact details on the VEVOR official website or through your purchase platform.
Visit the official VEVOR store for more products and support: VEVOR Store
Ask a question about this manual
Ask about setup, troubleshooting, compatibility, parts, safety, or missing instructions. Manuals+ will review the question and use this page’s manual context to help answer it.