LISEN A608
LISEN Suction Cup Phone Mount User Manual
Model: A608
1. Introduction
Thank you for choosing the LISEN Suction Cup Phone Mount. This manual provides essential information for the safe and effective use of your new device. Please read it thoroughly before installation and operation.
2. Safety Information
To ensure safe operation and prevent damage, please observe the following safety guidelines:
- Important Installation Information: This car mount is designed for smooth, flat surfaces like windshields and screens.
- Do not use on:
- Leather dashboards or other breathable surfaces, as a secure vacuum seal cannot form.
- Surfaces with large particles, textures, or curves.
- Compatibility: Exclusively for iPhone 12 - 16 Series (including Pro Max, Pro, Mini, and Plus variants).
- Ensure the mounting surface is clean and dry before installation to achieve optimal suction.
- Do not obstruct your view of the road or vehicle controls when mounting the device.
- Avoid extreme temperatures. The device is designed to withstand temperatures from -20°F to 176°F (-28°C to 80°C).
3. Package Contents
Verify that all items are present in the package:
- LISEN Suction Cup Phone Mount
- 3M adhesive pad (for challenging surfaces)
- Alcohol pad (for surface cleaning)
- User Manual (this document)
Note: Additional accessories may be included depending on the specific product variant.
4. Setup and Installation
Follow these steps for proper installation of your LISEN Suction Cup Phone Mount:
- Clean the Installation Area: Thoroughly clean the desired mounting surface with the included alcohol pad. Ensure the surface is smooth, flat, and free of dust, dirt, or moisture.

Image: Step 1 - Cleaning the installation area on a car dashboard.
- Secure the Base Pad (Optional, for textured dashboards): If mounting on a textured dashboard, peel off the protective film from the included 3M adhesive pad. Firmly press the pad onto the desired mounting area and allow it to cure for 24 hours before attaching the mount. For smooth surfaces like glass or screens, this pad is not required.

Image: Step 2 - Securing the adhesive base pad on a car dashboard.
- Attach the Suction Cup Bracket: Place the suction cup of the phone mount onto the cleaned surface (or the center of the adhesive pad).

Image: Step 3 - Attaching the suction cup bracket to the base.
- Lock into Place: Twist the lever on the suction cup base to create a vacuum seal. This will firmly secure the mount to the surface. You should hear a "click" indicating it's locked.

Image: Step 4 - Locking the suction cup mount for secure attachment.
- Attaching a Non-MagSafe Phone (Optional): If your phone or case is not MagSafe compatible, use the included adhesive magnetic attachment ring.
- Take out the positioning card and place it on your phone's back.
- Remove the protective film from the magnetic ring and apply it to your phone, pressing firmly to secure.
- Allow the magnetic ring to cure for 12 hours before use to ensure strong adhesion.

Image: Steps for attaching a magnetic ring to a non-MagSafe phone.
Compatibility Note: This mount is designed for MagSafe compatible iPhone 12-16 series. It is not recommended for use with granular, uneven, textured, soft, or breathable surfaces without the adhesive pad. Avoid using with metal cases or credit cards placed between the phone and the mount, as this can interfere with magnetic adhesion.

Image: Compatibility specifications for mounting surfaces and phone types.
5. Operating Instructions
5.1 Attaching Your Phone
Once the mount is securely installed, simply bring your MagSafe compatible iPhone (or phone with the adhesive magnetic ring) close to the magnetic ring on the mount. The strong magnets will instantly snap your phone into place. This allows for convenient one-handed operation.

Image: Attaching a phone to the LISEN magnetic mount.
5.2 Adjusting the Viewing Angle
The LISEN Suction Cup Phone Mount features a 360° adjustable design for optimal viewing. You can rotate your phone between portrait and landscape orientations, and adjust the angle using the triaxial rotation points. The aerospace-grade metal shaft and ABS base ensure stability even with frequent adjustments.
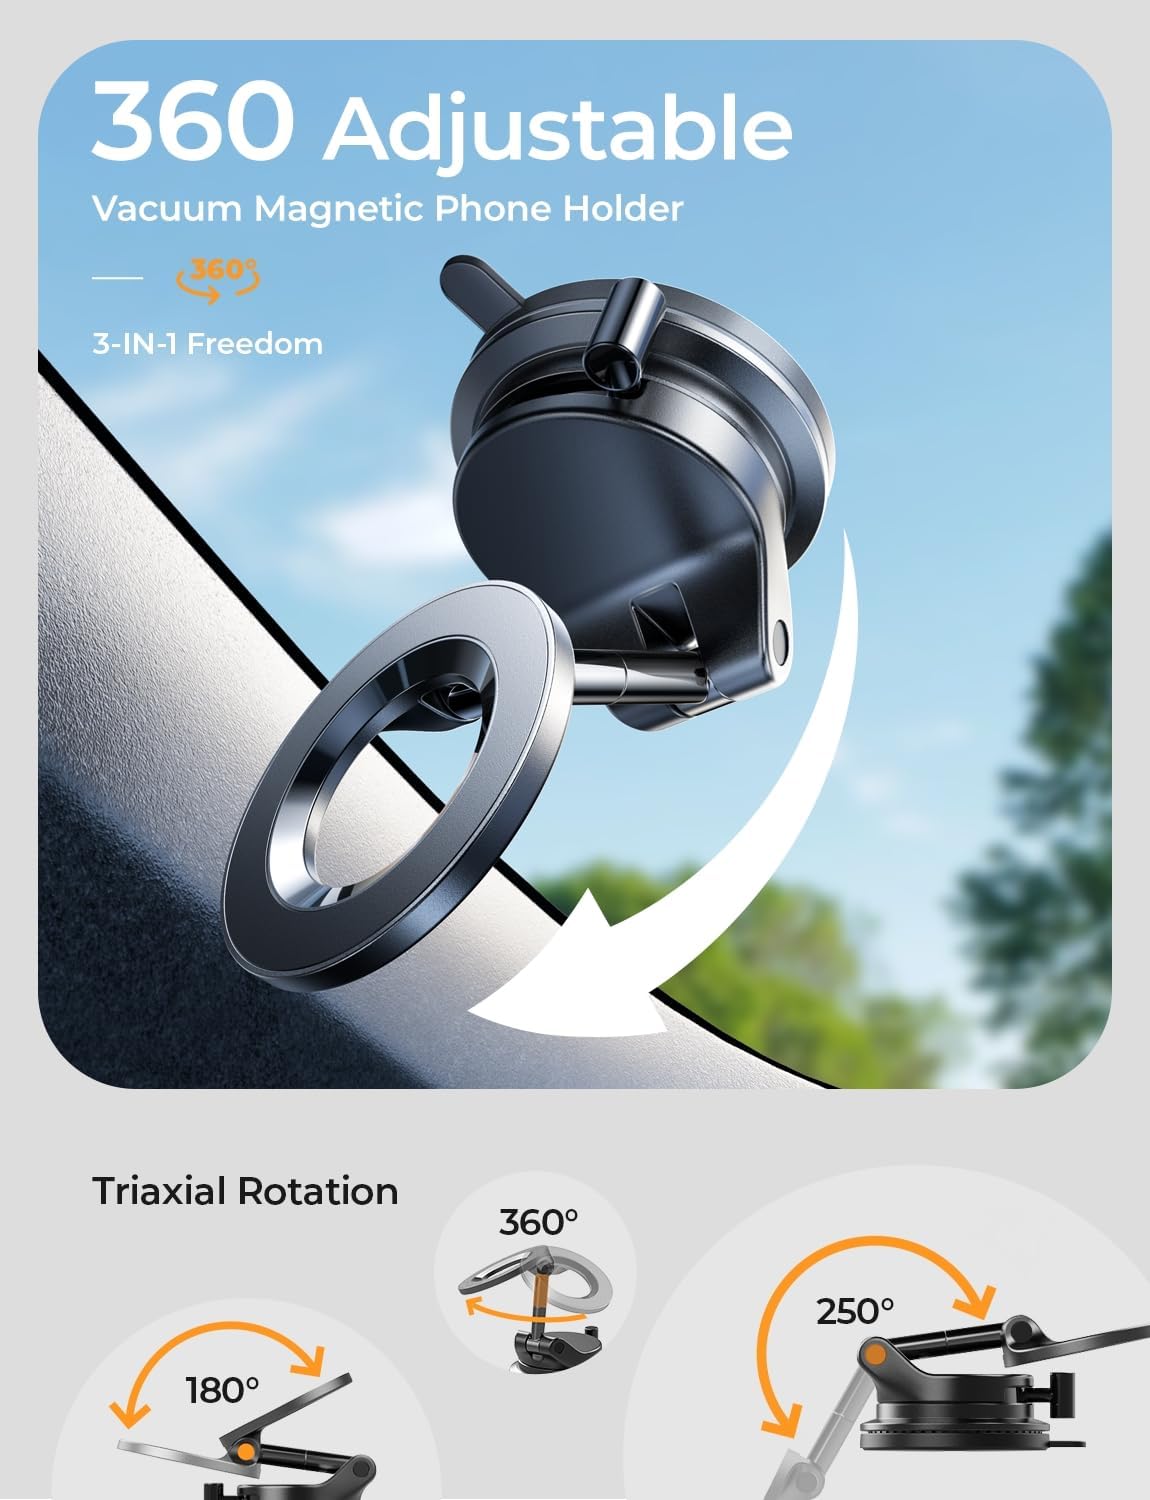
Image: Demonstrating the 360-degree adjustability of the mount.

Image: Detailed diagram of the mount's triaxial rotation capabilities.
5.3 Removing Your Phone
To remove your phone, simply pull it away from the magnetic ring. The strong magnetic connection allows for quick and easy detachment when parked.
6. Maintenance
Proper maintenance ensures the longevity and performance of your LISEN Suction Cup Phone Mount:
- Cleaning the Suction Cup: If the suction cup becomes dusty or dirty, rinse it with warm water and mild dish soap. Allow it to air dry completely before re-applying. This will restore its stickiness.
- Cleaning the Mount: Wipe the mount with a soft, damp cloth to remove dust and grime. Do not use harsh chemicals or abrasive cleaners.
- Storage: When not in use for extended periods, store the mount in a cool, dry place away from direct sunlight.
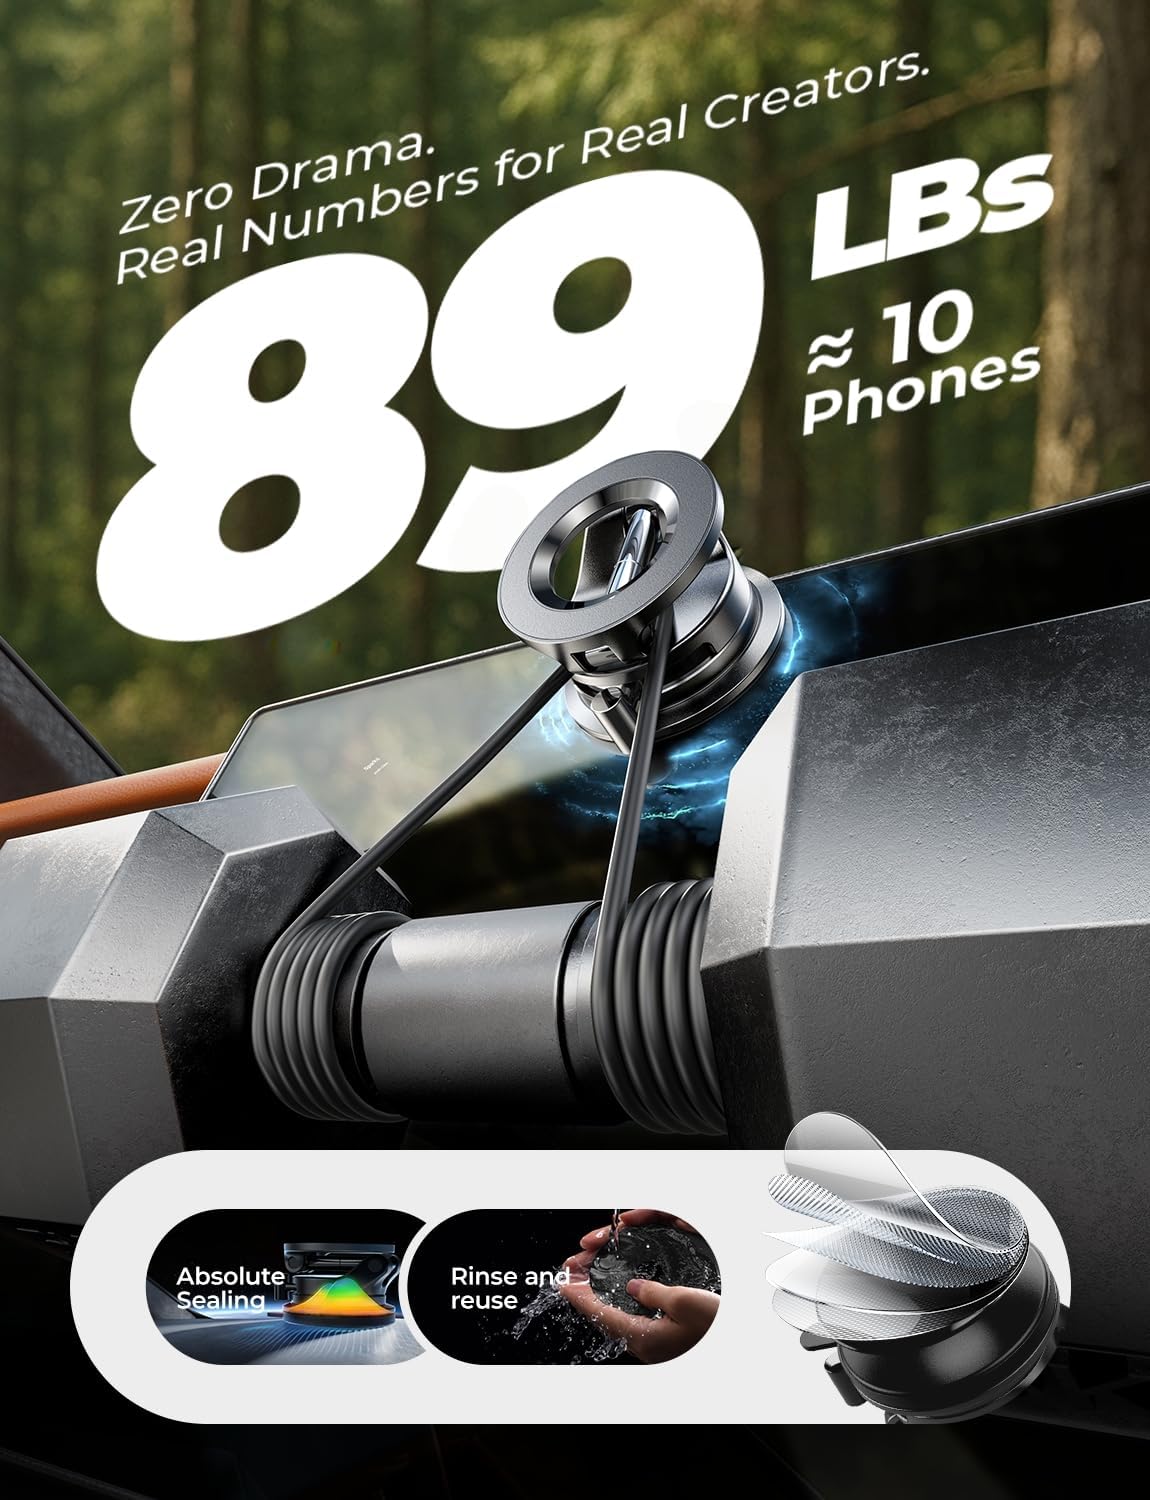
Image: Cleaning the suction cup by rinsing it with water.
7. Troubleshooting
If you encounter issues with your LISEN Suction Cup Phone Mount, refer to the following common problems and solutions:
| Problem | Possible Cause | Solution |
|---|---|---|
| Mount does not stick securely. | Surface is not smooth, clean, or flat; suction cup is dirty; air leakage. |
|
| Phone falls off the magnetic mount. | Phone/case not MagSafe compatible; metal objects/credit cards between phone and mount; excessive vibration. |
|
| Mount wobbles or moves during driving. | Improper installation; loose joints. |
|
8. Specifications
| Feature | Detail |
|---|---|
| Model Number | A608 |
| Brand | LISEN |
| Mounting Type | Suction Cup (Windshield, Smooth Dashboard, Screen) |
| Compatibility | iPhone 12, 13, 14, 15, 16 Series (MagSafe compatible) |
| Adjustability | 360° Rotation, Triaxial Adjustment (180°, 255°, 360° angles) |
| Material | Aerospace-grade metal shaft + ABS base |
| Temperature Resistance | -20°F to 176°F (-28°C to 80°C) |
| Dimensions (Folded) | Approximately 2.3 x 1.61 x 0.94 inches (5.8 x 4.1 x 2.4 cm) |
| Weight | 6 ounces (170 grams) |

Image: Detailed dimensions and adjustable angles of the LISEN Suction Cup Phone Mount.
9. Warranty and Support
LISEN stands behind its products with industry-leading warranty coverage. The LISEN Car Phone Mount comes with a 24-month warranty.
For any questions, concerns, or support needs, please contact LISEN customer service. You can find contact information on the official LISEN website or through your purchase platform.
As a responsible company, LISEN operates sustainably and is committed to high environmental and social standards.
Ask a question about this manual
Ask about setup, troubleshooting, compatibility, parts, safety, or missing instructions. Manuals+ will review the question and use this page’s manual context to help answer it.