1. Introduction
This manual provides essential information for the installation, operation, and maintenance of your new replacement range knob. This part is designed to replace original knobs on compatible Whirlpool range models, ensuring proper function and fit. Please read this manual thoroughly before attempting installation.
2. Compatibility
This replacement range knob is compatible with various Whirlpool range models. It is crucial to verify your appliance's model number against the list below to ensure proper fit and function. If your model is not listed, please consult your appliance's original documentation or contact the seller for assistance.
Compatible Models:
- KFEG500EBL0
- KFEG500ESS4
- KFEG500EBS4
- YKFEG500EWH5
- KFEG500EBS6
- KFEG500EBS1
- YKFEG500EWH7
- KFEG500ESS2
- KFEG504KPS3
- KFEG500EWH0
- YKFEG510ESS2
- YKFEG500ESS7
- KFEG500ESS0
- KFEG500EWH4
- KFEG500ESS1
- YKFEG500EBS4
- KFEG500ESS3
- YKFEG500ESS4
- YKFEG500ESS1
- YKFEG500ES
- YKFEG500EWH4
- YKFEG500EWH2
- KFEG500EBL3
- KFEG500EBL2
- YKFEG500EBS
Part Number: W10915061
3. Package Contents
Your package should contain the following item:
- 1 x Replacement Range Knob (Model: knobpart#4562395)
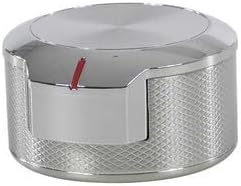
Figure 3.1: The replacement range knob. This knob is designed for durability and a precise fit on compatible Whirlpool range models.
4. Installation / Setup
Safety First: Before beginning any installation, ensure your range is completely turned off and disconnected from the power supply to prevent electrical shock or gas leaks. If your range is gas-powered, ensure the gas supply is also shut off.
- Prepare the Area: Clear any items from around the range knobs to allow for easy access.
- Remove Old Knob: Gently pull the old knob directly off the control shaft. It should slide off with moderate force. Avoid twisting or prying, which could damage the shaft.
- Inspect Shaft: Examine the control shaft for any damage, debris, or residue. Clean the shaft if necessary.
- Install New Knob: Align the new replacement knob with the control shaft. The knob has a specific orientation to fit correctly. Gently push the new knob onto the shaft until it is fully seated and secure. Do not force it.
- Test Fit: Once installed, gently turn the knob to ensure it rotates smoothly and engages properly with the control mechanism.
- Restore Power: Reconnect your range to the power supply (and gas supply, if applicable).
- Functionality Test: Turn on your range and test the new knob's functionality by selecting different settings (e.g., burner levels, oven temperature). Ensure it operates as expected.
If you encounter any resistance or difficulty during installation, do not force the knob. Re-check the compatibility and the orientation of the knob on the shaft.
5. Operation
The replacement range knob functions identically to the original part. To operate, simply push the knob in slightly and turn it to the desired setting (e.g., OFF, LOW, MEDIUM, HIGH for burners, or specific temperatures for the oven). The indicator line on the knob will point to the selected setting on your range's control panel.
Always ensure the knob is fully engaged on the shaft before attempting to turn it. Do not apply excessive force when turning, as this may damage the knob or the control mechanism.
6. Maintenance
To ensure the longevity and appearance of your replacement range knob, follow these simple maintenance guidelines:
- Cleaning: Clean the knob regularly with a soft, damp cloth and mild soap. Avoid abrasive cleaners, scouring pads, or harsh chemicals, as these can damage the finish.
- Drying: After cleaning, dry the knob thoroughly with a clean, soft cloth to prevent water spots.
- Avoid Excessive Force: Do not apply excessive force when turning or cleaning the knob, as this can loosen it or damage the internal components.
7. Troubleshooting
If you experience issues with your replacement range knob, consider the following common troubleshooting steps:
- Knob Does Not Fit:
- Double-check the compatibility list in Section 2 to ensure your range model is supported.
- Verify the orientation of the knob. Some knobs have a specific D-shaped or keyed shaft that requires correct alignment.
- Inspect the control shaft for any damage or obstructions that might prevent the knob from seating properly.
- Knob is Loose or Wobbly:
- Ensure the knob is pushed all the way onto the control shaft until it is firmly seated.
- If the knob continues to be loose, the control shaft itself might be worn or damaged. In this case, the issue may not be with the knob but with the appliance's internal components, requiring professional service.
- Knob Does Not Turn or Engage:
- Ensure the knob is fully pushed in before attempting to turn it, as some range controls require this action.
- Check for any debris or stickiness around the control shaft that might impede movement.
- If the knob still does not engage, the internal control mechanism of the range may be faulty.
For issues not resolved by these steps, or if you suspect a fault with your appliance, please contact a qualified appliance technician or the seller for further assistance.
8. Specifications
| Attribute | Detail |
|---|---|
| Product Type | Replacement Range Knob |
| Brand | Generic |
| Model Number | knobpart#4562395 |
| Part Number | W10915061 |
| Item Package Quantity | 1 |
| Manufacturer | Generic |
9. Warranty and Support
Specific warranty information for this replacement part is not provided in the product details. For details regarding warranty coverage, returns, or technical support, please contact the seller directly through the platform where the purchase was made. Ensure you have your order number and product details available when contacting support.
For general appliance repair or safety concerns, always consult a qualified technician.