1. Introduction
Thank you for choosing the Radtel RT-900 Multi-Band Ham Radio Walkie Talkie. This device is designed for reliable two-way communication across various frequency bands, including VHF/UHF, Air Band, NOAA, Marine, and River frequencies. It features 256 channels, 8W power output, and a Type-C charging port for convenience. This manual provides detailed instructions for the proper setup, operation, and maintenance of your RT-900 radio.
2. Safety Information
Please read and understand all safety precautions before operating the radio. Failure to do so may result in injury or damage to the device.
- Do not operate the radio in explosive atmospheres (e.g., flammable gases, dust particles, metallic powders).
- Do not modify the radio. Unauthorized modifications can void your warranty and violate regulations.
- Use only Radtel-approved batteries and chargers.
- Avoid exposing the radio to direct sunlight for extended periods or to extreme temperatures.
- Keep the radio away from medical devices to prevent interference.
- Do not immerse the radio in water as it is not water-resistant.
- Ensure the antenna is properly attached before transmitting to prevent damage to the radio.
3. Package Contents
Upon unpacking, please verify that all items listed below are included:
- 2x Radtel RT-900 Main Unit (without Bluetooth)
- 2x 2200mAh Li-ion Battery
- 2x Dual Band Antenna
- 2x Belt Clip
- 2x Type-C Charging Cable
- 2x Power Supply with USB Port
- 2x English User Manual
4. Product Overview
The Radtel RT-900 features a robust design with an intuitive keypad and a clear display. Below is an illustration of the radio's main components.
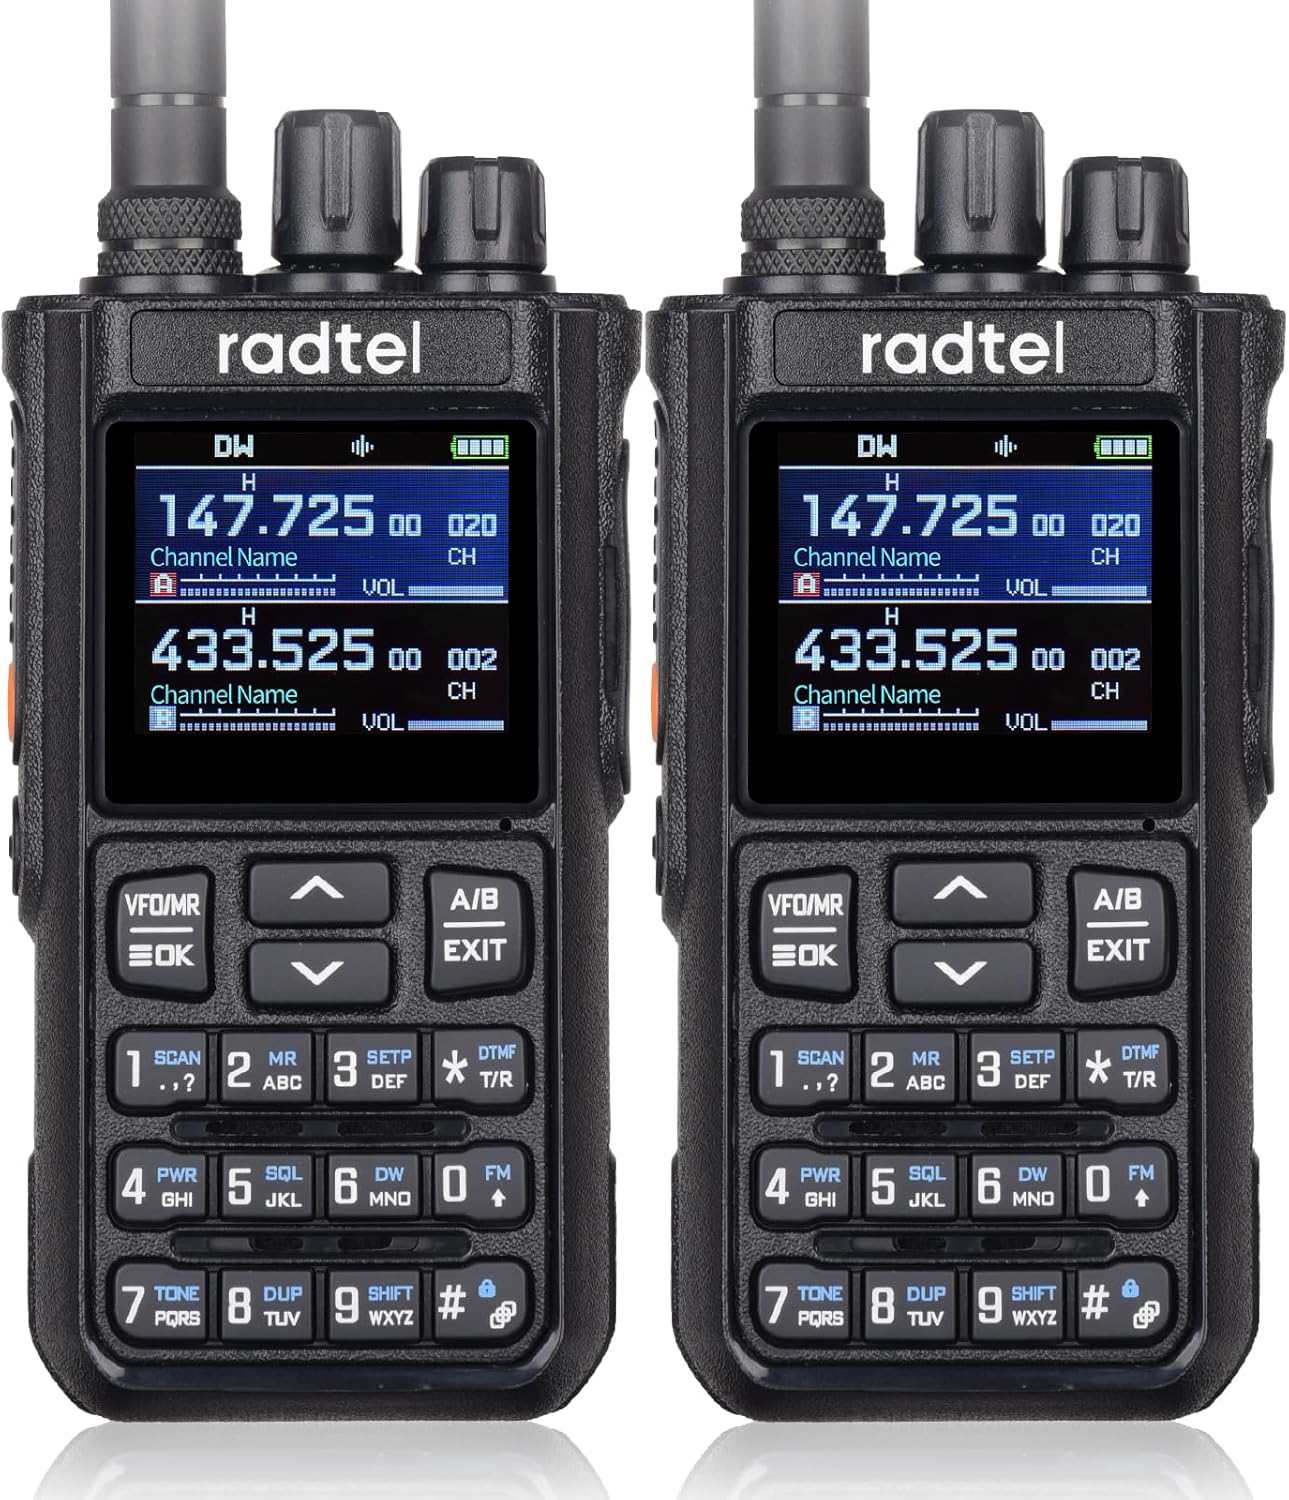
Figure 4.1: Front view of two Radtel RT-900 walkie-talkies. Each radio displays two frequencies (e.g., 147.725 MHz and 433.525 MHz) and has a full alphanumeric keypad below the screen.
4.1. Keypad and Display
Figure 4.2: Detailed view of the RT-900's display and keypad. The display shows current frequencies, channel names, and volume levels. The keypad includes numerical keys, function keys like VFO/MR, A/B, SCAN, SETP, DTMF, PWR, SQL, DW, TONE, DUP, SHIFT, and navigation arrows.
- Display: Shows frequency, channel number, channel name, battery status, signal strength, and various function indicators.
- VFO/MR (Function Key): Toggles between Frequency Mode (VFO) and Channel Mode (MR).
- A/B (Function Key): Switches between the upper (A) and lower (B) display frequencies.
- Up/Down Arrows: Used for navigating menus, adjusting frequency, or changing channels.
- EXIT (Function Key): Exits menu or cancels current operation.
- Numeric Keypad (0-9): For direct frequency input or selecting menu options.
- SCAN (Key 1): Initiates frequency or channel scanning.
- MR (Key 2): Memory Recall (often combined with VFO/MR).
- SETP (Key 3): Enters the radio's settings menu.
- DTMF T/R (Key *): Activates DTMF tone transmission/reception.
- PWR (Key 4): Adjusts transmit power (High/Low).
- SQL (Key 5): Adjusts Squelch level.
- DW (Key 6): Dual Watch function.
- FM (Key 0): Activates FM radio reception.
- TONE (Key 7): Sets CTCSS/DCS tones.
- DUP (Key 8): Sets Repeater Shift (Duplex).
- SHIFT (Key 9): Activates shift function for secondary key functions.
- # (Key #): Keypad lock/unlock.
5. Setup
5.1. Battery Installation
- Ensure the radio is powered off.
- Align the battery pack with the grooves on the back of the radio.
- Slide the battery pack upwards until it clicks into place.
- To remove, press the release latch (usually at the bottom of the battery) and slide the battery downwards.
5.2. Antenna Attachment
- Screw the dual band antenna clockwise into the connector on the top of the radio until it is finger-tight. Do not overtighten.
5.3. Initial Charging
Before first use, fully charge the battery.
- Connect the Type-C charging cable to the radio's Type-C port.
- Connect the other end of the cable to the provided power supply with a USB port.
- Plug the power supply into a standard AC outlet.
- The charging indicator on the radio (if available) will show charging status. Charge until the indicator shows full.
- A full charge typically takes several hours.
6. Operating Instructions
6.1. Power On/Off and Volume
- Power On: Rotate the power/volume knob (top-left knob) clockwise until you hear a click.
- Volume Adjustment: Continue rotating the same knob to adjust the listening volume.
- Power Off: Rotate the power/volume knob counter-clockwise until you hear a click.
6.2. Channel/Frequency Selection
- VFO Mode (Frequency Mode): Press VFO/MR to enter VFO mode. Use the Up/Down arrow keys to adjust the frequency in steps, or directly input the frequency using the numeric keypad.
- MR Mode (Channel Mode): Press VFO/MR to enter MR mode. Use the Up/Down arrow keys to select a stored channel.
- Switching A/B Display: Press A/B to switch between the upper (A) and lower (B) frequency displays. The active display is indicated by an arrow or highlight.
6.3. Transmitting and Receiving
- Receiving: When the radio is on and tuned to an active frequency/channel, it will automatically receive signals.
- Transmitting: Press and hold the PTT (Push-To-Talk) button on the side of the radio. Speak clearly into the microphone (located below the display). Release the PTT button to listen.
6.4. Key Features
- Multi-Scan Feature: The RT-900 includes a multi-scan feature for Frequency, DCS, and CTCSS scanning. Press SCAN (Key 1) to initiate scanning. This automatically selects the best available channel, helping to find the clearest signal in crowded environments.
- High-Fidelity Sound: Equipped with premium-quality speakers, the RT-900 delivers crisp and natural audio. Advanced sound technology reduces distortion and background noise for clear communication.
- Extended Range: High-gain antennas enhance signal reception and transmission range, ensuring stable communication in remote or challenging environments.
- Aviation Frequency Bands: Supports AM: 108-136 MHz RX, allowing reception of aircraft and tower transmissions. Ideal for aviation enthusiasts and professionals to monitor real-time air traffic.
- NOAA Weather Channels: Access NOAA weather alerts and broadcasts for critical weather information.
- Marine & River Frequencies: Supports relevant frequencies for marine and river communication.
7. Maintenance
7.1. Cleaning
- Wipe the radio's surface with a soft, damp cloth. Do not use harsh chemicals or abrasive cleaners.
- Ensure the Type-C charging port is free of dust and debris.
7.2. Battery Care
- Do not short-circuit the battery terminals.
- Do not dispose of batteries in fire.
- If the radio will not be used for an extended period, remove the battery and store it in a cool, dry place.
- Recharge the battery periodically if stored for a long time to maintain its lifespan.
8. Troubleshooting
| Problem | Possible Cause | Solution |
|---|---|---|
| Radio does not power on. | Battery is low or not installed correctly. | Charge the battery or re-install it properly. |
| Cannot transmit or receive. | Incorrect frequency/channel, antenna not attached, low battery, or squelch too high. | Verify frequency/channel, ensure antenna is secure, charge battery, adjust squelch level. |
| Poor audio quality / static. | Weak signal, interference, or squelch setting. | Move to an area with better signal, check for interference sources, adjust squelch. |
| Battery drains quickly. | Frequent transmission, high power setting, or aging battery. | Reduce transmission time, use low power when possible, consider replacing battery if old. |
9. Specifications
| Feature | Detail |
|---|---|
| Model Number | RT-900 |
| Brand | Radtel |
| Number of Channels | 256 |
| Frequency Range | VHF: 144-148MHz, UHF: 420-450MHz, Air Band: AM 108-136MHz (RX only) |
| Output Power | 8W |
| Talking Range Maximum | 6 Kilometers |
| Battery | 2200mAh Li-ion (2 included) |
| Charging Port | Type-C |
| Voltage | 7.4 Volts |
| Product Dimensions | 0.13 x 0.18 x 0.88 inches |
| Item Weight | 0.017 ounces |
| Water Resistance Level | Not Water Resistant |
10. Warranty and Support
10.1. Warranty Information
The Radtel RT-900 Multi-Band Ham Radio Walkie Talkie comes with a 1-Year Warranty from the date of purchase. This warranty covers manufacturing defects and malfunctions under normal use. It does not cover damage caused by misuse, accidents, unauthorized modifications, or exposure to water.
10.2. Customer Support
For technical assistance, troubleshooting, or warranty claims, please contact Radtel customer support. Refer to the contact information provided with your purchase or visit the official Radtel website for support details.
Please retain your proof of purchase for warranty service.


