Introduction
This manual provides detailed instructions for the installation, operation, and maintenance of your SMONET M9 WiFi Smart Deadbolt with Handle. Please read this manual thoroughly before installation and use to ensure proper function and security. Keep this manual for future reference.
Product Overview
Key Features
- WiFi & Bluetooth Connectivity: Remote unlocking and real-time operation logs.
- Multiple Unlocking Methods: Fingerprint, App control, Anti-peep code, Key Fobs, Traditional Keys, Auto Lock, Remote control, Alexa voice control.
- Fast Unlock: Fingerprint or IC card unlock in 0.5 seconds.
- Customizable Auto-Lock: Adjustable timing from 5 to 900 seconds.
- Emergency Power: USB-C charge port for backup power.
- Smart Home Integration: Compatible with Alexa (Hub included).
- Access Management: Create permanent, one-time, or temporary passwords for guests.
Included Components
The SMONET M9 package includes the following items:
- Exterior lock assembly
- Interior lock assembly
- Handleset
- Latch mechanism
- Lock Screws
- Key Fobs (2)
- Traditional Keys
- User Manual (this document)
- Diagram template for installation
- Mounting plate

Image: Complete SMONET M9 WiFi Smart Deadbolt set with handle, including exterior and interior units, latch, key fobs, and keys.
Setup
1. Pre-Installation Check
Before beginning installation, verify your door dimensions and compatibility. No extra drilling is typically required for standard doors.

Image: Diagram illustrating door hole diameter, backset, minimum distance, and bore distance requirements for installation. Also shows compatibility with latch holes and single cylinder doors.
2. Mechanical Installation
- Install the latch into the door edge.
- Attach the exterior lock assembly and handleset, ensuring proper alignment.
- Secure the interior mounting plate.
- Connect the cable from the exterior unit to the interior unit.
- Mount the interior lock assembly and handleset.
- Insert batteries into the interior unit.
Refer to the included diagram template for precise measurements and step-by-step visual guidance during installation. A simple screwdriver is the only tool typically needed.
3. App Setup and Initial Programming
Download the 'Next Lock' application from your device's app store (App Store/Play Store). Follow the in-app instructions to pair your SMONET M9 lock via Bluetooth and then connect it to your home WiFi network using the included Hub. Once connected, you can program fingerprints, user codes, and key fobs through the app.

Image: A user interacting with the mobile application to manage the smart door lock, demonstrating app control functionality.
Operating Instructions
Unlocking Methods
- Fingerprint Unlock: Place your registered fingerprint on the sensor. The lock will unlock in approximately 0.5 seconds.
- Keypad Code: Enter your programmed passcode on the keypad.
- Anti-Peep Code: To prevent others from seeing your code, you can enter random digits before and after your actual passcode. For example, if your code is 123456, you can enter 987123456321.
- Key Fob: Present the registered key fob to the designated area on the lock.
- Traditional Key: Use the physical key as a backup.
- Mobile App: Use the 'Next Lock' app to remotely unlock the door.
- Alexa Voice Control: With the included Hub connected, you can use Alexa voice commands to unlock the door. (e.g., "Alexa, unlock the front door").

Image: A family in a kitchen setting, demonstrating the use of Alexa voice commands to unlock the smart door lock.
Locking Methods
- Auto-Lock: The lock will automatically engage after a set period (default or customized between 5-900 seconds).
- One-Touch Lock: Press the '#' button on the keypad or use the app to manually lock the door.

Image: A woman carrying groceries, illustrating the convenience of the auto-lock feature which engages after a set time (5-900 seconds).
Remote Access and Guest Management
The 'Next Lock' app allows you to generate permanent, one-time, or temporary passcodes for guests, delivery personnel, or service providers. You can also monitor real-time unlock records and manage access from anywhere.
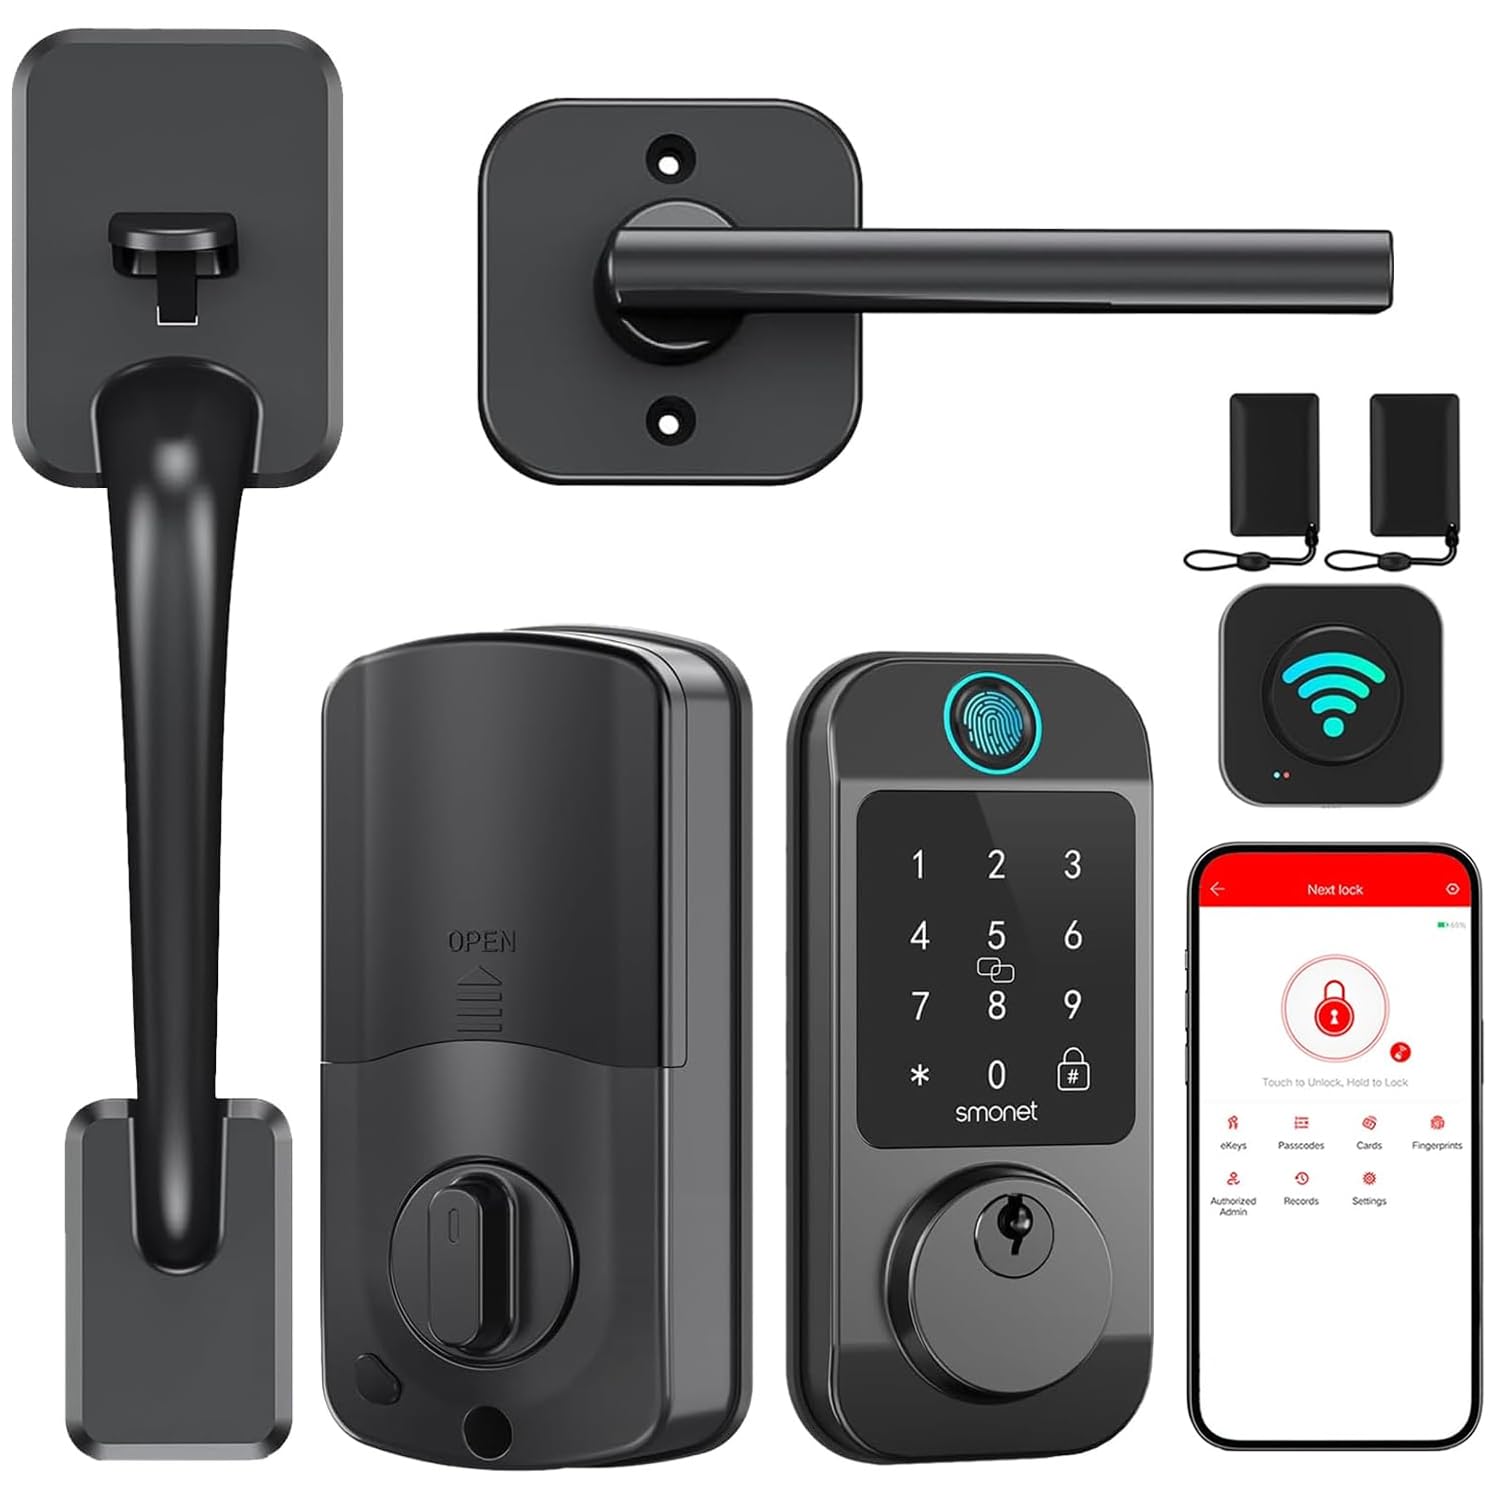
Image: A man receiving a one-time password on his phone, demonstrating the remote unlock feature for guests without distance limitations.
Maintenance
Battery Management
The SMONET M9 lock is designed for long battery life. Monitor the real-time battery status through the 'Next Lock' app. When batteries are low, the lock will provide a low battery warning. In case of complete battery depletion, an emergency USB-C port is available on the exterior unit for temporary power using a power bank.

Image: Close-up of the SMONET M9 smart lock highlighting the Type C emergency charging port and a graphic indicating real-time battery status.
Cleaning
Wipe the lock's exterior surfaces with a soft, damp cloth. Avoid using abrasive cleaners or solvents, as these can damage the finish and electronic components.
Troubleshooting
If you encounter issues with your SMONET M9 smart deadbolt, consider the following common solutions:
- Lock not responding: Check battery levels. If low, replace batteries or use the emergency USB-C port.
- Fingerprint not recognized: Ensure your finger is clean and dry. Re-register your fingerprint if issues persist.
- Keypad not working: Verify the passcode is correct. Ensure the keypad is clean and free from debris.
- App connectivity issues: Ensure your phone's Bluetooth is on and the lock is within range. Check your WiFi connection and ensure the Hub is properly configured and connected to the internet.
- Auto-lock not engaging: Check the auto-lock settings in the app to ensure it is enabled and the timing is set correctly.
- Lock feels stiff: Ensure all screws are tightened correctly and the lock is properly aligned with the door frame. Avoid over-tightening.
For further assistance, refer to the support information provided in the Warranty and Support section.
Specifications
| Feature | Detail |
|---|---|
| Brand | SMONET |
| Model Number | M9 |
| Lock Type | Biometric, Deadbolt |
| Special Features | Auto-Lock, Fingerprint, Fob Unlock, Passcode Unlock |
| Control Method | App, Touch, Voice |
| Connectivity Protocol | Bluetooth, Wi-Fi |
| Smart Home Compatibility | Smart Home Compatible (Alexa) |
| Material | Metal |
| Item Dimensions (L x W x H) | 14 x 10 x 3 inches |
| Color | Black |
| Unit Count | 1.0 Count |
Warranty and Support
SMONET offers a 30-day purchase policy and a one-year quality assurance for the M9 WiFi Smart Deadbolt. If you experience any issues or require assistance, please contact SMONET customer service. Our professional customer service team is available to ensure your satisfaction and resolve any concerns promptly.
For support, please visit the official SMONET website or contact the retailer where the product was purchased.