1. Introduction
This manual provides comprehensive instructions for the assembly, operation, and maintenance of your KOKEBREN 9-Drawer Fabric Dresser with Charging Station. Please read this manual thoroughly before assembly and use to ensure proper function and safety. Keep this manual for future reference.

Image 1.1: Front view of the KOKEBREN 9-Drawer Fabric Dresser with Charging Station.
2. Safety Information
Adhere to the following safety guidelines to prevent injury or damage to the product.
- Anti-Tipping Device: Always secure the dresser to the wall using the provided anti-tipping devices. This prevents accidental tipping, which can cause serious injury.
- Hardware Checks: Regularly inspect all hardware and tighten screws as needed to maintain structural integrity and stability.
- Adjustable Feet: When adjusting the feet for leveling, do so gradually. Make small increments to achieve balance without over-tightening.
- Weight Capacity: Do not exceed the maximum weight capacity of 100 lbs for the top surface.

Image 2.1: Detail showing the anti-tip device and sturdy frame construction.
3. Package Contents
Verify that all components are present before beginning assembly. If any parts are missing or damaged, contact customer support.
- Dresser Frame and Components (x1)
- Fabric Drawers (x9)
- Hardware Bag (x1) - Contains screws, bolts, anti-tip kit, etc.
- Assembly Guide (x1)
4. Specifications
Key product specifications are listed below:
| Brand | KOKEBREN |
| Model Number | QAZ-PHO_12DBXUOA-l61NQ8W |
| Product Dimensions (Overall) | 39" (L) x 11.8" (W) x 33.9" (H) |
| Weight Capacity (Top Surface) | 100 lbs |
| Material | Steel Frame, Fabric Drawers (3mm MDF, Non-woven fabric) |
| Color | White |
| Charging Station | 2 AC Outlets (125V/12A), 2 USB-A Ports, 5-Foot Power Cord, UL Certified |
| Item Weight | 34.6 pounds |
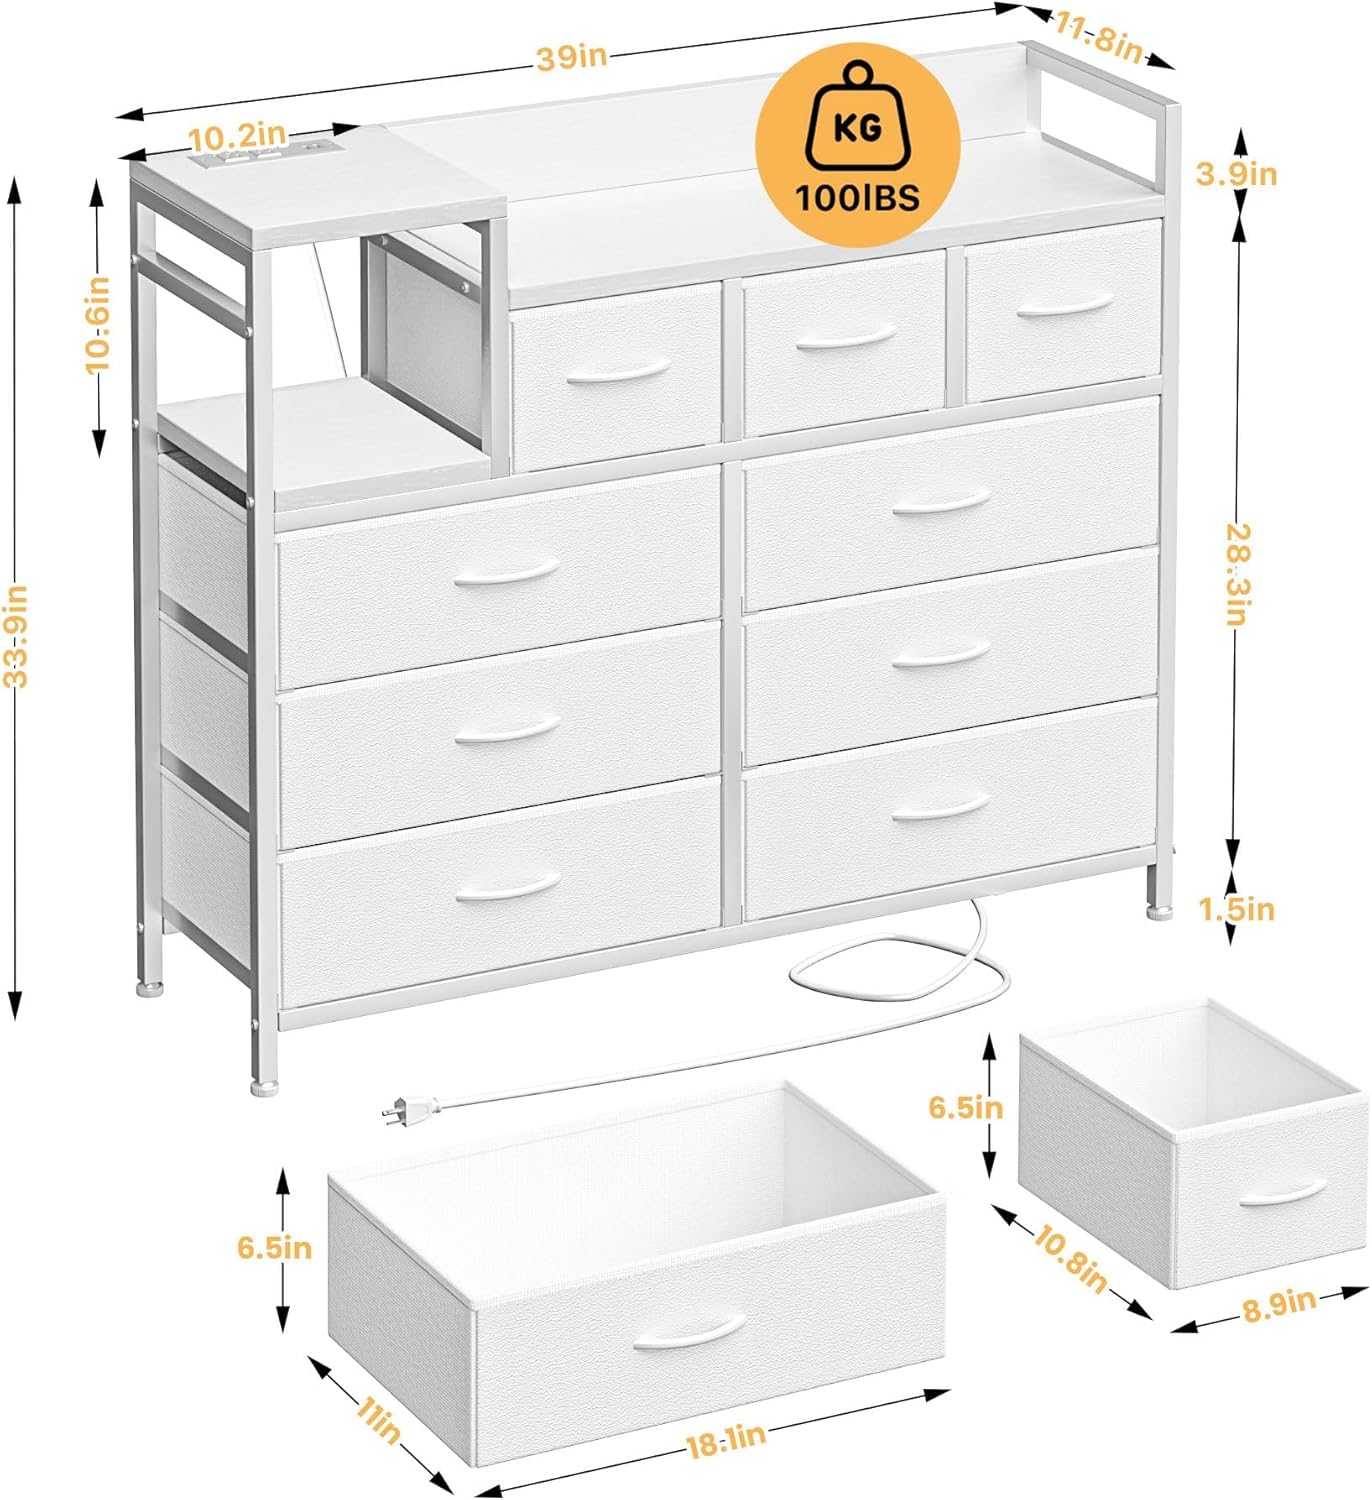
Image 4.1: Detailed dimensions and weight capacity of the dresser.
5. Setup (Assembly Instructions)
Assembly is required for this product. Refer to the included Assembly Guide for detailed, step-by-step instructions and diagrams. Ensure you have adequate space and the necessary tools (usually a screwdriver, often included) before starting.
- Unpack Components: Carefully remove all parts from the packaging and lay them out on a clean, soft surface to prevent scratches. Verify against the parts list in the Assembly Guide.
- Assemble Frame: Follow the instructions to connect the steel frame components using the provided hardware. Ensure all connections are secure but do not overtighten until the frame is fully assembled.
- Install Top and Shelves: Attach the wood tabletop and any internal shelves as directed in the guide.
- Insert Drawers: Unfold the fabric drawers and insert the bottom panels. Place them into the designated slots in the dresser frame.
- Attach Anti-Tipping Device: Securely attach the anti-tipping device to the back of the dresser and to a wall stud, following the specific instructions provided.
- Level the Dresser: Adjust the leveling feet at the bottom of the dresser to ensure it stands stable and level on your floor.

Image 5.1: Close-up of key components: high-quality fabric, adjustable feet, anti-tilt device, and sturdy steel frame.
6. Operating Instructions
6.1 Using the Charging Station
The integrated charging station is located on the top surface of the dresser. To use it:
- Ensure the dresser's power cord is securely plugged into a functional wall outlet.
- Connect your devices to the two AC outlets (125V/12A) or the two USB-A ports.
- The charging station is UL certified for safety.

Image 6.1: Detail of the charging station featuring two AC outlets and two USB-A ports.
6.2 Using the Drawers and Storage
The dresser features three small and six large fabric drawers for organizing various items. The wood tabletop and an open shelf provide additional display and storage space.
- Fabric Drawers: Gently pull the handles to open and push to close. Avoid overloading drawers to ensure smooth operation and prevent damage.
- Top Surface: Use the wood tabletop for lamps, books, or decorative items, ensuring the total weight does not exceed 100 lbs.
- Open Shelf: Utilize the open shelf for easy access items or smaller decorative pieces.
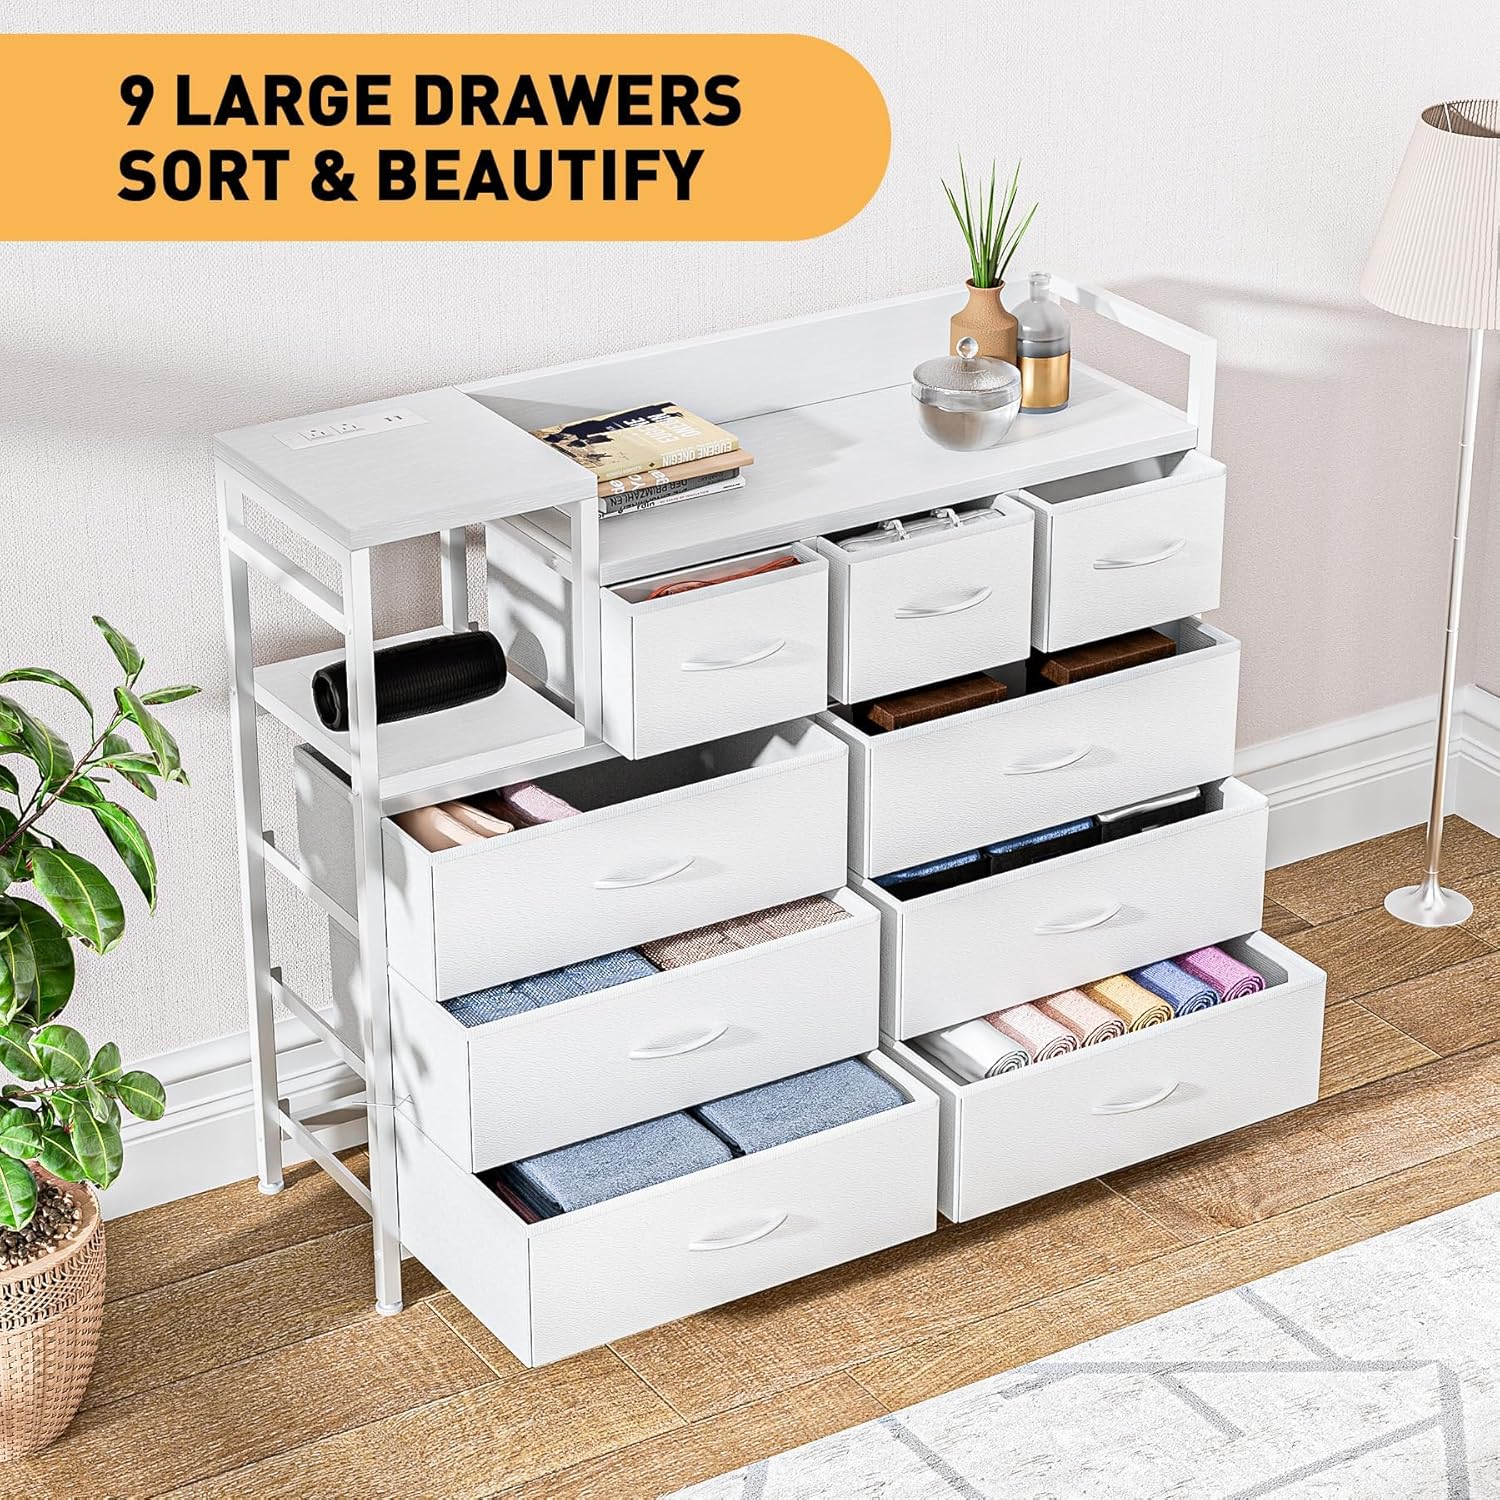
Image 6.2: The dresser with several drawers open, demonstrating storage capacity.
7. Maintenance
Regular maintenance helps prolong the life and appearance of your dresser.
- Cleaning the Frame: Wipe the steel frame and wood surfaces with a soft, damp cloth. Avoid harsh chemicals or abrasive cleaners.
- Cleaning Fabric Drawers: For light cleaning, use a lint roller or a soft brush. For stains, spot clean with a mild detergent and a damp cloth, then air dry completely. Do not machine wash the fabric drawers.
- Hardware Inspection: Periodically check all screws and bolts for tightness. Retighten as necessary to maintain stability.
8. Troubleshooting
If you encounter issues with your dresser, refer to the following common solutions:
- Dresser is Unstable/Wobbly:
- Ensure all assembly screws are tightened.
- Adjust the leveling feet at the bottom of the dresser to compensate for uneven floors.
- Verify the anti-tipping device is correctly installed and secured to the wall.
- Drawers Do Not Slide Smoothly:
- Check if drawers are overloaded. Redistribute contents if necessary.
- Ensure the fabric drawers are fully unfolded and the bottom panels are correctly inserted.
- Verify the dresser frame is assembled squarely and not twisted.
- Charging Station Not Working:
- Confirm the dresser's main power cord is firmly plugged into a live wall outlet.
- Test the wall outlet with another device to ensure it is functional.
- Check if the device you are trying to charge is working correctly.
9. Warranty and Support
Specific warranty details for the KOKEBREN 9-Drawer Fabric Dresser with Charging Station are not provided in this manual. For warranty information, technical support, or to order replacement parts, please contact KOKEBREN customer service directly through their official website or the retailer from whom the product was purchased. Please have your model number (QAZ-PHO_12DBXUOA-l61NQ8W) and purchase date available when contacting support.