
eOUTIL DL905
eOUTIL DL905 Digital Magnetic Angle Gauge with Laser Instruction Manual
Model: DL905
Introduction
The eOUTIL DL905 is a versatile 3-in-1 digital tool combining a digital level, angle gauge, and laser line functionality. Designed for precision, it assists in various tasks such as woodworking, framing, picture hanging, and general renovation projects. This manual provides detailed instructions for the safe and effective use of your device.
Safety Information
Please read and understand all safety warnings and instructions before using this product. Failure to follow these instructions may result in electric shock, fire, or serious injury.
- Laser Safety: This device emits a Class 2 laser. Do not stare directly into the laser beam. Avoid direct eye exposure.
- Operating Environment: Use the device in a clean, dry environment. Avoid exposure to dust, moisture, or extreme temperatures.
- Battery Safety: Use only the specified charging method. Do not disassemble, puncture, or expose the battery to high temperatures.
- Maintenance: Do not attempt to modify or repair the device yourself. Refer all servicing to qualified personnel.
- Children: Keep the device out of reach of children.
Product Overview
Key Features
- 3-in-1 Functionality: Combines digital level, angle gauge, and laser line.
- Magnetic Base: Strong magnets on four sides for stable attachment to metal surfaces.
- High Accuracy: Measures 0–360° with ±0.2° accuracy and 0.05° resolution.
- Dual Measurement Modes: Absolute and relative measurement.
- Auto-Rotating Backlit Display: Bright LCD screen with auto-reverse for easy reading.
- Rechargeable: Built-in 400mAh battery with USB-C charging.
Device Components
Familiarize yourself with the components of your eOUTIL DL905 device:

Image: The eOUTIL DL905 Digital Magnetic Angle Gauge, showing its orange and black casing, digital display, and laser apertures.

Image: Detailed view of the eOUTIL DL905 display and buttons with numbered callouts for each component.
| No. | Component | Description |
|---|---|---|
| 1 | Angle 0-90°/0-165° | Indicates the measured angle range. |
| 2 | Data Hold | Indicates when the current reading is held. |
| 3 | Zero Indicator | Shows when the device is zeroed. |
| 4 | Unit | Displays the current measurement unit (e.g., mm/m, IN/FT, %). |
| 5 | Measured Value | The primary digital display for angle or level readings. |
| 6 | Low Battery Indicator | Alerts when the battery level is low. |
| 7 | Deviation Indicator | Shows deviation when testing in IN/FT unit. |
| 8 | Angle Position Indicator | Visual representation of the angle. |
| 9 | Audible Buzzer | Indicates audible alerts (e.g., at 0°, 90°, 180°). |
| 10 | Laser Apertures | Points from which the laser beams are emitted. |
| 11 | Power / Data Hold Button | Press to power on/off, short press to hold data. |
| 12 | Mode Setting Unit & Audible Buzzer ON/OFF Button | Changes measurement units and toggles buzzer. |
| 13 | 0-90°/0-180° Range Switch & ZERO Function Button | Switches angle measurement range and sets zero point. |
| 14 | Laser ON/OFF Button | Activates or deactivates the laser function. |
| 15 | Magnetic V-groove Base & Backside | Magnetic surfaces for attachment to ferrous materials, including a V-groove for cylindrical objects. |
Setup
Charging the Device
The eOUTIL DL905 comes with a built-in rechargeable 400mAh Lithium Polymer battery. Before first use, ensure the device is fully charged.
- Locate the USB-C charging port on the side of the device.
- Connect the provided USB-C cable to the device and the other end to a standard USB power adapter (not included) or a computer USB port.
- The charging indicator on the display will show charging status. A full charge typically takes a few hours.
- Disconnect the cable once charging is complete.

Image: The eOUTIL DL905 device connected to a USB-C charging cable, illustrating the charging port location.
Initial Power On
Press and hold the Power / Data Hold button (11) for approximately 2 seconds to turn on the device. The backlit LCD display will illuminate.
Operating Instructions
Power On/Off
- To power on, press and hold the Power / Data Hold button (11) for 2 seconds.
- To power off, press and hold the Power / Data Hold button (11) for 2 seconds. The device will also automatically power off after a period of inactivity to conserve battery.
Basic Angle Measurement
Place the base of the device firmly on the surface you wish to measure. The angle will be displayed on the LCD screen.

Image: Series of four illustrations demonstrating how to measure angles by placing the device on different inclined surfaces, showing the corresponding angle readings on the display.
Absolute and Relative Measurement Modes
- Absolute Measurement Mode: This mode measures the angle relative to a true horizontal plane (0°). This is the default mode upon power-on.
- Relative Measurement Mode: To measure the angle difference between two surfaces, place the device on the first surface and press the 0-90°/0-180° Range Switch & ZERO Function button (13) to set the current position as 0°. Then, move the device to the second surface; the display will show the relative angle.
Zeroing the Device
To set the current surface as the reference 0° (relative measurement), place the device on the desired reference surface and short press the 0-90°/0-180° Range Switch & ZERO Function button (13). The display will show '0.00°'.
Using the Laser Function
The device features three laser line modes: horizontal, vertical, and cross line.
- Press the Laser ON/OFF button (14) to activate the laser.
- Each subsequent short press of the Laser ON/OFF button (14) will cycle through the laser modes: Horizontal Line > Vertical Line > Cross Line > Laser Off.
- Position the device to project the desired laser line onto your working surface.

Image: A user operating the eOUTIL DL905, demonstrating the projection of horizontal, vertical, and cross laser lines on a wall.
Using the Magnetic Base
The strong magnetic base (15) allows for hands-free operation on ferrous metal surfaces. The V-groove design on the bottom is specifically for attaching to cylindrical objects.
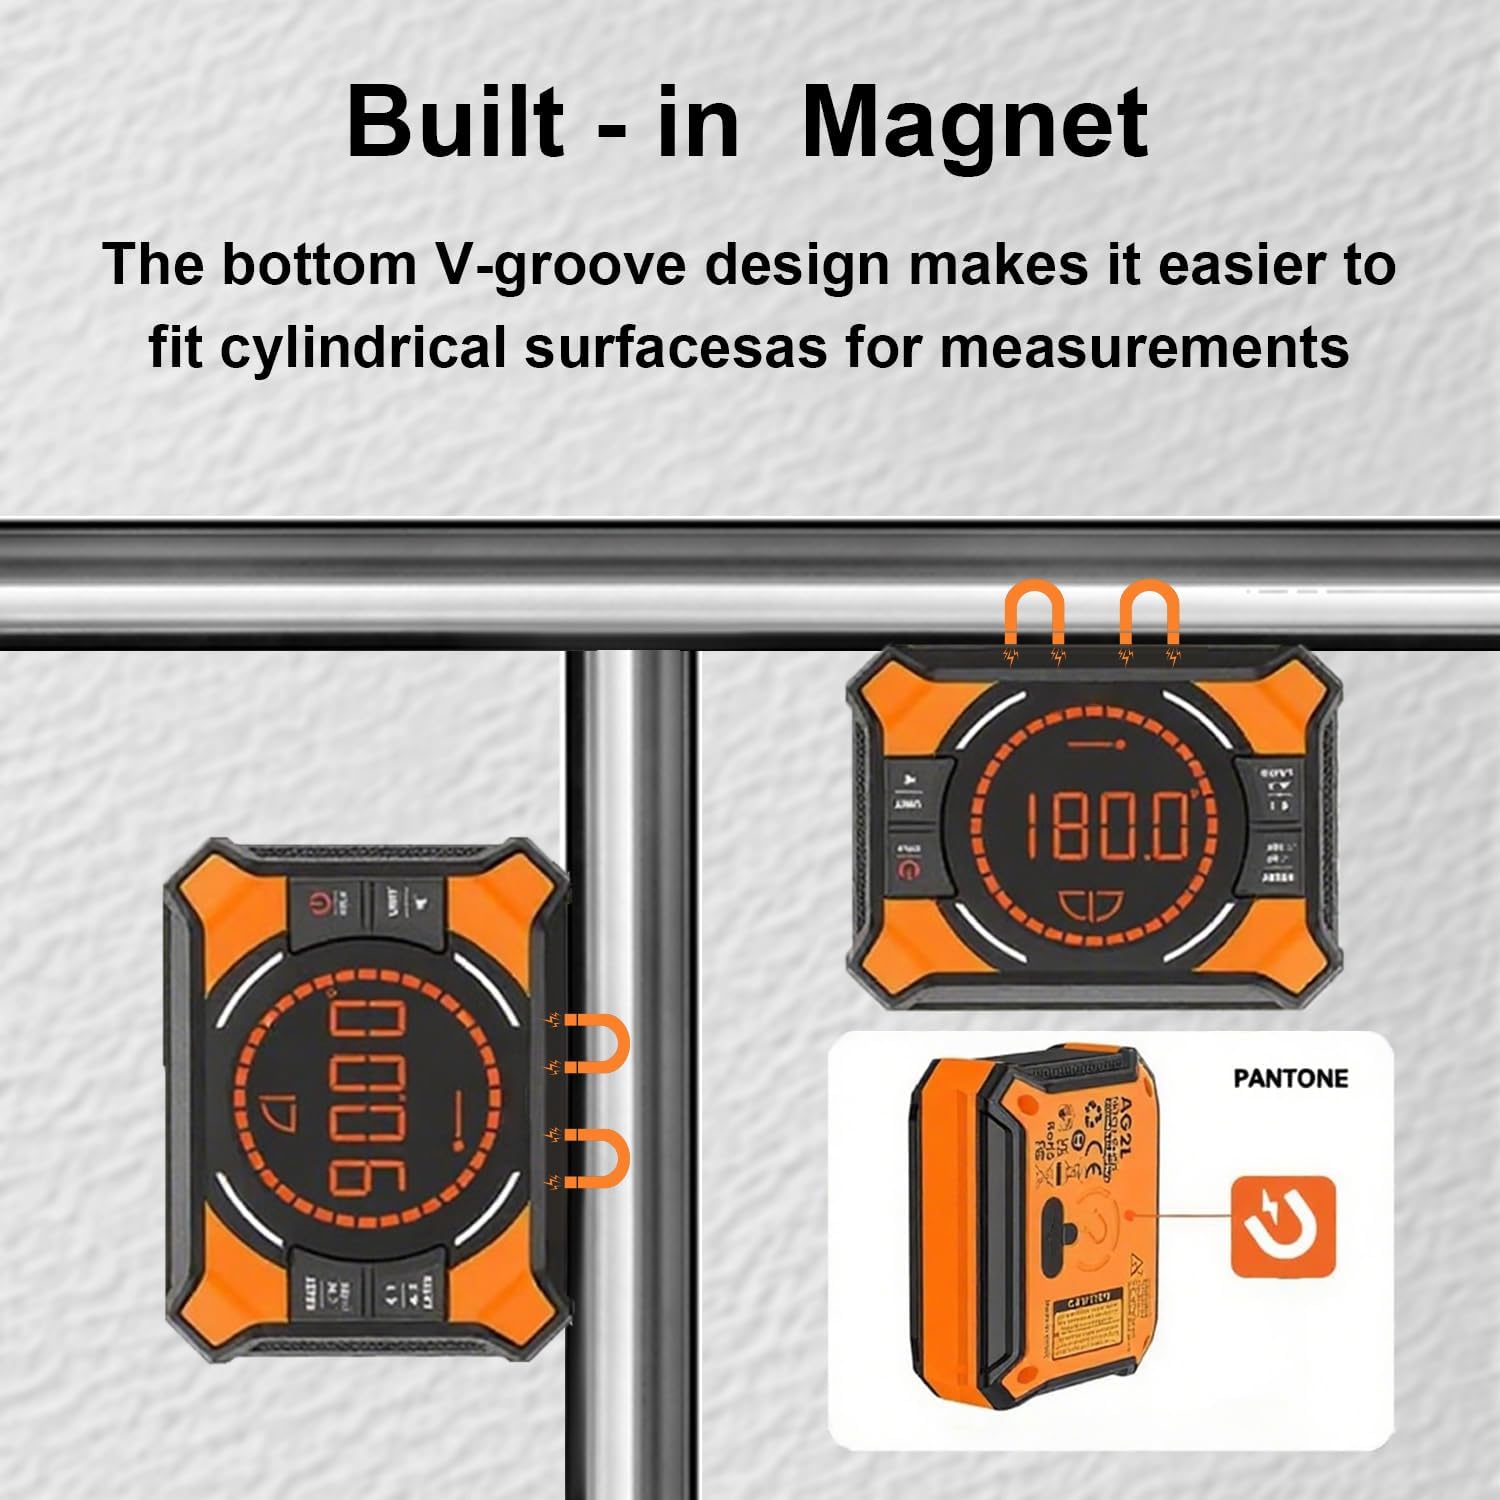
Image: The eOUTIL DL905 attached magnetically to a metal railing, demonstrating its secure hold and V-groove design for cylindrical surfaces.
Hold Function
To freeze the current reading on the display, short press the Power / Data Hold button (11) while the device is on. The 'HOLD' indicator (2) will appear. Press it again to release the hold function.
Unit Conversion
Short press the Mode Setting Unit & Audible Buzzer ON/OFF button (12) to cycle through different measurement units: degrees (°), mm/m, IN/FT, and percentage (%).
Maintenance
- Cleaning: Wipe the device with a soft, dry cloth. Do not use abrasive cleaners or solvents.
- Storage: Store the device in a cool, dry place, away from direct sunlight and extreme temperatures. If storing for extended periods, ensure the battery is partially charged.
- Battery Care: Recharge the battery regularly, even if not in use, to maintain its lifespan. Avoid fully discharging the battery frequently.
Troubleshooting
| Problem | Possible Cause | Solution |
|---|---|---|
| Device does not power on. | Low battery. | Charge the device using the provided USB-C cable. |
| Inaccurate readings. | Device not properly zeroed; surface not flat. | Ensure the device is placed on a stable, flat surface. Re-zero the device if using relative measurement. |
| Laser does not activate. | Laser function is off; low battery. | Press the Laser ON/OFF button (14). Check battery level and recharge if necessary. |
| Display is dim or flickering. | Low battery. | Charge the device. |
Specifications
| Feature | Specification |
|---|---|
| Model Number | DL905 |
| Measurement Range | 0-360° |
| Accuracy | ±0.2° |
| Resolution | 0.05° |
| Battery Type | Rechargeable Lithium Polymer (400mAh) |
| Charging Port | USB-C |
| Laser Class | Class 2 |
| Product Dimensions | 3.36 x 2.56 x 0.04 inches |
| Item Weight | 5.3 ounces (0.15 Kilograms) |
| Operation Mode | Manual |
Warranty and Support
eOUTIL products are manufactured to high-quality standards. For information regarding warranty coverage, technical support, or service inquiries, please refer to the warranty card included with your purchase or contact eOUTIL customer service through the retailer where the product was purchased.
Ask a question about this manual
Ask about setup, troubleshooting, compatibility, parts, safety, or missing instructions. Manuals+ will review the question and use this page’s manual context to help answer it.