Criditpid Charbroil 463722313
Criditpid Grill Replacement Parts
Instruction Manual
Introduction
This manual provides detailed instructions for the installation, operation, and maintenance of your Criditpid Grill Replacement Parts. These parts are designed to restore the performance of your compatible Charbroil grill. Please read this manual thoroughly before proceeding with installation or use.
Compatibility
These replacement parts are compatible with the following Charbroil Grill Models:
- Charbroil 463722313
- Charbroil 463722314
- Charbroil 463742111
- Charbroil 463750914
- Charbroil 463722315
- Charbroil 463770915
Before purchasing and installing, please confirm the size and applicable model of your old parts and compare them with the specifications provided in this manual to ensure correct fitment.
Product Components
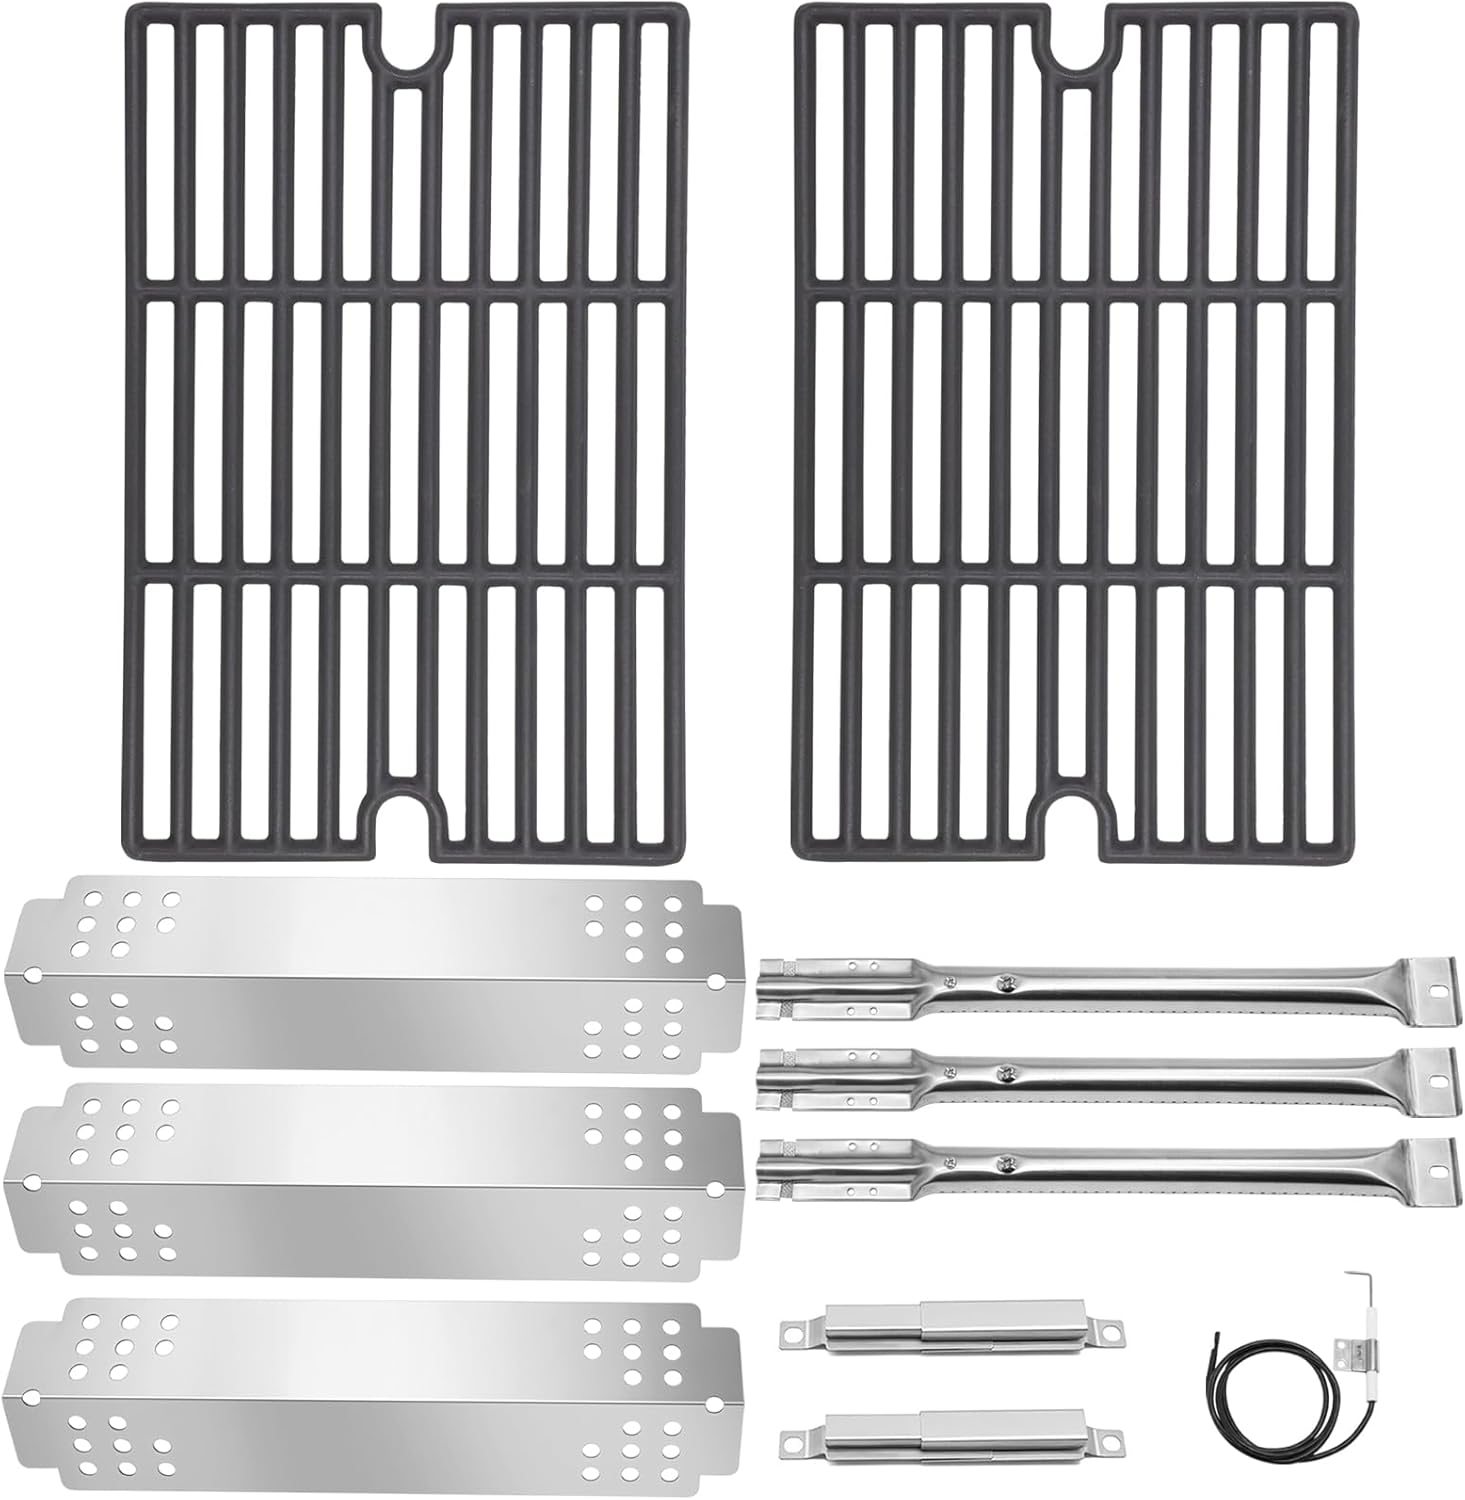
Your Criditpid Grill Replacement Parts package includes the following components:
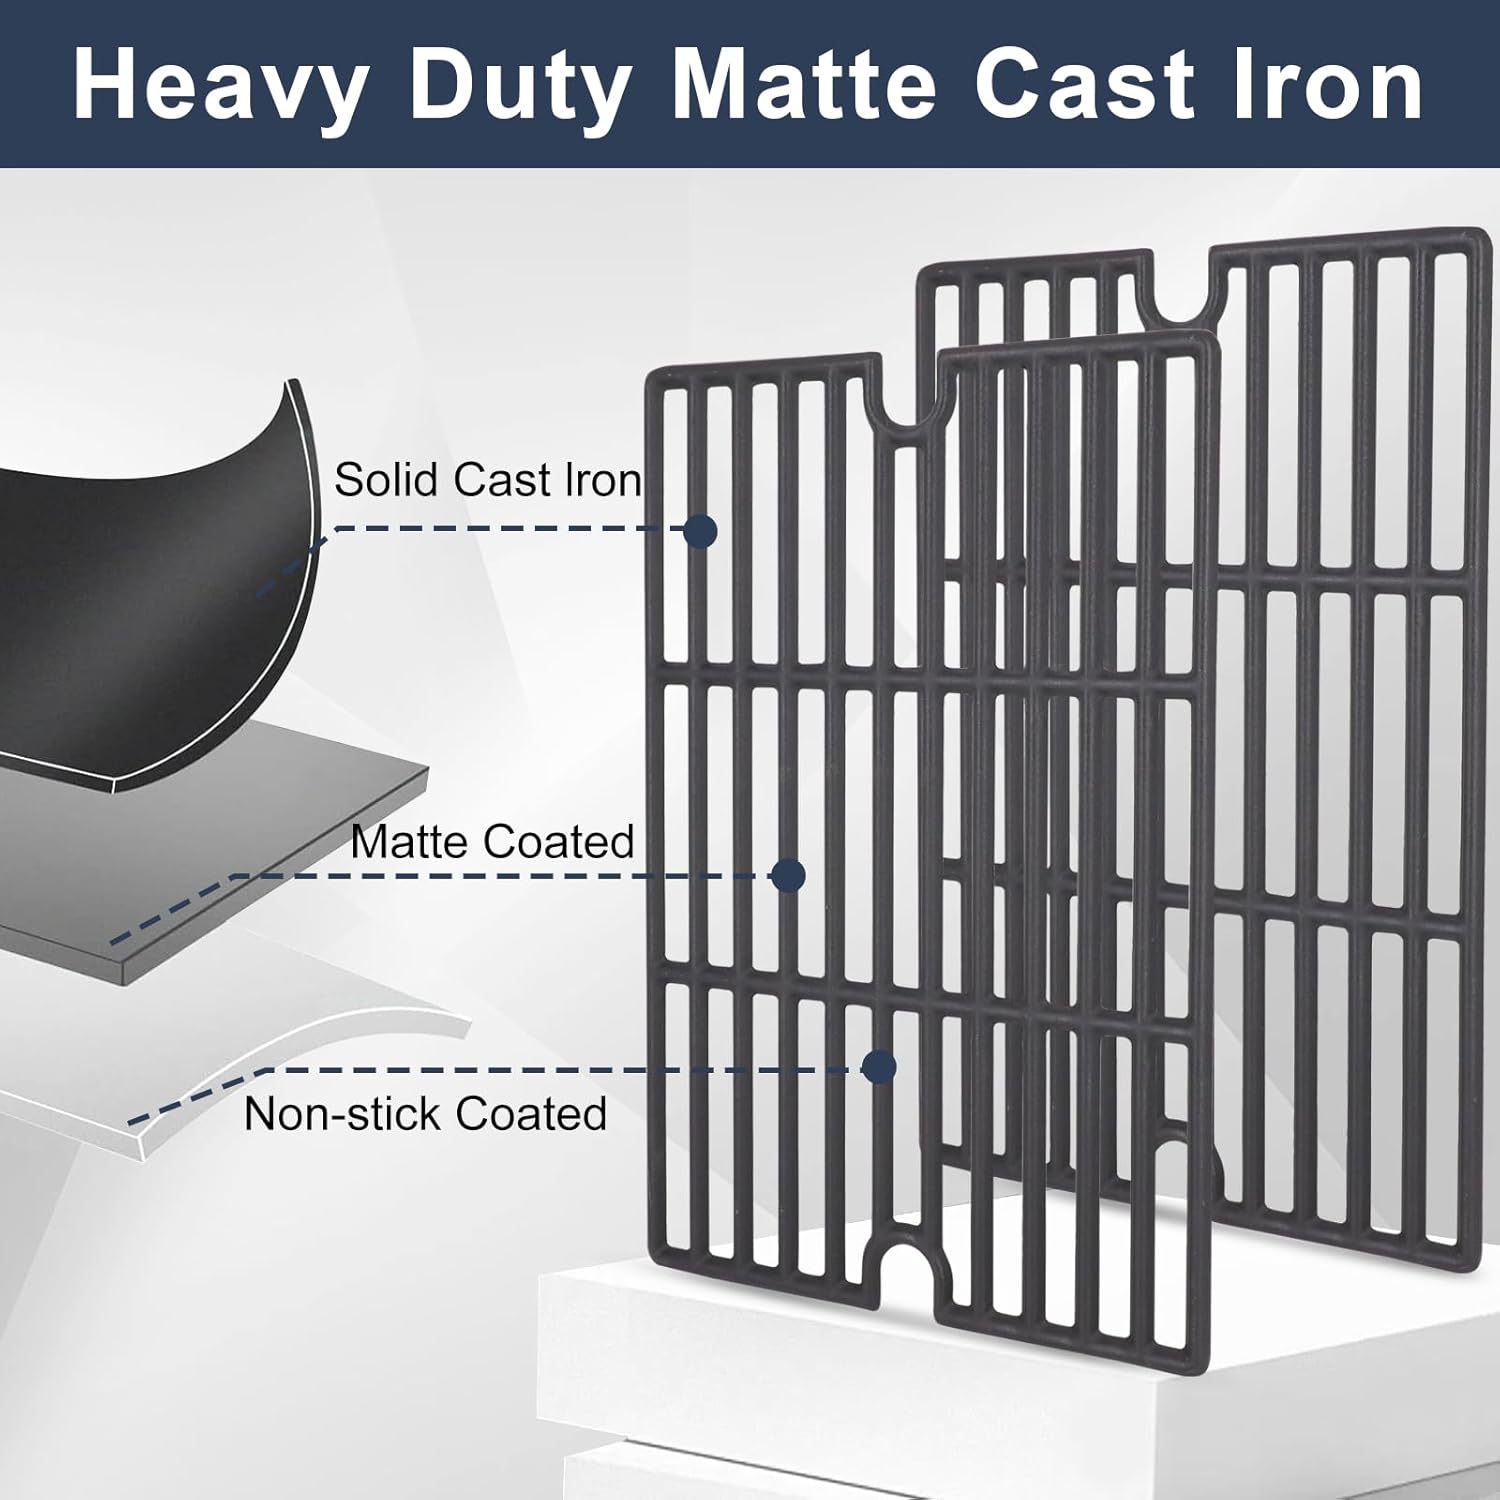
- 2-Pack Heavy Matte Cast Iron Cooking Grates
- 3-Pack Stainless Steel Heat Plates
- 3-Pack Stainless Steel Burner Tubes
- 2-Pack Stainless Steel Adjustable Crossover Tubes
- 1-Pack Igniters
Specifications
| Component | Dimension | Material | Notes |
|---|---|---|---|
| Heat Plate | 15 1/16" x 3 15/16" | Stainless Steel | Replaces G312-0205-W1 |
| Burner Tube | 14 7/8" x 1" | Stainless Steel | |
| Crossover Tubes | Adjusts from 5" to 9" | Stainless Steel | |
| Cooking Grate (each) | 16 1/2" x 10 3/4" | Heavy Matte Cast Iron | Total cooking area: 16 1/2" x 21 1/2". Models G312-2102-W1A, G312-0K02-W1 |


Setup and Installation
Safety First: Always ensure your grill is completely cool and disconnected from its fuel source (propane tank or natural gas line) before attempting any installation or maintenance.
- Remove Old Components: Carefully remove the existing cooking grates, heat plates (flame tamers), burner tubes, and crossover tubes from your grill. Note their original positions for reference.
- Clean Grill Interior: While the components are removed, it is an opportune time to clean the interior of your grill, removing any grease, food debris, or rust.
- Install New Burner Tubes: Place the new stainless steel burner tubes into their designated slots. Ensure they are properly seated and aligned with the gas valves at one end and the support at the other.
- Install Crossover Tubes: Connect the adjustable crossover tubes between the burner tubes. Adjust their length as needed to bridge the gap between burners, ensuring a secure fit.
- Install Heat Plates: Position the new stainless steel heat plates directly over the burner tubes. These should rest on the grill's internal supports, shielding the burners and distributing heat.
- Install Cooking Grates: Carefully place the heavy matte cast iron cooking grates onto the grill's grate supports. Ensure they are stable and cover the entire cooking surface.
- Install Igniters (if applicable): If your kit includes new igniters, follow your grill's specific instructions for replacing them, ensuring proper connection to the ignition module.
- Leak Test: After reassembling, reconnect the fuel source and perform a leak test on all gas connections before lighting the grill. Refer to your grill's original manual for proper leak testing procedures.
Operating
With the new Criditpid replacement parts installed, your grill should operate with improved efficiency and heat distribution.
- Preheating: Allow your grill to preheat for 10-15 minutes with all burners on high before placing food on the grates. This ensures the cast iron grates reach optimal searing temperature.
- Heat Distribution: The new stainless steel heat plates are designed to distribute heat evenly across the cooking surface and reduce flare-ups.
- Searing: The heavy matte cast iron grates are excellent for searing, creating prominent grill marks and locking in flavors.


Maintenance
Regular maintenance will extend the life of your grill replacement parts and ensure optimal performance.
- Cooking Grates: After each use, clean the cast iron grates with a grill brush while they are still warm. For deeper cleaning, remove them and wash with warm soapy water, then dry thoroughly to prevent rust. Lightly oil the grates after cleaning.
- Heat Plates: Periodically remove and clean the stainless steel heat plates. Scrape off any accumulated grease or debris. They can be washed with warm soapy water and dried.
- Burner Tubes and Crossover Tubes: Inspect burner tubes for clogged ports. Use a wire brush or a small wire to clear any obstructions. Ensure crossover tubes are free of debris.
- General Cleaning: Keep the interior of your grill clean to prevent grease buildup, which can lead to flare-ups and corrosion.
Troubleshooting
If you encounter issues after installing your new parts, consider the following common solutions:
- Uneven Heating: Ensure burner tubes are properly aligned and their ports are clear. Check that heat plates are correctly positioned over the burners.
- Low Flame/No Flame: Verify that the gas supply is adequate and connections are secure. Check burner tube ports for clogs. Ensure igniters are sparking correctly.
- Excessive Flare-ups: This can be caused by excessive grease buildup. Clean the heat plates and the grill interior thoroughly. Ensure heat plates are properly installed to deflect grease.
- Parts Don't Fit: Double-check the dimensions provided in the specifications section against your grill's requirements. Confirm your grill model is listed in the compatibility section.
Warranty and Support
Criditpid products are designed for durability and performance. For any questions, concerns, or assistance with your grill replacement parts, please contact Criditpid customer service. We offer breakage assurance in case of any defective grill parts.
For additional support or to inquire about protection plans, please refer to the seller's information on the product purchase page.