1. Introduction
This manual provides detailed instructions for the setup, operation, and maintenance of your LICHI Indoor Outdoor Thermometer Wireless Weather Station (Model: LC803). This device is designed to monitor indoor and outdoor temperature and humidity, provide weather forecasts, and offer additional features such as time display and an alarm clock.
2. What's in the Box
- 1 x Indoor Thermometer Main Unit
- 1 x Outdoor Remote Sensor
- 1 x Instruction Manual
3. Product Overview
The LICHI Wireless Weather Station consists of a main display unit and a remote outdoor sensor. The main unit features a clear LCD display for indoor and outdoor readings, while the remote sensor transmits outdoor data wirelessly.

Image: The main display unit and the remote sensor, illustrating their compact design.
Key Features:
- High Precision Sensors: Equipped with advanced sensors for accurate temperature and humidity measurements.
- Wireless Transmission: Reliable wireless technology with a transmission distance of up to 330ft (100m) in open spaces.
- Multifunctional Display: Features time, weather forecast icons, barometric pressure, calendar, and temperature/humidity max/min values.
- Backlight Display: A 4-inch LCD display with a backlight button for clear visibility in various lighting conditions.
- Expandable: Supports up to 3 remote sensors (one sensor included).

Image: A close-up view of the main unit's 4-inch LCD display, highlighting its size.
4. Setup
4.1 Battery Installation
- Main Unit: Open the battery compartment on the back of the main unit. Insert 3 AAA batteries (not included), ensuring correct polarity (+/-). Close the compartment.
- Remote Sensor: Open the battery compartment on the back of the remote sensor. Insert 2 AA batteries (not included), ensuring correct polarity (+/-). Close the compartment.
Note: It is recommended to insert batteries into the remote sensor first, then the main unit, to ensure proper synchronization.
4.2 Sensor Pairing
Upon battery installation, the main unit will automatically search for the remote sensor. The outdoor temperature and humidity readings should appear on the main unit's display within a few minutes. If the readings do not appear, press and hold the 'CHANNEL' button on the main unit to initiate a manual search.
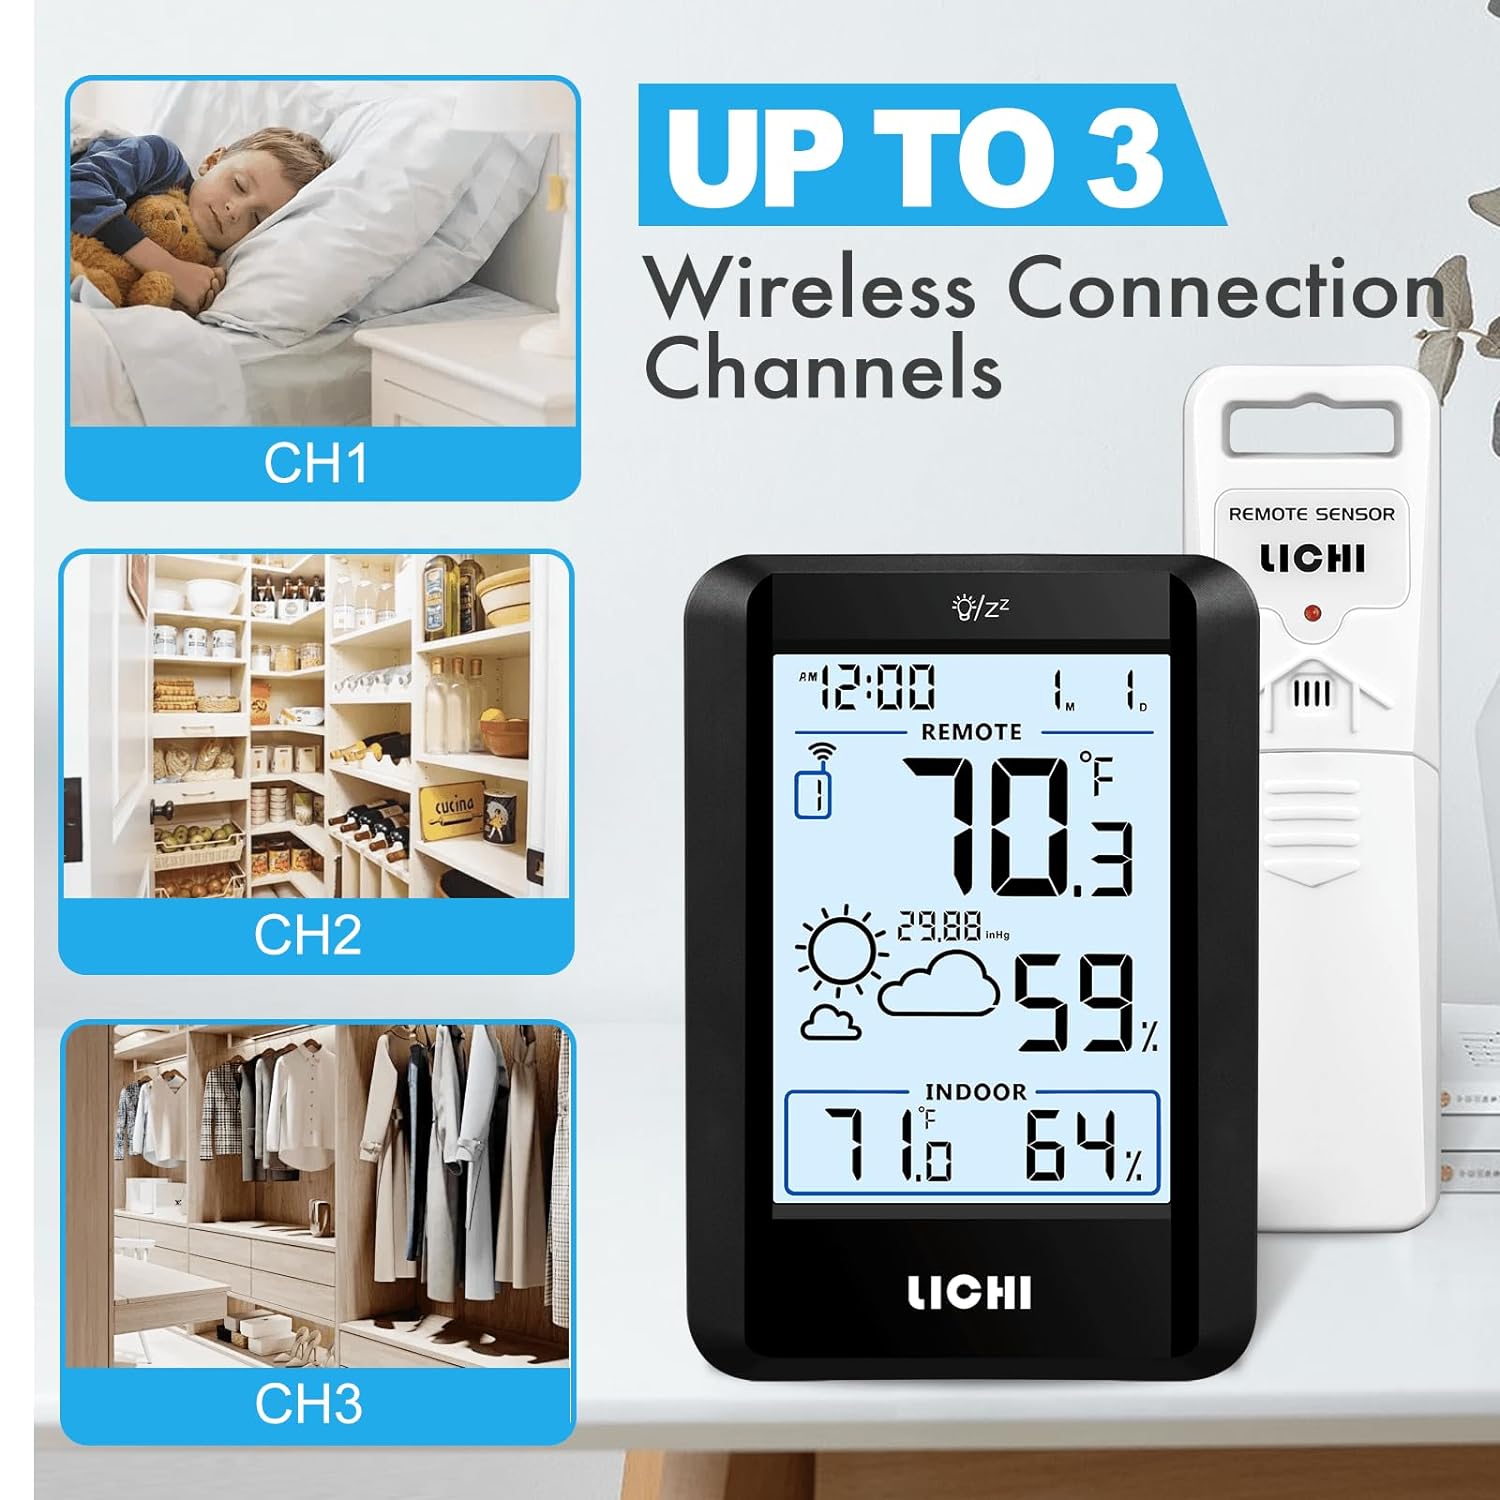
Image: The main unit's display showing options for Channel 1, Channel 2, and Channel 3, indicating multi-sensor capability.
4.3 Placement Options
The main unit can be placed on a tabletop using its foldable stand or mounted on a wall using the integrated hanging ring. The remote sensor should be placed outdoors in a shaded, dry location, protected from direct sunlight and precipitation, for accurate readings. Ensure it is within the 330ft (100m) wireless range of the main unit.

Image: The main unit demonstrating its versatility with both a tabletop stand and a wall-mount option.

Image: The main unit positioned indoors and the remote sensor placed outdoors, highlighting the 328ft/100m wireless transmission range.
5. Operating Instructions
5.1 Display Functions
- Time Display: Shows the current time in 12-hour or 24-hour format.
- Indoor/Outdoor Temperature: Displays current temperature readings for both environments.
- Indoor/Outdoor Humidity: Displays current humidity levels for both environments.
- Weather Forecast: Icons predict weather conditions for the next 12-24 hours based on barometric pressure changes.
- Barometric Pressure: Shows the current atmospheric pressure.
- Calendar: Displays the current date.
- MAX/MIN Records: Records the highest and lowest temperature and humidity values over a 24-hour period.

Image: The main unit's display featuring various weather forecast icons, such as sunny, cloudy, and rainy.
5.2 Setting the Time and Date
Refer to the specific buttons on your device (usually 'MODE' or 'SET') to enter time/date setting mode. Use 'UP'/'DOWN' buttons to adjust values and 'MODE'/'SET' to confirm and move to the next setting.
5.3 Alarm Clock and Snooze Function
The device includes an alarm clock with a snooze function. To set the alarm, typically press the 'ALARM' button, then use 'UP'/'DOWN' to set the desired time. The snooze function is usually activated by pressing the backlight/snooze button when the alarm sounds.

Image: The main unit's display indicating the alarm clock and snooze functions are active.
5.4 Backlight Activation
Press the backlight button (often located on the top of the main unit) to illuminate the display for approximately 10 seconds, improving readability in low-light conditions.

Image: A close-up of the backlight/snooze button, typically found on the top edge of the main unit.
6. Maintenance
- Cleaning: Wipe the main unit and remote sensor with a soft, damp cloth. Do not use abrasive cleaners or solvents.
- Battery Replacement: Replace batteries when the low battery indicator appears on the display to ensure continuous and accurate operation.
- Storage: If storing the device for an extended period, remove all batteries to prevent leakage.
7. Troubleshooting
- No Display: Ensure batteries are correctly installed with proper polarity and are not depleted. Replace if necessary.
- Outdoor Reading Not Displayed: Check if the remote sensor is within range of the main unit. Ensure there are no significant obstructions (e.g., thick walls, large metal objects) between the sensor and the main unit. Re-pair the sensor by pressing the 'CHANNEL' button on the main unit.
- Inaccurate Readings: Ensure the remote sensor is placed in a shaded, dry area away from direct heat sources or extreme cold. Allow time for the sensors to stabilize after initial setup or relocation.
- Intermittent Signal: Relocate the remote sensor closer to the main unit or adjust its position to minimize interference.
8. Specifications

Image: The main unit and remote sensor displayed with their physical dimensions and key accuracy specifications.
| Feature | Specification |
|---|---|
| Model Number | LC803 |
| Indoor Temperature Range | +14.2°F to +122°F |
| Outdoor Temperature Range | -40°F to +158°F |
| Humidity Range | 1% to 99% |
| Temperature Accuracy | +/-0.5°F |
| Humidity Accuracy | +/-2% |
| Wireless Transmission Range | Up to 330ft (100m) in open spaces |
| Main Unit Power Source | 3 x AAA batteries (not included) |
| Remote Sensor Power Source | 2 x AA batteries (not included) |
| Display Type | Digital LCD with Backlight |
| Product Dimensions | 5 x 3.5 x 0.98 inches (Main Unit) |
| Material | Plastic |
9. Warranty and Support
For warranty information and technical support, please refer to the contact details provided on the product packaging or the official LICHI website. Keep your purchase receipt for warranty claims.

