
SHINEOFI TLT39IU5282808L
SHINEOFI Printer Ribbon Replacement Kit User Manual
Model: TLT39IU5282808L
1. Product Overview
The SHINEOFI Printer Ribbon Replacement Kit provides high-quality, durable ribbons designed for consistent and clear printing across various applications, including office, home, retail, and restaurant environments. This kit ensures reliable performance for high-volume printing needs.
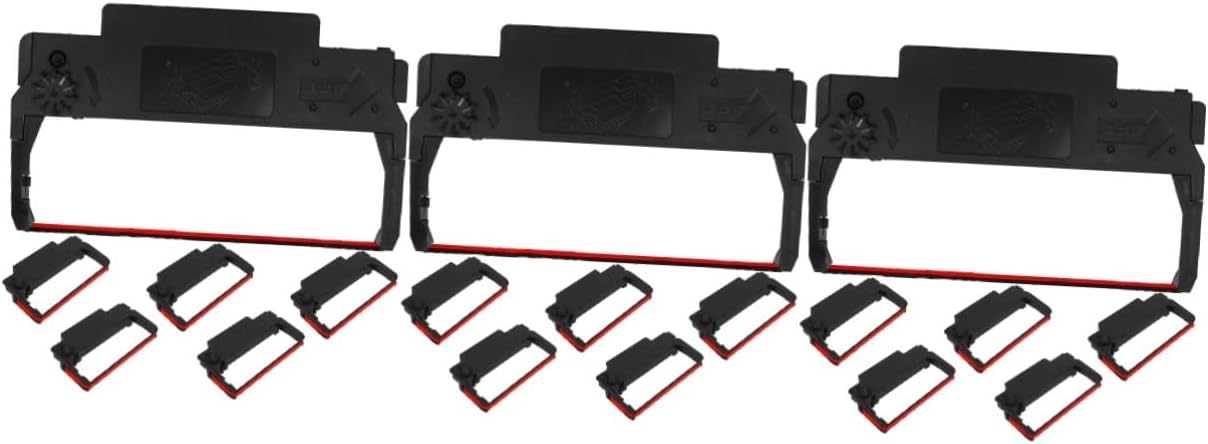
Image 1.1: Overview of the SHINEOFI Printer Ribbon Replacement Kit, showing multiple ribbon cartridges and individual ribbons.
Key Features:
- Designed for continuous printing, minimizing the need for frequent replacements.
- Constructed from durable plastic material for extended longevity.
- User-friendly design ensures easy installation and replacement.
- Delivers consistent printing results and protects your printer from damage due to uneven ribbon interface.
- Ideal for high-volume printing, providing reliable performance for various printing demands.
2. Setup and Installation
2.1. Package Contents
Verify that all components are present in your package:
- SHINEOFI Printer Ribbon Cartridges (Quantity as per purchased set, e.g., 3 sets of 6 ribbons for a total of 18 ribbons)

Image 2.1: A single SHINEOFI printer ribbon cartridge, ready for installation.
2.2. Installation Steps
Follow these steps to install the printer ribbon:
- Power Off Printer: Ensure your printer or cash register machine is turned off and unplugged before proceeding with installation.
- Locate Ribbon Compartment: Open the printer cover to access the ribbon compartment. Refer to your printer's specific manual if you are unsure of its location.
- Remove Old Ribbon (if applicable): Carefully remove the used ribbon cartridge. Dispose of it responsibly.
- Unpack New Ribbon: Remove the new SHINEOFI ribbon cartridge from its packaging. Avoid touching the ribbon itself to prevent contamination.
- Insert New Ribbon: Align the new ribbon cartridge with the guides in the printer's ribbon compartment. Gently push it into place until it clicks or seats firmly. Ensure the ribbon is properly threaded through any guides or rollers as per your printer's design.
- Close Cover: Close the printer cover securely.
- Power On Printer: Plug in and power on your printer.

Image 2.2: Proper handling and insertion of the ribbon cartridge during installation.
3. Operating Instructions
Once the ribbon is installed, the printer is ready for operation. The SHINEOFI ribbon is designed to provide clear and consistent output for various printing tasks.
3.1. Printing Quality
The high-quality ink and durable ribbon material ensure sharp, legible prints without smudges or streaks. For optimal results, ensure your printer's settings are configured correctly for the type of paper being used.

Image 3.1: Example of clear and consistent printing results achieved with the SHINEOFI ribbon.
3.2. High-Volume Use
These ribbons are engineered for high-volume printing environments, offering reliable performance and extended lifespan, reducing the frequency of ribbon changes.
4. Maintenance
Proper maintenance can extend the life of your printer and ensure consistent print quality.
4.1. Ribbon Storage
- Store unused ribbons in their original sealed packaging in a cool, dry place away from direct sunlight.
- Avoid extreme temperatures and humidity, which can affect ribbon performance.
4.2. Printer Cleaning
- Regularly clean the printer's interior, especially around the print head and ribbon path, to prevent dust and debris buildup.
- Use a soft, lint-free cloth and a mild cleaning solution suitable for electronics. Do not spray cleaners directly into the printer.
5. Troubleshooting
If you encounter issues, refer to the table below for common problems and their solutions.
| Problem | Possible Cause | Solution |
|---|---|---|
| Faint or faded print | Ribbon is running out of ink or improperly installed. | Replace the ribbon cartridge. Ensure it is seated correctly. |
| Smudged or blurry print | Ribbon is not tensioned correctly, or print head is dirty. | Re-install the ribbon, ensuring proper tension. Clean the print head according to your printer's manual. |
| Ribbon jams | Improper installation or foreign object in ribbon path. | Power off printer, carefully remove the ribbon, check for obstructions, and re-install. |
| Printer not recognizing ribbon | Ribbon not fully seated or incompatible ribbon. | Ensure the ribbon is fully inserted. Verify the ribbon is compatible with your printer model. |
6. Specifications
Detailed specifications for the SHINEOFI Printer Ribbon Replacement Kit.

Image 6.1: Dimensions of the SHINEOFI Printer Ribbon Cartridge.
| Attribute | Detail |
|---|---|
| Brand | SHINEOFI |
| Model Number | TLT39IU5282808L |
| Product Dimensions | 12.1 x 7.5 x 0.1 cm (Ribbon only); 12.1 x 7.5 x 1.5 cm (Cartridge) |
| Item Weight | 750 Grams (for the 3-set kit) |
| Material Type | Plastic |
| Number of Items | 3 (sets, each containing multiple ribbons) |
| Manufacturer | SHINEOFI |
| Date First Available | 24 April 2025 |
Ask a question about this manual
Ask about setup, troubleshooting, compatibility, parts, safety, or missing instructions. Manuals+ will review the question and use this page’s manual context to help answer it.