CO-Z SGO-1400-HL&AGO-LT00-0Z
CO-Z Automatic Gate Opener User Manual
Model: SGO-1400-HL&AGO-LT00-0Z
Brand: CO-Z
1. Introduction
This manual provides detailed instructions for the installation, operation, and maintenance of your CO-Z Automatic Gate Opener. Designed for sliding gates up to 40 feet long and weighing up to 1400 pounds, this system offers convenient and secure access control for your property. It features HomeLink compatibility, multiple remote control support, and advanced safety features.
Please read this manual thoroughly before installation and operation to ensure proper function and safety.
2. Safety Information
WARNING: Improper installation or use can lead to serious injury or death. Always follow all instructions and safety warnings.
- Keep the area around the gate clear of obstructions and people, especially children and pets, during gate operation.
- Do not allow children to operate or play with the gate opener controls.
- Ensure all safety devices, such as infrared sensors, are properly installed and functioning before operating the gate.
- Disconnect power to the gate opener before performing any maintenance or repairs.
- Only qualified personnel should perform electrical wiring. Ensure all wiring complies with local electrical codes.
- Never attempt to stop a moving gate.
- Regularly inspect the gate and opener for signs of wear, damage, or misalignment.
3. Components List
Verify that all components are present and undamaged before beginning installation.

Image Description: This image displays the complete set of components included with the CO-Z Automatic Gate Opener. Visible items include the main gate opener motor unit mounted on a sturdy base, three remote controls, two infrared safety sensors, various mounting brackets and U-bolts, and multiple sections of #41 gate chain with connecting links. Also shown are keys for manual release and other small hardware pieces.
- Main Gate Opener Unit
- Remote Controls (x2)
- Infrared Safety Sensors (Pair)
- Mounting Base and Hardware
- #41 Gate Chain (multiple sections)
- Chain Connecting Links
- Manual Release Keys
- Installation Manual (this document)
4. Setup and Installation
Proper installation is critical for the safe and efficient operation of your gate opener.
4.1 Site Preparation
- Ensure the gate is structurally sound, moves freely, and is properly aligned.
- Verify the gate dimensions and weight are within the opener's specifications (up to 40 ft. length, 1400 lb. weight).
- Prepare a stable, level mounting pad for the gate opener unit.
- Plan the routing for power lines and signal lines. The signal line from the receiver (sensor with a 5-pin terminal) and any power lines should be at least 22 AWG (0.5 mm²) thick.
4.2 Mounting the Opener Unit
Securely mount the gate opener unit to its prepared base using the provided hardware. Ensure it is level and positioned correctly relative to the gate's movement path.

Image Description: This image shows the CO-Z gate opener motor unit securely mounted on its base, illustrating its robust design. To the right, two smaller inset images display examples of different gate types—a wooden privacy gate and a metal bar gate—that are compatible with this powerful motor, emphasizing its versatility for heavy-duty applications.
4.3 Installing the Gate Chain
Attach the #41 gate chain securely to the gate and route it around the opener's drive sprocket. Ensure the chain is taut but allows for smooth movement without binding.

Image Description: A close-up view of the #41 American Standard chain properly engaged with the drive sprocket of the CO-Z gate opener. This image highlights the mechanical connection that facilitates the gate's movement, demonstrating the compatibility and robust design of the chain system.

Image Description: A tightly coiled 10-foot section of American Standard #41 chain, ready for installation. This image emphasizes the quality and standard sizing of the chain provided for the gate opener system.

Image Description: A detailed technical diagram illustrating the dimensions of the 10 ft. ANSI #41 gate chain. The diagram includes labeled measurements for pitch, roller diameter, inner width, pin diameter, pin length, inner plate depth, and plate thickness, along with a table providing specific values in both inches and millimeters. This provides precise information for compatibility and replacement.

Image Description: A close-up view of several sections of #41 gate chain, along with the connecting links and pins used to join chain segments. This image highlights the components necessary for extending or repairing the gate chain.
4.4 Wiring and Sensor Installation
Connect the power supply and safety sensors according to the wiring diagram provided in the full installation guide (not included in this summary). Ensure infrared sensors are aligned and free from obstructions to enable obstacle detection.
5. Operating Instructions
5.1 Remote Control Operation
The gate opener comes with two remote controls. Pressing a button on the remote will activate the gate to open or close. The remote controls operate from up to 98.4 feet away and utilize frequency encryption technology for security.
5.2 HomeLink Compatibility
This gate opener is compatible with your vehicle's HomeLink system, allowing you to control the gate directly from your car. Refer to your vehicle's HomeLink manual for pairing instructions.

Image Description: This diagram illustrates the HomeLink compatibility and various features of the gate opener. It highlights a 100 ft. remote range, 315 MHz remote frequency, optional left/right opening direction, a 3.3 ft. pedestrian mode opening, weather and corrosion resistant build, advanced obstacle detection, 0/15/30/45 second self-closing presets, and high-end encryption remote control technology.
5.3 Auto-Close Presets
The system can be configured with auto-close presets of 15, 30, or 45 seconds. After the gate opens, it will automatically close after the selected delay.
5.4 Obstacle Detection
The infrared safety sensors detect obstacles in the gate's path during closing. If an obstacle is detected, the gate will stop and reverse to prevent damage or injury.
5.5 Pedestrian Mode
A pedestrian mode allows the gate to open approximately 3.3 feet, providing sufficient space for foot traffic without fully opening the gate.

Image Description: This image highlights the smooth and durable operation of the gate opener. It features icons and text indicating resistance to extreme temperatures (-4°F to 158°F), IP44 weather resistance, minimal noise output (56 dB Max.), suitability for sloped ground (15° Max.), and corrosion resistance. Below, a car interior view shows a hand interacting with a HomeLink compatible screen, demonstrating integrated control.
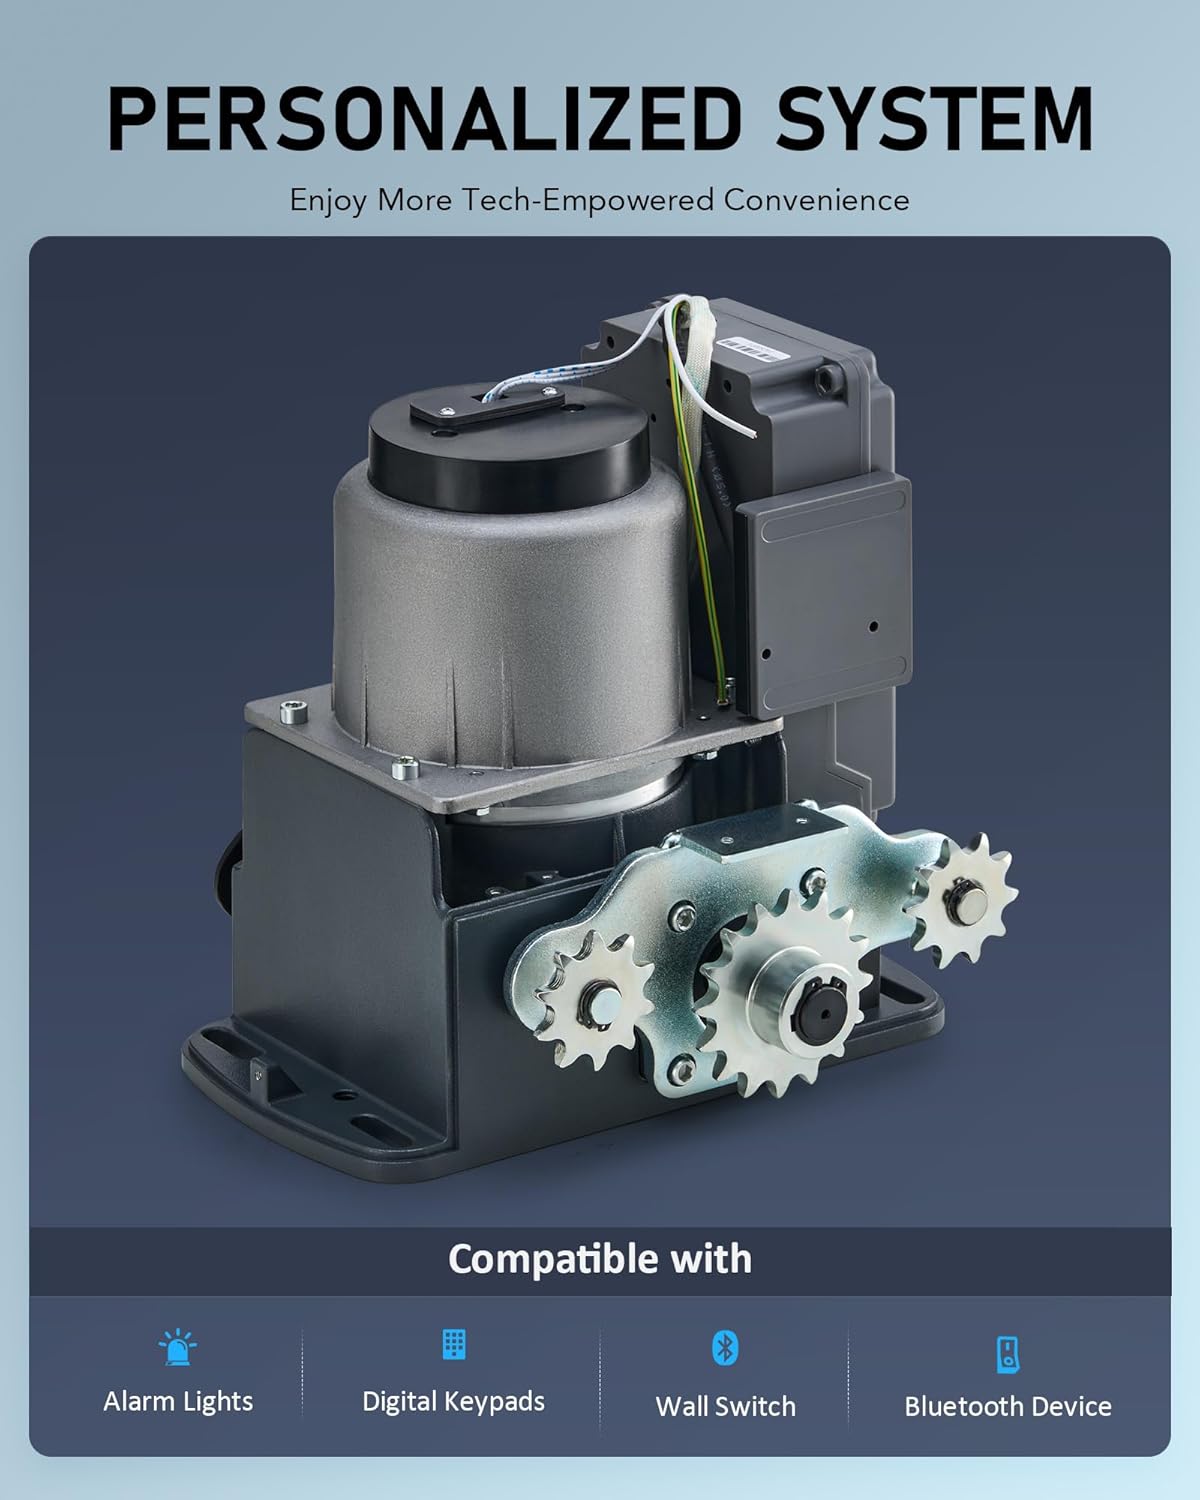
Image Description: This image displays the internal components of the gate opener motor unit and highlights its compatibility with various external devices. Icons below indicate compatibility with Alarm Lights, Digital Keypads, Wall Switches, and Bluetooth Devices, suggesting an expandable and personalized system.
6. Maintenance
Regular maintenance ensures the longevity and reliable operation of your gate opener.
- Monthly: Inspect the gate and opener for any signs of wear, damage, or loose connections. Check the chain tension and lubricate if necessary.
- Quarterly: Clean the infrared sensors to ensure they are free from dirt, dust, or spiderwebs that could obstruct their beam.
- Annually: Have a qualified technician inspect the entire system, including electrical connections and mechanical components.
- Keep the area around the gate opener free of debris and vegetation.
7. Troubleshooting
This section addresses common issues you might encounter. For problems not listed here, please contact customer support.
| Problem | Possible Cause | Solution |
|---|---|---|
| Gate does not respond to remote. | Dead remote battery, remote out of range, remote not programmed, power outage. | Replace remote battery. Move closer to the gate. Reprogram remote. Check power supply to opener. |
| Gate opens but does not close. | Infrared sensors obstructed or misaligned, auto-close feature disabled. | Clear sensor path, realign sensors. Check auto-close settings. |
| Gate stops or reverses unexpectedly. | Obstruction detected by safety sensors, excessive friction in gate movement. | Remove obstruction. Check gate for binding or damage; lubricate moving parts. |
| Motor runs but gate does not move. | Chain disengaged or broken, manual release engaged. | Inspect and re-engage/repair chain. Disengage manual release. |
8. Specifications
| Feature | Specification |
|---|---|
| Max. Gate Weight | 1400 lb. |
| Max. Gate Length | 40 ft. |
| Model Number | SGO-1400-HL&AGO-LT00-0Z |
| Motor Power | 280W |
| Torque | 11.8 lb.-ft. |
| Remote Control Range | Up to 98.4 ft. (30 m) |
| Remote Frequency | 315 MHz |
| Auto-Close Presets | 15, 30, 45 seconds |
| Operating Temperature | -4°F to 158°F |
| Ingress Protection (IP) Rating | IP44 |
| Max. Slope for Operation | 15° |
9. Warranty and Support
CO-Z products are designed for durability and performance. For warranty information or technical support, please refer to the warranty card included with your product or visit the official CO-Z website. You can also contact customer service through the retailer where you purchased the product.
For further assistance, please visit the CO-Z Store on Amazon.
Related Documents - SGO-1400-HL&AGO-LT00-0Z
 |
CO-Z Sliding Gate Opener User Manual: Installation and Operation Guide Comprehensive user manual for the CO-Z Sliding Gate Opener (Model SGO-0000-US). Provides detailed instructions for installation, safety precautions, operation, maintenance, and troubleshooting of this 280W automatic gate system. |
 |
Sliding Gate Opener User Manual - DOORADO SGO-EC06-00 Comprehensive user manual for the DOORADO Sliding Gate Opener (1400LB / 600KG), covering safety notices, parts list, technical specifications, installation procedures, operation, maintenance, and troubleshooting. |
 |
CO-Z Sliding Gate Opener User Manual: Installation, Operation, and Safety Guide for Models SGO-0000-01, SGO-EC06-02, SGO-1801-GY Download the CO-Z Sliding Gate Opener User Manual. Get detailed instructions for installing, operating, and maintaining models SGO-0000-01, SGO-EC06-02, and SGO-1801-GY. Includes safety guidelines and troubleshooting tips for your automatic gate system. |
 |
CO-Z Sliding Gate Opener User Manual: Installation, Safety, and Operation Guide for Models 4400 & 5500 Comprehensive user manual for the CO-Z Sliding Gate Opener (Models 4400 & 5500). This guide provides essential safety information, detailed installation instructions, technical specifications, package contents, remote pairing, maintenance tips, and troubleshooting solutions for your automatic gate system. |
 |
Sliding Gate Opener User Manual This user manual provides instructions for the installation, operation, and maintenance of a sliding gate opener. It includes technical specifications, a packing list, safety instructions, and troubleshooting tips. |
 |
CO-Z Sliding Gate Opener User Manual - Installation and Safety Guide Comprehensive user manual for the CO-Z Sliding Gate Opener, covering installation, safety guidelines, operation, maintenance, and troubleshooting. Learn how to safely and effectively automate your gate. |
Ask a question about this manual
Ask about setup, troubleshooting, compatibility, parts, safety, or missing instructions. Manuals+ will review the question and use this page’s manual context to help answer it.