1. Introduction
This manual provides detailed instructions for the safe and effective use of your ScopeAround SA160 Digital Otoscope. This device is designed for visual inspection of the ear canal, nose, and throat, and includes features for capturing photos and videos. Please read this manual thoroughly before operating the device and retain it for future reference.
2. Safety Information
- Consult a Professional: This device is intended for personal visual inspection and is not a substitute for professional medical diagnosis or treatment. If you observe any abnormalities, pain, or discomfort, consult a healthcare professional immediately.
- Gentle Use: Always insert the otoscope probe gently into the ear canal. Avoid forceful insertion to prevent discomfort or injury. Keep your hand steady during use.
- Children: For children under 3 years old, use only under strict adult supervision. Gently pull the earlobe down and back to straighten the ear canal for easier and safer viewing.
- Hygiene: Always clean the specula and ear picks before and after each use to prevent cross-contamination.
- Water Resistance: The lens tip is IP67 waterproof, allowing for cleaning. However, the main unit is not waterproof. Do not immerse the main unit in water.
3. Package Contents
Verify that all items are present in your package:
- SA160 Digital Otoscope (Main Unit) x1
- 8GB Memory Card x1 (pre-installed)
- Specula x5
- Ear Picks x4
- Q-tip Pack x1
- Lens Probe x1
- Extension Cable x1
- USB Cable (Type-C) x1
- User Manual x1
- Alcohol Prep Pads

Figure 1: Complete package contents of the ScopeAround SA160 Digital Otoscope.
4. Product Overview
The ScopeAround SA160 Digital Otoscope features an integrated 1.45-inch IPS LCD screen for clear, real-time visuals. It is equipped with a 3.9mm HD CMOS sensor, 720P resolution, and 6 LED lights with 3 adjustable brightness levels for optimal viewing. The device supports 1x/1.3x/1.5x zoom options and includes an 8GB memory card for photo and video capture.

Figure 2: Labeled components of the SA160 Digital Otoscope.

Figure 3: The 1.45-inch HD IPS screen provides clear and detailed images.

Figure 4: The 3.9mm ear camera with 6 LED lights and adjustable brightness.
5. Setup
- Charge the Device: Before first use, ensure the device is fully charged using the provided USB Type-C cable. The charging port is located on the side of the main unit.
- Insert Memory Card: The 8GB memory card is typically pre-installed. If not, gently insert it into the memory card slot on the side of the device.
- Attach Lens Probe: The lens probe is detachable. Ensure it is securely twisted into the main unit's port.
- Attach Speculum/Ear Pick: Depending on your needs, attach a clean speculum or ear pick to the end of the lens probe.
6. Operating Instructions
6.1 Power On/Off
- Power On: Press and hold the Power Button (labeled with a power icon) for 3 seconds until the screen illuminates.
- Power Off: Press and hold the Power Button for 3 seconds until the screen turns off.
6.2 Checking Others' Ears
- Positioning: Stand slightly behind and to the side of the person being examined, keeping your eyes level with their ear canal.
- Straighten Ear Canal: Gently pull the outer ear up and back (for adults) or down and back (for children under 3 years old) to straighten the ear canal.
- Insert Probe: Slowly and gently insert the otoscope into the outer ear canal. Avoid forceful insertion. Observe the ear canal and eardrum through the device's screen.
- Adjust Brightness/Zoom: Use the Up/Down buttons to adjust LED brightness or zoom level (1x/1.3x/1.5x) for a clearer view.
- Finish Examination: Carefully remove the otoscope from the ear.

Figure 5: Examining another person's ear with the otoscope.
6.3 Checking Your Own Ears (with Extension Cable)
For self-examination, the extension cable provides greater flexibility:
- Detach Lens Probe: Gently pull the lens probe from the main unit.
- Connect Extension Cable: Connect one end of the extension cable to the main unit's port and the other end to the detached lens probe.
- Self-Examination: Hold the main unit in one hand and the extended lens probe in the other. Gently insert the probe into your ear canal while observing the screen.

Figure 6: Self-examination using the extension cable.
6.4 Capturing Photos and Videos
- Take a Photo: During live viewing, short press the Capture Button (labeled with a camera icon) to take a still image.
- Record a Video: During live viewing, long press the Capture Button to start recording a video. Long press again to stop recording.
- Review Media: Press the Settings Button (labeled with a gear icon) and navigate to the 'Playback' option to view captured photos and videos.
- File Transfer: Connect the device to a computer using the USB Type-C cable to transfer files from the 8GB memory card.
7. Maintenance and Care
- Cleaning the Lens: Use an alcohol prep pad or a cotton swab to gently wipe the lens of the probe before and after each use.
- Cleaning Specula/Ear Picks: Wash reusable specula and ear picks with soap and water, then sterilize with alcohol before and after each use.
- Storage: Store the device and accessories in a clean, dry place away from direct sunlight and extreme temperatures.
- Battery Care: The rechargeable battery supports long-term operation. To prolong battery life, avoid fully discharging the device frequently.
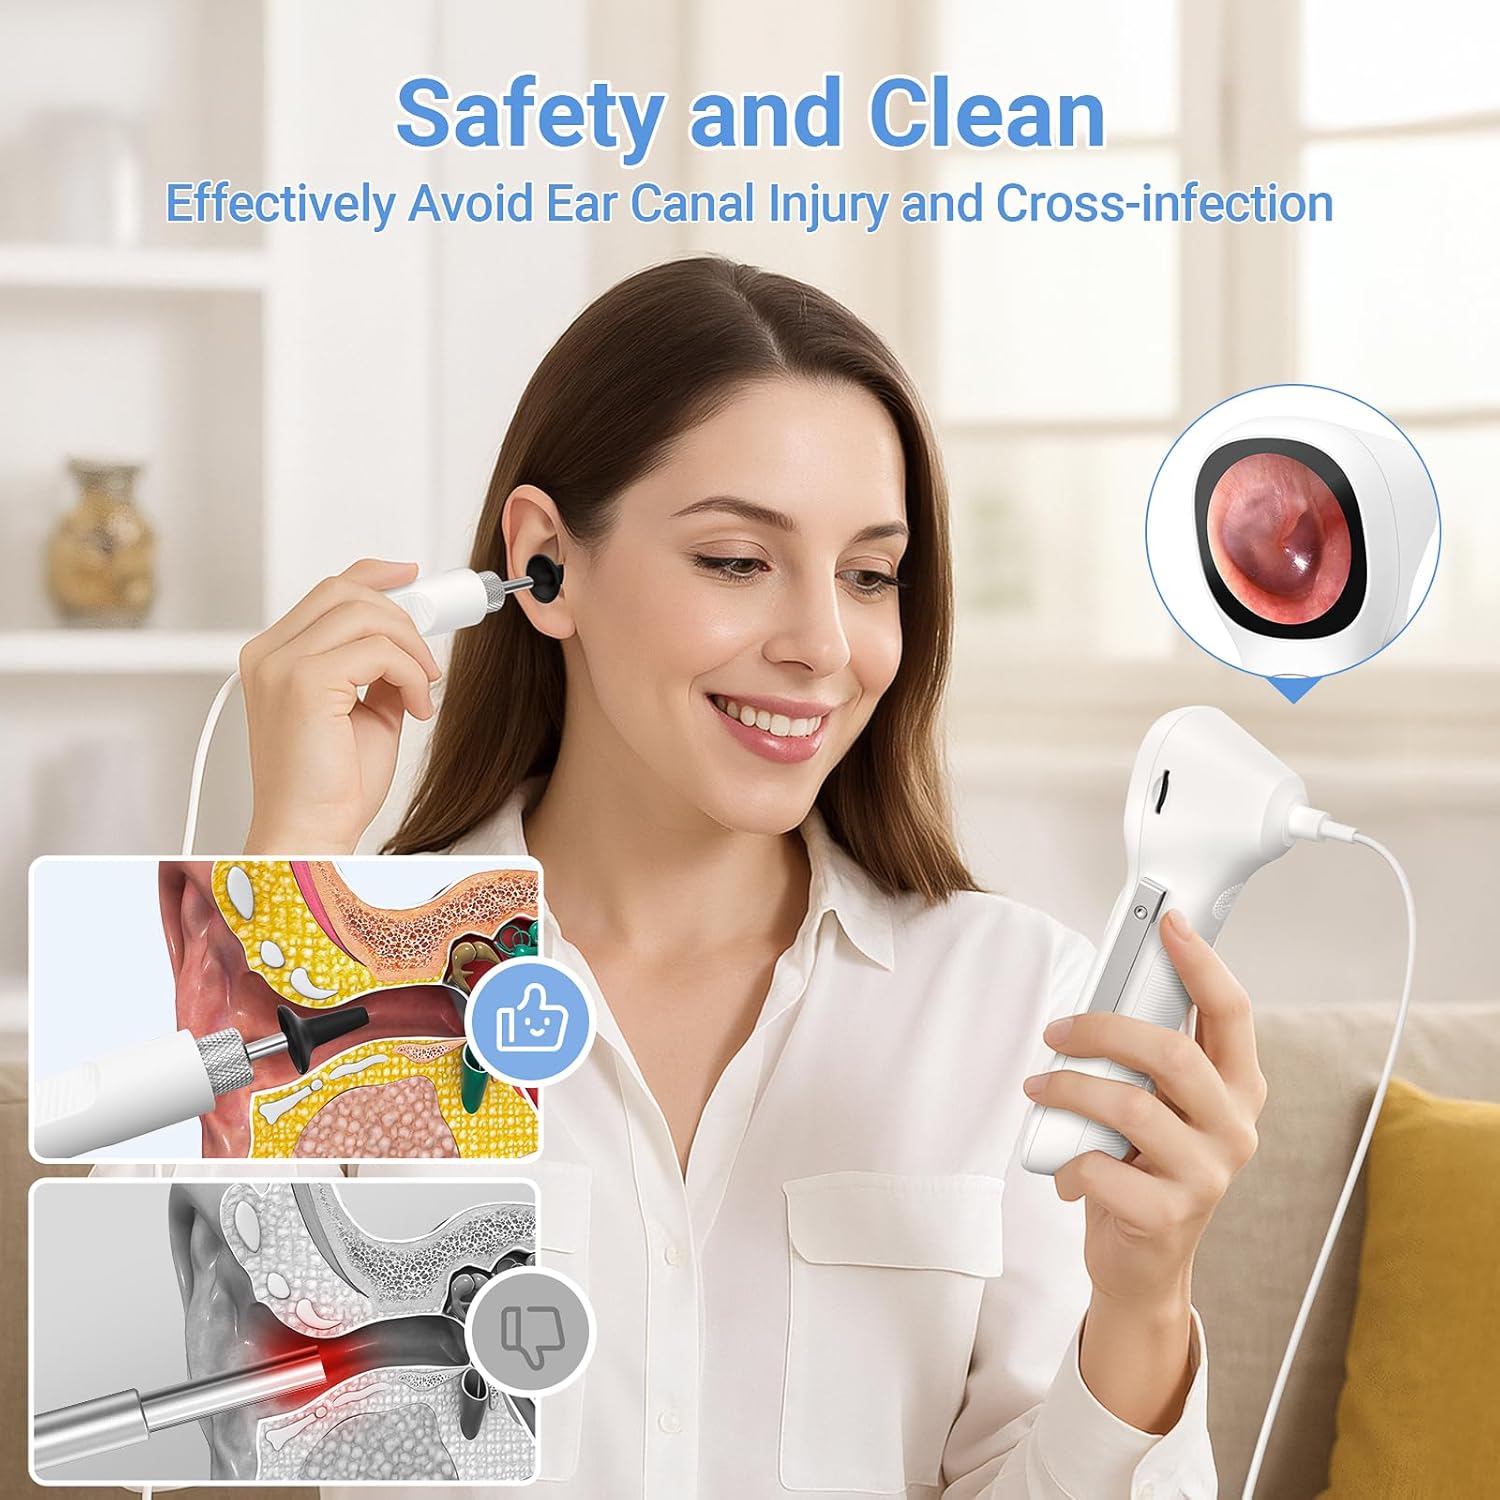
Figure 7: Emphasizing safety and cleanliness for ear inspections.
8. Troubleshooting
8.1 Screen Displays "No Camera"
If the screen displays "No Camera", follow these steps:
- Check Lens Probe Connection: Ensure the lens probe is properly and securely connected to the otoscope port. Twist it firmly to ensure full contact.
- Check Extension Cable Connection (if applicable): If using the extension cable, ensure both ends are securely connected to the main unit and the lens probe.
- Restart Device: Power off the device, then power it back on.
If none of the above steps resolve the issue, it may indicate a hardware problem. Please contact customer service for further assistance.
9. Specifications
| Feature | Specification |
|---|---|
| Model Name | Otoscope SA160 |
| Display | 1.45-inch IPS LCD (360x360 resolution) |
| Camera Resolution | 720P HD CMOS Sensor |
| Lens Diameter | 3.9mm |
| LED Lights | 6 LED Lights with 3 Adjustable Brightness Levels |
| Magnification | 1x/1.3x/1.5x Zoom Options |
| Waterproof Rating | IP67 (Lens Tip Only) |
| Internal Storage | 8GB Memory Card (included) |
| Battery | 1 Lithium Polymer battery (included), 3.7V 1000mAh |
| Charging Port | Type-C |
| Item Weight | 10.2 ounces |
| Package Dimensions | 8.15 x 4.41 x 2.4 inches |
10. Warranty and Support
For any questions, technical assistance, or warranty inquiries regarding your ScopeAround SA160 Digital Otoscope, please contact ScopeAround customer service. Our US-based support team is available to provide assistance via phone and email.
Please refer to the contact information provided with your product packaging or visit the official ScopeAround website for support details.


