1. Introduction
This manual provides comprehensive instructions for the safe and effective use of your DBEIXIWEI CD03 4K HD Body Camera Recorder. Please read this manual thoroughly before operating the device and retain it for future reference. This device is designed for capturing high-quality video, audio, and photos in various scenarios.

Image 1.1: The DBEIXIWEI CD03 4K HD Body Camera Recorder, shown with its included back clip and data cable.
2. Package Contents
Verify that all items are present in the package:
- 1 x DBEIXIWEI CD03 Body Camera
- 1 x Back Clip
- 1 x Data Line (USB cable)
- 1 x User Manual (this document)
3. Product Overview
Familiarize yourself with the components and controls of your CD03 body camera:
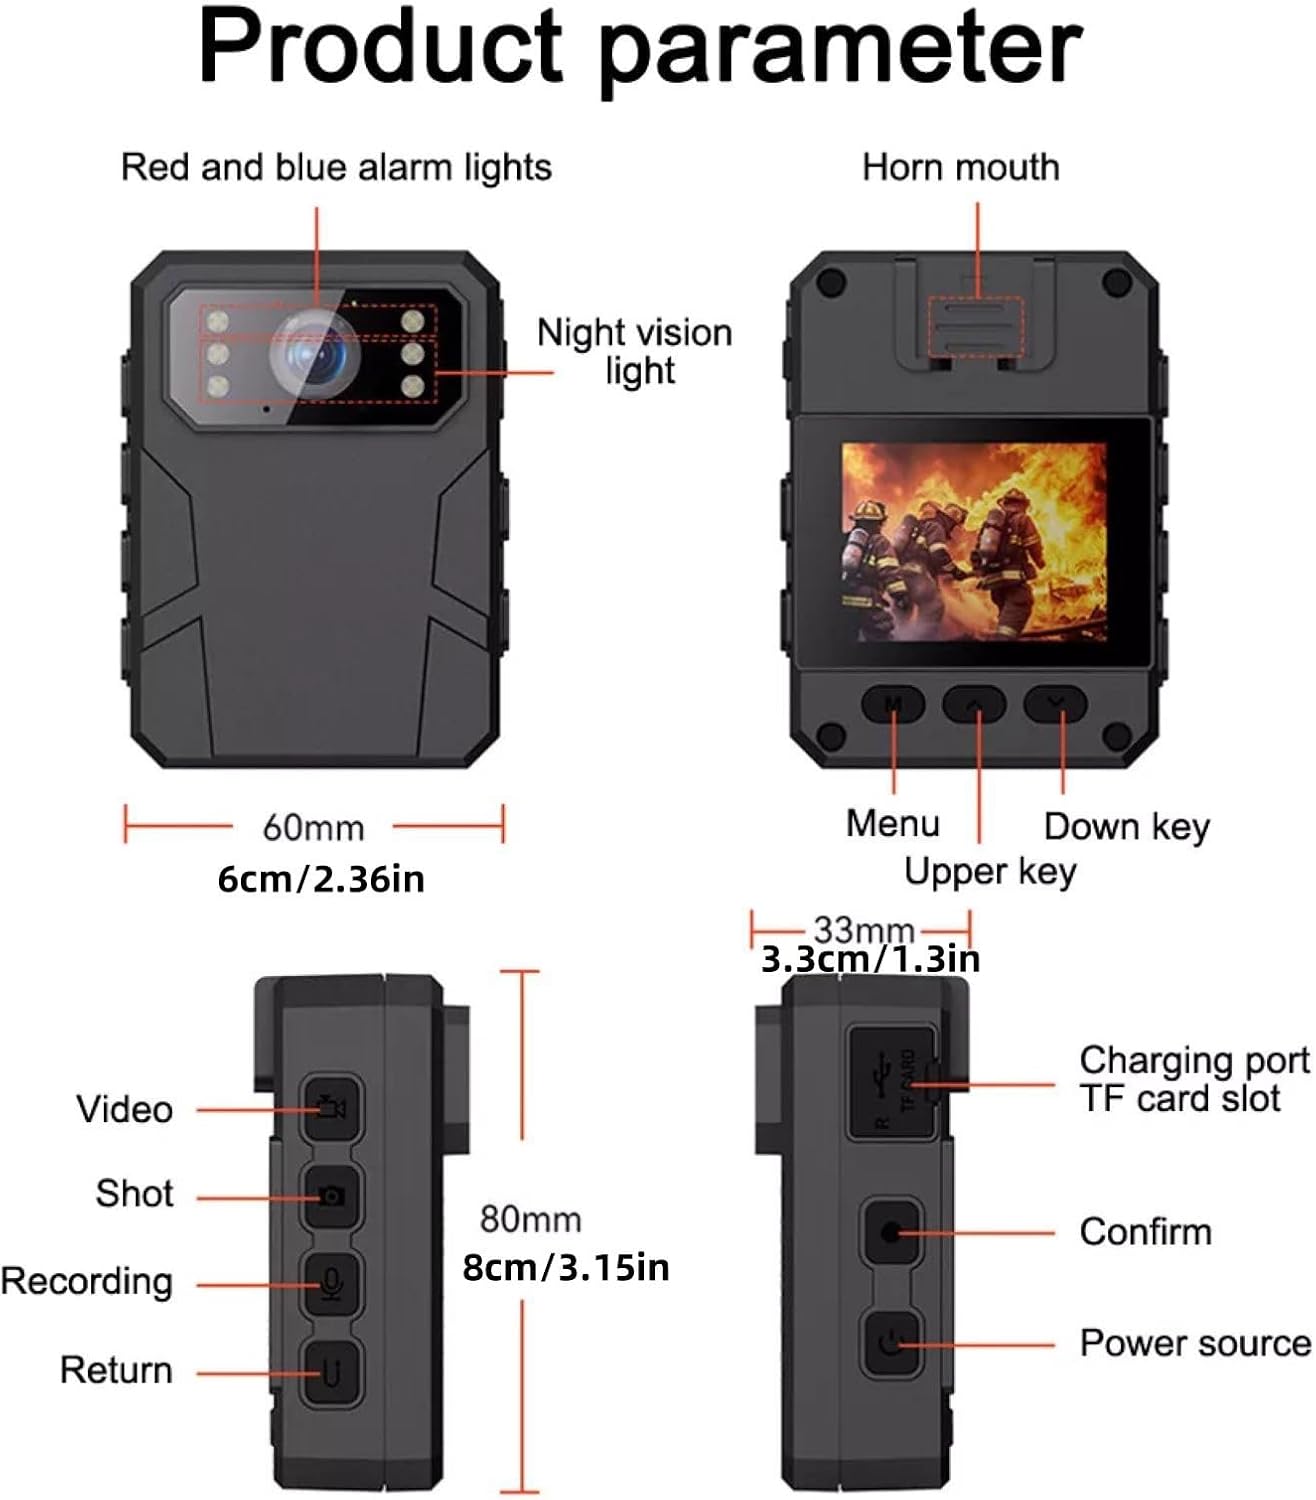
Image 3.1: Detailed diagram of the CD03 body camera's components and controls.
- Front Panel: Red and blue alarm lights, Night vision light, Camera lens, Horn mouth.
- Left Side: Video button, Shot button, Recording button, Return button.
- Right Side: Charging port (Mini 5pi), TF card slot, Confirm button, Power source button.
- Rear Panel: 2-inch color screen, Menu button, Down key, Upper key.
4. Safety Information
Please observe the following safety guidelines to prevent damage to the device or personal injury:

Image 4.1: Important battery safety warning label.
- Battery Safety: Do not mix old and new batteries. Do not mix alkaline, standard (carbon-zinc), or rechargeable batteries.
- Keep the device away from water and moisture.
- Avoid exposing the device to extreme temperatures or direct sunlight for extended periods.
- Do not attempt to disassemble or repair the device yourself. Contact customer support for assistance.
- Use only the provided data line for charging.
5. Setup
5.1 Charging the Device
- Connect the provided data line to the Mini 5pi charging port on the right side of the camera.
- Connect the other end of the data line to a 5V/1A USB power adapter (not included) or a computer USB port.
- The charging indicator light will illuminate. A full charge takes approximately 4 hours.
5.2 Micro SD Card Installation
The device supports external Micro SD cards up to 128GB (not included).
- Locate the TF card slot on the right side of the camera.
- Gently insert the Micro SD card into the slot until it clicks into place. Ensure the card is oriented correctly.
- It is recommended to format the Micro SD card using the camera's menu settings before first use to ensure compatibility and optimal performance.
5.3 Powering On/Off
- To Power On: Press and hold the Power Source button on the right side of the camera until the screen illuminates.
- To Power Off: Press and hold the Power Source button until the device shuts down.
6. Operating Instructions
6.1 Basic Functions

Image 6.1: The front REC button for quick operation.
- Video Recording: Press the Video button on the left side to start video recording. Press again to stop.
- Photo Taking: Press the Shot button on the left side to take a photo.
- Audio Recording: Press the Recording button on the left side to start audio recording. Press again to stop.
6.2 Advanced Features

Image 6.2: The 120° wide-angle lens captures a broad field of view.
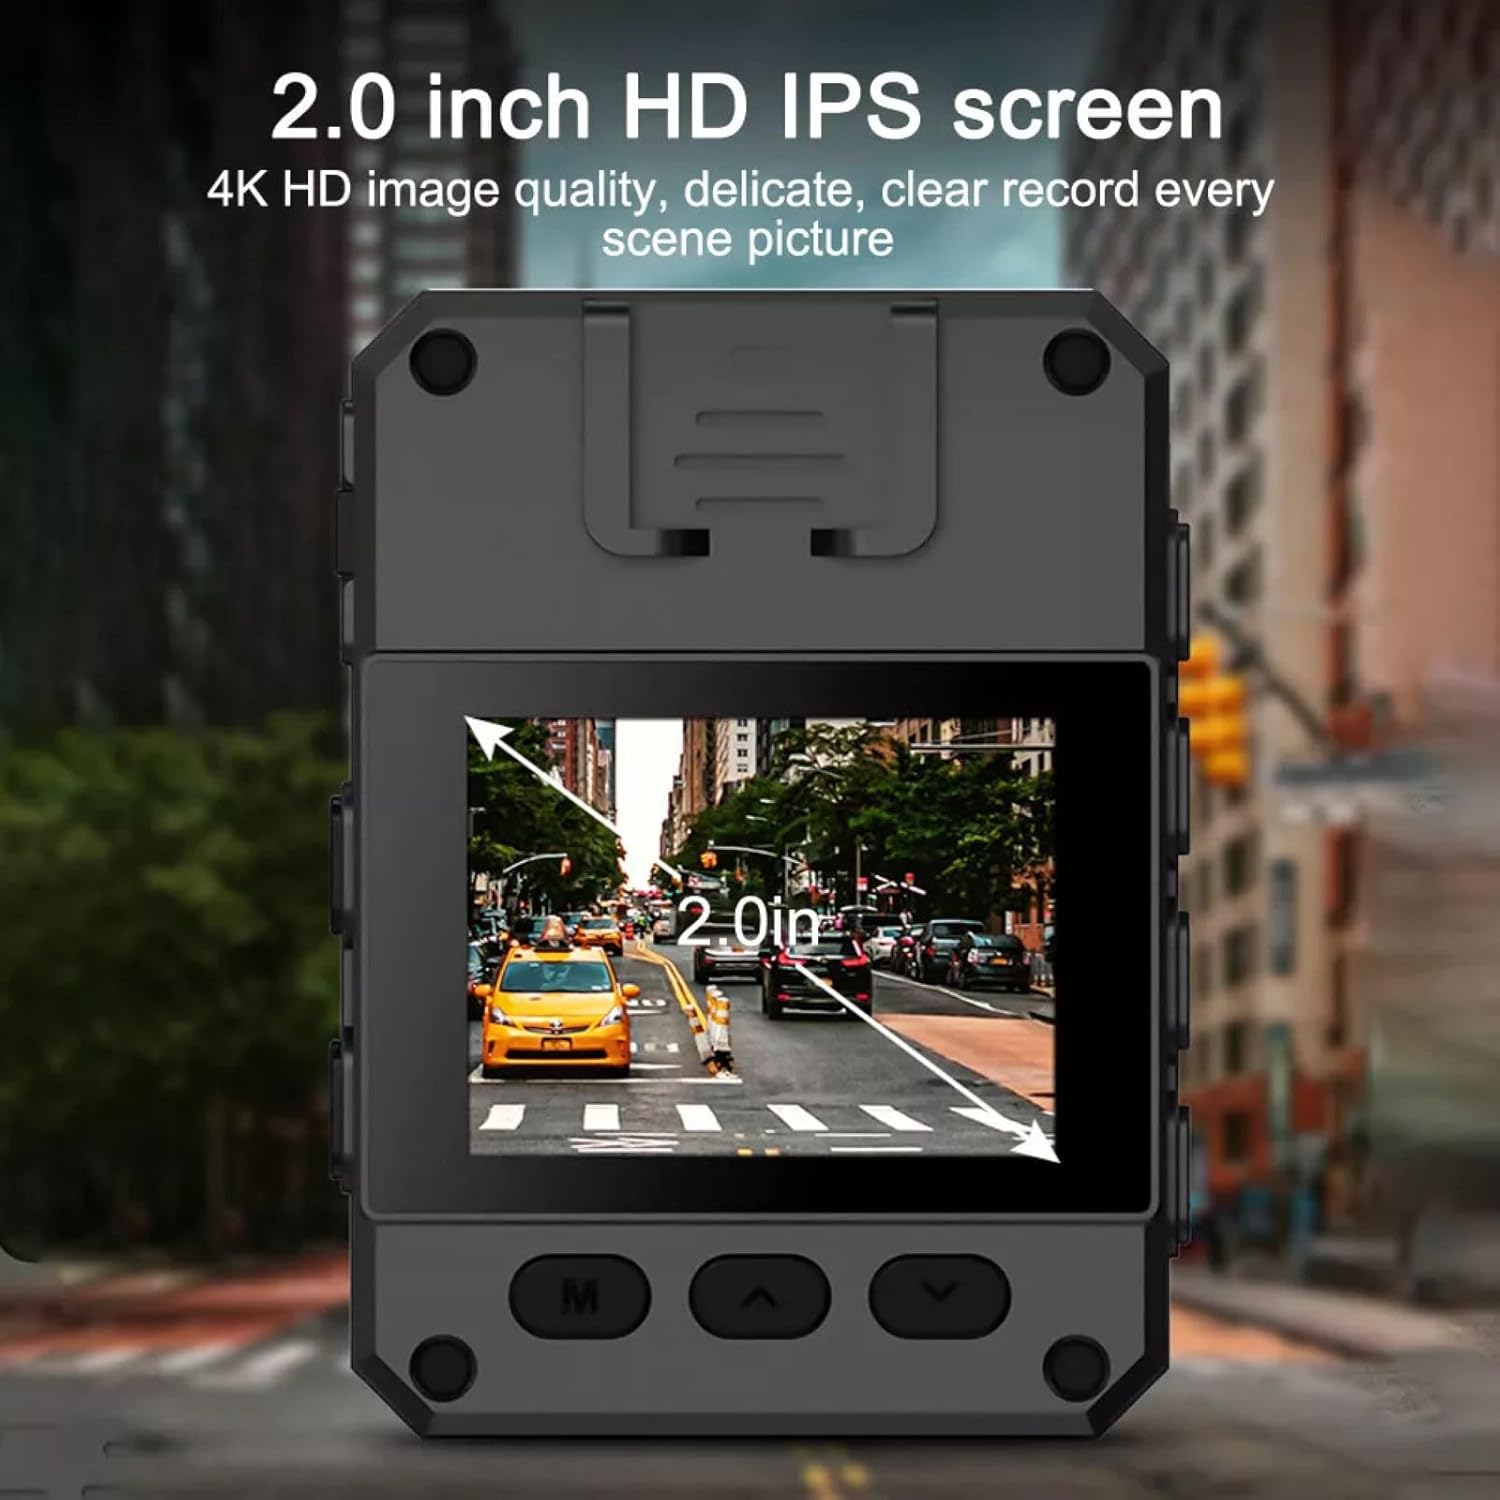
Image 6.3: The 2.0-inch HD IPS screen provides clear image quality.
- Motion Detection: Activate this feature in the menu to automatically start recording when motion is detected.
- Infrared Night Vision: The camera supports infrared night vision for recording in low-light conditions. This can be enabled or set to auto in the settings.
- Loop Recording: Configure loop recording intervals (e.g., 3, 5, 10 minutes) in the settings. When the memory card is full, the oldest files will be overwritten.
- Delayed Recording: Set a delay for recording to start after pressing the button (e.g., 3, 5, 10 seconds).
- Video Pre-recording: This feature captures a few seconds of footage before the record button is pressed, ensuring no critical moments are missed.
6.3 One-Click Alarm
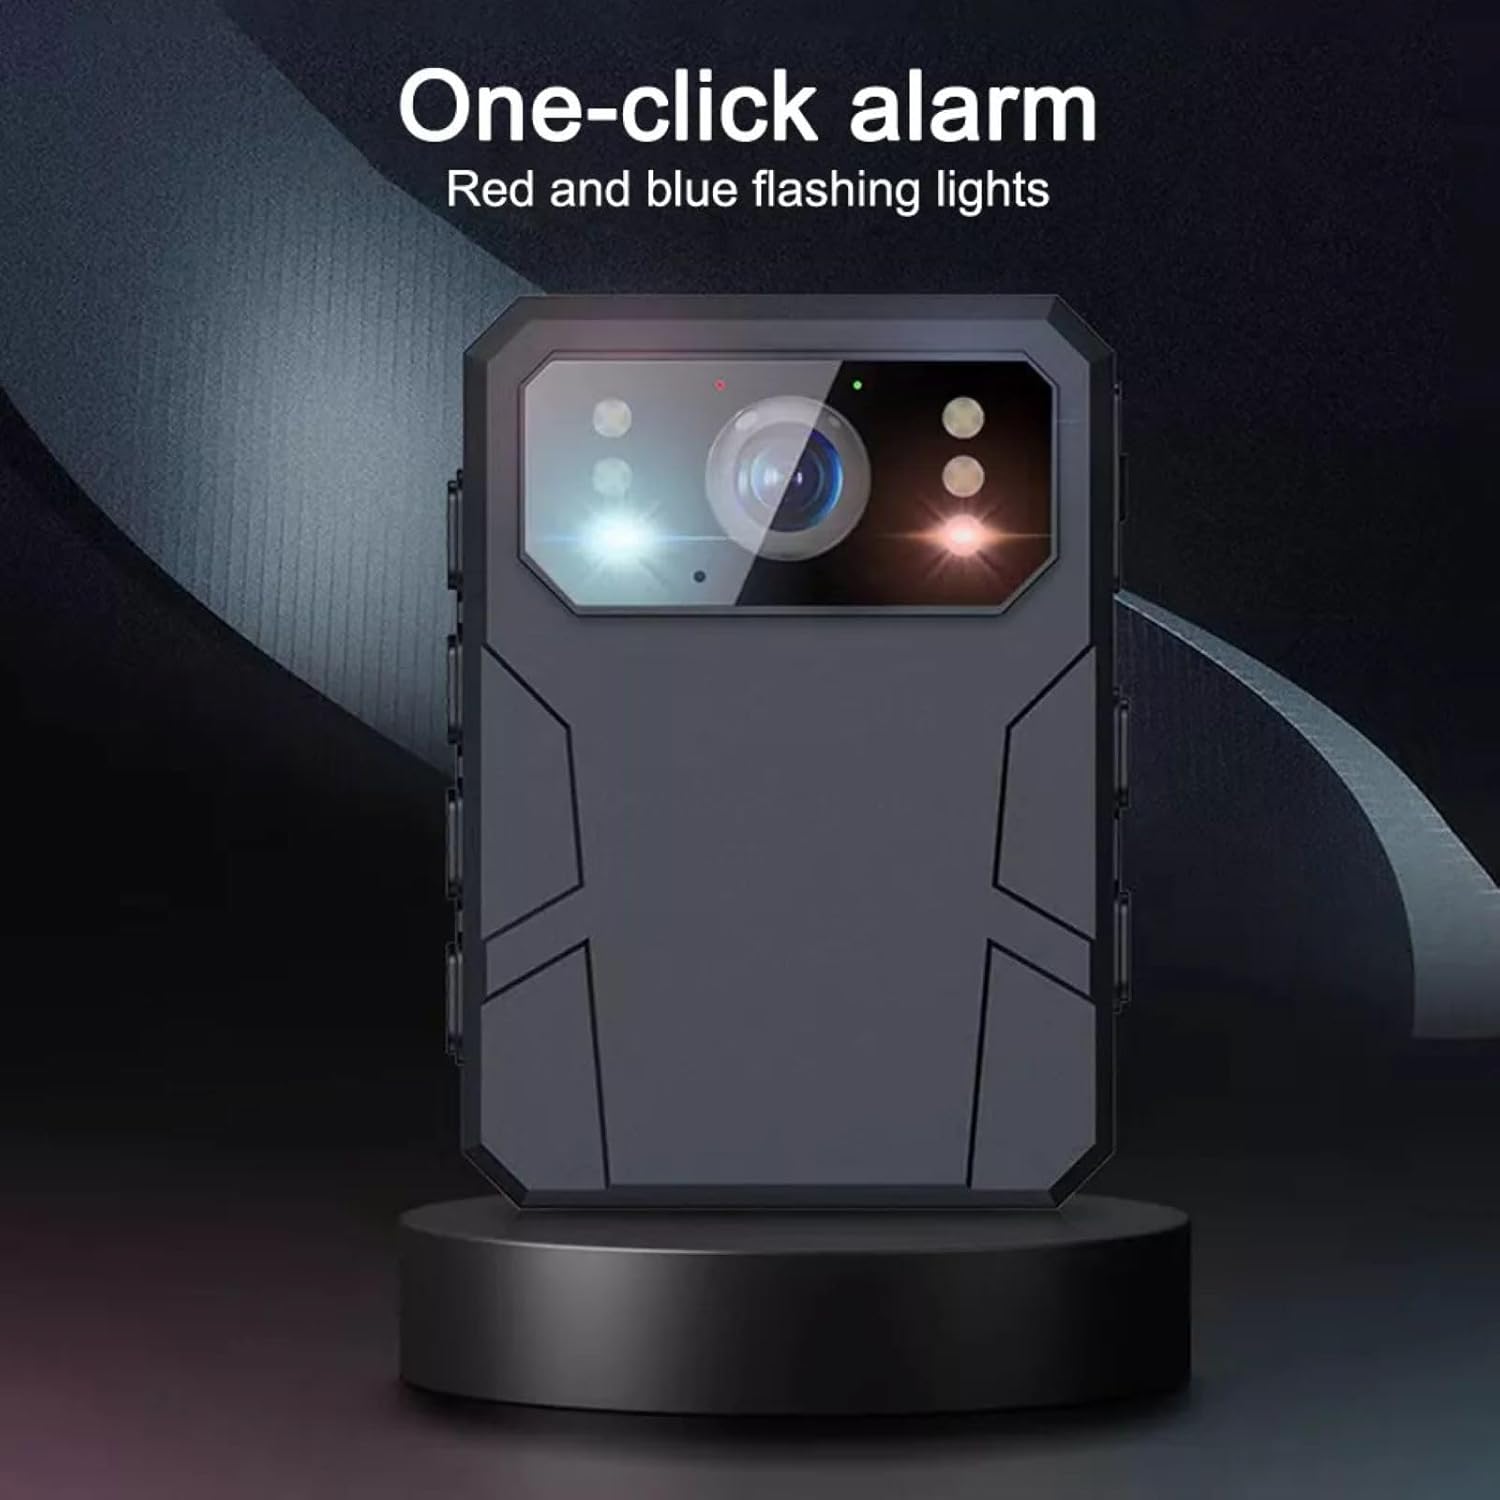
Image 6.4: The one-click alarm activates red and blue flashing lights.
To activate the one-click alarm, press the designated button (typically associated with the red and blue alarm lights). This will trigger flashing lights for immediate attention.
6.4 Menu Navigation and Settings
- Use the Menu button to access the settings menu.
- Use the Up and Down keys to navigate through menu options.
- Press the Confirm button to select an option or confirm a setting.
- Press the Return button to go back to the previous menu or exit the menu.
- Available settings include: Video Resolution (4K/2K/1080P), Time-lapse recording, Selfie settings, Exposure compensation, Time setting, White balance, Formatting, and Language selection.
6.5 Playback
To review recorded files:
- Enter the playback mode via the menu.
- Navigate through your video, photo, and audio files using the Up/Down keys.
- Select a file and press the Confirm button to play or view it.
7. Maintenance
- Cleaning: Use a soft, dry cloth to clean the camera body and lens. Avoid using harsh chemicals or abrasive materials.
- Storage: Store the camera in a cool, dry place away from direct sunlight and extreme temperatures when not in use.
- Battery Care: For optimal battery life, charge the device regularly, even if not in frequent use. Avoid fully discharging the battery for extended periods.
- Firmware Updates: Check the manufacturer's website periodically for any available firmware updates to ensure optimal performance and new features.
8. Troubleshooting
If you encounter issues with your CD03 body camera, refer to the following common problems and solutions:
| Problem | Possible Cause | Solution |
|---|---|---|
| Device does not power on | Low battery; Device frozen | Charge the device fully. If frozen, press and hold the Power Source button for 10-15 seconds to force a restart. |
| Cannot record video/photo | No Micro SD card; Card full; Card error | Insert a Micro SD card. Delete old files or replace the card. Format the card in the camera's settings. |
| Poor video/image quality | Dirty lens; Low light; Incorrect settings | Clean the lens. Ensure sufficient lighting or activate night vision. Check resolution settings. |
| Device not recognized by computer | Faulty USB cable; Driver issue | Try a different USB cable or USB port. Ensure the camera is powered on when connected. |
If the problem persists after trying these solutions, please contact customer support.
9. Specifications
Detailed technical specifications for the DBEIXIWEI CD03 Body Camera:
| Feature | Specification |
|---|---|
| Model | CD03 |
| Screen Size | 2-inch color screen (240 x 320 resolution) |
| Video Resolution | 4K / 2K / 1080P |
| Video Frame Rate | 30fps |
| Video Format | AVI |
| Image Ratio | 4:3 |
| Camera Angle | 120° |
| Motion Detection | Supported |
| Infrared Night Vision | Supported |
| Charging Interface | Mini 5pi |
| Battery Capacity | 4800mAh |
| Charging Voltage | 5V/1A |
| Charging Time | Approximately 4 hours |
| Working Hours | Up to 24 hours (continuous recording) |
| Memory Card Type | Micro SD card (not included) |
| Memory Expansion | Up to 128GB Micro SD card |
| Delayed Recording Options | Off, 3s, 5s, 10s, 30s, 60s |
| Loop Recording Options | Off, 3min, 5min, 10min, 15min, 30min |
| Language Support | English, Japanese, Korean, Russian, French, German, Portuguese, Simplified Chinese, Traditional Chinese |
| Dimensions | 80 x 60 x 33mm (3.1 x 2.4 x 1.3 inches) |
| Material | ABS |
| Item Weight | 7.1 ounces |
10. Warranty and Support
For warranty information, technical support, or service inquiries, please refer to the contact details provided with your purchase or visit the official DBEIXIWEI website. Keep your proof of purchase for warranty claims.