RASTKY RASTKYxhm9bnta1g
RASTKY Smart Voice Translator User Manual
Model: RASTKYxhm9bnta1g
1. Introduction
Thank you for choosing the RASTKY Smart Voice Translator. This device is designed to facilitate seamless communication across language barriers, offering high-accuracy online, offline, and photo translation capabilities. Its portable design and intuitive interface make it an ideal companion for travelers, language learners, and anyone needing quick and reliable translation.
This manual provides detailed instructions on how to set up, operate, and maintain your translator to ensure optimal performance and longevity.
2. Safety Information
Please read all safety instructions carefully before using the device to prevent damage or injury.
- Do not expose the device to extreme temperatures, direct sunlight, or high humidity.
- Avoid dropping or subjecting the device to strong impacts.
- Do not attempt to disassemble or repair the device yourself. Refer to qualified service personnel.
- Keep the device away from water and other liquids.
- Use only the provided or approved charging cable and adapter.
- Dispose of the device and its battery responsibly according to local regulations.
3. Product Overview
Familiarize yourself with the components and controls of your RASTKY Smart Voice Translator.

Figure 3.1: Front View
This image shows the front of the RASTKY Smart Voice Translator, featuring the 2.4-inch touch screen, the "YOU" button (left), the camera button (center), and the "ME" button (right). Below the buttons is the speaker grille.
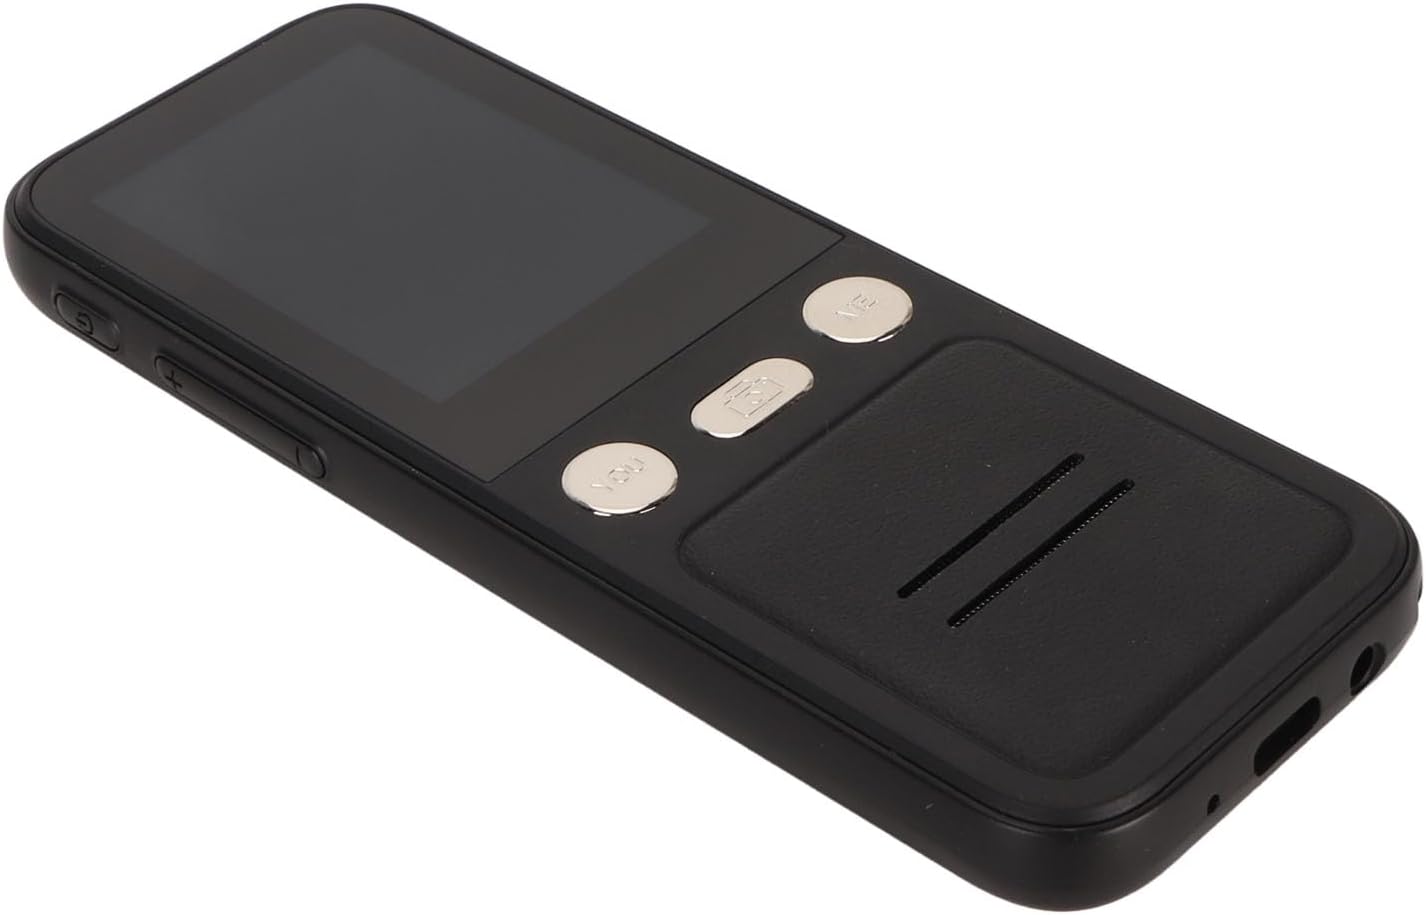
Figure 3.2: Side View
This image displays the side of the translator, highlighting the power button and volume control buttons located on the left side of the device.

Figure 3.3: Front and Back View
This image presents both the front and back of the translator. The back shows the "SMART CAMERA" lens and text indicating "charge Type-c USB=1.0Amax", along with compliance markings.

Figure 3.4: Bottom Ports
A close-up view of the bottom of the device, showing the USB Type-C charging port and a 3.5mm headphone jack.
3.1. Device Components
- 2.4-inch Touch Screen: For navigation and displaying translations.
- "YOU" Button: Press and hold to speak your language for translation.
- "ME" Button: Press and hold for the other person to speak their language for translation.
- Camera Button: Activates the 5MP camera for photo translation.
- Power Button: Turns the device on/off and locks/unlocks the screen.
- Volume Buttons: Adjusts the audio output volume.
- Speaker: Outputs translated audio.
- Microphone: Captures speech for translation.
- USB Type-C Port: For charging the device.
- 3.5mm Headphone Jack: For private listening of translations.
4. Setup
4.1. Charging the Device
Before first use, fully charge your translator. A full charge typically takes approximately 2-3 hours.
- Connect the provided USB Type-C cable to the charging port at the bottom of the device.
- Connect the other end of the USB cable to a compatible USB power adapter (not included) or a computer's USB port.
- The charging indicator on the screen will show the charging status.

Figure 4.1: Device and Charging Cable
This image shows the RASTKY Smart Voice Translator alongside its USB Type-C charging cable, illustrating the components included for charging.
4.2. Powering On/Off
- To Power On: Press and hold the Power button (located on the side) for approximately 3 seconds until the screen lights up.
- To Power Off: Press and hold the Power button for approximately 3 seconds. A power-off menu will appear on the screen. Select "Power Off" to shut down the device.
- Screen Lock/Unlock: Briefly press the Power button to lock or unlock the screen.
4.3. Initial Setup and Wi-Fi Connection
Upon first power-on, you may be prompted to select your preferred language and connect to a Wi-Fi network. A Wi-Fi connection is recommended for the most accurate and comprehensive translation services, including access to 112 online languages.
- Follow the on-screen prompts to select your system language.
- Navigate to Settings > Wi-Fi.
- Select your desired Wi-Fi network from the list and enter the password if required.
- Once connected, the Wi-Fi icon will appear on the status bar.
5. Operating Instructions
5.1. Online Voice Translation (112 Languages)
This mode provides the highest accuracy and widest range of languages.
- Ensure the device is connected to Wi-Fi.
- On the main translation screen, select the source language (your language) and the target language (the language you want to translate to) by tapping on the language names at the top of the screen.
- To speak your language, press and hold the "YOU" button (left button). Speak clearly into the microphone. Release the button when you finish speaking.
- The device will display and speak the translation in the target language.
- To have the other person speak, press and hold the "ME" button (right button). They should speak clearly into the microphone. Release the button when they finish speaking.
- The device will display and speak the translation in your language.
5.2. Offline Voice Translation (10 Languages)
The device supports 10 default offline languages. Additional offline language packs can be downloaded via Wi-Fi for use without an internet connection.
- Default Offline Languages: Simplified Chinese, Traditional Chinese, English, German, Spanish, French, Japanese, Korean, Russian, and Thai.
- To Download More Offline Languages: Connect to Wi-Fi, navigate to Settings > Offline Translation, and select the language packs you wish to download.
- Once downloaded, the offline translation process is similar to online translation, using the "YOU" and "ME" buttons.
5.3. Photo Translation (43 Languages)
The 5MP camera allows you to translate text from images, such as signs, menus, or documents.
- Ensure the device is connected to Wi-Fi for optimal photo translation accuracy.
- Tap the Camera button on the device's front panel or select the Photo Translation option from the main menu on the screen.
- Point the camera at the text you wish to translate. Ensure the text is well-lit and clear within the frame.
- Tap the capture button on the screen to take a photo.
- The device will process the image and display the translated text on the screen. You can select the source and target languages for photo translation.
5.4. Language Selection
To change the translation languages:
- On the main translation screen, tap on the language displayed for "YOU" (your language) to open the language list. Select your desired language.
- Tap on the language displayed for "ME" (the other person's language) to open the language list. Select their desired language.
- For photo translation, language selection options will appear within the photo translation interface.
6. Maintenance
Proper care will extend the life of your RASTKY Smart Voice Translator.
- Cleaning: Use a soft, dry, lint-free cloth to clean the device. For stubborn smudges on the screen, slightly dampen the cloth with water or a screen cleaner. Do not use harsh chemicals or abrasive materials.
- Storage: Store the device in a cool, dry place away from direct sunlight and extreme temperatures when not in use for extended periods.
- Battery Care: To preserve battery life, avoid fully discharging the battery frequently. Charge the device regularly, even if not in constant use.
7. Troubleshooting
If you encounter issues with your translator, refer to the following common problems and solutions.
| Problem | Possible Cause | Solution |
|---|---|---|
| Device does not power on. | Low battery; device frozen. | Charge the device for at least 30 minutes. If still unresponsive, press and hold the Power button for 10-15 seconds to force a restart. |
| Translation is inaccurate or slow. | Poor Wi-Fi connection; unclear speech; incorrect language selection. | Ensure a stable Wi-Fi connection. Speak clearly and at a moderate pace. Verify that the correct source and target languages are selected. |
| Photo translation not working. | Poor lighting; blurry image; text not recognized. | Ensure adequate lighting. Hold the device steady to avoid blur. Make sure the text is within the camera frame and clearly legible. |
| No sound from speaker. | Volume too low; speaker obstructed. | Increase the volume using the volume buttons. Check if anything is blocking the speaker grille. |
| Cannot connect to Wi-Fi. | Incorrect password; out of range; network issue. | Double-check the Wi-Fi password. Move closer to the Wi-Fi router. Restart your router and the translator. |
8. Specifications
Technical specifications for the RASTKY Smart Voice Translator.
- Model: RASTKYxhm9bnta1g
- Screen Size: 2.4 Inch Touch Screen
- Resolution: 240 x 320
- Battery Capacity: 1500mAh (Built-in)
- Continuous Playback: 6 hours or more
- RAM: 1GB
- ROM: 8GB
- Camera: 5MP Pixels
- Networking Method: WIFI Networking
- Data Interface: Type C Interface
- Speech Recognition: For Google SR
- Translation Engine: For Google, for iFlytek
- Online Supported Languages: 112
- Offline Supported Languages: 10 (Simplified Chinese, Traditional Chinese, English, German, Spanish, French, Japanese, Korean, Russian, Thai)
- Photo Translation Languages: 43
- Dimensions: Approximately 6.69 x 3.15 x 1.57 inches
- Weight: Approximately 8 ounces
9. Warranty and Support
RASTKY products are manufactured to the highest quality standards. For warranty information and customer support, please refer to the warranty card included with your purchase or visit the official RASTKY website. Please have your model number (RASTKYxhm9bnta1g) and purchase details ready when contacting support.
For further assistance, you may also contact your retailer.
no relevant documents
Ask a question about this manual
Ask about setup, troubleshooting, compatibility, parts, safety, or missing instructions. Manuals+ will review the question and use this page’s manual context to help answer it.