1. Introduction
This manual provides comprehensive instructions for the installation, setup, and operation of your Sellrich 10.1-inch Single DIN Car Stereo. Please read this manual thoroughly before using the product to ensure correct usage and to prevent damage. Keep this manual for future reference.
2. What's in the Box
Verify that all items are present upon unboxing:
- Single DIN Car Stereo Unit (with 10.1-inch detachable screen)
- Backup Camera
- Power Cable
- User Manual
- External Microphone
- Mounting Bracket

Image: Package contents for the Sellrich car stereo.
3. Product Overview
3.1 Key Features
- 10.1-inch Full HD IPS Touch Screen with detachable design.
- Wireless CarPlay and Android Auto for seamless smartphone integration.
- Bluetooth 5.2 for hands-free calling and wireless music streaming.
- AM/FM/RDS Radio tuner.
- Built-in EQ adjustment for customized audio.
- Support for Steering Wheel Control (SWC).
- Rear view camera input with waterproof night vision camera included.
- MirrorLink function for iOS/Android devices.
- USB, AUX, and TF card ports for media playback and phone charging.
- Online video playback (e.g., YouTube) via Wi-Fi connection.
3.2 Unit Dimensions and Connections
The main unit features a universal 1-DIN chassis with a large 10.1-inch detachable screen. The screen angle is adjustable for optimal viewing.

Image: Front and rear views of the car stereo with dimensions and port labels.
- L-OUT / R-OUT: Left and Right audio output (RCA).
- CAMIN AV1: Rear view camera input.
- ANT: Antenna input.
- SW: Steering Wheel Control input.
- MIC: External microphone input.
- CVBSIN: Video input.
- USB: USB port for media and charging.
- Power Cable: Main power harness connection.
- Horn Cable: Horn connection.
4. Installation
This 1-DIN universal design fits most cars with an original single-DIN dash kit. Some vehicles may require an additional dash kit and wiring harness (not included) for proper fit and function. Ensure your vehicle operates on a 12V DC voltage system.
4.1 Wiring Connections
Connect the following wires correctly before powering on the radio:
- Black Wire: Connect to the negative pole (ground).
- Yellow Wire (B+): Connect to the positive terminal of the constant current battery (12V B+). This activates the memory function.
- Red Wire (ACC): Connect to the ignition switch positive.
Important: If the memory function does not work after power-off, check for reversed wiring between the ACC (red) and B+ (yellow) wires. Ensure the yellow wire is connected to constant power.
4.2 Reversing Camera Wiring
To enable the reversing camera function:
- Connect the camera's video output cable to the "CAMIN AV1" input on the car stereo.
- Connect the camera's power cable to the red port of the camera.
- Connect the red wire from the camera power cable to the reversing lamp's positive (+) terminal.
- Connect the black wire from the camera power cable to ground (GND).
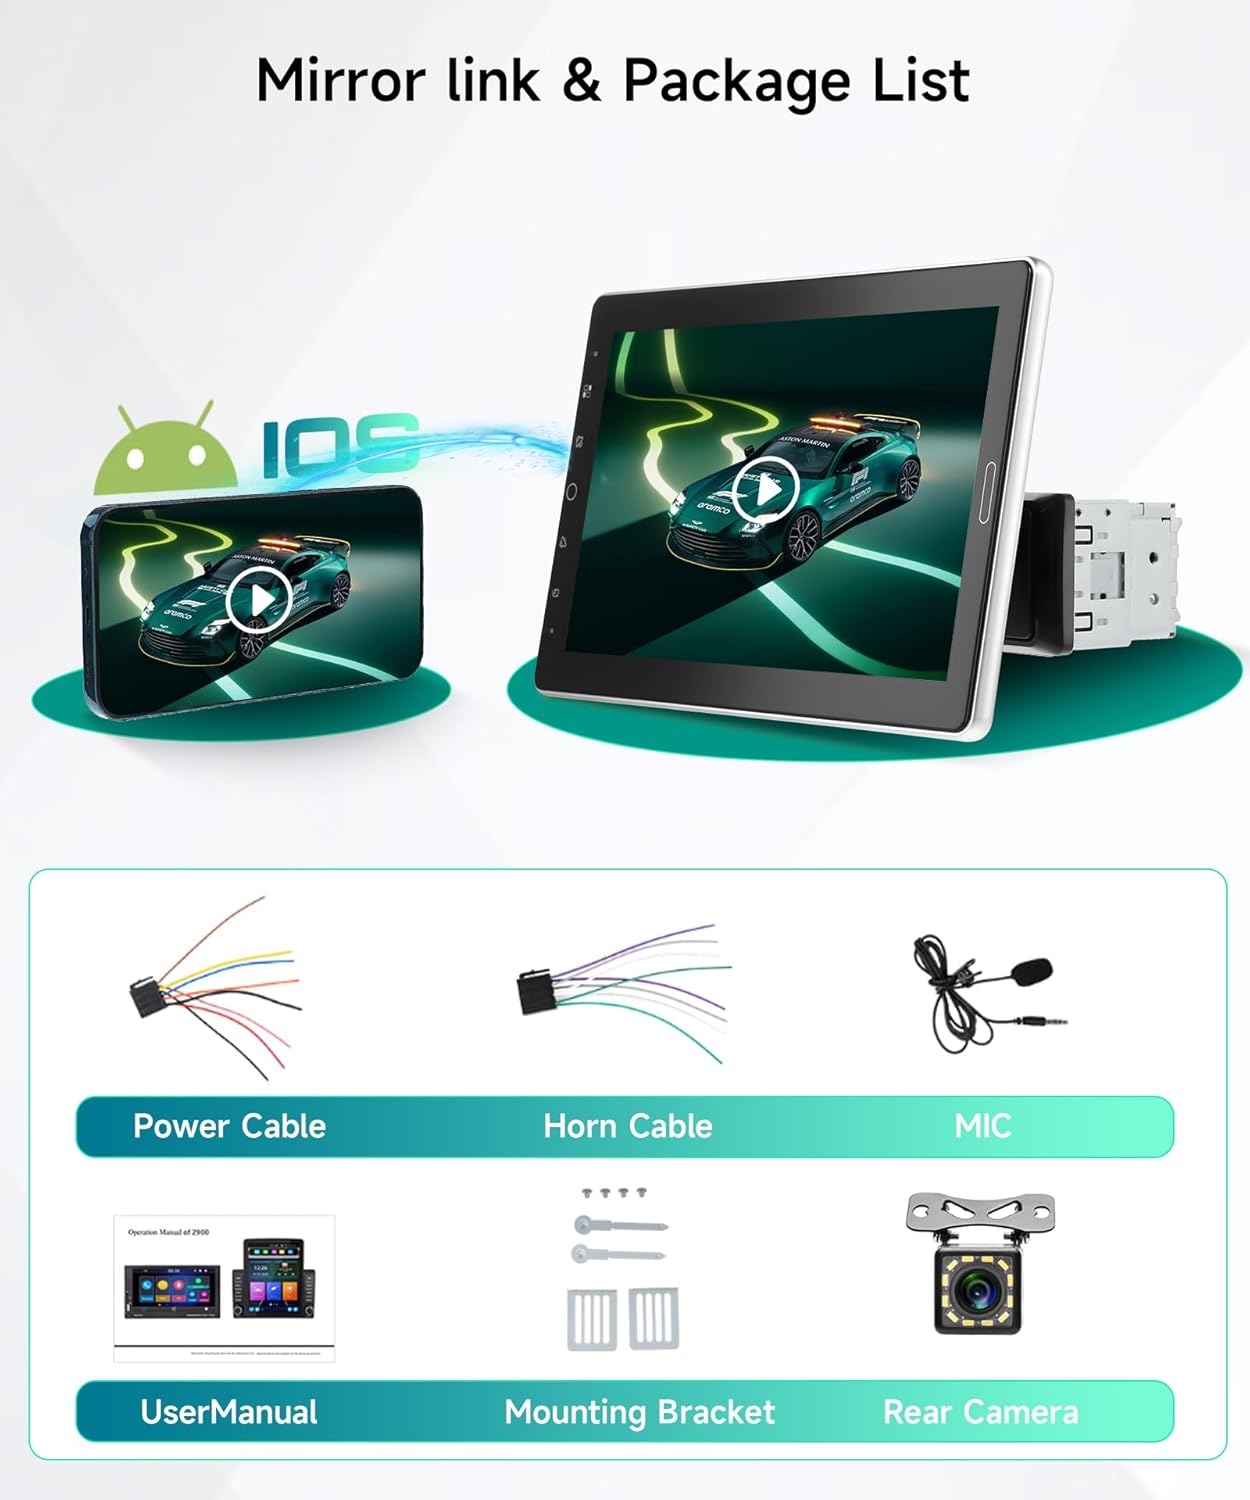
Image: Wiring diagram for the car stereo and backup camera.
4.3 Steering Wheel Control (SWC)
Connect your car's original steering wheel control wires to the SWC cable from the radio harness. You can then configure the button functions in the stereo's settings menu.
4.4 Detaching and Reattaching the Screen
The 10.1-inch screen is detachable for security and convenience. Follow these steps to remove and reattach the screen:

Image: Step-by-step guide for screen removal.
- Step 1: Remove the buckle upwards.
- Step 2: Push the buckle to the right.
- Step 3: Slide the bracket upwards.
- Step 4: After sliding to the top, push the buckle to the right and hold it, then push the bracket upwards.
- Step 5: Press the left and right clips and remove the cable downwards.
- Step 6: The screen is now detached. Reverse these steps to reattach.
5. Setup
5.1 Initial Power-On
After successful installation, turn on your vehicle's ignition to power on the stereo. The unit will display a welcome screen.
5.2 Wireless CarPlay & Android Auto
To use Wireless CarPlay or Android Auto:

Image: Wireless CarPlay and Android Auto in operation.
- Ensure your smartphone's Bluetooth and Wi-Fi are enabled.
- On the car stereo, navigate to the CarPlay or Android Auto application.
- Pair your smartphone with the car stereo via Bluetooth.
- Once paired, the system will automatically establish a Wi-Fi connection for CarPlay/Android Auto.
- Follow any on-screen prompts on your phone to grant necessary permissions.
This allows access to navigation, music, calls, and messages directly from the car's touchscreen, with voice control support (Siri/Google Assistant).
5.3 Bluetooth Pairing
For general Bluetooth functions (hands-free calling, music streaming):

Image: Bluetooth and Radio interfaces.
- Go to the Bluetooth menu on the car stereo.
- Enable Bluetooth on your smartphone and search for available devices.
- Select the car stereo (e.g., "CAR-BT-7FBE") from your phone's list and confirm pairing.
- The external microphone ensures clear call quality.
5.4 Setting Time and Date
Access the system settings to adjust the year, month, day, hour, and minute. You can also select between 12-hour and 24-hour formats.
6. Operating Instructions
6.1 Radio (AM/FM/RDS)
The stereo features an AM/FM tuner with RDS functionality. Navigate to the Radio app to scan for stations, save presets, and view RDS information (if available).
- FM Frequencies: 87.5-108MHz
- AM Frequencies: 522-1620kHz
6.2 Media Playback (USB/TF/AUX)
Insert a USB drive, TF card, or connect an external audio device via the AUX input to play music or videos. The front USB port also supports fast phone charging.
6.3 EQ Adjustment
Customize your audio experience using the built-in equalizer. Adjust settings for FGR/Super Bass, Bass, Heavy Bass, Midrange, Mid-Treble, Treble, and Super Treble to achieve desired sound profiles.

Image: Online video and EQ adjustment screens.
6.4 Steering Wheel Control Learning
After connecting the SWC wires, access the Steering Wheel Control settings in the menu. Follow the on-screen instructions to assign functions to your steering wheel buttons.

Image: Reversing camera view and steering wheel control setup.
6.5 MirrorLink Function
The MirrorLink function allows you to mirror your smartphone's screen onto the car stereo display. This is compatible with both iOS and Android devices. Access the "MirrorLink" app on the stereo and follow the pairing instructions.
6.6 Online Video Playback (YouTube)
To watch online videos, connect the car stereo to your smartphone's Wi-Fi hotspot. Then, open the YouTube application on the stereo. Video playback quality may vary depending on your mobile network speed.
6.7 Reversing Camera Display
When the vehicle is shifted into reverse, the stereo will automatically display the feed from the connected rear view camera, providing parking assistance with clear images.
7. Maintenance
- Clean the screen with a soft, dry cloth. Avoid abrasive cleaners.
- Keep the unit free from dust and moisture.
- Ensure all connections are secure to prevent intermittent issues.
8. Troubleshooting
| Problem | Possible Cause | Solution |
|---|---|---|
| Unit does not power on. | Incorrect wiring (ACC/B+ reversed), blown fuse, loose connection. | Check power wiring (Black to GND, Yellow to 12V B+, Red to ACC). Verify fuse integrity. Ensure all connections are secure. |
| Memory function not working (settings reset). | Yellow (B+) and Red (ACC) wires are reversed or not connected to constant power. | Ensure the Yellow wire is connected to a constant 12V power source and the Red wire to switched 12V power. |
| No sound or distorted sound. | Speaker wires incorrectly connected, volume too low, EQ settings. | Check speaker wiring. Adjust volume and EQ settings. Ensure audio source is active. |
| Wireless CarPlay/Android Auto not connecting. | Bluetooth/Wi-Fi off on phone, incorrect pairing, phone not supported. | Ensure phone Bluetooth and Wi-Fi are on. Re-pair the device. Check phone compatibility. |
| Reversing camera not displaying. | Camera wiring incorrect, camera faulty, vehicle not in reverse. | Verify camera video and power connections. Ensure the reverse trigger wire is correctly connected. |
9. Specifications
- Screen Size: 10.1 inches
- Screen Type: IPS Touch Screen, Detachable
- Video Playback: 1080P HD
- Installation Size: 178 (L) x 50 (H) x 84 (W) mm / 7.01 (L) x 1.97 (H) x 3.31 (W) inches
- Bluetooth Version: 5.2
- Radio Tuner: AM/FM/RDS (FM: 87.5-108MHz, AM: 522-1620kHz)
- Connectivity: Wireless CarPlay, Android Auto, MirrorLink, Bluetooth, USB, AUX, TF Card
- Power Voltage: 12V DC
- Item Weight: 3.78 pounds
- Manufacturer: Sellrich
- Model Number: SF20250910B0F621WZHM
10. Warranty and Support
For warranty information, technical support, or any questions regarding your Sellrich car stereo, please contact Sellrich customer service. You can typically find contact information on the product packaging or through the retailer where the product was purchased.

Image: How to contact Sellrich customer service.