1. Introduction
This manual provides detailed instructions for the installation, operation, and maintenance of your ASVEGE 12.1-inch Car Radio multimedia player. This unit is specifically designed for Toyota Tundra models from 2014 to 2019, offering an enhanced in-car entertainment and navigation experience.
The system features an Android 12.0 operating system, an 8-core CPU, 8GB RAM, and 128GB ROM, ensuring smooth performance. It includes a 12.1-inch HD 1024*768 IPS display, built-in DSP, FM Radio, Bluetooth 5.0, WiFi, and support for wireless/wired CarPlay and Android Auto.
2. Safety Information
- Professional Installation Recommended: Due to the complexity of car electrical systems, professional installation is highly recommended to prevent damage to the unit or your vehicle.
- Driving Safety: Always prioritize safe driving. Do not operate the unit in a way that distracts you from the road. Adjust settings only when the vehicle is stationary.
- Power Supply: Ensure the unit is connected to a 12V DC power supply with negative grounding. Incorrect voltage can cause damage.
- Wiring: Follow all wiring diagrams carefully. Incorrect wiring can lead to malfunctions or electrical hazards.
- Temperature: Avoid exposing the unit to extreme temperatures or direct sunlight for prolonged periods.
3. Package Contents
Before beginning installation, verify that all components are present in the package:
- 1 x ASVEGE 12.1-inch Head Unit (Host)
- 1 x GPS Antenna
- 1 x WiFi Antenna
- 1 x External Microphone
- 1 x USB Cable
- 1 x RCA Output/Input Cable Set
- 1 x Power Harness (Vehicle Specific)
- Additional necessary cables and adapters for installation.
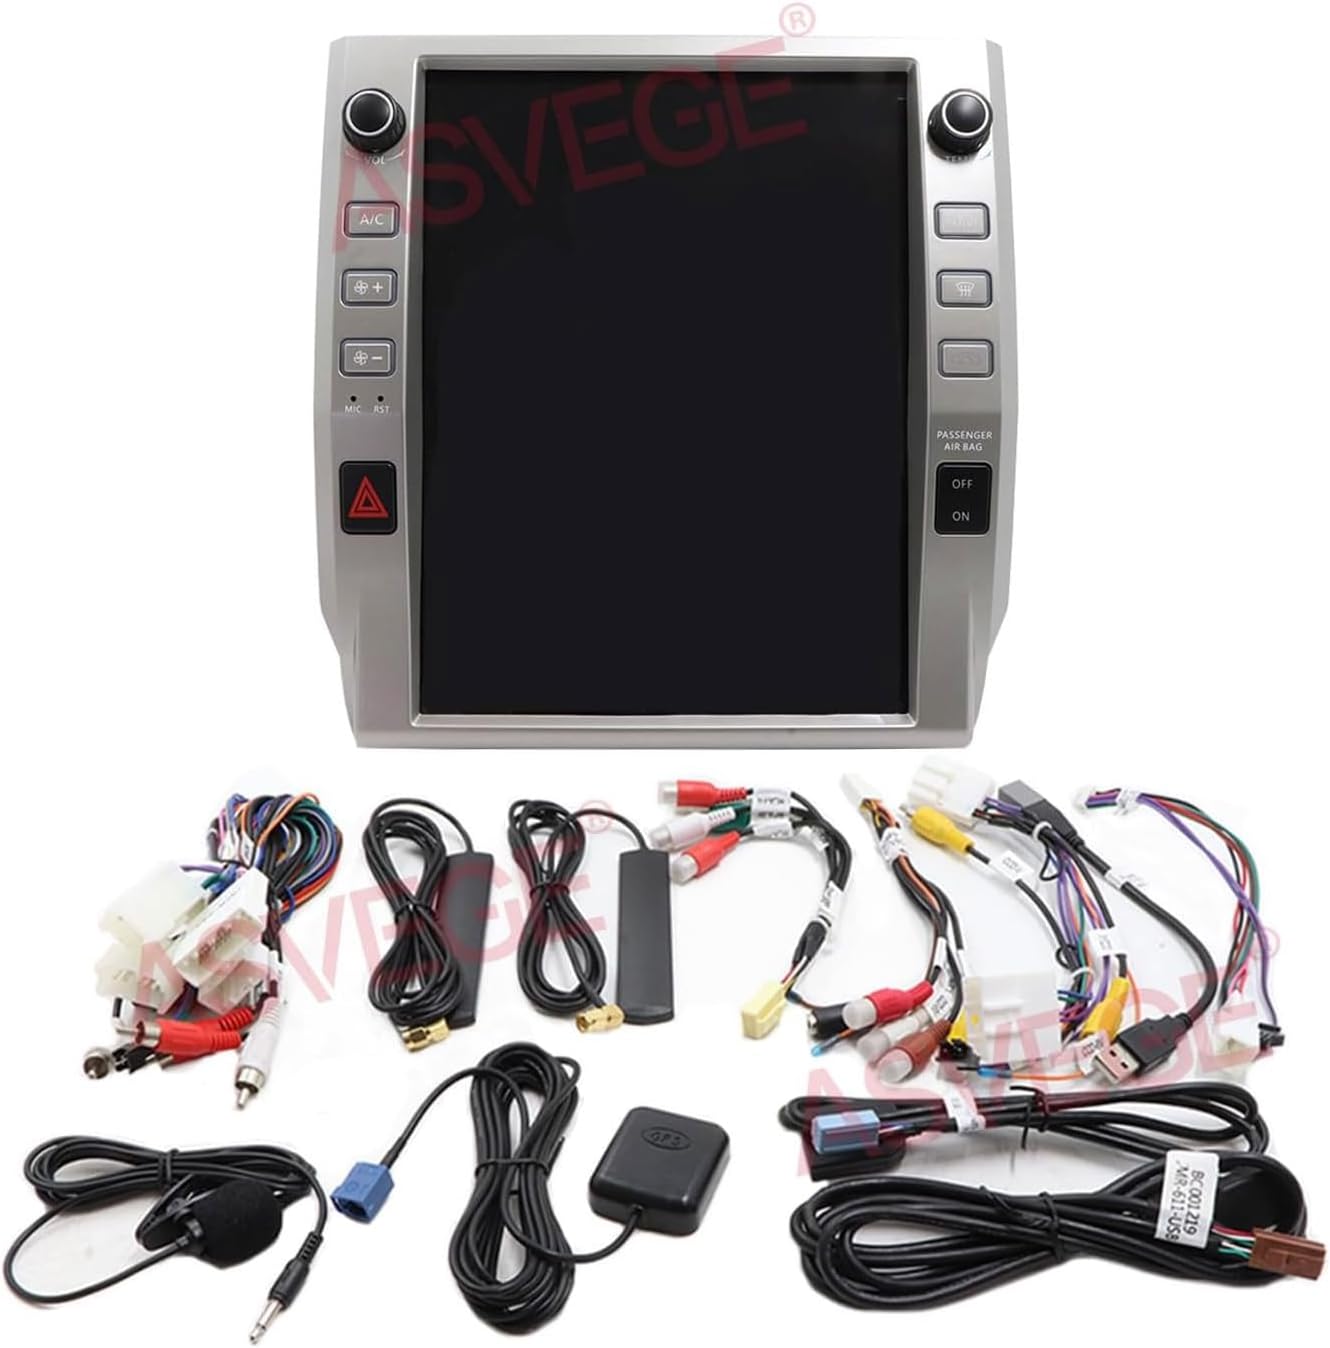
Image 3.1: Overview of the ASVEGE 12.1 Car Radio head unit and all included cables and accessories.
4. Setup and Installation
Installation of this multimedia system requires technical knowledge. If you are not confident in performing the installation yourself, please seek assistance from a qualified professional.
4.1 Pre-Installation Check
- Confirm vehicle compatibility: This unit is designed for Toyota Tundra 2014-2019 models.
- Disconnect the vehicle's battery before starting any electrical work.
- Ensure all necessary tools are available.
4.2 Removing the Original Unit
Carefully remove the existing factory radio and trim panels from your Toyota Tundra dashboard. Refer to your vehicle's service manual for specific instructions on panel removal to avoid damage.

Image 4.1: Visual comparison showing the original Toyota Tundra dashboard setup (top) and the integrated ASVEGE 12.1-inch unit after installation (bottom).
4.3 Wiring Connections
Connect the provided wiring harnesses to the new head unit and the vehicle's existing wiring. Pay close attention to the labels on each connector. Some vehicles may require specific adapters or modifications. Ensure all connections are secure.
- Power Harness: Connect the main power harness to the vehicle's power supply.
- GPS Antenna: Connect the GPS antenna and route it to a location with a clear view of the sky (e.g., on the dashboard near the windshield).
- WiFi Antenna: Connect the WiFi antenna for network connectivity.
- USB Cables: Route USB extension cables to a convenient location for connecting external devices.
- RCA Cables: Connect RCA cables for external amplifiers, subwoofers, or auxiliary video inputs/outputs as needed.
- Reverse Camera: If connecting an aftermarket reverse camera, ensure the camera's video input and trigger wire are correctly connected. The unit supports original car reversing cameras.

Image 4.2: Detailed wiring diagram illustrating connections for the ASVEGE unit, including support for original amplifiers via JMR-227 cable. Note that JMR-22B is not supported for original AMP.

Image 4.3: Illustration of amplifier control wiring (left) and the corresponding 'Original Amplifier Settings' menu within the unit's console (right), allowing adjustment of volume, bass, treble, and balance.
4.4 Installing the New Unit
Once all wiring is connected, carefully mount the ASVEGE 12.1-inch head unit into the dashboard opening. Secure it using the appropriate mounting brackets and screws. Reinstall any removed trim panels.

Image 4.4: Depicts the ASVEGE 12.1 Car Radio installed in a Toyota Tundra dashboard, compatible with both Auto AC (left) and Manual AC (right) configurations for models 2014-2021.
4.5 Initial Power-On and System Settings
Reconnect the vehicle's battery. Power on the unit. During the initial boot, you may need to access the system settings to configure specific vehicle parameters.
- Go to Car settings > System > Setting Guide > Car Model and select your specific Toyota Tundra model and year. This step is crucial for ensuring all vehicle-specific functions (like steering wheel controls, climate control integration) operate correctly.
- If you encounter issues with sound or the camera, verify the protocol version in the settings.
5. Operating Instructions
5.1 Basic Operation
- Power On/Off: Press and hold the power button (usually marked VOL) to turn the unit on or off. A short press typically mutes/unmutes audio.
- Volume Control: Use the physical volume knob or touchscreen controls to adjust audio levels.
5.2 Touchscreen Interface
The unit operates on an Android 12.0 system with a responsive 12.1-inch IPS touchscreen. Navigate through applications and settings by tapping, swiping, and pinching gestures, similar to a tablet device.

Image 5.1: The main Android interface of the ASVEGE 12.1 Car Radio, showing a grid of pre-installed and downloadable applications such as Navigation, Music, Bluetooth, and System Settings.
5.3 CarPlay and Android Auto
The unit supports both wireless and wired CarPlay/Android Auto, allowing seamless integration with your smartphone.
- Wireless Connection: Enable Bluetooth and Wi-Fi on your phone. Pair your phone with the head unit via Bluetooth. Follow the on-screen prompts to initiate wireless CarPlay or Android Auto.
- Wired Connection: Connect your phone to the unit's USB port using a compatible USB cable. The system should automatically detect and launch CarPlay or Android Auto.
- Once connected, you can access phone calls, navigation, music, and other compatible apps directly from the unit's large screen, using Siri or Google Assistant for voice control.
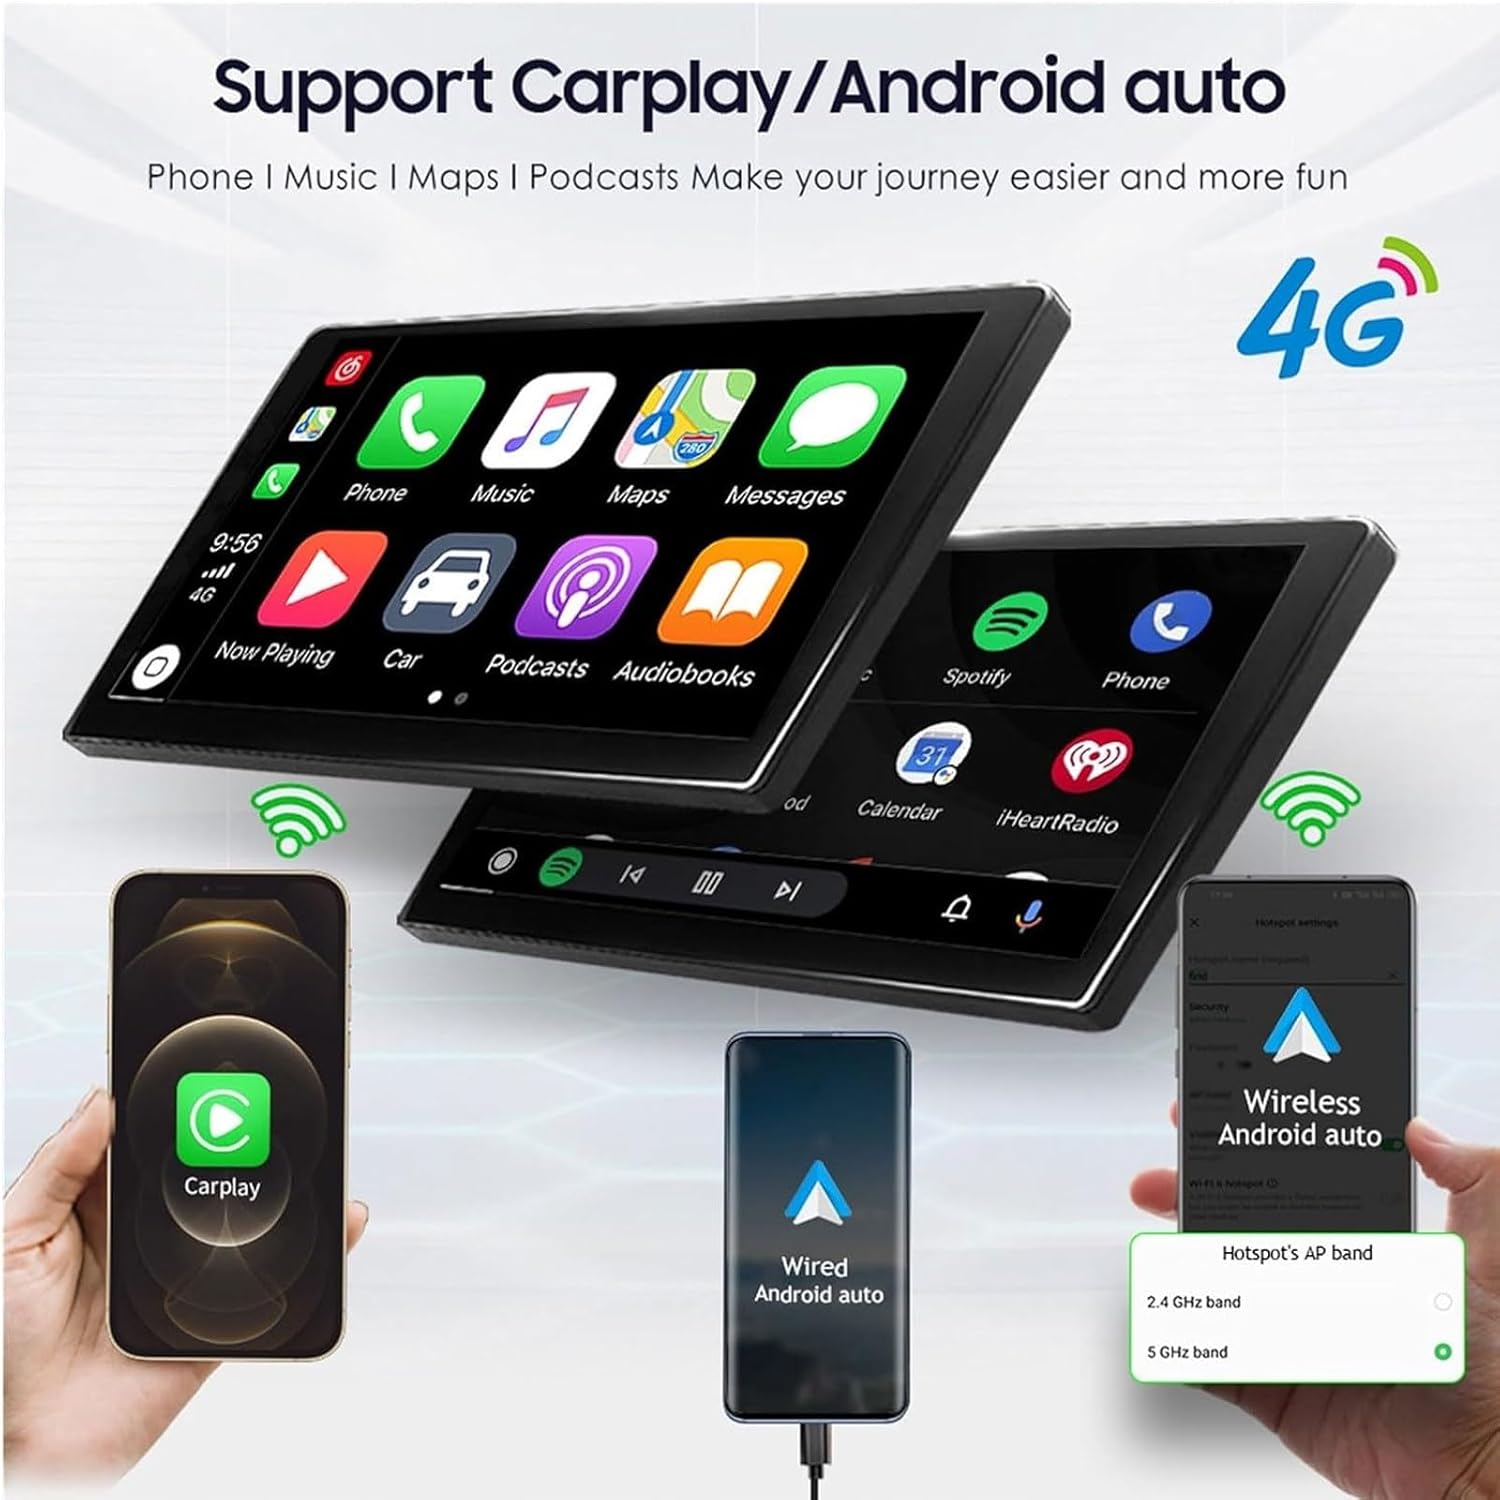
Image 5.2: Illustrates the ASVEGE 12.1 Car Radio's support for CarPlay and Android Auto, showing how phone applications like navigation, music, and calls are mirrored on the large display.
5.4 GPS Navigation
The unit comes with built-in GPS and supports both online and offline navigation maps. You can download Android-compatible navigation apps from the Google Play Store by connecting to a mobile hotspot or Wi-Fi.
- Online Maps: Use apps like Google Maps, Waze, etc., with an active internet connection.
- Offline Maps: Download map data for your region to use navigation without an internet connection.
- The system supports voice guidance and 2D/3D map views.
5.5 Bluetooth Connectivity
Bluetooth 5.0 allows for hands-free calling and audio streaming.
- Pairing: Go to the Bluetooth settings on the unit and enable Bluetooth. Search for available devices on your phone and select the unit's Bluetooth name (e.g., "GT6-BT-7852"). Confirm the pairing code if prompted.
- Hands-Free Calling: Once paired, you can make and receive calls directly through the unit.
- Audio Streaming: Play music from your phone through the car's speakers.
5.6 FM Radio
Access the FM Radio application to listen to local radio stations.
- Scanning: Use the auto-scan function to find and save available stations.
- Presets: Manually save your favorite stations for quick access.
5.7 Multimedia Playback
The unit supports various multimedia formats via USB, AUX IN, and internal storage.
- USB: Connect USB drives to play audio and video files.
- AUX IN: Connect external audio devices using the auxiliary input.
- Video Player: Play 1080P videos from compatible sources.
5.8 Steering Wheel Control
The device supports original steering wheel button learning, allowing you to map your vehicle's steering wheel controls to the unit's functions for convenient remote control.
- Access the steering wheel control settings in the system menu.
- Follow the on-screen instructions to program each button.
5.9 Rear View Camera
The unit automatically displays the rear view camera feed when the vehicle is shifted into reverse. It supports original factory cameras and aftermarket cameras.
Video 5.1: A comprehensive video guide (33:06 duration) demonstrating various features and operations of the ASVEGE car radio system, including navigation, multimedia, and connectivity options.
6. Maintenance
- Cleaning the Screen: Use a soft, lint-free cloth to gently wipe the touchscreen. For stubborn smudges, slightly dampen the cloth with water or a screen-cleaning solution. Avoid harsh chemicals.
- Software Updates: Periodically check for system software updates via the unit's settings menu (if available) to ensure optimal performance and access to new features. Connect to Wi-Fi for updates.
- General Care: Keep the unit free from dust and debris. Avoid spilling liquids on the unit.
7. Troubleshooting
If you encounter issues with your ASVEGE car radio, refer to the following common problems and solutions:
- No Power: Check all power connections and the vehicle's fuse box. Ensure the battery is properly connected.
- No Sound: Verify speaker connections. Check volume levels and ensure the unit is not muted. If using an original amplifier, ensure the correct protocol version is selected in Car settings > System > Setting Guide > Car Model.
- Camera Not Working: Check the camera's power and video input connections. Ensure the reverse trigger wire is correctly connected. Verify camera settings in the system menu.
- CarPlay/Android Auto Connectivity Issues: Ensure Bluetooth and Wi-Fi are enabled on your phone and the unit. Try restarting both devices. For wired connections, try a different USB cable.
- Some Functions Unavailable: This may be due to an incorrect protocol version. Go to Car settings > System > Setting Guide > Car Model and ensure the correct vehicle model is selected.
- GPS Signal Loss: Ensure the GPS antenna has a clear view of the sky and is securely connected.
If problems persist after attempting these solutions, please contact ASVEGE customer support via Amazon for further assistance.
8. Specifications
| Feature | Specification |
|---|---|
| Display Size | 12.06 Inches |
| Screen Resolution | HD 1024*768 IPS |
| Operating System | Android 12.0 |
| CPU | 8-core |
| RAM | 8GB |
| ROM | 128GB |
| Bluetooth Version | 5.0 |
| Connectivity | WiFi (2.4G), 3G/4G Network Support |
| Special Features | Wireless/Wired CarPlay, Android Auto, GPS Navigation, DSP, FM Radio, Touchscreen |
| Audio Output Mode | Stereo (4*50W amplification) |
| Mounting Type | Dashboard Mount |
| Vehicle Service Type | Car, Truck (Toyota Tundra 2014-2019) |
9. Warranty and Support
Your ASVEGE 12.1 Car Radio comes with a 12-month warranty from the date of purchase, covering manufacturing defects and malfunctions under normal use.
For technical support, troubleshooting assistance, or warranty claims, please contact ASVEGE customer service directly through the Amazon platform where you purchased the product. Provide your order details and a clear description of the issue to facilitate a prompt resolution.