1. Introduction
Thank you for purchasing the Cuisinart Round Flip Belgian Waffle Maker. This appliance is designed to help you create delicious, restaurant-quality Belgian waffles with ease. Please read this manual thoroughly before first use to ensure safe operation and optimal performance. Keep these instructions for future reference.
2. Product Overview & Features
The Cuisinart Round Flip Belgian Waffle Maker (Model WAF-F30NAS) is engineered for convenience and consistent results. Key features include:
- Bakes a restaurant-quality, 1-inch thick Belgian-style waffle.
- Easy-to-handle flip-style rotary operation for even baking on both sides.
- PFAS-free Ceramic nonstick plate for effortless food release and easy cleaning.
- 5-setting browning control for custom shade selection, from light and fluffy to dark and crispy.
- Ready-to-bake and ready-to-eat indicator lights prevent undercooking and overcooking.

Figure 2.1: Cuisinart Round Flip Belgian Waffle Maker (WAF-F30NAS) with prepared waffles and toppings.
3. Setup & First Use
- Unpacking: Carefully remove all packaging materials and labels from the waffle maker.
- Initial Cleaning: Wipe the nonstick plates with a damp cloth or sponge. Dry thoroughly. The drip tray should also be washed in warm, soapy water and dried.
- Placement: Place the waffle maker on a clean, flat, stable, and heat-resistant surface. Ensure there is adequate ventilation around the appliance.
- Power Connection: Plug the power cord into a standard electrical outlet. The red "POWER" indicator light will illuminate, signaling that the unit is heating.
- Preheating: Allow the waffle maker to preheat until the green "READY" indicator light illuminates. This indicates the unit has reached the optimal baking temperature.
4. Operating Instructions
Follow these steps to bake perfect Belgian waffles:
- Prepare Batter: Prepare your favorite waffle batter. For best results, ensure the batter is not too thick or too thin.
- Set Browning Control: Use the browning control dial (settings 1-5) to select your desired waffle shade. Setting 3-4 is recommended for a golden-brown waffle.
- Add Batter: Once the green "READY" light is on, open the waffle maker. Pour the batter evenly onto the center of the bottom waffle plate. Use approximately 1 cup of batter for a single waffle, or adjust as needed to fill the grid without overflowing.
- Close and Flip: Carefully close the lid. Immediately grasp the handle and rotate the waffle maker 180 degrees clockwise until it locks into place. This ensures even distribution of batter and uniform cooking. The green "READY" light will turn off.
- Baking: Allow the waffle to cook. The green "READY" light will illuminate again when the waffle is done. The cooking time will vary based on your browning setting and batter consistency.
- Remove Waffle: Once the "READY" light illuminates, rotate the waffle maker 180 degrees counter-clockwise to return it to the upright position. Open the lid and carefully remove the cooked waffle using a heat-resistant, non-metallic utensil (e.g., plastic or wooden spatula). Avoid using metal utensils, which can damage the nonstick coating.
- Repeat: Close the lid and wait for the green "READY" light to illuminate again before adding more batter for the next waffle.
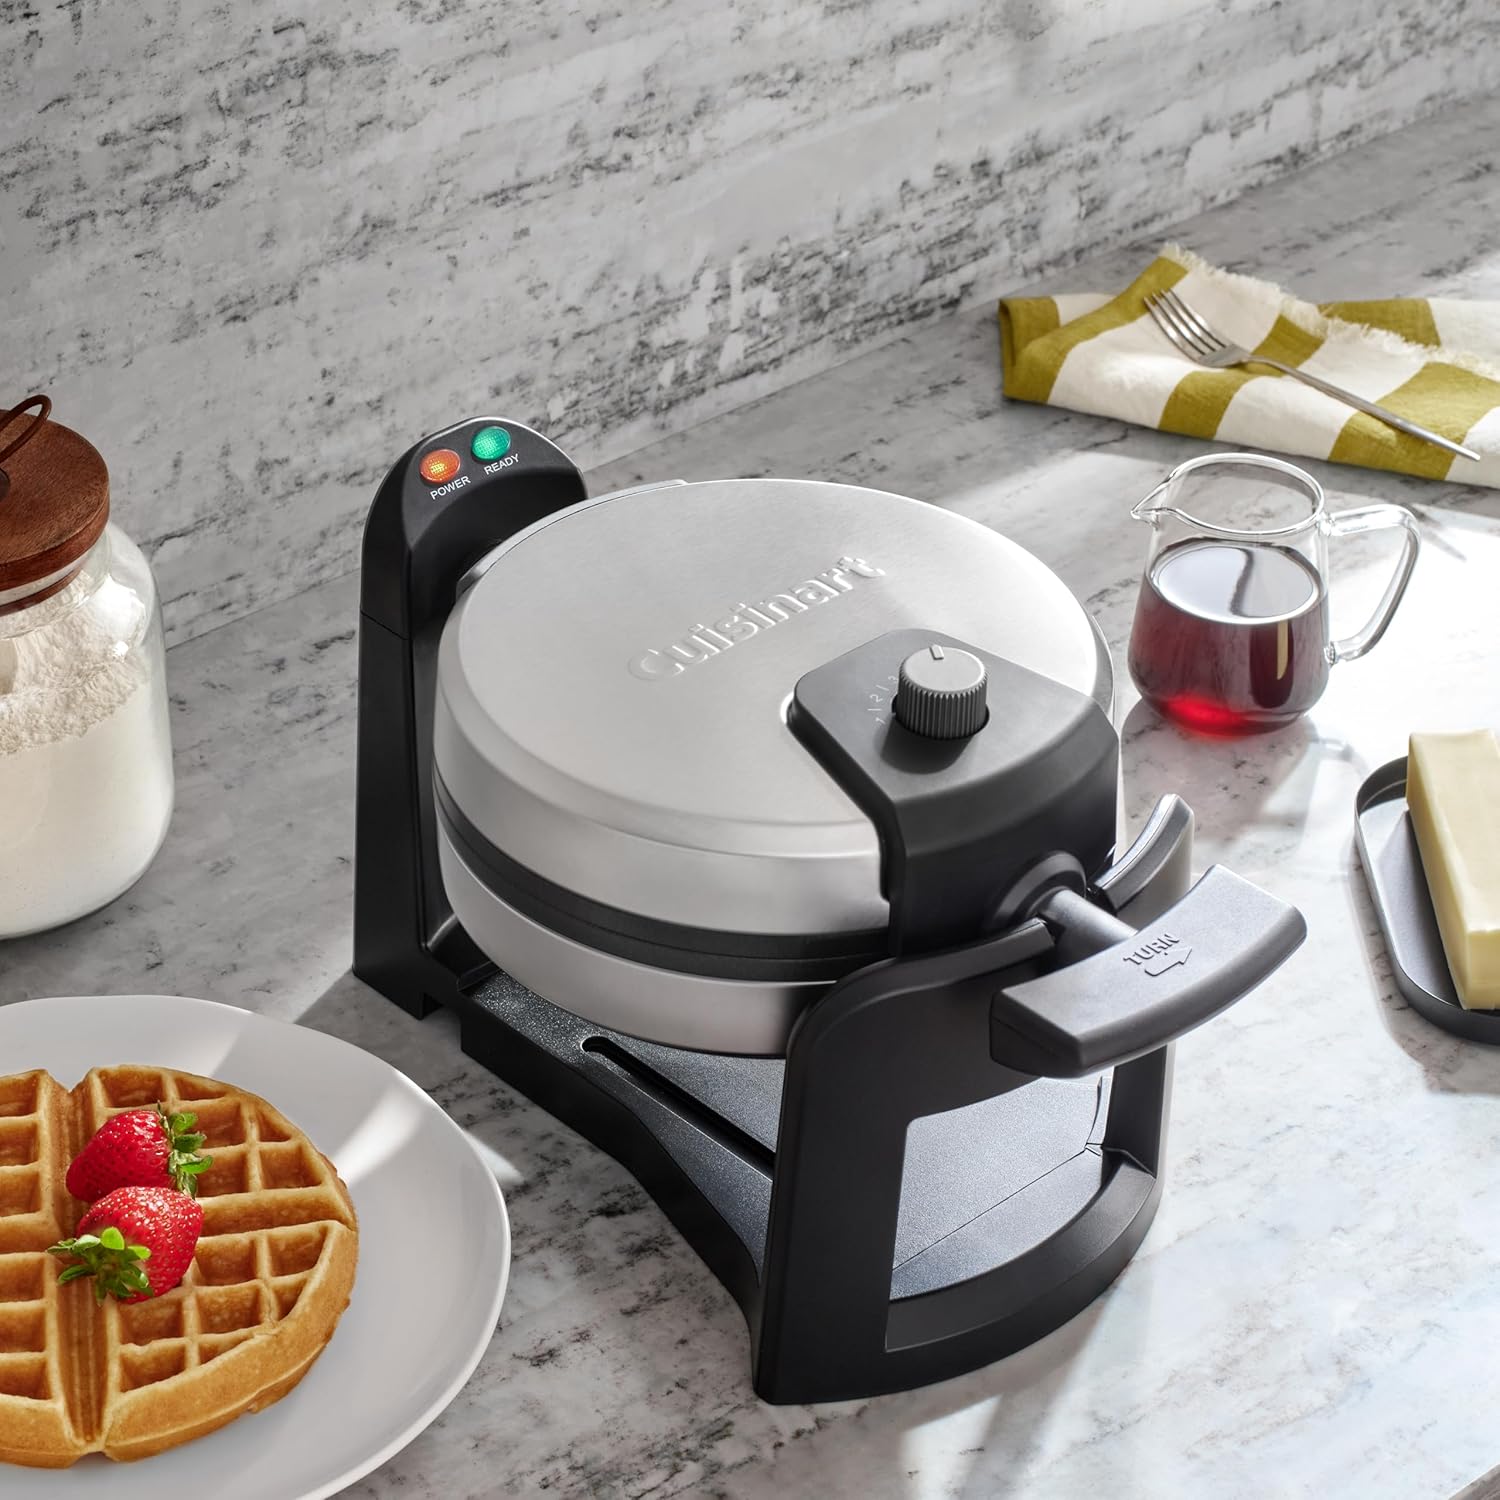
Figure 4.1: Waffle maker in upright position, ready for batter or waffle removal.
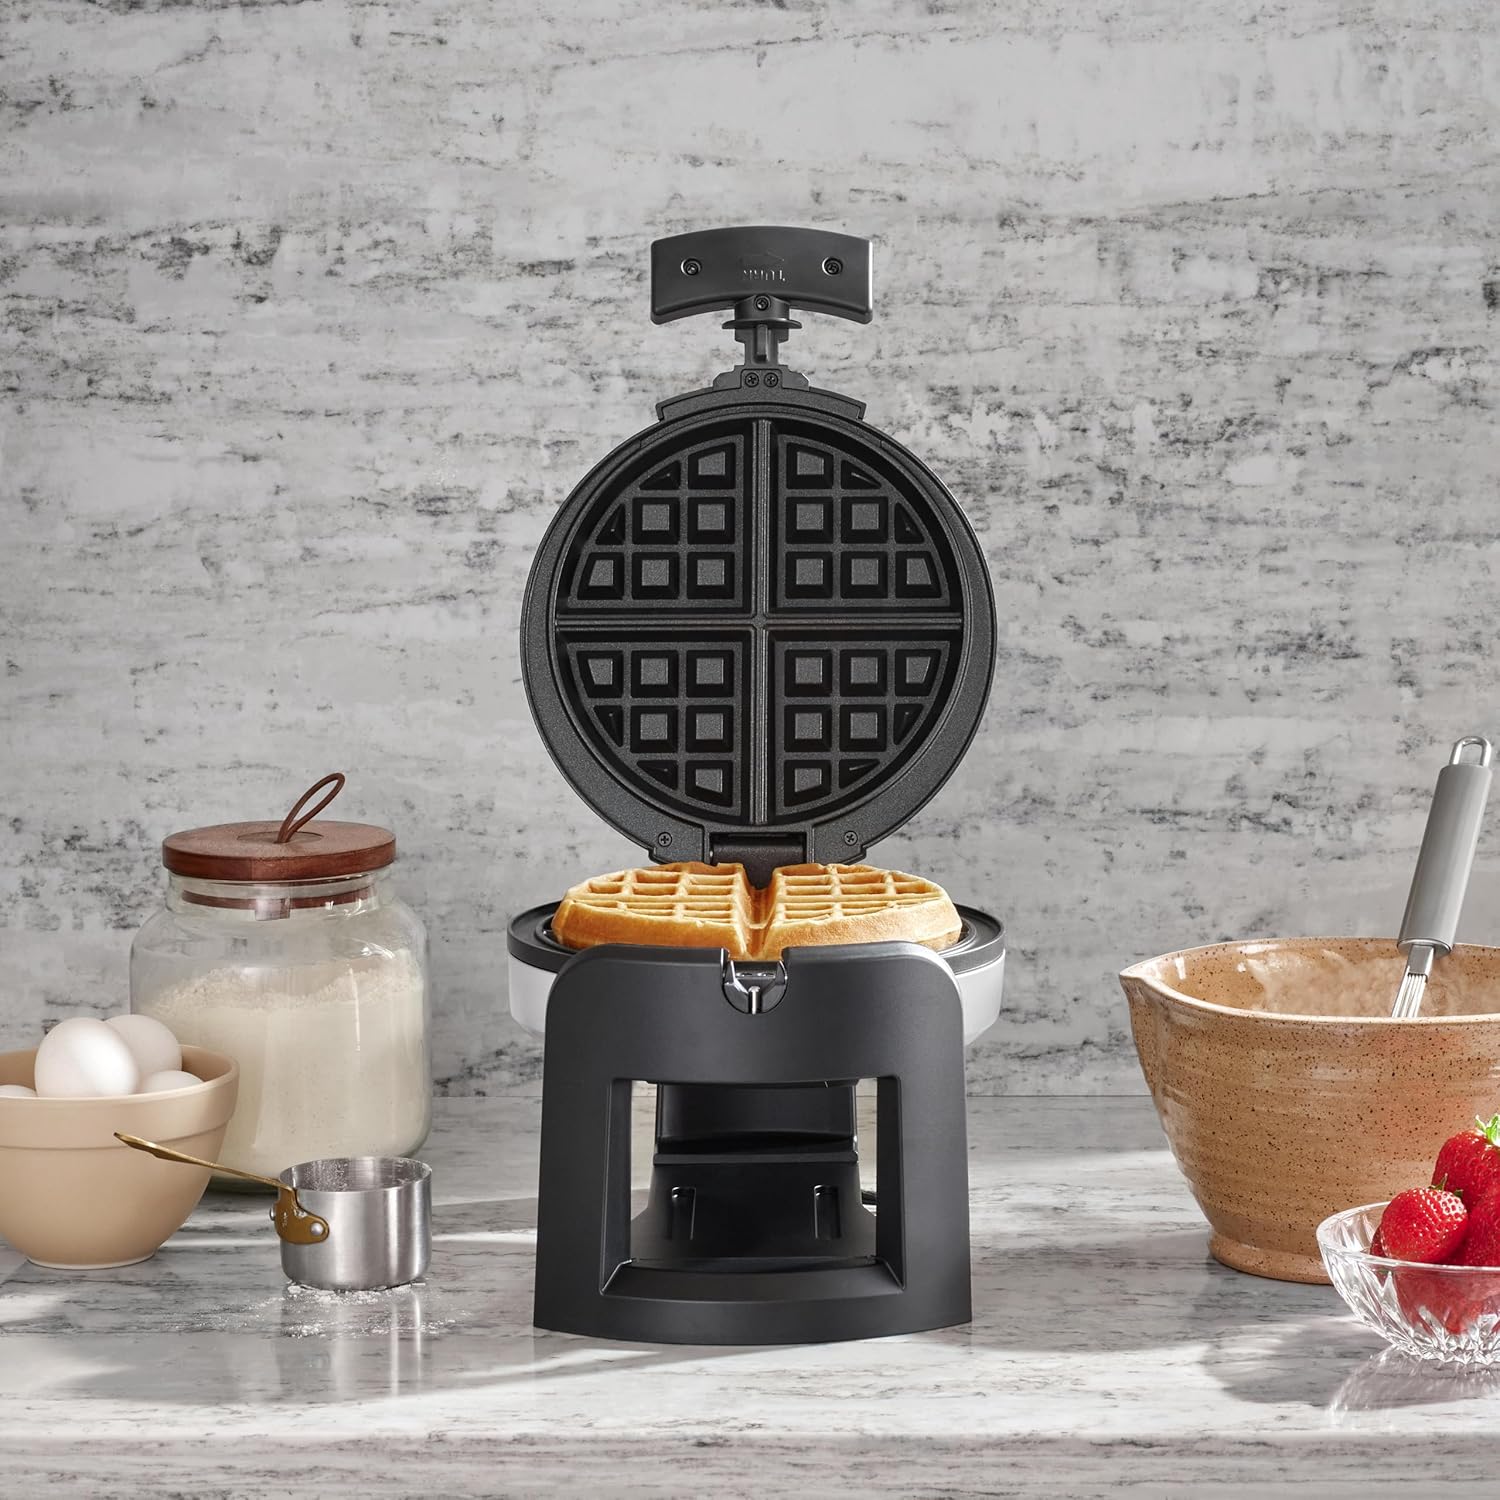
Figure 4.2: A perfectly cooked Belgian waffle inside the Cuisinart Waffle Maker.
5. Cleaning & Maintenance
Proper cleaning and maintenance will extend the life of your waffle maker.
- Cool Down: Always unplug the waffle maker and allow it to cool completely before cleaning.
- Clean Waffle Plates: The PFAS-free ceramic nonstick plates are easy to clean. Use a damp cloth or sponge to wipe away any excess batter or crumbs. For stubborn residue, a small amount of cooking oil can be applied to soften it before wiping. Never use abrasive cleaners or scouring pads, as these can damage the nonstick surface.
- Drip Tray: The removable drip tray catches any overflow batter. Remove and wash the drip tray in warm, soapy water. It is also dishwasher safe. Ensure it is dry before reinserting.
- Exterior: Wipe the exterior of the waffle maker with a soft, damp cloth. Do not immerse the unit in water or other liquids.
- Storage: Store the waffle maker in a clean, dry place. The unit can be stored upright to save counter space.
6. Troubleshooting
If you encounter issues with your waffle maker, refer to the following common solutions:
- Waffle Not Cooking Evenly: Ensure the unit is fully preheated (green "READY" light is on) before adding batter. Make sure to flip the unit 180 degrees immediately after closing the lid with batter inside.
- Waffles Sticking: Although the plates are nonstick, a light spray of cooking oil or butter can be applied before the first waffle of each batch, especially if using a low-fat batter. Ensure the plates are clean and free of residue.
- Waffles Too Light/Dark: Adjust the browning control dial to a higher setting for darker waffles or a lower setting for lighter waffles.
- Overflowing Batter: Reduce the amount of batter used per waffle. The included measuring cup (if applicable) provides a good starting point.
7. Specifications
| Feature | Detail |
|---|---|
| Brand | Cuisinart |
| Model Number | WAF-F30NAS |
| Special Feature | Manual |
| Color | Black/Stainless Steel |
| Material | Stainless Steel |
| Product Dimensions | 12.36"D x 8.34"W x 8.18"H |
| Wattage | 1000 watts |
| Item Weight | 4.27 pounds |
| Voltage | 120 Volts |
| Number of Settings | 5 (Browning Control) |
| Included Components | Waffle Maker |
8. Warranty & Support
This Cuisinart Waffle Maker comes with a Limited Warranty. For detailed information regarding warranty coverage, terms, and conditions, please refer to the warranty card included with your product or visit the official Cuisinart website. For customer support, troubleshooting assistance, or to inquire about replacement parts, please contact Cuisinart Customer Service.


