EROMMY 10X10FT with Side Shade
EROMMY Outdoor Pergola 10' x 10' User Manual
Model: 10X10FT with Side Shade
Introduction
This manual provides essential information for the assembly, operation, maintenance, and troubleshooting of your EROMMY Outdoor Pergola. Please read these instructions carefully before assembly and use to ensure safe and optimal performance of your product.
The EROMMY Outdoor Pergola is designed to provide a versatile and comfortable outdoor living space. Featuring a robust metal frame and an adjustable, retractable canopy with side sun shades, it offers flexible sun and privacy control for patios, backyards, and other outdoor areas. Its durable, waterproof, and fade-resistant fabric ensures long-lasting use.
Safety Information
WARNING: Failure to follow these safety instructions may result in injury or damage to the product.
- Always secure the shelter to the ground using the provided expansion bolts to prevent tipping in windy conditions.
- Exercise caution during assembly and disassembly to avoid injury. It is recommended that 1-2 people perform the assembly.
- Keep the shelter clear of flammable materials.
- Do not use the pergola during severe weather conditions, including strong winds, heavy rain, or snow. Retract the canopy and secure it during such conditions.
- Ensure all connections are tightened securely before and after each use.
Parts List
Before beginning assembly, verify that all parts listed below are present and undamaged. Refer to the included parts diagram for visual identification.
| Part Name | Quantity | Description |
|---|---|---|
| Main Frame Posts | 4 | Vertical support columns. |
| Cross Beams | 4 | Horizontal support for the canopy. |
| Retractable Canopy Fabric | 2 | Beige polyester fabric with PU coating. |
| Side Sun Shades | 2 | Adjustable fabric panels for privacy and shade. |
| Hardware Kit | 1 set | Includes bolts, nuts, washers, expansion bolts, and tools. |
| Tie Straps | Multiple | For securing the canopy and side shades. |
Setup and Assembly
The EROMMY retractable pergola is designed for straightforward assembly. It is recommended that 1-2 people perform the assembly, which typically takes 2-3 hours. All parts are labeled, and a clear manual with diagrams is included.
- Unpack and Identify Parts: Carefully unpack all components and lay them out. Compare them against the parts list and diagram to ensure everything is present.
- Assemble the Frame: Begin by connecting the main frame posts to the cross beams according to the diagram. Ensure all bolts are finger-tight initially.
- Secure the Frame: Once the basic frame is assembled, carefully lift and position it in your desired location. Use the provided expansion bolts to firmly secure the pergola to the ground. This step is crucial for stability and wind resistance.
- Install the Canopy Rails: Attach the canopy rails to the frame as indicated in the instructions. These rails guide the retractable canopy.
- Attach the Retractable Canopy: Slide the two-piece split canopy fabric onto the designated rails. Ensure the fabric tubes are properly aligned to reduce wear.
- Install Side Sun Shades: Attach the side sun shades to the frame. These can be adjusted later for privacy and shade.
- Final Tightening: Once all components are in place, systematically tighten all bolts and connections using the provided tools. Double-check for stability.

Image: Fully assembled EROMMY Outdoor Pergola with side shades extended, providing shade over an outdoor dining set.
Operating Instructions
Your EROMMY pergola features an adjustable canopy and side sun shades for customized light and privacy control.
Adjusting the Retractable Canopy:
- The canopy consists of two independent sections. To adjust, gently pull or push each section along its designated rails.
- Extend the canopy fully for maximum shade and UV protection.
- Retract the canopy partially or fully to allow more sunlight.
- Use the integrated tie straps to secure the canopy in your desired position, preventing wind lift and noise.

Image: Visual representation of the flexible sun shading, demonstrating how the side curtains can be adjusted to different positions (right, middle, left) for optimal shade and privacy.
Adjusting Side Sun Shades:
- The side shades can be raised or lowered to provide additional privacy and shelter from low-angle sun.
- Secure the side shades using their respective tie straps to maintain their position and prevent movement in breezy conditions.

Image: The EROMMY pergola shown with its side shades partially lowered, creating a more enclosed and private outdoor space.
Maintenance
Regular maintenance will extend the life and appearance of your EROMMY pergola.
- Canopy Cleaning: The polyester canopy with PU coating is machine-washable for easy maintenance. For light cleaning, wipe with a damp cloth and mild soap. Allow to air dry completely before retracting or storing.
- Frame Cleaning: Clean the metal frame with a soft cloth and mild detergent. Avoid abrasive cleaners or harsh chemicals that could damage the anti-rust coating.
- Hardware Check: Periodically inspect all bolts and connections to ensure they remain tight. Re-tighten as necessary to maintain structural integrity.
- Winter Storage: In areas with heavy snow or extreme winter conditions, it is recommended to remove the canopy fabric and store it indoors to prevent damage. The frame can remain outdoors if properly secured.
- Fabric Wear: The extended fabric tube design helps reduce fabric wear. Regularly check the canopy and side shades for any signs of wear or tear and address them promptly to prevent further damage.
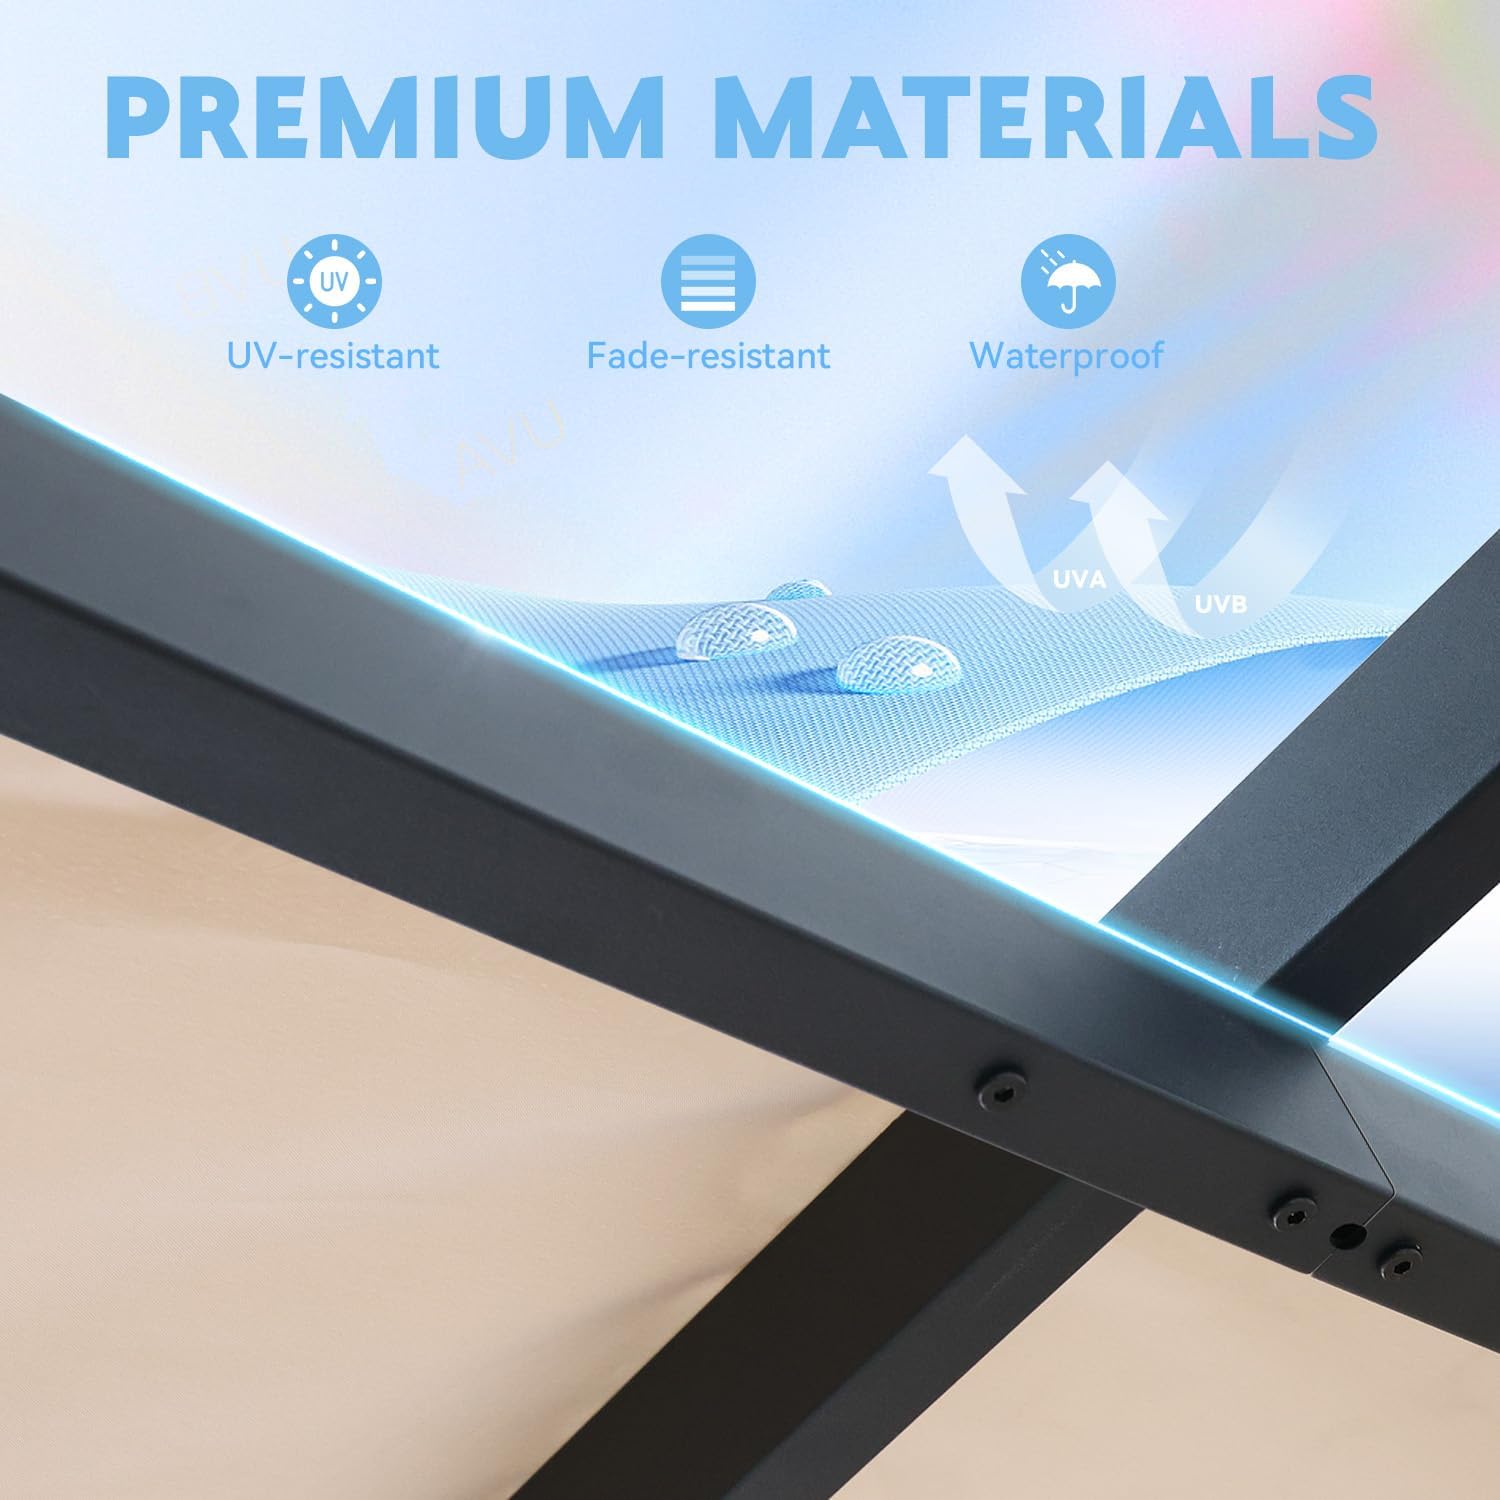
Image: Detail view highlighting the durable design elements, such as the extended fabric tube that minimizes wear and the windproof straps for securing the canopy.
Troubleshooting
This section addresses common issues you might encounter with your EROMMY Outdoor Pergola.
| Problem | Possible Cause | Solution |
|---|---|---|
| Pergola feels unstable or wobbly. | Loose connections; not properly secured to the ground. | Ensure all bolts are tightened. Verify that the expansion bolts are securely anchored to the ground. If on a soft surface, consider additional anchoring. |
| Canopy does not retract/extend smoothly. | Obstruction in the rails; fabric misaligned; dirty rails. | Check rails for debris. Ensure fabric is correctly aligned within the tracks. Clean rails with a damp cloth. |
| Water pools on the canopy. | Canopy not taut enough; heavy rainfall. | Ensure the canopy is fully extended and secured with tie straps to maintain tension. During heavy rain, it is advisable to retract the canopy to prevent pooling and potential damage. |
| Side shades do not stay in place. | Tie straps not secured; strong winds. | Ensure all tie straps are firmly secured to the frame. In very windy conditions, it may be necessary to fully retract the side shades. |
Specifications
| Feature | Detail |
|---|---|
| Brand | EROMMY |
| Model | 10X10FT with Side Shade |
| Product Dimensions | 118.08"L x 118.08"W x 90.6"H |
| Item Weight | 87 Pounds |
| Frame Material | Metal, Aluminum (Galvanized iron and aluminum alloy construction) |
| Canopy Material | Polyester with PU coating |
| Color | Beige |
| Water Resistance Level | Waterproof |
| UV Protection | 100 (UV-resistant, fade-resistant) |
| Occupancy | 4-8 People |
| Assembly Required | Yes |

Image: Detailed dimensions of the pergola, including overall length, width, and height, essential for planning installation space.

Image: An illustration of the robust triangular structure and the multi-layered anti-rust coating applied to the metal frame, emphasizing durability.
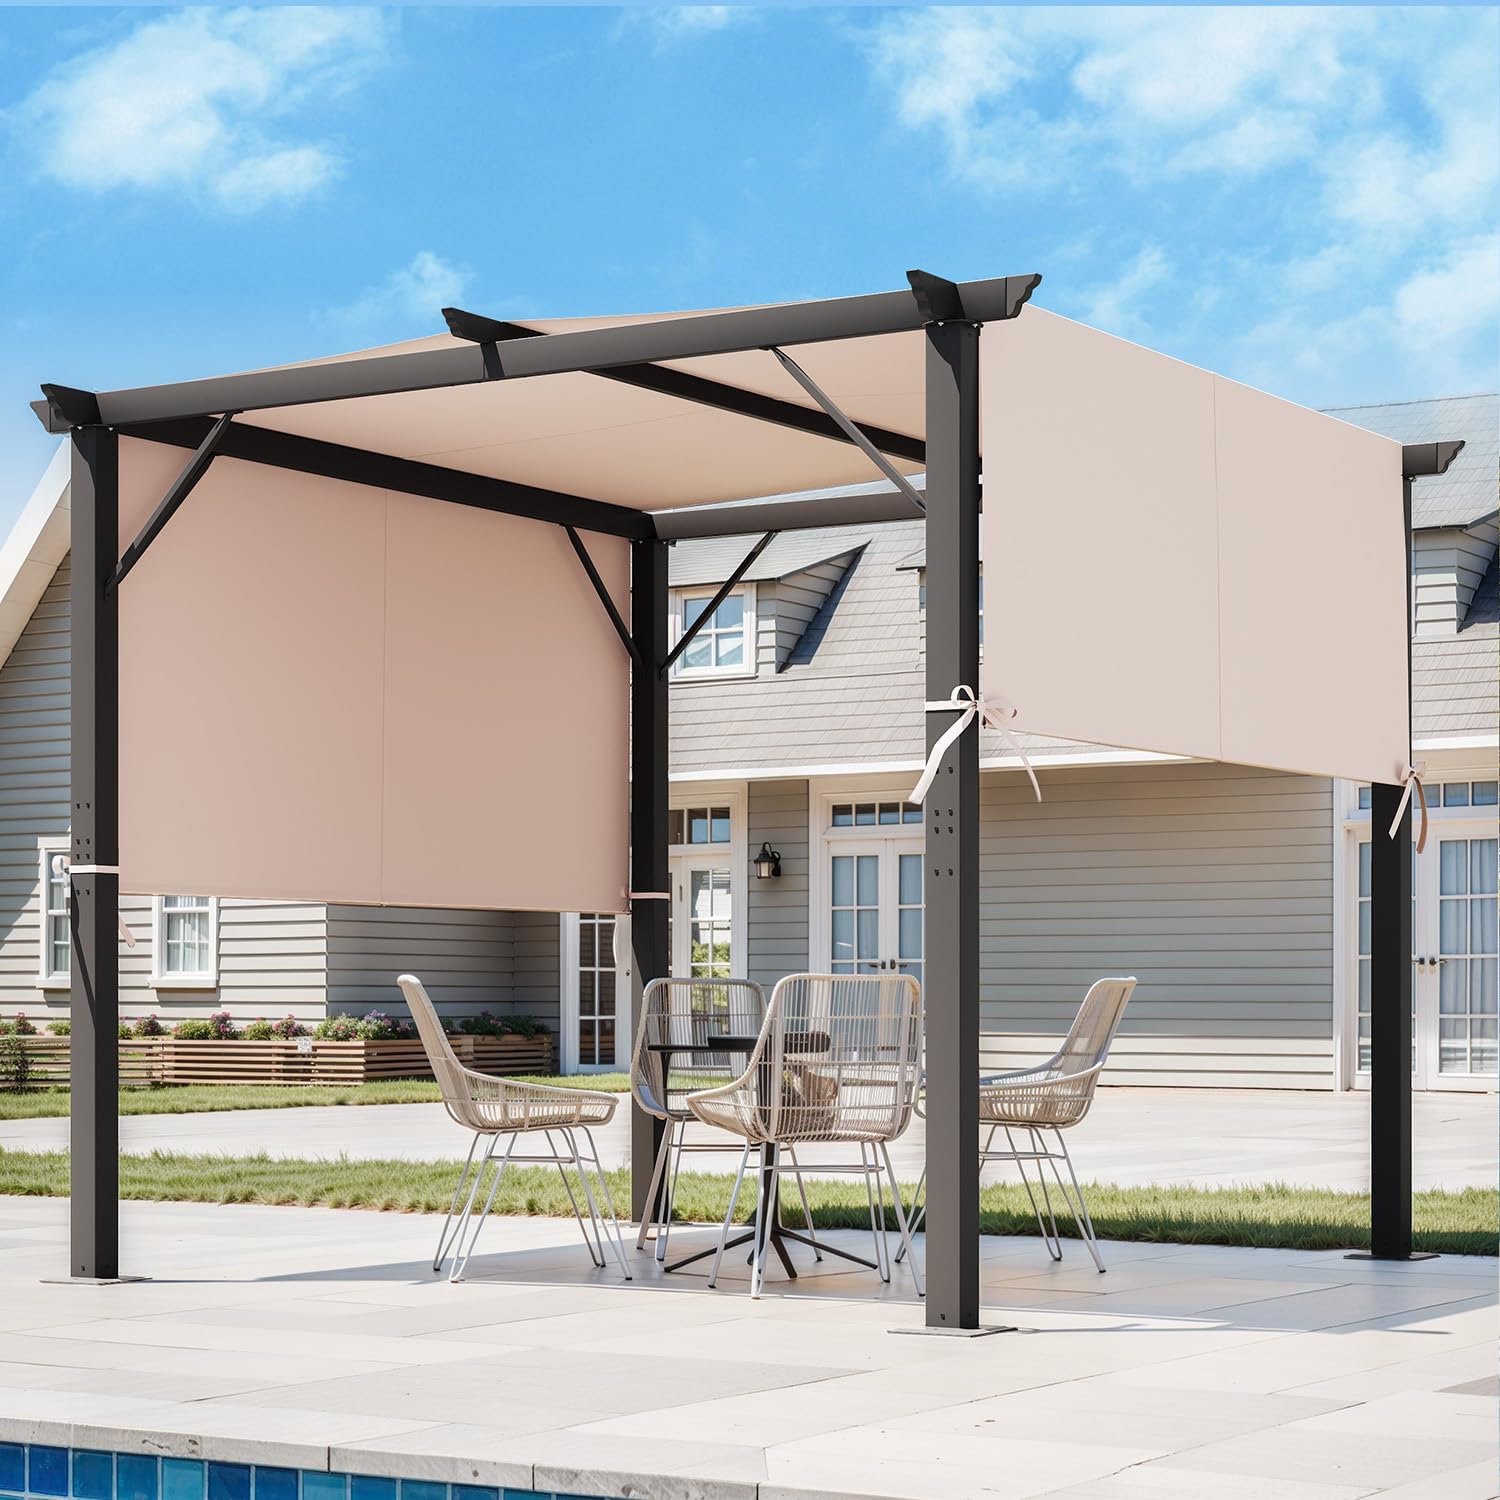
Image: A graphic detailing the premium qualities of the canopy fabric, including its UV-resistant, fade-resistant, and waterproof characteristics, with visual cues for UVA and UVB protection.
Warranty and Support
EROMMY stands behind the quality of its products. While specific warranty details are not provided in this manual, our customer service team is available to assist you with any questions or concerns regarding assembly, parts, or product performance.
For support, please refer to the contact information provided at the point of purchase or visit the official EROMMY website.
Contact Information:
- Website: EROMMY Official Store on Amazon
- Customer Service: Please refer to your purchase documentation for direct contact methods.
Related Documents - 10X10FT with Side Shade
 |
Motorized Louvered Pergola Assembly and Installation Guide Comprehensive assembly and installation guide for the Erommy Motorized Louvered Pergola. Includes detailed parts lists for various boxes (A-H), important safety notices, and dimensional diagrams for proper setup. |
 |
XWG-090 10 FT x 10 FT Pergola: Assembly Instructions and Parts List Comprehensive instruction manual for assembling the EROMMY XWG-090 10 FT x 10 FT Pergola. Includes a detailed parts list, assembly steps, warnings, and required tools. |
 |
Outsunny 84C-584V00 Garden Pergola Assembly Guide | Retractable Roof Canopy Comprehensive assembly instructions for the Outsunny 84C-584V00 Garden Pergola. Learn how to build your aluminium pergola with retractable roof and roller shade. Includes parts, hardware, and step-by-step guidance. |
 |
Flexpatio Shuttered Pergola Wall Installation Guide Comprehensive installation guide for the Flexpatio Shuttered Pergola Wall (13' Side), covering safety precautions, required tools, included parts, step-by-step assembly instructions, and warranty information. |
 |
FlexPatio Roller Shades Pergola Wall Installation Guide Comprehensive installation manual for the FlexPatio Roller Shades Pergola Wall, including safety information, parts list, step-by-step assembly instructions, and remote control operation. |
 |
PERGOLUX ZIP SCREEN S1 Crank Side Installation Guide Step-by-step instructions for installing the PERGOLUX ZIP SCREEN S1 on the crank side of your pergola, including tools, parts, and assembly details. |
Ask a question about this manual
Ask about setup, troubleshooting, compatibility, parts, safety, or missing instructions. Manuals+ will review the question and use this page’s manual context to help answer it.