1. Introduction
This manual provides detailed instructions for the safe and efficient operation, setup, and maintenance of the LDMLAX A-87S Automatic Fiber Optic Fusion Splicer. The A-87S is a high-precision instrument designed for splicing various types of optical fibers, featuring automatic core alignment, a 3.5-inch TFT color LCD display, and a versatile fiber fixture system. Please read this manual thoroughly before using the device.
2. Safety Information
Always observe the following safety precautions to prevent injury and damage to the equipment:
- Do not expose the splicer to rain or moisture.
- Ensure the power supply voltage matches the device requirements.
- Avoid looking directly into the fiber end during splicing, as invisible laser light may be present.
- Handle optical fibers with care; they are fragile and can cause splinters.
- Keep the splicing area clean and free of debris.
- Only use accessories and replacement parts approved by LDMLAX.
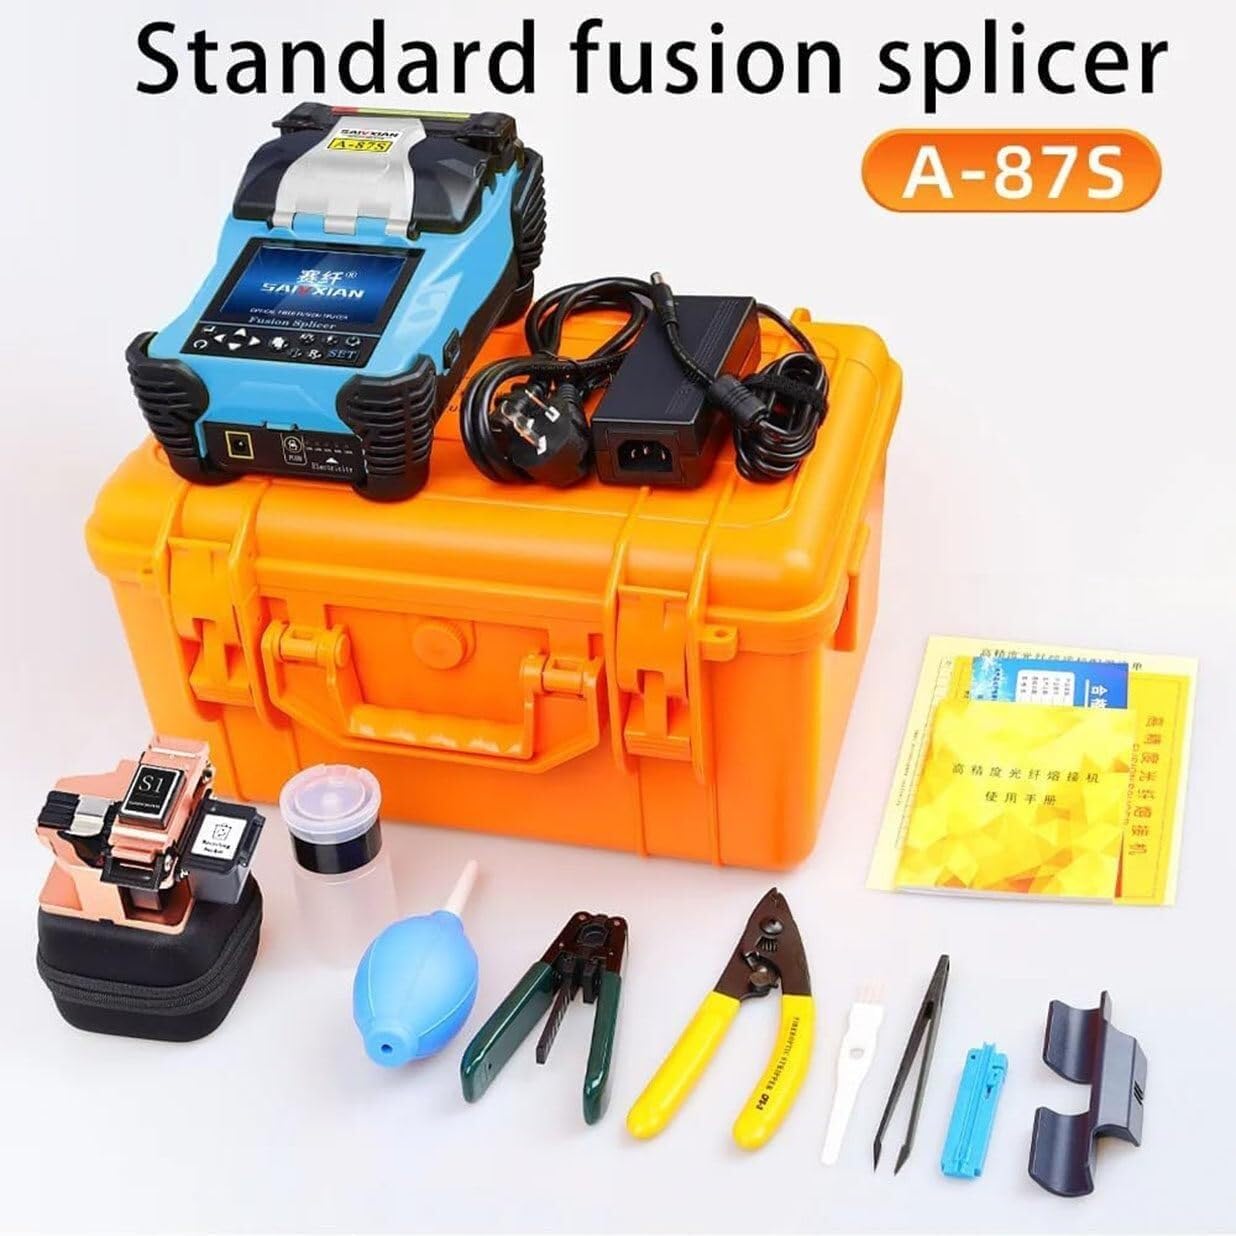
3. Package Contents
Verify that all items listed below are present in your package:
- 1 x Optical Fiber Fusion Splicer Kit (includes A-87S Splicer)
- Matching Battery (built-in)
- Power Adapter
- Fiber Cleaver
- Fiber Strippers
- Alcohol Dispenser
- Other essential tools and accessories

The complete package for the A-87S Fiber Optic Fusion Splicer, including the splicer unit, power adapter, carrying case, fiber cleaver, fiber strippers, alcohol dispenser, and other essential tools for fiber optic splicing.
4. Setup
4.1 Initial Inspection
Upon unpacking, inspect the splicer and all accessories for any signs of damage. If any damage is found, do not operate the device and contact customer support.
4.2 Charging the Battery
The A-87S comes with a built-in 11.1V 4800mAh lithium battery. Before first use, fully charge the battery using the provided power adapter. A full charge typically takes 3.5 hours.
4.3 Powering On/Off
Press and hold the power button to turn the splicer on or off. The 3.5-inch TFT color LCD display will illuminate upon startup.
4.4 Language Settings
The device supports both Chinese and English languages. Navigate through the display menu to select your preferred language for operation.

The A-87S Fiber Optic Fusion Splicer features a 3.5-inch TFT color LCD display for clear operation and monitoring. The display content can be flipped for convenient two-way use, and the system supports both Chinese and English languages.
5. Operating Instructions
5.1 Fiber Preparation
- Strip the Fiber: Use a fiber stripper to remove the protective coating from the fiber end, exposing the bare fiber.
- Clean the Fiber: Clean the bare fiber with an alcohol wipe to remove any contaminants.
- Cleave the Fiber: Use a precision fiber cleaver to create a clean, perpendicular end face on the fiber. Ensure the cleave length is appropriate for the splicer (e.g., 8-16mm for coating below 250µm).
5.2 Placing Fiber in the Fixture
The A-87S features a multifunctional three-in-one fixture, suitable for bare fiber, pigtail, jumper, and leather cable. Carefully place the prepared fiber ends into the V-grooves of the splicer's fixture. Ensure the fiber is seated correctly and securely.
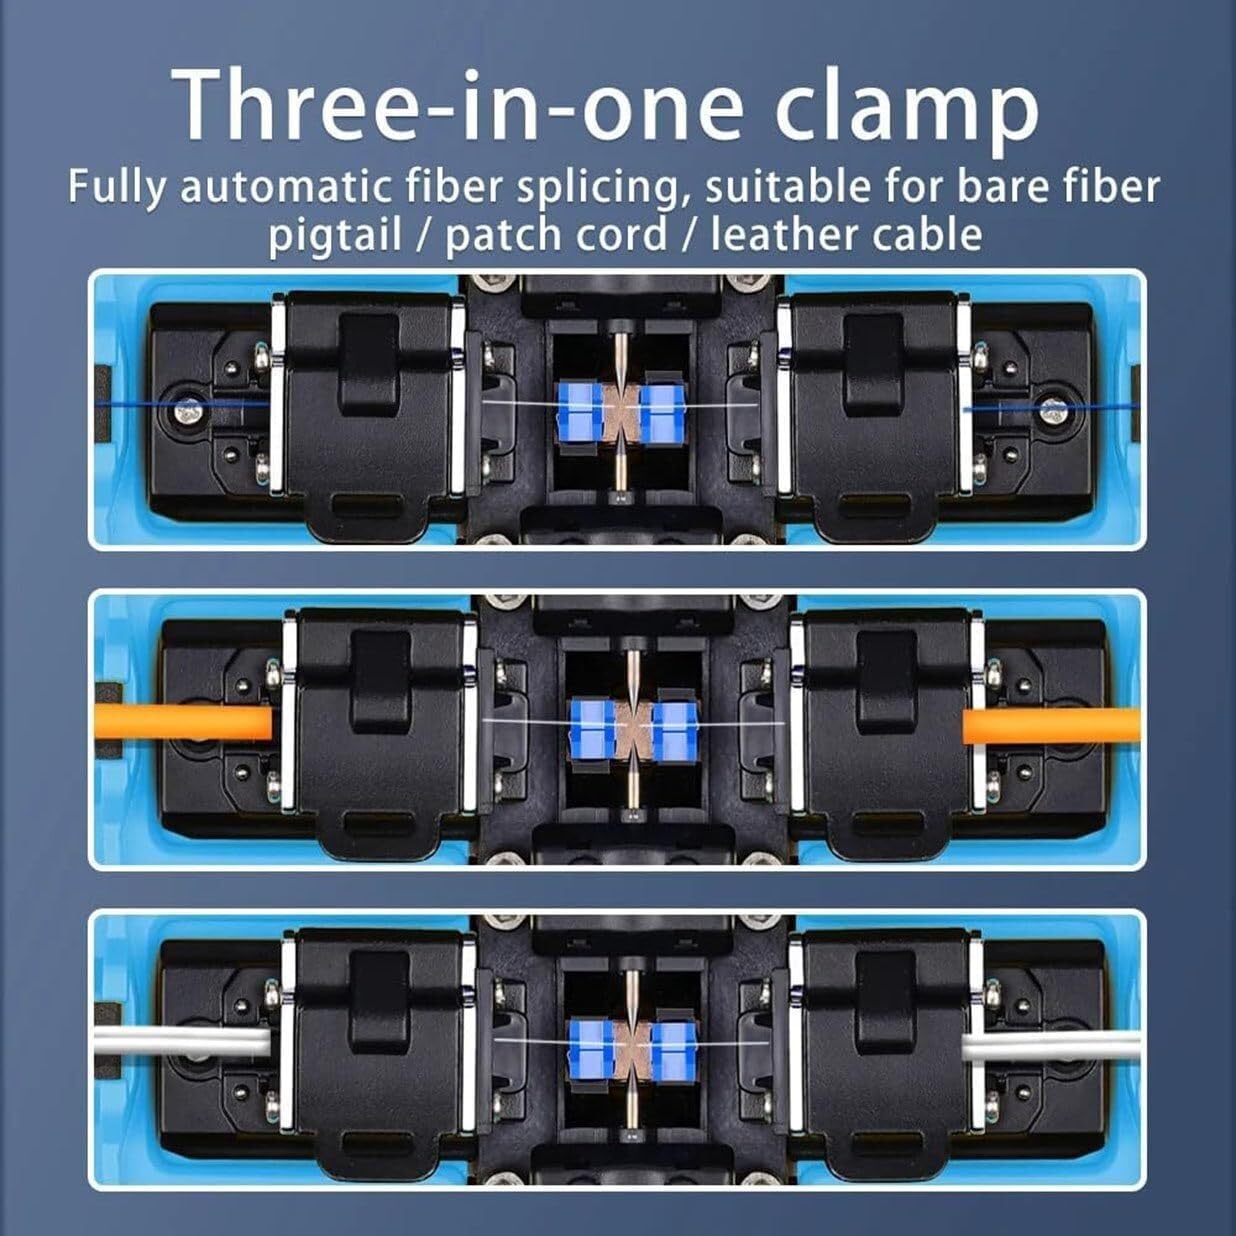
This image demonstrates the versatile three-in-one clamp system of the A-87S fusion splicer. It is designed for fully automatic fiber splicing and is suitable for bare fiber, pigtail, patch cord, and leather cable, providing broad compatibility for different FTTx fiber optic cables.
5.3 Splicing Process
Close the splicer lid. The A-87S will automatically perform core alignment using its four-motor high-precision system and initiate the splicing process. The typical connection time is approximately 9 seconds.
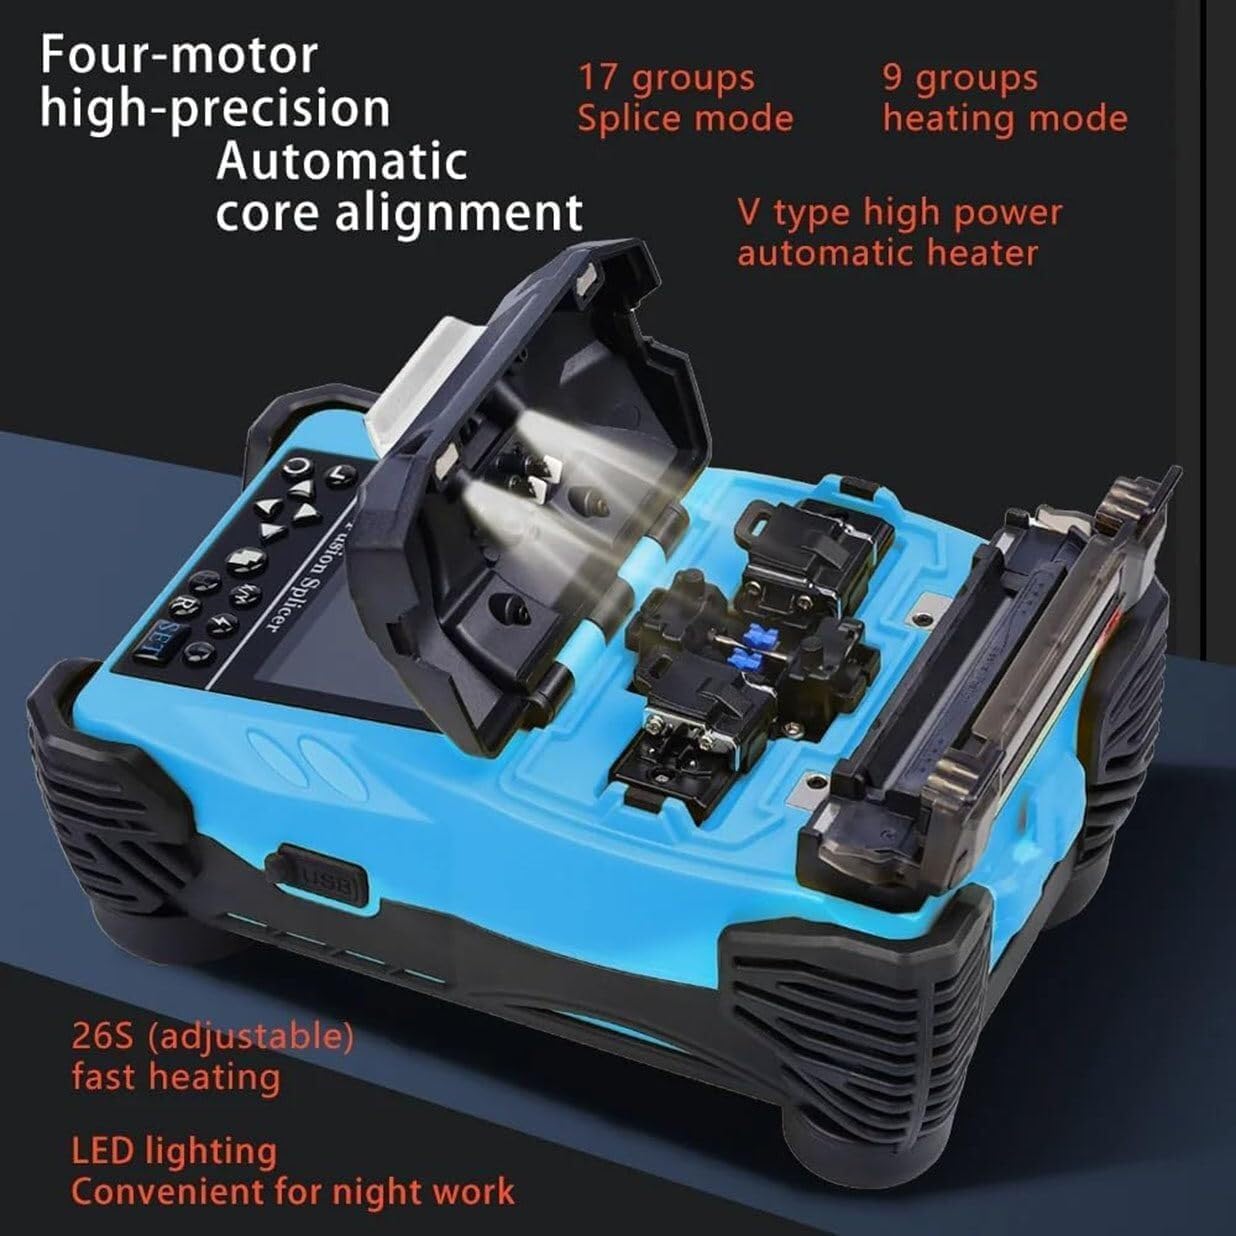
An internal view of the A-87S fusion splicer, illustrating its four-motor high-precision automatic core alignment system. It also features a V-type high-power automatic heater for efficient heat shrinking and LED lighting for night work. The device offers 17 splice modes and 9 heating modes.
5.4 Heating Process
After splicing, place the splice protection sleeve over the splice point and move it into the heating oven. The A-87S features a V-type high-power automatic heater. The typical heating time is 26 seconds, but this can be adjusted, along with the heating temperature, through the device settings.
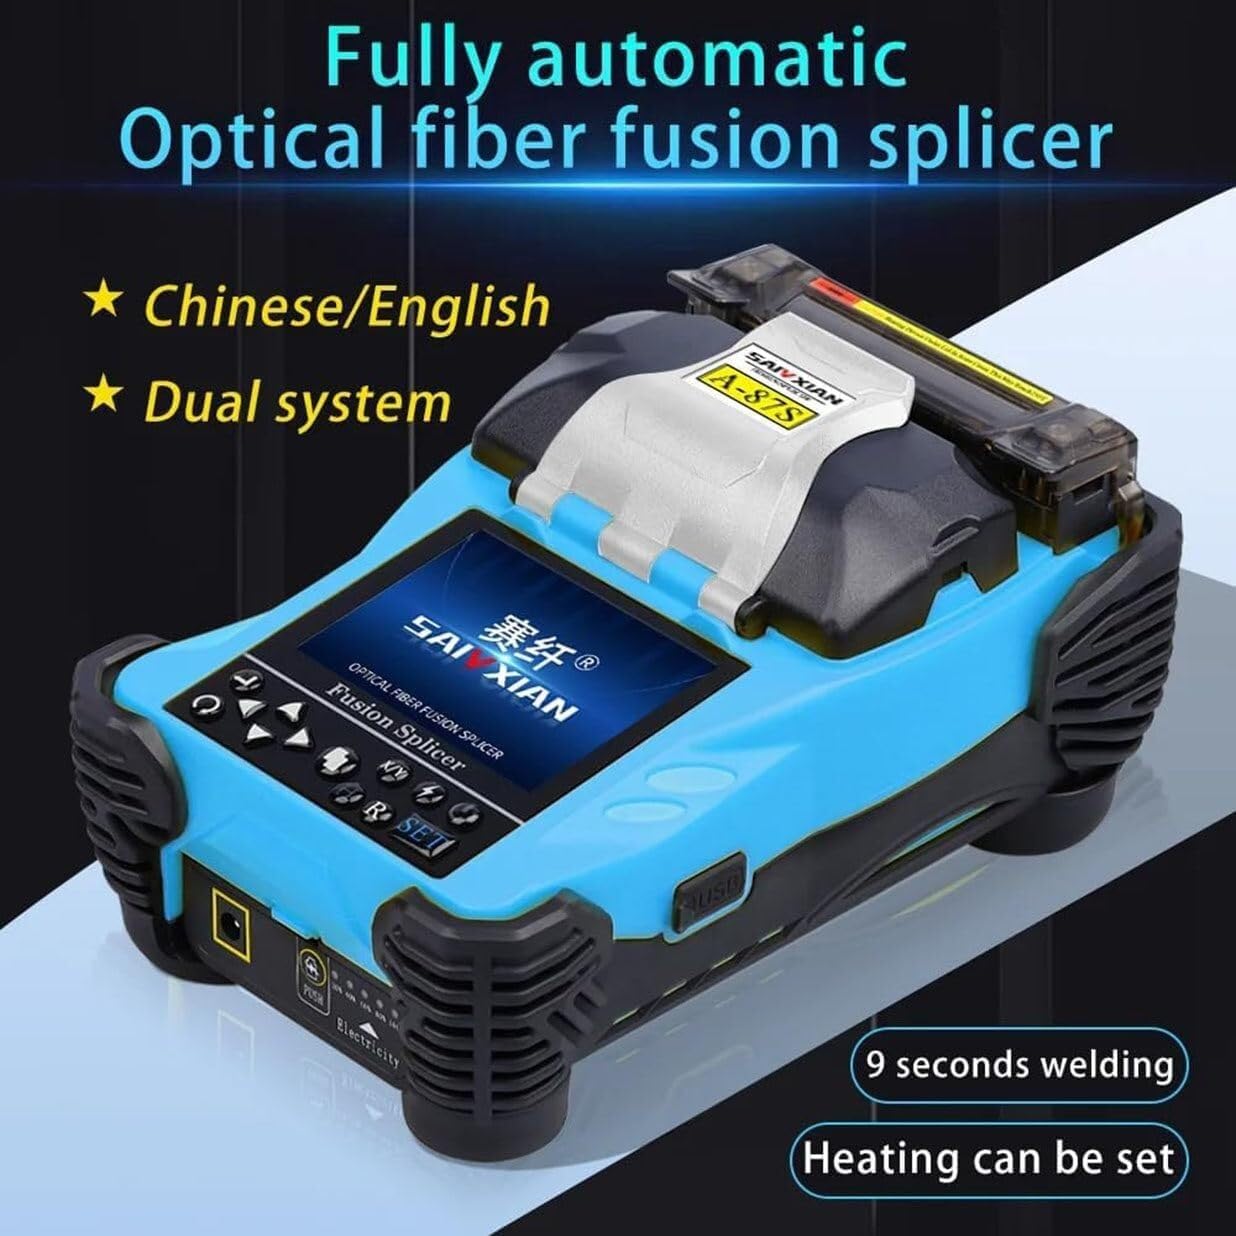
This image highlights the fully automatic operation of the A-87S fusion splicer, capable of completing a splice in approximately 9 seconds. The device supports both Chinese and English language systems.
5.5 Display and Menu Navigation
The 3.5-inch TFT color LCD display provides real-time monitoring of the splicing process with 400X magnification. The display content can be flipped for convenient two-way operation. Use the navigation buttons to access and adjust settings for 17 groups of splice modes and 9 groups of heating modes. The internal memory saves up to 5000 updated connection results.

The 3.5-inch TFT color LCD display of the A-87S fusion splicer, showing the English language interface. Users can easily switch between Chinese and English systems, accessing menus for splicing, heating, discharge calibration, storage records, operation options, application menus, maintenance, and language settings.
6. Maintenance
6.1 Cleaning Electrodes and V-Grooves
Regularly clean the electrodes and V-grooves to ensure optimal splicing performance. Use a soft, lint-free cloth and alcohol. Dirty electrodes can lead to poor splice quality and increased splice loss. Replace electrodes when they show signs of wear or degradation.
6.2 Display Cleaning
Clean the display screen with a soft, dry cloth. Avoid using abrasive cleaners or solvents.
6.3 Battery Care
To prolong battery life, avoid fully discharging the battery frequently. Store the splicer in a cool, dry place when not in use for extended periods, and ensure the battery has some charge.
7. Troubleshooting
This section provides solutions to common issues you might encounter. For problems not listed here, please contact customer support.
- Poor Splice Quality/High Loss: Check fiber cleave quality, clean electrodes and V-grooves, ensure fibers are properly seated, and verify splice mode settings.
- Splicer Not Powering On: Ensure the battery is charged or the power adapter is connected correctly.
- Display Issues: Restart the device. If the problem persists, contact support.
- Heating Failure: Check heating mode settings and ensure the heating element is clean.
8. Specifications
| Feature | Specification |
|---|---|
| Item Type | Fiber Optic Fusion Splicer |
| Material | ABS |
| Magnification | 400X (X axes or Y axes) |
| Return Loss | Better than 60dB |
| Typical Connection Time | 9 seconds |
| Typical Heating Time | 26 seconds (adjustable) |
| Cladding Diameter | 80-150µm |
| Coating Diameter | 100-1000µm |
| Cutting Length (Coating < 250µm) | Approx. 8-16mm |
| Cutting Length (Coating 250-1000µm) | Approx. 16mm |
| Heat Shrink Tubing | 60mm, 40mm, and micro shrink tubing |
| Display | 3.5in TFT color LCD display |
| External Interface | USB interface |
| Splice Mode Groups | 17 groups |
| Heating Mode Groups | 9 groups |
| Connection Loss Storage | Internal memory saves 5000 results |
| Built-In Battery | 11.1V 4800mAh lithium battery |
| Power Supply | Built-in lithium battery, charging via adapter |
| Applicable Fibers | SM (G.652, G.657), MM (G.651), DS (G.653), NZDS (G.655), custom fiber types |
| Optical Fiber Fixture | Multifunctional (bare fiber, pigtail, jumper, leather cable; replaceable for SC/FTTx connectors) |
| Package Dimensions | 3.94 x 3.94 x 3.94 inches (Product specific) |
| Item Weight | 12.13 pounds |
| Manufacturer | LDMLAX |
| Item Model Number | 20250422 |
This image provides the physical dimensions of the A-87S fusion splicer's carrying case (330mm x 183mm x 213mm) and the overall product packaging (375mm x 220mm x 280mm). The product weight with the fusion splicing chassis is 4.4KG, and with the chassis plus carton is 5.1KG.
9. Warranty Information
Please refer to your purchase documentation or contact the seller for specific warranty terms and conditions applicable to the LDMLAX A-87S Fiber Optic Fusion Splicer. Keep your proof of purchase for warranty claims.
10. Customer Support
If you have any questions, require technical assistance, or encounter issues not covered in this manual, please do not hesitate to contact LDMLAX customer support. We are committed to providing prompt and helpful solutions.