Introduction
This manual provides comprehensive instructions for the setup, operation, and troubleshooting of your new Generic remote control for the Members Mark MMKD2-TL adjustable bed base. Please read these instructions carefully before use to ensure proper functionality and to avoid any issues.
Important Compatibility Note
This remote control is specifically designed for certain adjustable bed bases. To ensure compatibility, it is crucial to verify your existing control box and old remote control's product numbers. Before attempting to pair or use, please confirm your bed base model matches the MMKD2-TL specification.
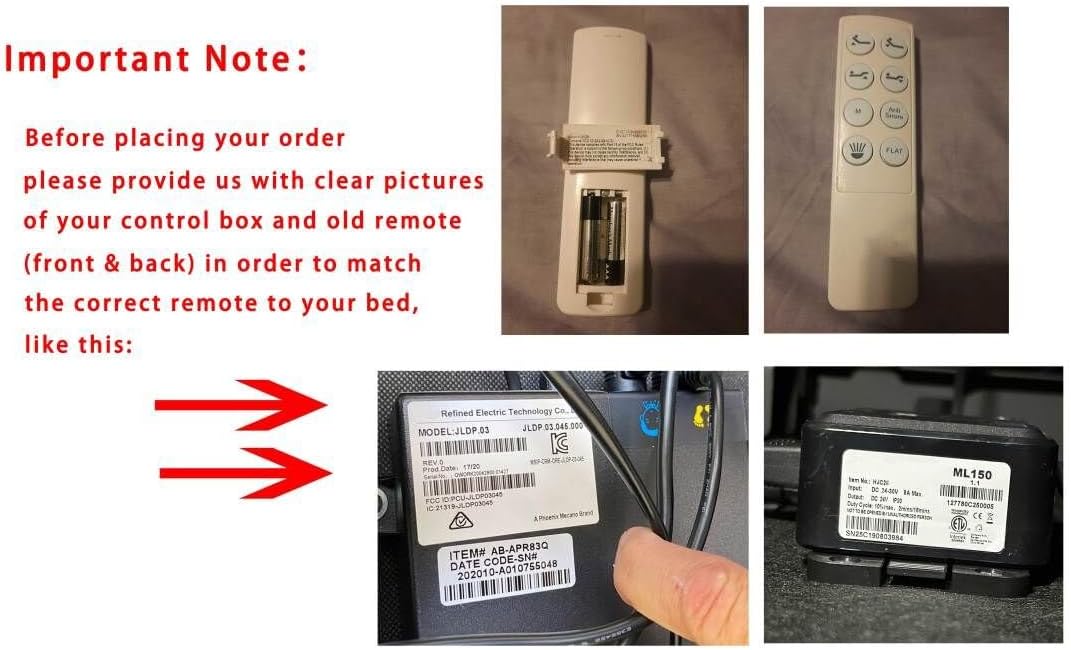
Figure 1: Important note regarding compatibility. Always verify your control box and old remote details before purchasing or attempting to pair a new remote.
The product number for your old remote can typically be found in the battery compartment. For the control box, look for a label on the unit itself.
Setup and Pairing
1. Battery Installation
Before using the remote, install the required batteries (typically AAA, not included).
- Remove the battery compartment cover on the back of the remote control.
- Insert the batteries, ensuring correct polarity (+/-).
- Replace the battery compartment cover.

Figure 2: Remote control with battery cover removed, showing battery placement.
2. Pairing the Remote Control
There are several methods for pairing your remote control to the adjustable bed base. Please try the method that best matches your bed base's instructions or the available components.
Method A: Standard Pairing (Recommended First)
- Unplug the power cord of your adjustable bed base from the electrical outlet.
- Wait approximately 5 to 10 seconds.
- Plug the power cord back into the electrical outlet.
- Within 10 seconds of plugging in the power, locate the PAIR button on the back of your remote control (often inside the battery compartment or a small button on the back).
- Press and hold the PAIR button. The PAIR button will illuminate blue and start flashing.
- Continue holding until the PAIR button stops flashing and the LED light on the control box (if visible) goes out.
- Release the PAIR button. The remote should now be paired.
- Test all remote functions to confirm successful pairing.
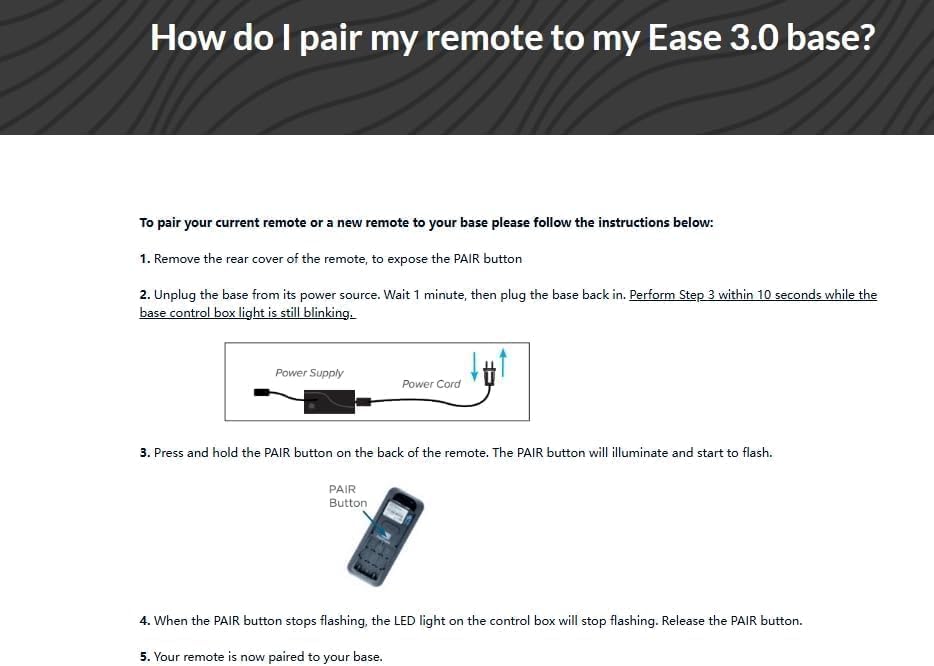
Figure 3: Visual guide for pairing, showing power cord and remote's PAIR button.
Method B: Pairing with Power Down Box (If Applicable)
This method applies if your bed base includes a "Power Down Box" or similar control unit with a pairing button.
- Remove the back cover from the remote control. Remove and then re-insert the batteries.
- Double-click the button on the Power Down Box. The light on the Power Down Box will illuminate.
- Press and hold the PAIR button on the back of the remote control. The light on the remote will begin to flash, then become a continuous solid light, and then turn off.
- Both lights on the Power Down Box and the remote will be continuous, then simultaneously turn off.
- Replace the back cover of the remote. The remote is now paired.
Method C: Pairing without Power Down Box (Alternative)
If a Power Down Box is not available or does not have a visible button:
- Remove the back cover of the remote.
- Locate the rubber button in the center of the back of the remote (often within the battery compartment).
- Point the remote control at the control box of the bed.
- Press and hold this button for approximately 30 seconds to complete the pairing process.

Figure 4: Detailed view of the remote's internal pairing button and steps for pairing.
For more information on OKIN products, visit www.okindrive.com/patents.
Operating the Remote Control
Once successfully paired, your remote control allows you to adjust your bed base to various positions. The specific functions depend on your bed base model, but common buttons include:
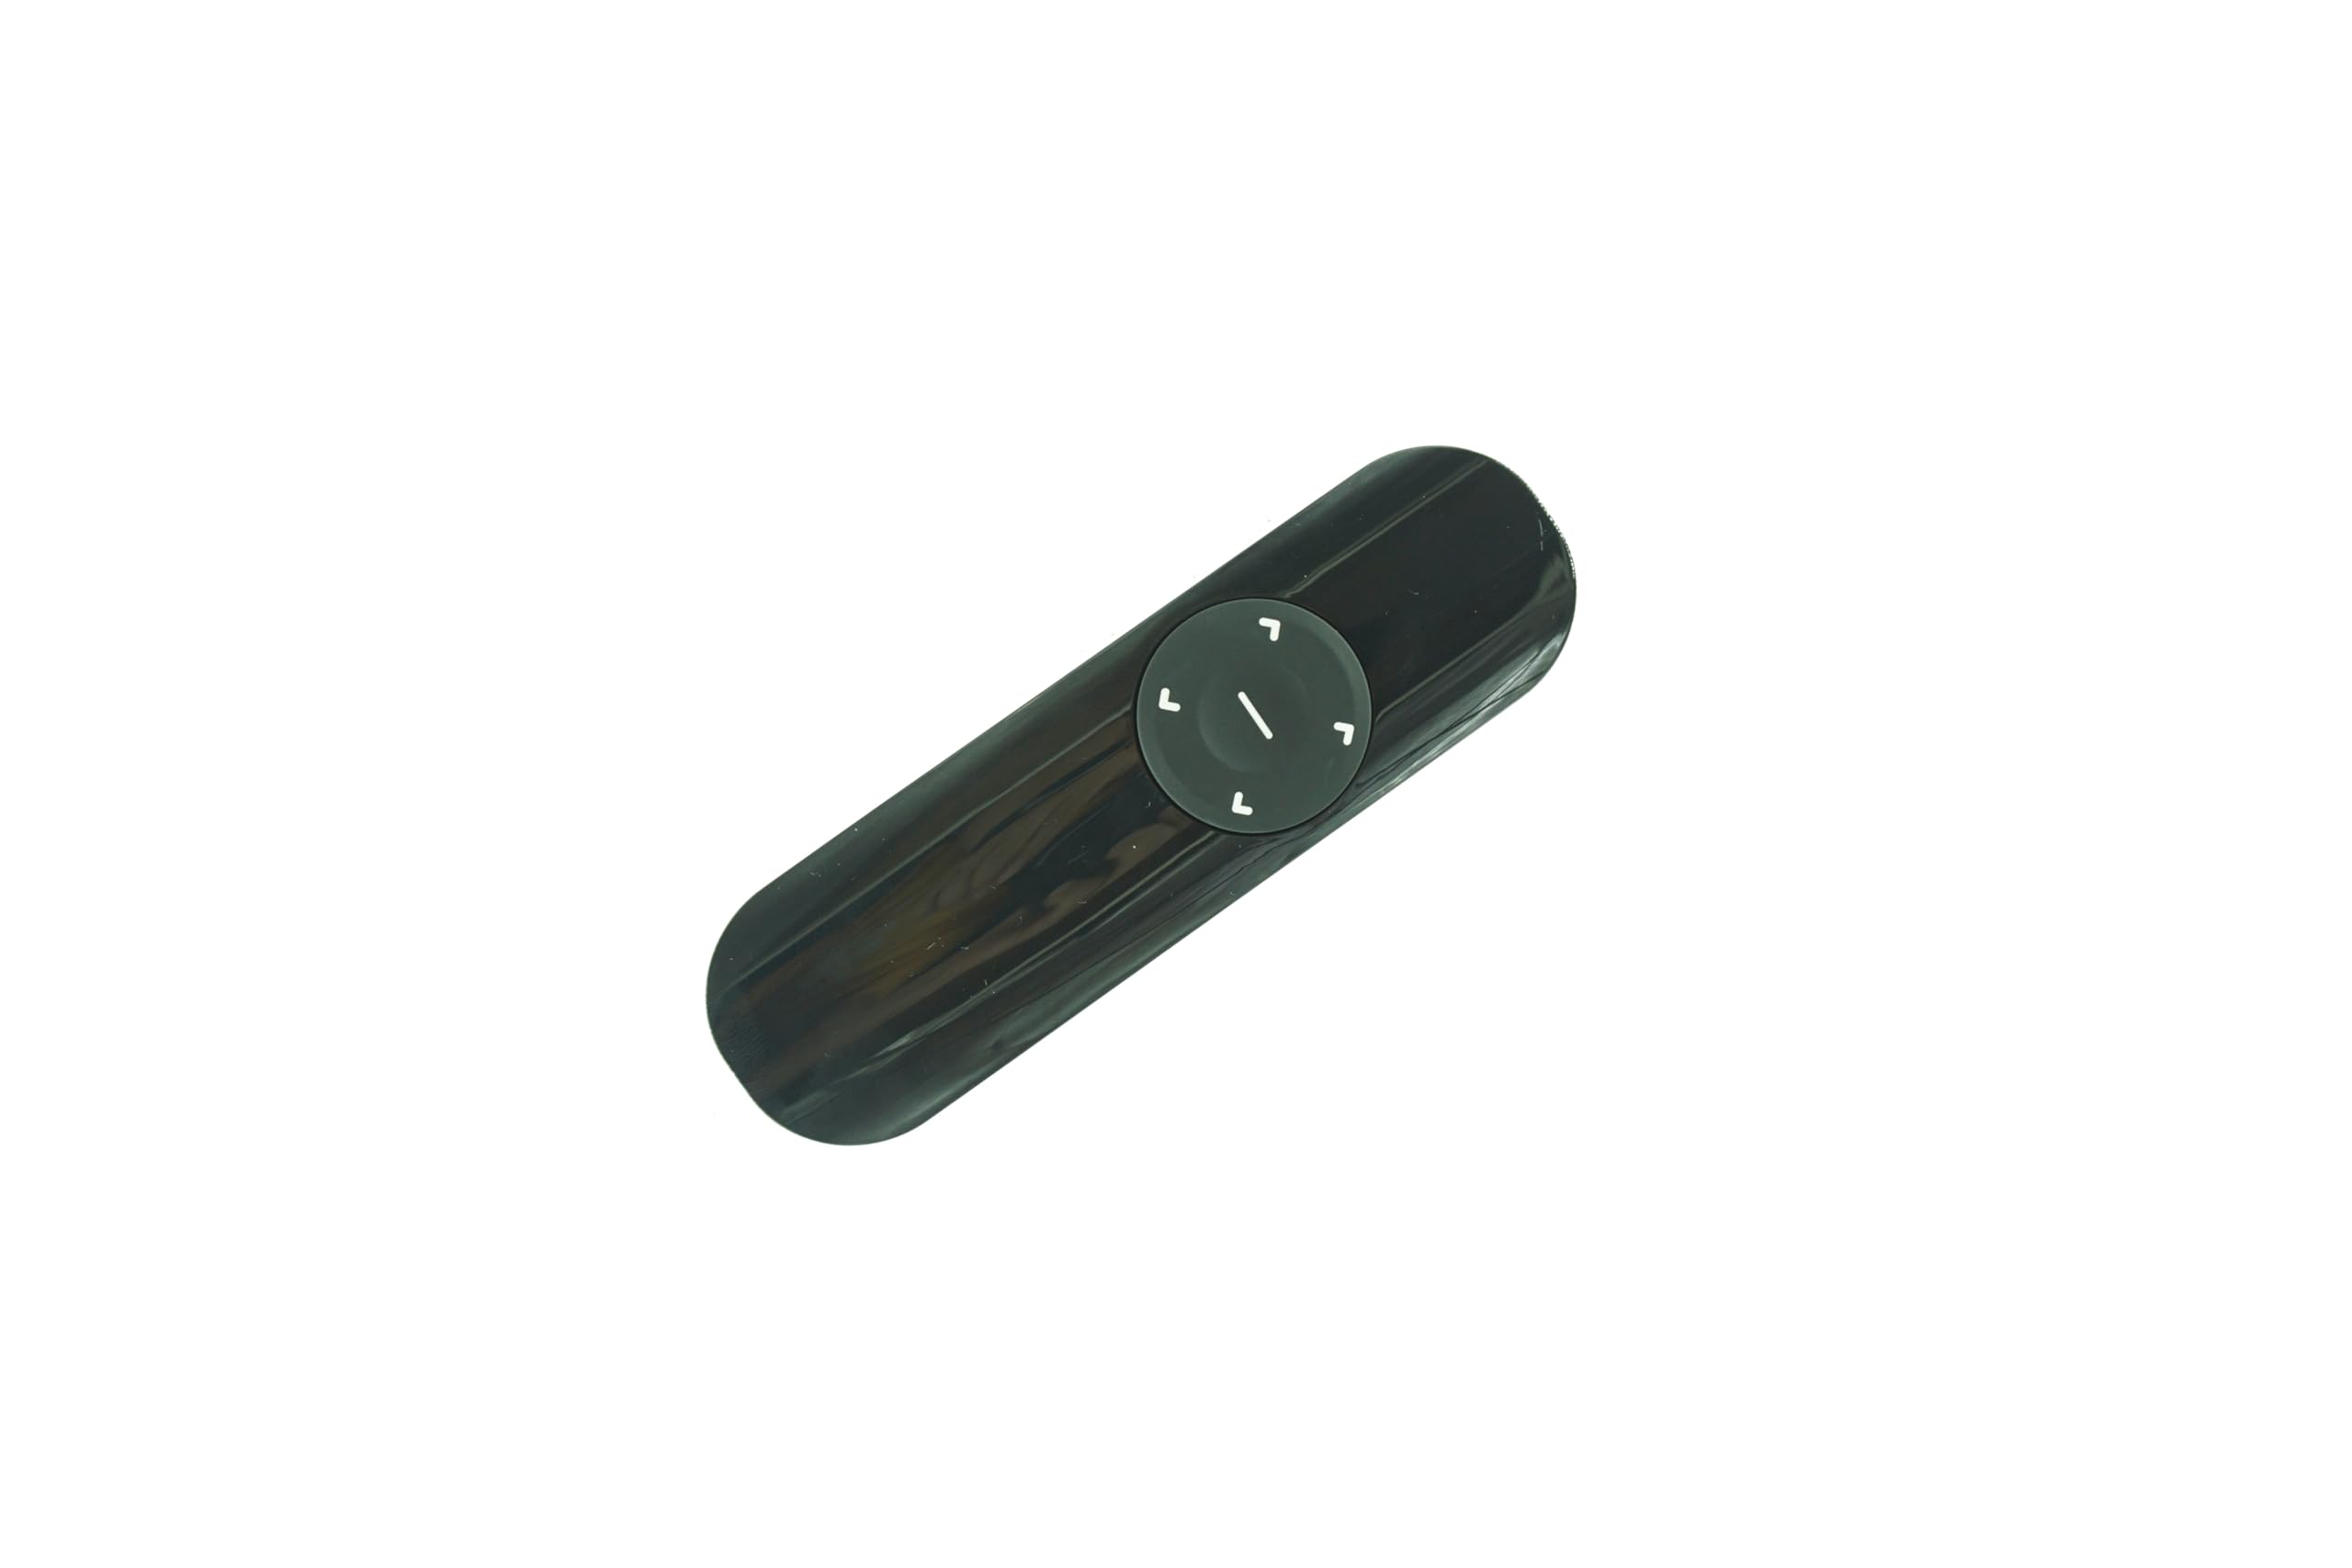
Figure 5: Front view of the remote control with function buttons.
- Head Up/Down: Adjusts the head section of the bed.
- Foot Up/Down: Adjusts the foot section of the bed.
- Flat: Returns the bed to a completely flat position.
- Zero Gravity (if available): Positions the bed to elevate the head and foot, promoting circulation and reducing pressure.
- Massage (if available): Activates or adjusts massage functions.
Refer to your adjustable bed base's original manual for detailed descriptions of each button's function specific to your model.
Maintenance
Battery Replacement
When the remote control's range decreases or buttons become unresponsive, it's time to replace the batteries. Follow the battery installation steps outlined in the "Setup and Pairing" section.
Cleaning
Wipe the remote control with a soft, dry cloth. Do not use liquid cleaners or abrasive materials, as these can damage the remote's surface or internal components.
Troubleshooting
| Problem | Possible Cause | Solution |
|---|---|---|
| Remote not responding. |
|
|
| Bed base not moving after pairing. |
|
|
| Remote LED not flashing during pairing. |
|
|
If you continue to experience issues, please refer to the original manual for your adjustable bed base or contact the seller for further assistance.
Specifications
- Brand: Generic
- Model: MMKD2-TL
- Special Feature: Not a universal remote; specifically for listed models.
- Color: Black
- Max Number of Supported Devices: 1
- Compatible Devices: Adjustable bed base (Members Mark MMKD2-TL)
Warranty and Support
For warranty information or technical support, please contact the seller or refer to the documentation provided with your original adjustable bed base. Ensure you have your product model number (MMKD2-TL) and any purchase details available when seeking support.


