1. Introduction
This manual provides essential information for the safe and effective use of your FTOMIKA 1.5 Series Car Connector DJ7021-1.5-11/21. This product is designed for reliable electrical connections in various automotive and motorcycle applications. Please read this manual thoroughly before installation and use.
2. Product Overview
The FTOMIKA 1.5 Series Car Connector DJ7021-1.5-11/21 is a quick connection plug system, simplifying the installation process for electrical wiring. It is engineered for secure connections in automotive and motorcycle electrical systems. Crafted from durable materials, these connectors are designed for long-lasting performance in demanding environments.
This specific product variant includes 50 sets of 6-pin female connectors (part number 282090-1).

Image: A single 6-pin female connector housing, black with yellow and red internal components.
3. Safety Information
- Always disconnect power from the electrical system before working with connectors to prevent electric shock or damage to components.
- Ensure proper wire gauge is used for the intended current load to avoid overheating.
- Use appropriate crimping tools for terminals to ensure a secure and reliable electrical connection.
- Verify correct polarity before making final connections.
- Keep connectors clean and free from moisture and debris.
4. Package Contents
Your package contains the following components:
- 50 x 6-pin Female Connector Housings (DJ7021-1.5-21, part number 282090-1)
- 300 x Female Terminals (1.5 Series, for 6-pin connectors)
- 300 x Wire Seals/Grommets (for 6-pin connectors)

Image: An assortment of various pin count male and female connector housings, illustrating the product family.
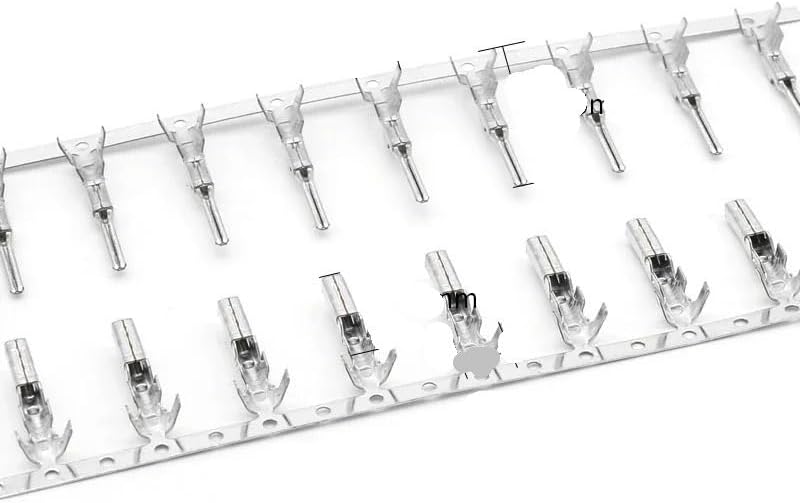
Image: A strip of metal terminals, showing the male and female pins used within the connector housings.
5. Setup and Assembly
Follow these steps to properly assemble your FTOMIKA 1.5 Series connectors:
- Prepare Wires: Strip approximately 3-4mm of insulation from the end of each wire that will be connected. Ensure the wire strands are clean and untwisted.
- Insert Wire Seal: Slide a wire seal (grommet) onto each stripped wire, ensuring the narrow end faces the stripped wire section.
- Crimp Terminal: Using a suitable crimping tool, crimp a female terminal onto the stripped end of each wire. Ensure both the conductor and insulation are securely crimped without damaging the wire. A good crimp should be mechanically strong and electrically sound.
- Insert Terminal into Housing: Carefully insert the crimped terminal, with the wire seal, into the correct cavity of the female connector housing. Push until you hear or feel a click, indicating the terminal is locked in place. Gently pull on the wire to confirm it is secure.
- Repeat for all Wires: Repeat steps 1-4 for all wires required for your 6-pin connection.
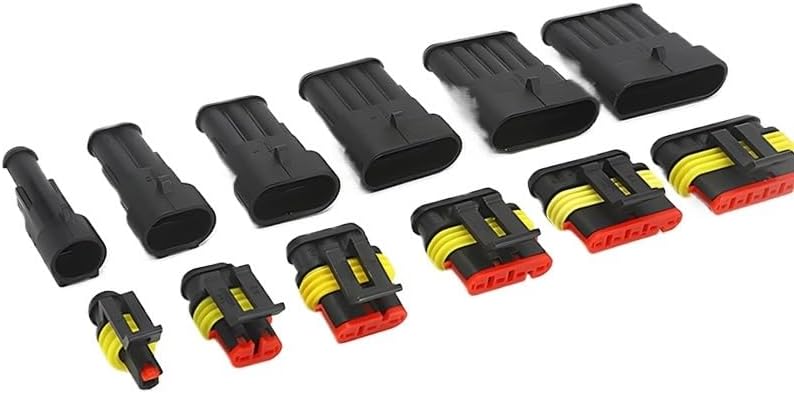
Image: A 2-pin male and female connector pair, demonstrating the connection mechanism.
6. Operating Instructions
Once both the male and female connector sides are assembled with wires and terminals, follow these steps to make a connection:
- Align Connectors: Align the male and female connector housings, ensuring the pins and cavities match correctly.
- Push Together: Firmly push the male and female connectors together until they fully engage. You should feel or hear a positive click as the locking mechanism secures the connection.
- Verify Connection: Gently pull on both connector housings to ensure they are securely latched and will not easily separate.
To disconnect, press the release tab (if present) or pull firmly on the connector housings while wiggling slightly to disengage the lock.

Image: A 2-pin male and female connector shown connected, illustrating the secure engagement.
7. Maintenance
Proper maintenance ensures the longevity and reliability of your connectors:
- Regular Inspection: Periodically inspect connectors for signs of wear, corrosion, or damage.
- Cleaning: If necessary, clean connectors with a non-conductive electrical contact cleaner. Ensure connectors are dry before re-connecting.
- Secure Connections: Ensure all connections remain tight and free from vibration that could lead to loosening.
- Environmental Protection: While designed for demanding environments, avoid prolonged exposure to extreme temperatures, harsh chemicals, or excessive moisture where possible.
8. Troubleshooting
If you encounter issues with your connectors, consider the following:
- No Electrical Continuity:
- Check if terminals are properly crimped to wires.
- Ensure terminals are fully inserted and locked into the connector housing.
- Verify that the male and female connectors are fully engaged and locked.
- Inspect for bent or damaged terminals.
- Loose Connection:
- Ensure the locking mechanism is fully engaged.
- Check for any debris preventing full engagement.
- Difficulty Connecting/Disconnecting:
- Ensure correct alignment of male and female parts.
- Do not force connections; inspect for obstructions or damage.
9. Specifications
| Attribute | Detail |
|---|---|
| Model Number | DJ7021-1.5-11/21 |
| Variant (Current Product) | 6P Female 282090-1 (50 Sets) |
| Brand | FTOMIKA |
| Series | 1.5 Series |
| Material | Plastic |
| Package Dimensions | 3.15 x 1.57 x 1.57 inches |
| Item Weight | 1.06 ounces |
| Assembly Required | No (refers to the connector set itself, assembly of wires to connectors is required) |
10. Warranty and Support
For warranty information or technical support, please refer to the product packaging or contact the manufacturer, FTOMIKA, directly through their official channels. Keep your purchase receipt for any warranty claims.