1. Introduction
Thank you for choosing the Angoily Ceiling Fan Variable Speed DC Motor Controller. This device is designed to provide convenient and efficient control over your DC ceiling fan and its integrated lighting. Please read this manual thoroughly before installation and operation to ensure safe and optimal performance.
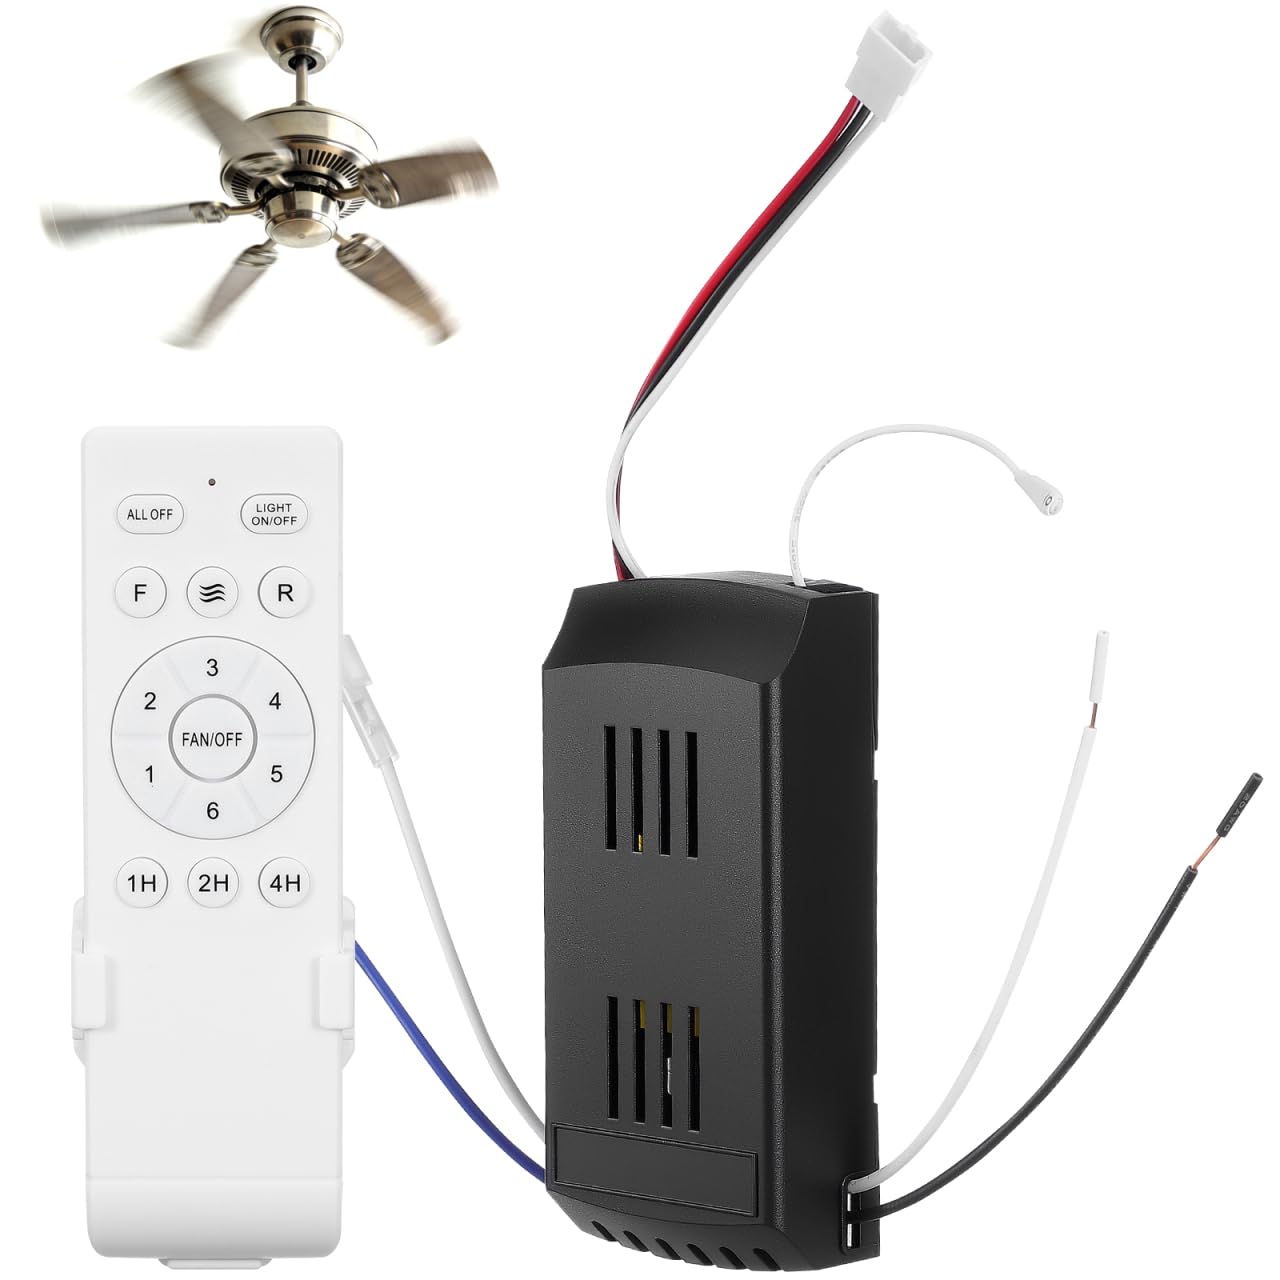
Image 1.1: Wireless control of a ceiling fan and light.
2. Product Features
- Wireless Control: Effortlessly operate your ceiling fan and light with the included remote control.
- Variable Speed Adjustment: Offers precise speed control with 6 distinct fan speeds to suit your comfort needs.
- Low Voltage DC Design: Ensures safe and reliable operation, minimizing electrical risks.
- Wide Compatibility: Suitable for use with various DC ceiling fans and their integrated lighting systems.
- Timed Adjustment: Features 1-hour, 2-hour, and 4-hour timer settings for convenience.
- Energy Saving: Designed for efficient operation to help reduce energy consumption.
- Stable Signal: Provides a stable control signal with an adjust distance of up to 50 meters.
- User-Friendly Interface: Simple button layout for intuitive control of fan and light functions.
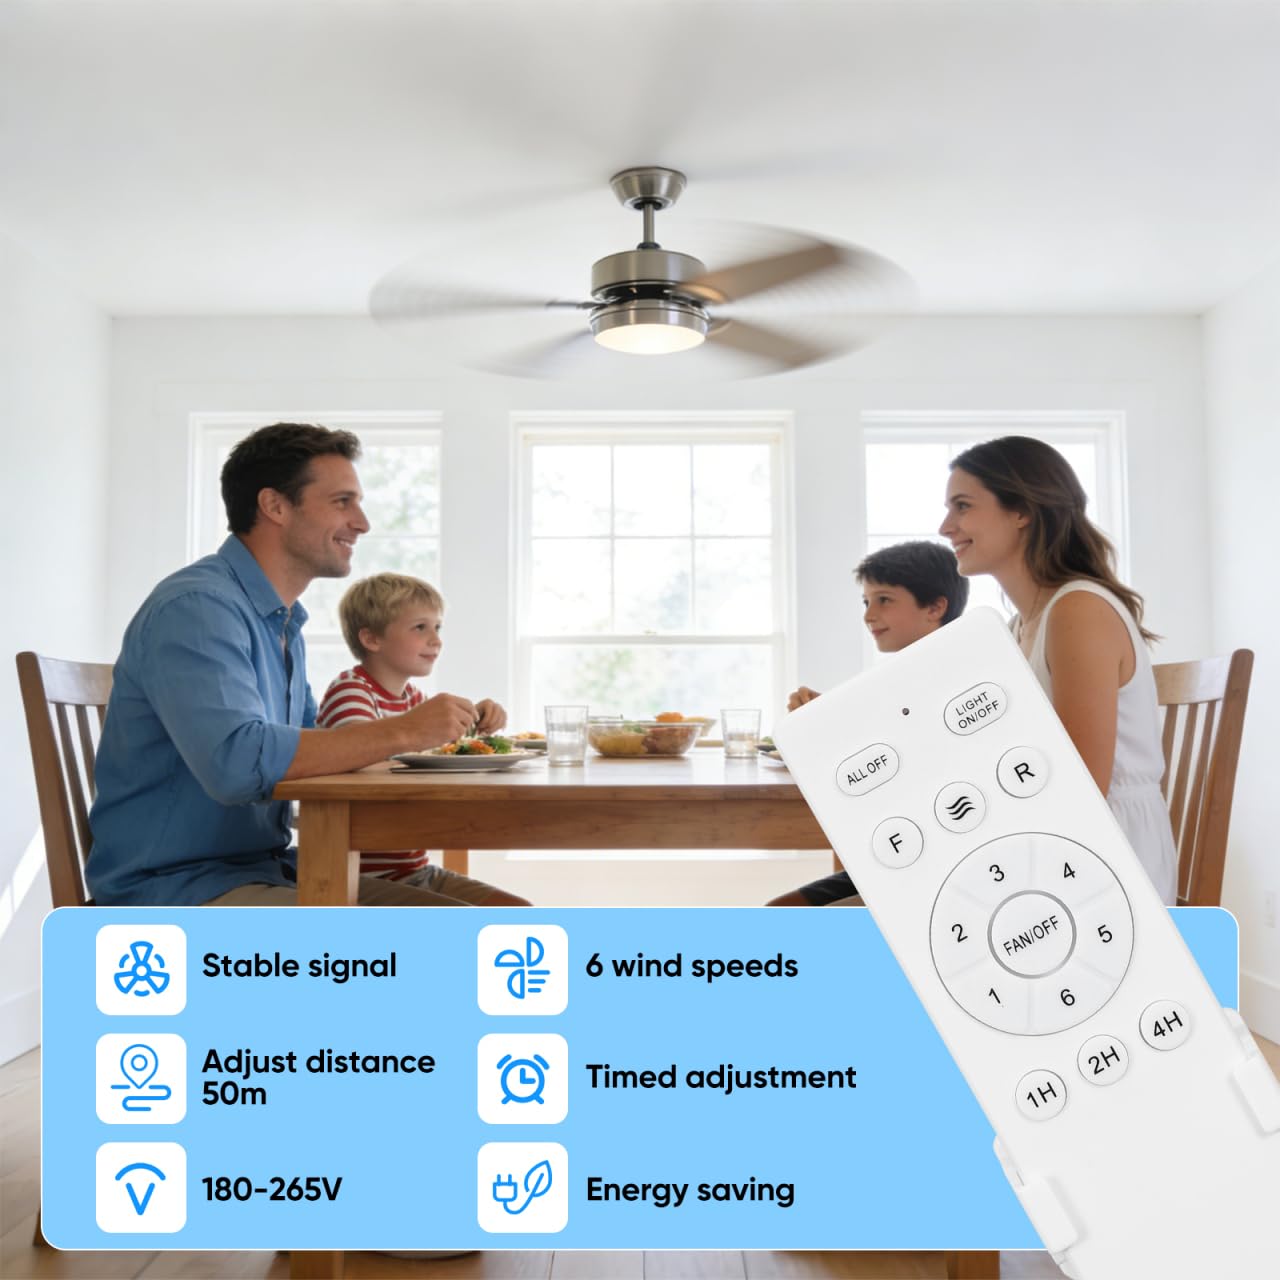
Image 2.1: Key features of the Angoily Ceiling Fan Controller.
3. Product Applicability
This controller is designed for use with specific types of ceiling fans. Please refer to the image below to determine compatibility.

Image 3.1: Examples of compatible and incompatible fan types.
Compatible: Standard ceiling fans with integrated lights.
Incompatible: Pedestal fans, industrial hanging fans, or other non-ceiling fan types.
4. Setup and Installation
Safety Warning: Before beginning installation, ensure the power supply to the ceiling fan circuit is turned off at the circuit breaker. Improper installation can lead to electrical shock or fire.
- Prepare the Fan: Rotate the ball mount of your ceiling fan until it aligns with the protrusion of the hanger bracket.
- Connect Motor Wiring: Connect the motor wiring according to the instructions provided with your fan and the receiver unit. Ensure correct polarity for DC motors.
- Connect Power Wires: Connect the live wire and neutral wire from your household electrical supply to the receiver unit.
- Secure Connections: Use electrical tape to secure all wire ends and ensure no bare wires are exposed.
- Organize Wires: Connect and organize the lines in a centralized manner within the fan canopy.
- Final Assembly: Screw fixing the fan canopy to cover the wiring and receiver unit.

Image 4.1: Step-by-step installation guide for the ceiling fan controller.
4.1 Remote Control Holder Installation
The remote control can be conveniently stored using the included wall mount holder.

Image 4.2: Remote control holder mounted on a wall.
5. Operating Instructions
Familiarize yourself with the remote control buttons for optimal use.

Image 5.1: Remote control button functions.
- ALL OFF: Turns off both the fan and the light.
- LIGHT ON/OFF: Toggles the ceiling fan light on or off.
- F (Fan rotates forward): Sets the fan to rotate in the forward direction (typically for cooling).
- R (Fan reversal): Sets the fan to rotate in reverse (typically for circulating warm air in winter).
- Natural Wind: Activates a mode that simulates natural breeze by varying fan speed.
- 1-6 (Fan Speed Adjustment): Selects one of six fan speeds. '1' is the lowest speed, '6' is the highest.
- FAN/OFF (Pairing Code): Stops the fan. This button is also used for pairing the remote with the receiver (refer to pairing instructions if needed).
- 1H, 2H, 4H (Timed Adjustment): Sets the fan to operate for 1, 2, or 4 hours respectively before automatically turning off.
6. Maintenance
To ensure the longevity and proper functioning of your Angoily Ceiling Fan Controller, follow these maintenance guidelines:
- Cleaning: Wipe the remote control and receiver unit with a soft, dry cloth. Do not use abrasive cleaners or solvents.
- Battery Replacement: If the remote control's range decreases or it becomes unresponsive, replace the batteries. Ensure correct battery type and polarity.
- Environmental Conditions: Avoid exposing the controller to extreme temperatures, high humidity, or direct sunlight.
- Wiring Inspection: Periodically check the wiring connections for any signs of wear, corrosion, or looseness. Ensure power is off before inspection.
7. Troubleshooting
| Problem | Possible Cause | Solution |
|---|---|---|
| Fan/Light does not respond to remote. | 1. Dead batteries in remote. 2. Remote not paired with receiver. 3. Power supply to fan is off. | 1. Replace remote batteries. 2. Re-pair the remote with the receiver (refer to fan's manual for pairing instructions, often involves pressing a button on the receiver or a specific remote sequence). 3. Check circuit breaker and wall switch. |
| Fan operates, but light does not. | 1. Light bulb is faulty. 2. Wiring issue for the light. | 1. Replace the light bulb. 2. Check light wiring connections (ensure power is off). |
| Fan operates intermittently. | Loose wiring connection. | Turn off power and check all wiring connections to the receiver and fan motor. |
| Reduced remote control range. | Weak remote batteries. | Replace remote batteries. |
8. Specifications
- Brand: Angoily
- Model Number: 5M7VYP00MS9MWP811I11IQ85P
- Product Type: Remote Control for Ceiling Fan
- Material: Plastic
- Item Weight: Approximately 0.28 Pounds (127 grams)
- Controller Dimensions: Approximately 11.70 x 5.50 x 2.72 cm (4.60 x 2.16 x 1.07 inches)
- Remote Dimensions: Approximately 13.70 x 4.30 x 2.00 cm (5.38 x 1.69 x 0.79 inches)
- Operating Voltage: 180-265V (for receiver input, check fan compatibility)
- Control Distance: Up to 50 meters

Image 8.1: Dimensions of the remote control and receiver unit.
9. Warranty and Support
For warranty information or technical support, please refer to the documentation provided with your purchase or contact Angoily customer service through the retailer where the product was purchased. Keep your proof of purchase for warranty claims.