1. Introduction
This manual provides essential instructions for the safe and efficient installation, operation, and maintenance of your EQBVZZRD 80AST-A1C02430 AC Servo Motor Kit. This kit includes a 750W AC servo motor, a T3D 20A driver, and a 300CM encoder cable, designed for precision control in various automated applications.
The EQBVZZRD AC Servo Motor Kit is suitable for a wide range of industrial applications, including industrial manipulators, engraving and carving equipment, semiconductor manufacturing equipment, measuring instruments, medical equipment, and industrial robots.

Figure 1.1: Overview of the EQBVZZRD 750W AC Servo Motor Kit, showing the servo motor, T3D driver, and connecting cables.
2. Setup and Wiring
Proper wiring is crucial for the safe and correct operation of the servo motor kit. Refer to the wiring diagram below for detailed connection instructions.

Figure 2.1: T3D-L15A/L20A Driver Wiring Diagram. This diagram illustrates the connection points for power, communication, motor, and encoder.
2.1. Connection Points Overview
- CN1: Upper Computer Command Port - Connects to a CNC, PLC, or other upper-level control device for command input.
- CN2: Motor Encoder Port - Connects directly to the motor encoder for feedback.
- CN3/CN4: RS485 Communication Port - Located at the top of the drive, these ports are used for RS485 communication.
- L1/L2 Terminal: Main Power Input - Connect these terminals to a single-phase 220V AC power supply.
- NC Terminal: This terminal should not be connected.
- P/D/C Terminal: Braking Resistor Connection - For models with a brake, connect the braking resistor to these terminals. Use the internal braking resistor if applicable.
- N Terminal: Do not connect this terminal. Incorrect connection can cause danger or damage to the drive.
- U/V/W/PE Terminal: Motor Power Line - The four wires (U, V, W, and PE) of the motor power line must be connected to their corresponding terminals on the drive. Ensure correct polarity and prevent incorrect connections.
- CHARGE: Drive Power Indicator - This indicator illuminates when the drive is powered on.
3. Operating Principles and Features
The EQBVZZRD AC Servo Motor Kit is engineered for high-performance and precise control in demanding industrial environments.
3.1. Motor Characteristics

Figure 3.1: The 80AST-A1C02430 AC Servo Motor, featuring its robust construction and connection points.
The 80AST-A1C02430 servo motor offers the following key features:
- High Torque: Delivers substantial rotational force for demanding applications.
- No Lost Step: Ensures precise positioning and eliminates step loss common in open-loop systems.
- Low Noise: Operates quietly, contributing to a better working environment.
- Fast Response: Quickly reacts to command signals for dynamic control.
- Small Size: Compact design allows for integration into various machinery.
- High Controllability: Provides excellent control over speed, position, and torque.
3.2. Driver Functions
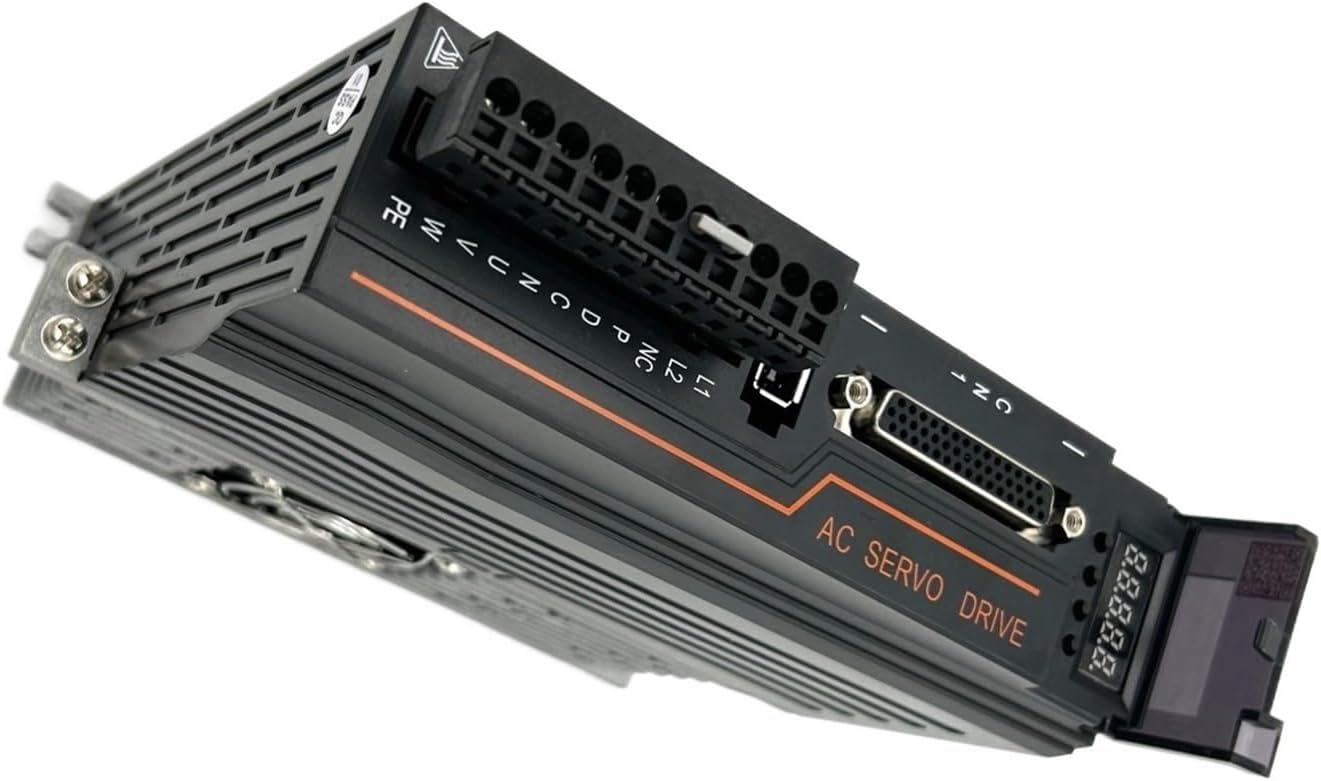
Figure 3.2: The T3D 20A AC Servo Driver, showcasing its compact form factor and terminal block.
The T3D 20A driver complements the servo motor with advanced functionalities:
- Advanced Algorithm: Utilizes sophisticated control algorithms for optimal performance.
- Stable Low-Speed Operation: Ensures smooth and stable motor operation even at very low speeds.
- High-Performance Encoder: Guarantees precise motor position and speed accuracy through reliable feedback.
4. Maintenance
Regular maintenance helps ensure the longevity and optimal performance of your servo motor kit. While the kit requires minimal maintenance, adhering to general best practices is recommended.
- Keep Clean: Ensure the motor and driver are free from dust, debris, and moisture. Use a soft, dry cloth for cleaning.
- Inspect Connections: Periodically check all wiring connections (power, encoder, communication) to ensure they are secure and free from corrosion or damage.
- Environmental Conditions: Operate the kit within specified temperature and humidity ranges to prevent damage.
- Ventilation: Ensure adequate airflow around the driver, especially if it has a cooling fan, to prevent overheating.
5. Troubleshooting
This section provides general guidance for common issues. For complex problems, consult a qualified technician or contact customer support.
- Motor Not Responding:
- Check power supply connections to L1/L2 terminals.
- Verify that the CHARGE indicator on the driver is illuminated.
- Ensure all motor power (U/V/W/PE) and encoder (CN2) cables are correctly and securely connected.
- Confirm that the upper computer (CNC/PLC) is sending valid commands via CN1.
- Abnormal Noise or Vibration:
- Inspect motor mounting for looseness.
- Check for any mechanical obstructions or misalignments in the connected load.
- Review driver parameters for correct tuning.
- Overheating:
- Ensure adequate ventilation around the driver and motor.
- Check for excessive load on the motor.
- Verify ambient temperature is within operating limits.
6. Specifications
The following table outlines the general specifications for the EQBVZZRD 80AST-A1C02430 AC Servo Motor Kit.
| Feature | Specification |
|---|---|
| Motor Model | 80AST-A1C02430 |
| Motor Power | 750W |
| Driver Model | T3D 20A |
| Rated Current | 4.8A |
| Rated Torque | 2.39 N.m |
| Encoder Cable Length | 300CM |
| Package Dimensions | 0.39 x 0.39 x 0.39 inches (approximate) |
| Item Weight | 2.2 pounds (approximate) |
| Assembly Required | No |
7. Warranty and Support
For warranty information, technical support, or service inquiries, please refer to the documentation provided with your purchase or contact EQBVZZRD customer service directly. Keep your purchase receipt as proof of purchase.