Introduction
This manual provides detailed instructions for the installation, operation, and maintenance of your Otcboimo WiFi Smart Garage Door Opener. This device allows you to control your garage door remotely via the Smart Life app, voice commands, and provides alerts for door status.
Key Features:
- Remote control via Smart Life app from anywhere.
- Door-left-open alerts for enhanced security.
- Voice control compatibility with Amazon Alexa, Google Assistant, and Siri.
- Supports 2.4GHz WiFi networks only.
Package Contents
Verify that all items are present in your package:
- 1 x Smart garage door opener
- 1 x USB adapter
- 1 x Door sensor with sensor wire
- 4 x Screws
- 2 x Double-sided adhesive tapes
- 1 x User manual
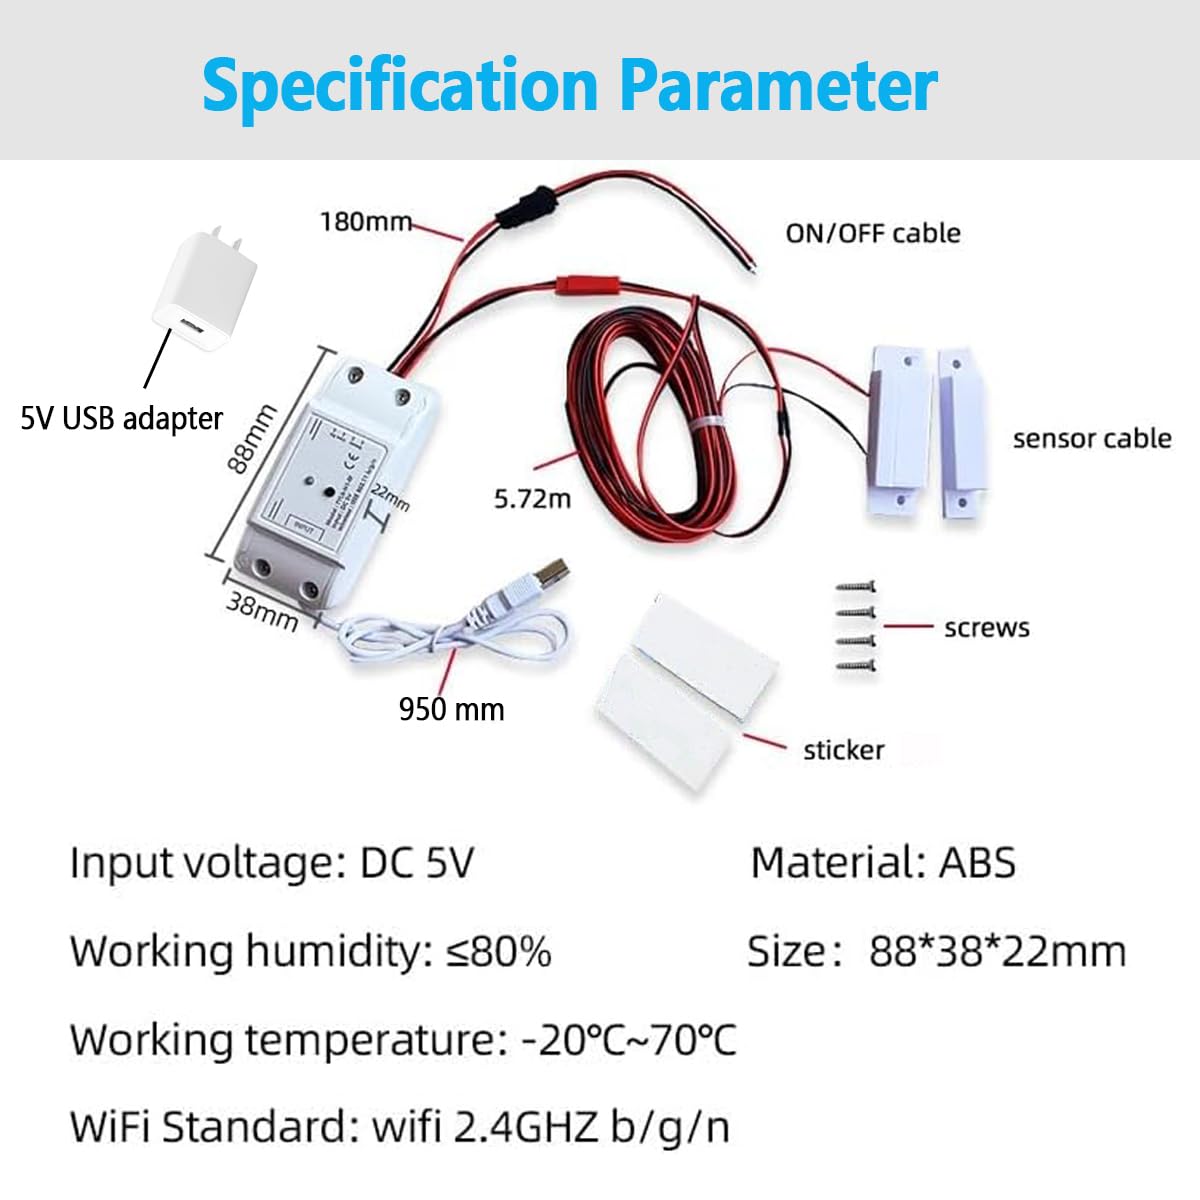
Image: Package contents showing the smart opener, USB adapter, door sensor, screws, adhesive tapes, and user manual.
Compatibility Check
Before installation, it is crucial to determine the compatibility of your existing garage door opener. There are two primary methods for wiring, depending on your opener's type.
Method 1: Direct Connection Compatibility
This method applies to most garage door openers that use a simple wall button connection.
- Locate the "Push button" terminals on your garage door opener's motorhead where the wall button wires are connected.
- Using pliers or a short wire, momentarily short the two terminals.
- If the garage door starts to open or close, your opener is compatible with Method 1 wiring.
Note: Openers with yellow or purple learn buttons are generally not compatible with Method 1. If your opener has a yellow or purple learn button, you must use Method 2.

Image: Compatibility check using pliers to short terminals and visual guide for incompatible yellow/purple learn buttons.
Installation and Wiring
The installation process involves connecting the smart opener to your garage door system and installing the door sensor. Ensure your WiFi signal is strong in the garage area.
Wiring Method 1: Direct Connection to Motor Controller
This method is for garage door openers compatible with direct wiring (not yellow or purple learn buttons).
- Locate the "Push button" terminals on your garage door opener.
- Connect the NO (Normally Open) and COM (Common) terminals of the smart garage door opener to the "Push button" terminals of your garage door motor controller. This creates a parallel control system, allowing your existing wall switch to remain functional.
- Connect the USB adapter to the smart opener for power.
Wiring Method 2: Connection to Existing Remote Control
This method is required for garage door openers with yellow or purple learn buttons, as they do not output signals for direct wiring. This method requires basic soldering skills and tools.
- Open your existing garage door remote control (the remote must have a battery).
- Identify the two pins on the remote's button that, when shorted, activate the garage door. You can test this by touching a wire across different pins; the remote's indicator light should turn on.
- Solder the wires from the COM and NO terminals of the smart opener to these two identified pins on your remote control. This effectively simulates a button press on the remote.
- Connect the USB adapter to the smart opener for power.

Image: Two wiring methods for the smart garage door opener, including direct connection and connection to a remote control.
Door Sensor Installation
The door magnetic sensor is essential for the smart opener to detect the open/closed status of your garage door.
- Mount the main sensor unit (with the wire) securely to the garage door frame.
- Mount the smaller magnetic component to the garage door itself, ensuring it aligns with the main sensor unit when the door is closed. The gap between the two parts should be minimal when the door is closed.
- Ensure the sensor cable is routed safely and does not interfere with the garage door's movement.

Image: Detailed installation diagram for the smart opener and door sensor placement.
App Setup and Connectivity
The Otcboimo Smart Garage Door Opener uses the Tuya or Smart Life app for remote control and smart features.
- Download the App: Download the "Smart Life" or "Tuya Smart" app from your smartphone's app store (iOS or Android).
- Register/Log In: Create a new account or log in to your existing account.
- Add Device: Follow the in-app instructions to add a new device. Select "Garage Door Opener" or a similar category.
- Connect to WiFi: Ensure your smartphone is connected to a 2.4GHz WiFi network. The smart opener only supports 2.4GHz WiFi (5GHz networks are not supported). Follow the app's prompts to connect the device to your home WiFi network.
- Pairing: The app will guide you through the pairing process, which usually involves putting the device into pairing mode (often by pressing a button on the device).

Image: Remote control via Tuya / Smart Life app.
Operating the Smart Garage Door Opener
Remote Control via App
Once successfully set up, you can control your garage door from anywhere with an internet connection using the Smart Life or Tuya Smart app.
- Open the app and select your garage door opener device.
- Tap the designated button to open or close the garage door.
- The app will display the current status of your garage door (open or closed) based on the magnetic sensor.
Notifications and Reminders
The app provides useful notifications to keep you informed about your garage door's status.
- Door Left Open Alert: Receive alerts if your garage door has been left open for a customizable period.
- Open/Close Reminders: Set reminders to ensure the door is closed at specific times or after certain events.

Image: Smart Life app interface displaying notification and reminder options.
Voice Control
Integrate your smart garage door opener with popular voice assistants for hands-free operation.
- Compatibility: Works with Amazon Alexa, Google Assistant, and Apple Siri.
- Linking Accounts: Follow the instructions in your Smart Life/Tuya Smart app to link your account with Alexa, Google Home, or Siri.
- Voice Commands:
- "Alexa, open the garage door."
- "Hey Google, close the garage."
- "Siri, open my garage door." (You may need to set up a shortcut for Siri.)
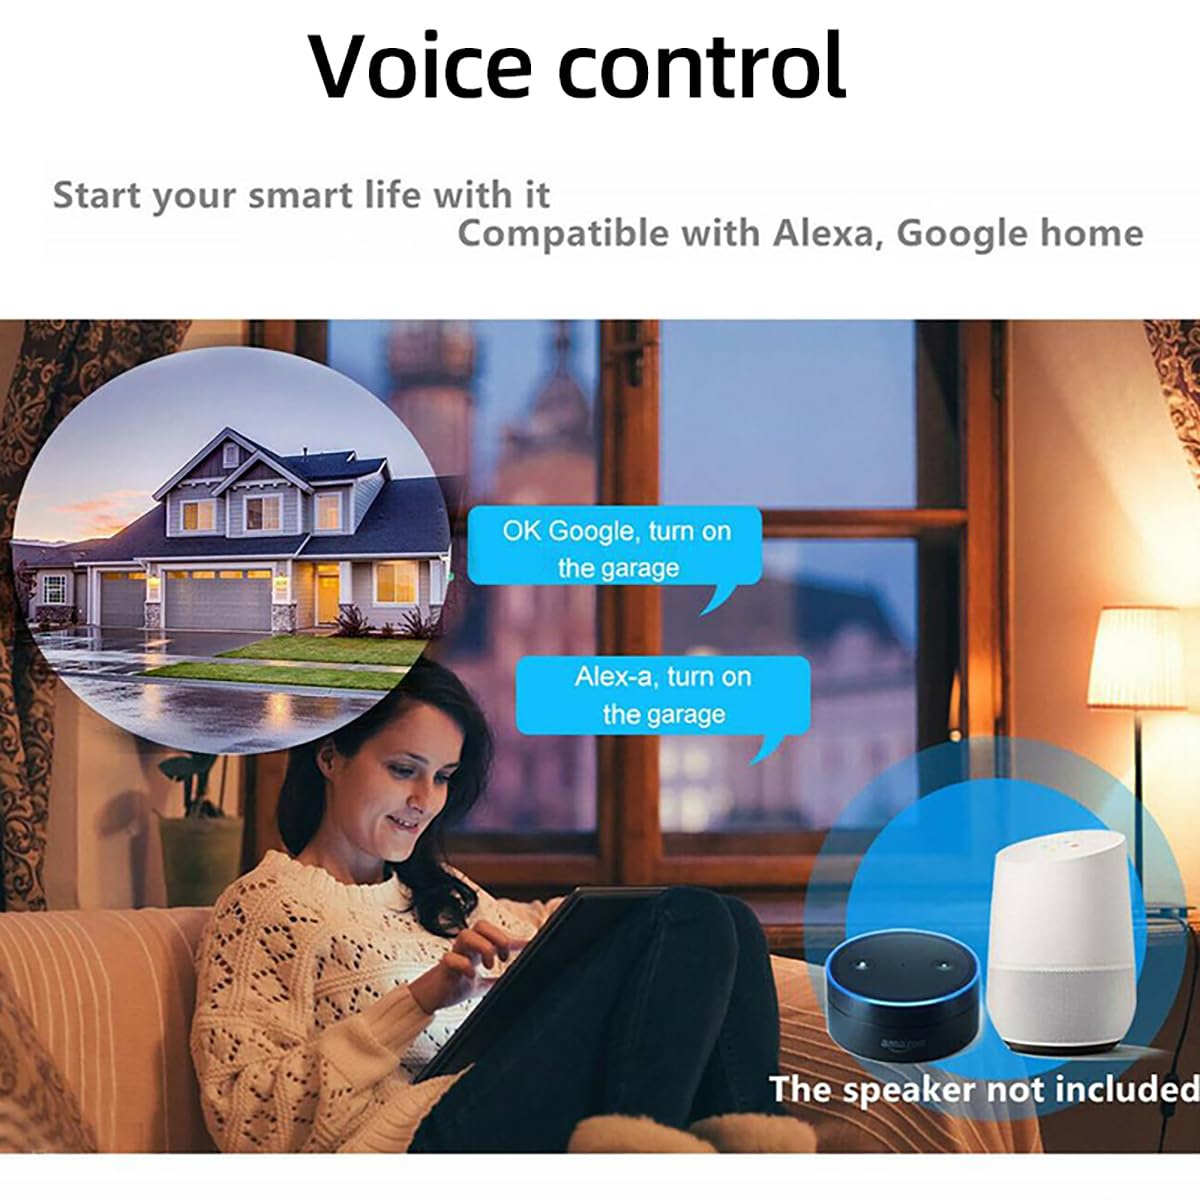
Image: Voice control integration with Amazon Alexa and Google Home.
Maintenance
To ensure optimal performance and longevity of your smart garage door opener, consider the following maintenance tips:
- Regular Cleaning: Keep the main unit and sensor free from dust and debris. Use a soft, dry cloth for cleaning.
- Sensor Alignment: Periodically check that the magnetic door sensor components remain properly aligned for accurate open/closed status detection.
- Cable Inspection: Inspect all wiring for any signs of wear, damage, or loose connections. Ensure cables are securely fastened and not pinched by moving parts.
- App Updates: Keep the Smart Life/Tuya Smart app updated to the latest version to benefit from new features and security enhancements.
- WiFi Signal: Ensure a stable 2.4GHz WiFi signal in your garage for consistent connectivity.
Troubleshooting
If you encounter issues with your smart garage door opener, refer to the following common troubleshooting steps:
- Device Not Responding:
- Check if the device is powered on and the USB adapter is securely connected.
- Verify your home WiFi network is active and the device is within range of the router.
- Ensure your smartphone has an internet connection.
- Restart the smart opener by unplugging and re-plugging the power.
- Door Status Incorrect:
- Check the alignment and proximity of the magnetic door sensor components. They should be close together when the door is closed.
- Inspect the sensor wire for any damage or loose connections to the main unit.
- Cannot Connect to WiFi:
- Confirm your WiFi network is 2.4GHz. The device does not support 5GHz WiFi.
- Ensure your WiFi password is entered correctly in the app.
- Move the smart opener closer to your WiFi router during the initial setup.
- Try resetting the device to factory settings (refer to the app or device instructions for specific reset procedures) and attempt pairing again.
- Voice Control Not Working:
- Verify that your Smart Life/Tuya Smart account is correctly linked to your Alexa, Google Home, or Siri account.
- Ensure your voice assistant device is online and functioning correctly.
- Use the exact voice commands as specified in the app or voice assistant settings.
Specifications
| Parameter | Value |
|---|---|
| Input Voltage | DC 5V |
| WIFI Standard | IEEE 802.11 b/g/n |
| Security Mechanism | WPA-PSK/WPA2-PSK |
| WIFI Protocol | Only support 2.4GHz (does not support 5GHz) |
| Working Temperature | -20℃ ~ 70℃ (-4°F ~ 158°F) |
| Working Humidity | ≤80% |
| Material | ABS |
| Size (L x W x H) | 88 x 38 x 22 mm (3.47 x 1.54 x 0.95 inches) |
| Current Rating | 10 Amps |
| Operating Voltage | 5 Volts |
| Control Method | App, Voice |
| Compatible Devices | Amazon Echo, Google Home, Apple devices, Standard garage door openers, Standard garage door remotes |
| Item Weight | 6.1 ounces |
| Model Number | TYCKM |
Warranty and Support
For warranty information or technical support, please refer to the contact details provided with your purchase documentation or visit the official Otcboimo website. Keep your purchase receipt as proof of purchase.