Introduction
This manual provides comprehensive instructions for the safe and effective operation of your Westinghouse 600V True RMS Auto-Ranging Multimeter. Designed for precision and durability, this multimeter is suitable for both professional electricians and dedicated DIY enthusiasts. Please read this manual thoroughly before use and retain it for future reference.
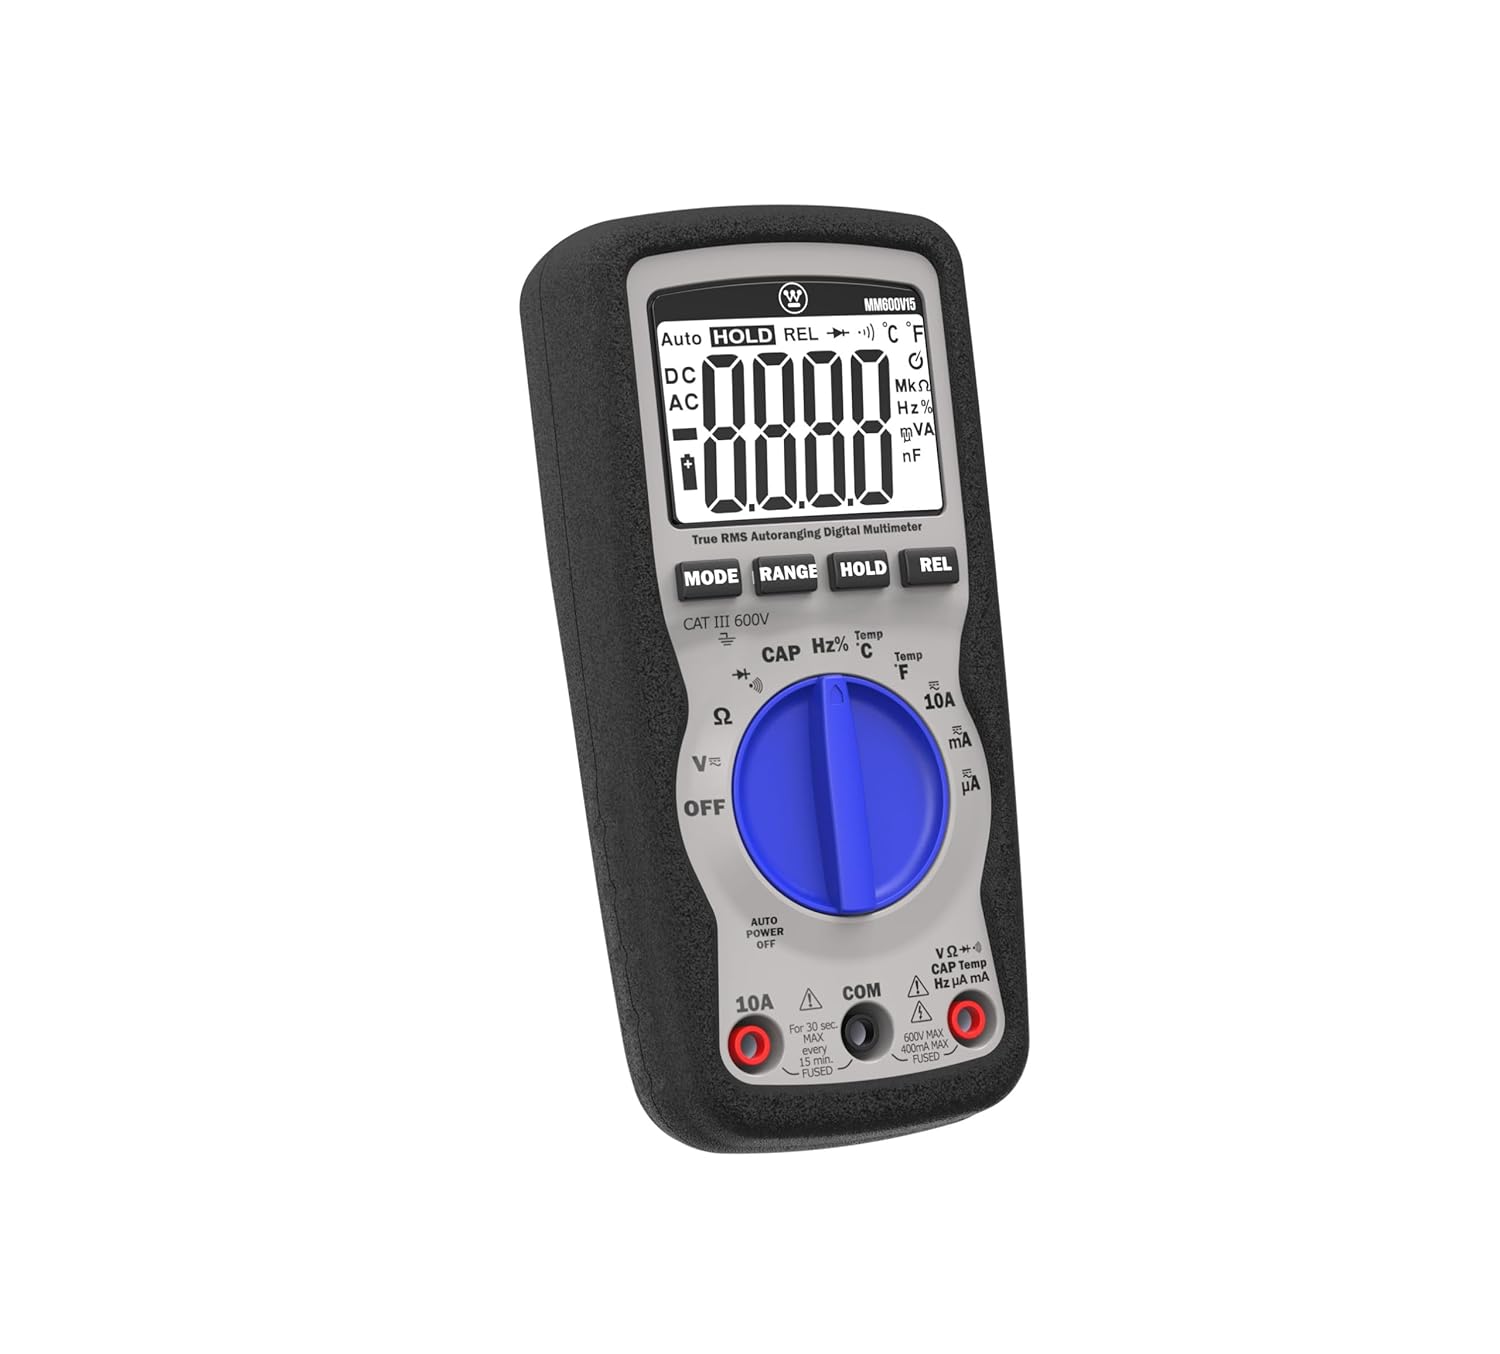
The Westinghouse MM600V15 is a versatile tool capable of measuring AC/DC voltage, AC/DC current, resistance, capacitance, frequency, and temperature. It features a large screen for easy readability and a relative mode for comparative analysis. Built to withstand tough conditions, it is drop-resistant up to 6.5 feet (2 meters) and certified to UL 61010-1 and CSA C22.2 standards for maximum safety.
Safety Information
Always observe all safety precautions when using the multimeter. Failure to do so may result in electric shock, injury, or damage to the meter or equipment under test.
- Ensure the multimeter is set to the correct function and range before making measurements.
- Do not attempt to measure voltages or currents exceeding the specified maximum ratings (600V AC/DC, 10A AC/DC).
- Inspect test leads for damage before each use. Replace if insulation is cracked or exposed.
- Avoid working alone.
- Use caution when working with live circuits.
- Keep fingers behind the finger guards on the test probes.
- The device is certified to UL 61010-1 and CSA C22.2 standards for maximum safety.
Package Contents
Verify that all items are present in the package:
- Westinghouse 600V True RMS Auto-Ranging Multimeter (Model: MM600V15)
- Test Leads (Red and Black)
- K-Type Thermocouple Temperature Probe
- 9V Battery (pre-installed or included)
- Rugged Carrying Case
- User Manual (this document)

Image: The Westinghouse Multimeter shown alongside its black carrying case, red and black test leads, and a K-type thermocouple temperature probe.
Setup
Battery Installation
The multimeter requires one 9V battery (included). To install or replace the battery:
- Ensure the multimeter is turned OFF.
- Locate the battery compartment on the back of the meter.
- Use a Phillips head screwdriver to loosen the screw securing the battery cover.
- Carefully remove the battery cover.
- Connect the 9V battery to the battery clips, observing correct polarity (+ and -).
- Place the battery into the compartment and replace the cover, securing it with the screw.

Image: A user connecting a 9V battery to the multimeter's test leads to check its voltage, demonstrating battery handling.
Initial Checks
Before first use, or after battery replacement, perform a quick check:
- Turn the rotary switch to any function (e.g., V~ for AC Voltage). The display should illuminate and show "0.00" or similar.
- Check the test leads for continuity by setting the meter to resistance (Ω) or continuity mode and touching the red and black probes together. The meter should show a very low resistance (near 0 Ω) or beep for continuity.
Operating Instructions
The Westinghouse Multimeter features auto-ranging, simplifying measurements by automatically selecting the correct range. Use the 'MODE' button to switch between AC/DC, resistance/continuity/diode, or frequency/duty cycle within a single rotary switch position.
1. Voltage Measurement (AC/DC)
To measure voltage up to 600V AC/DC:
- Insert the red test lead into the "VΩmA" input jack and the black test lead into the "COM" input jack.
- Turn the rotary switch to "V~" for AC Voltage or "V-" for DC Voltage. If the symbol is combined, use the 'MODE' button to select AC or DC.
- Connect the test probes in parallel to the circuit or component you wish to measure.
- Read the voltage value on the large LCD display.

Image: A user measuring AC voltage from a standard wall outlet using the multimeter, demonstrating its application for household electrical diagnostics.

Image: A user measuring DC voltage from a car battery, highlighting the multimeter's utility for automotive applications.
2. Current Measurement (AC/DC)
To measure current up to 10A AC/DC:
- IMPORTANT: Turn off power to the circuit before connecting the meter.
- For measurements up to 10A, insert the red test lead into the "10A" input jack. For mA/µA measurements, use the "VΩmA" input jack. The black test lead always goes into "COM".
- Turn the rotary switch to "10A" or "mA/µA". Use the 'MODE' button to select AC or DC current.
- Connect the meter in series with the circuit.
- Restore power to the circuit and read the current value.
3. Resistance (Ω), Continuity, and Diode Test
To measure resistance, check continuity, or test diodes:
- Insert the red test lead into the "VΩmA" input jack and the black test lead into the "COM" input jack.
- Turn the rotary switch to the "Ω" position.
- Use the 'MODE' button to cycle through Resistance (Ω), Continuity (speaker icon), and Diode Test (diode symbol).
- Connect the probes across the component to be tested. For continuity, the meter will beep if resistance is below a certain threshold.
4. Capacitance (CAP) and Frequency (Hz%)
To measure capacitance or frequency:
- Insert the red test lead into the "VΩmA" input jack and the black test lead into the "COM" input jack.
- Turn the rotary switch to "CAP Hz%".
- Use the 'MODE' button to select Capacitance (CAP) or Frequency (Hz%).
- Connect the probes across the component.
5. Temperature Measurement (°C/°F)
To measure temperature:
- Insert the K-type thermocouple probe into the dedicated temperature input jacks (ensure correct polarity).
- Turn the rotary switch to "Temp °C" or "Temp °F" depending on your desired unit.
- Place the tip of the thermocouple on or near the object whose temperature you wish to measure.
- Read the temperature value on the display.

Image: The multimeter with its kickstand extended, showing a temperature reading on the screen with the temperature probe connected to the input jacks.
6. Relative Mode (REL)
The Relative Mode allows you to store a reference value and display subsequent measurements as a deviation from that reference. This is useful for comparative analysis or nulling out lead resistance.
- Perform a measurement as usual.
- Press the 'REL' button. The current reading will be stored as the reference, and the display will show "0.00" or the difference from the reference.
- Subsequent measurements will show the difference from the stored reference.
- Press 'REL' again to exit Relative Mode.
7. Data Hold (HOLD)
To freeze the current reading on the display:
- Press the 'HOLD' button during a measurement. The reading will be held on the display.
- Press 'HOLD' again to release the reading and resume live measurement.
8. True RMS Accuracy
This multimeter features True RMS (Root Mean Square) measurement capability. Unlike standard multimeters that assume perfect sine waves, True RMS meters accurately measure AC voltage and current even when waveforms are distorted by electronic devices like LED lights, power supplies, or motor drives. This ensures reliable and precise readings in complex electrical systems.
Video: An official product video demonstrating the features and benefits of the Westinghouse True RMS Auto-Ranging Multimeter, including its accuracy with complex electrical signals and included accessories.
Maintenance
Cleaning
Wipe the meter with a damp cloth and mild detergent. Do not use abrasives or solvents. Keep the display clean and free from scratches.
Battery Replacement
When the battery indicator appears on the display, replace the 9V battery as described in the "Setup" section. Prompt battery replacement ensures accurate readings and proper meter function.
Storage
If the meter is not used for an extended period, remove the battery to prevent leakage. Store the meter and accessories in the provided rugged carrying case in a cool, dry place, away from direct sunlight and extreme temperatures.
Troubleshooting
| Problem | Possible Cause | Solution |
|---|---|---|
| Meter does not turn on or display is blank. | Dead or improperly installed battery. | Check battery installation and replace if necessary. Ensure correct polarity. |
| Inaccurate readings. | Incorrect function/range selected; damaged test leads; low battery. | Verify correct function and range. Inspect test leads for damage. Replace battery. |
| "OL" (Overload) displayed. | Measurement exceeds selected range or meter's maximum capacity. | Switch to a higher range (if not auto-ranging) or ensure measurement is within meter's limits. |
| No continuity beep. | Continuity mode not selected; open circuit. | Press 'MODE' to select continuity (speaker icon). Check the circuit for breaks. |
| Difficulty with battery compartment. | Tight fit or screw. | Apply gentle, even pressure when opening/closing. Ensure screw is aligned. |
Specifications
| Feature | Specification |
|---|---|
| Model Number | MM600V15 |
| Voltage Measurement | 600V AC/DC Max |
| Current Measurement | 10A AC/DC Max |
| Display | Large 4000-count LCD |
| Accuracy | True RMS |
| Drop Resistance | 6.5 Feet (2 Meters) |
| Safety Certification | UL 61010-1 and CSA C22.2 |
| Power Source | 1 x 9V Battery (included) |
| Product Dimensions (L x W x H) | 5.9 x 2.8 x 2 inches |
| Item Weight | 0.45 Pounds (7.2 ounces) |
| Country of Origin | China |
Warranty and Customer Support
Your Westinghouse 600V True RMS Auto-Ranging Multimeter is backed by a 2-year Westinghouse warranty.
For technical assistance, troubleshooting, or warranty claims, please contact Westinghouse customer service. Support is available 24/7.
Please refer to the official Westinghouse website or your product registration card for the most current contact information.