Introduction
The Emgykit MD319 NOAA Weather Alert Radio is designed to provide timely and localized emergency alerts, ensuring your safety and preparedness during severe weather events and other hazards. Utilizing Specific Area Message Encoding (S.A.M.E.) technology, this radio filters alerts to notify you only of threats relevant to your designated area. It features multiple alert settings, dual power options, and an integrated digital clock with an alarm function.
Package Contents
Verify that all items are present in your package:
- MD319 NOAA Weather Alert Radio
- Owner's Manual
- 110V AC Power Adapter
- External Antenna
- External Alarm Light
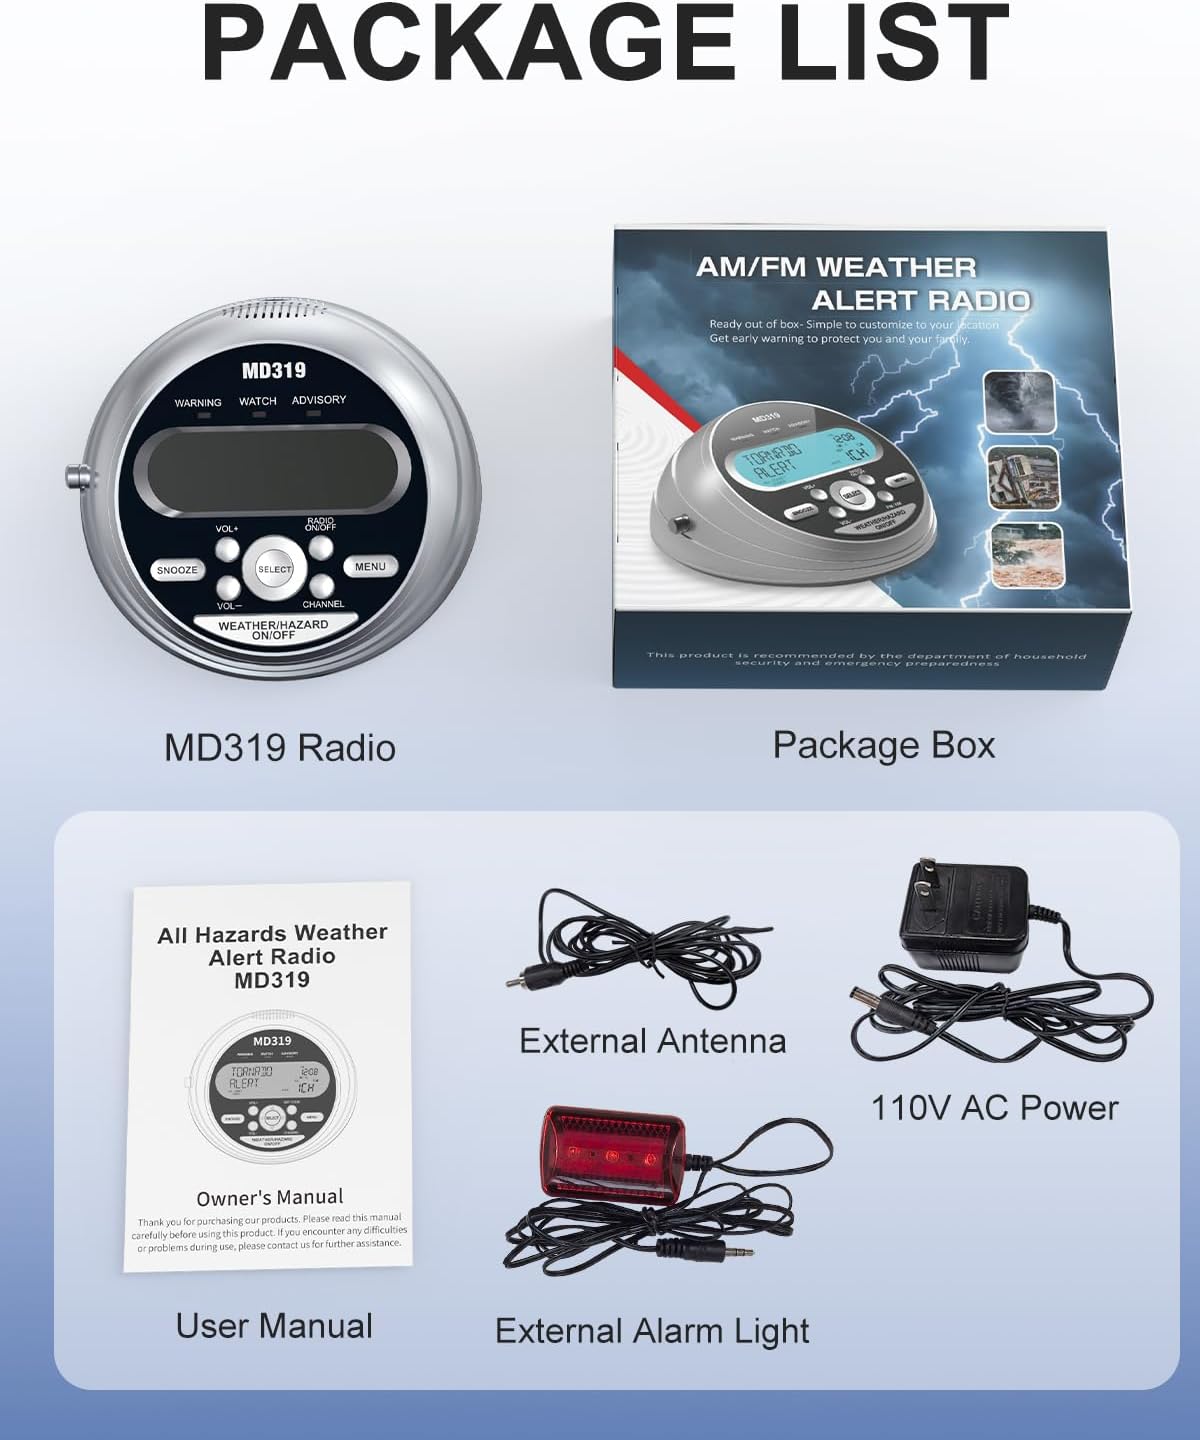
Image: The package contents of the MD319 radio, showing the main unit, user manual, power adapter, external antenna, and external alarm light.
Product Overview
Familiarize yourself with the main components and controls of your MD319 radio.

Image: Front panel diagram highlighting the LCD display, warning lights, speaker, and control buttons including Snooze, Volume, Select, Set Code, Menu, Channel, and Weather/Hazard On/Off.

Image: Back panel diagram illustrating the battery compartments, DC Jack for power, External Alert Jack for the warning light, Earphone Jack, and External Antenna Connector.
Setup
Powering the Device
The MD319 radio operates on both 110V AC power and 4 AA battery backup (not included). For continuous operation, connect the provided 110V AC power adapter to the DC Jack on the back of the unit and plug it into a wall outlet. For battery backup, open the battery compartment on the bottom of the unit and insert 4 AA batteries, ensuring correct polarity. This provides over 72 hours of operation during power outages.

Image: The MD319 radio demonstrating its dual power supply options: 110V AC wall power and a compartment for 4 AA battery backup.
Setting Time and Date
To set the time and date:
- Press the MENU button.
- Use the UP/DOWN buttons to navigate to "SET UP TIME" or "SET UP DATE".
- Press SELECT to enter the setting mode.
- The first digit will start flashing. Use UP/DOWN to adjust the digit.
- Press LEFT/RIGHT to move to the next digit.
- Repeat until all digits are set.
- Press SELECT to save.
- Press MENU to exit.

Image: The integrated digital clock and alarm system of the MD319, showing the date, time, and relevant setting indicators.
Programming County Codes (S.A.M.E.)
The MD319 uses S.A.M.E. technology to provide localized alerts. You can program up to 23 county codes.
- Press the SET CODE button for quick access, or navigate via the MENU button to "COUNTY CODE".
- Use UP/DOWN to select ALL (for all alerts in your area), SINGLE (for one specific county), or MULTIPLE (for several counties).
- If selecting SINGLE or MULTIPLE, press SELECT.
- Enter the 6-digit FIPS code for your county. Use UP/DOWN to change digits and LEFT/RIGHT to move between digits.
- To find your county's FIPS code, visit www.weather.gov/nwr/counties or call 1-888-NWR-4337.
- Press SELECT to save each code.
- Press MENU to exit.

Image: The radio's display during county code customization, showing a map with example FIPS geographic codes for localized programming.
Selecting Weather Channel
The MD319 supports 7 NOAA weather frequencies.
- Press the CHANNEL button for quick access, or navigate via the MENU button to "WEATHER CHANNEL".
- Use UP/DOWN to select the desired channel (1CH-7CH).
- Press SELECT to confirm and save the setting.
- Press MENU to exit.

Image: The MD319 radio illustrating its capability to receive 7 NOAA weather frequencies, with visual examples of various weather emergencies.
Operating Instructions
Alert Modes
The MD319 offers three alert settings: VOICE, SIREN, and DISPLAY.
- VOICE: Delivers a 90-second real-time voice broadcast of the alert.
- SIREN: Activates a loud 90+ dB siren for 5 minutes.
- DISPLAY: Activates silent LED visual alerts, color-coded for Watch (Orange), Warning (Red), and Advisory (Yellow) levels.
To select your preferred alert mode:
- Press the MENU button.
- Use UP/DOWN to navigate to "ALERT MODE".
- Press SELECT.
- Use UP/DOWN to choose VOICE, SIREN, or DISPLAY.
- Press SELECT to save.
- Press MENU to exit.

Image: The MD319 radio displaying its three alert settings: Voice, Siren, and Light Display, with descriptions of each mode's duration and intensity.
Alarm Function
The integrated digital clock includes an alarm system with a snooze function.
- To set the alarm, navigate to "SET UP ALARM" via the MENU button.
- Press SELECT.
- Use UP/DOWN to turn the alarm ON or OFF.
- If ON, set the alarm time using UP/DOWN for digits and LEFT/RIGHT to move between them.
- Press SELECT to save.
- To snooze a sounding alarm, press the SNOOZE button for 9 minutes of extra rest.
Siren Volume
Adjust the siren volume to your preference (LOW/HIGH).
- Press the MENU button.
- Use UP/DOWN to navigate to "SIREN VOLUME".
- Press SELECT.
- Use UP/DOWN to select LOW or HIGH.
- Press SELECT to save.
- Press MENU to exit.
Button Beep
Enable or disable the button beep sound.
- Press the MENU button.
- Use UP/DOWN to navigate to "BUTTON BEEP".
- Press SELECT.
- Use UP/DOWN to select ON or OFF.
- Press SELECT to save.
- Press MENU to exit.
Backlight Setting
Adjust the backlight behavior for the LCD display.
- Press the MENU button.
- Use UP/DOWN to navigate to "BACKLIGHT".
- Press SELECT.
- Use UP/DOWN to select NORMAL (backlight on for 5 seconds after button press) or CONTINUOUS (backlight always on).
- Press SELECT to save.
- Press MENU to exit.
Maintenance
To ensure optimal performance and longevity of your MD319 NOAA Weather Alert Radio, follow these maintenance guidelines:
- Cleaning: Use a soft, dry cloth to clean the exterior of the radio. Avoid using abrasive cleaners or solvents.
- Battery Replacement: If using battery backup, replace the 4 AA batteries when the low battery indicator appears on the display or if the unit fails to power on without AC adapter. Ensure correct polarity when inserting new batteries.
- Storage: Store the radio in a cool, dry place away from direct sunlight and extreme temperatures. If storing for extended periods, remove the batteries to prevent leakage.
- Antenna Care: Handle the telescopic antenna with care to prevent bending or breakage.
Troubleshooting
If you encounter issues with your MD319 radio, try the following solutions:
- No Power: Check if the AC adapter is securely plugged into both the radio and the wall outlet. If using batteries, ensure they are inserted correctly and are not depleted.
- No Weather Alerts: Verify that the correct FIPS county codes are programmed. Ensure the selected weather channel has a strong signal. Extend the telescopic antenna fully or connect the external antenna for improved reception.
- Weak/Static Signal: Adjust the position of the telescopic antenna or connect the external antenna. Relocate the radio to an area with better reception, away from large metal objects or other electronic devices that may cause interference.
- Alarm Not Sounding: Check that the alarm is set to ON and the volume is not set to LOW if you expect a loud alert. Ensure the alert mode is set to VOICE or SIREN, not just DISPLAY.
- Display Issues: If the display is dim or flickering, check power connections or replace batteries. Adjust the backlight setting if needed.
Specifications
- Product Dimensions: 5.97 x 5.61 x 2.93 inches
- Item Weight: 1.54 pounds
- Item Model Number: MD319
- Batteries: 4 AA batteries required (not included)
- Brand: Emgykit
- Color: Silver
- Special Feature: Built-In Clock
- Connectivity Technology: Auxiliary
- Tuner Technology: NOAA
- Power Source: Corded Electric
- Radio Bands Supported: NOAA (162.400-162.550 MHz)
Warranty and Support
For warranty information or technical support, please refer to the contact details provided in the Owner's Manual included with your product. You may also visit the official Emgykit website for further assistance.
Instructional Videos
MD319 Basic Function Operation Guide
This video provides a basic guide to operating the Emgykit MD319 NOAA Weather Alert Radio, covering essential functions and initial setup steps.
MD319 More Functions Instructional Video
This video demonstrates additional functions and advanced settings of the MD319 NOAA Weather Alert Radio, helping users explore its full capabilities.
NOAA Weather Alert Radio with S.A.M.E. Programming
A detailed instructional video on setting up and utilizing the S.A.M.E. localized programming feature of the NOAA Weather Alert Radio for targeted emergency notifications.