1. Introduction
This manual provides detailed instructions for the operation and maintenance of your TempoTec Variations V3 Blaze Digital Audio Player. Please read this manual thoroughly before using the device to ensure proper functionality and to maximize your listening experience.
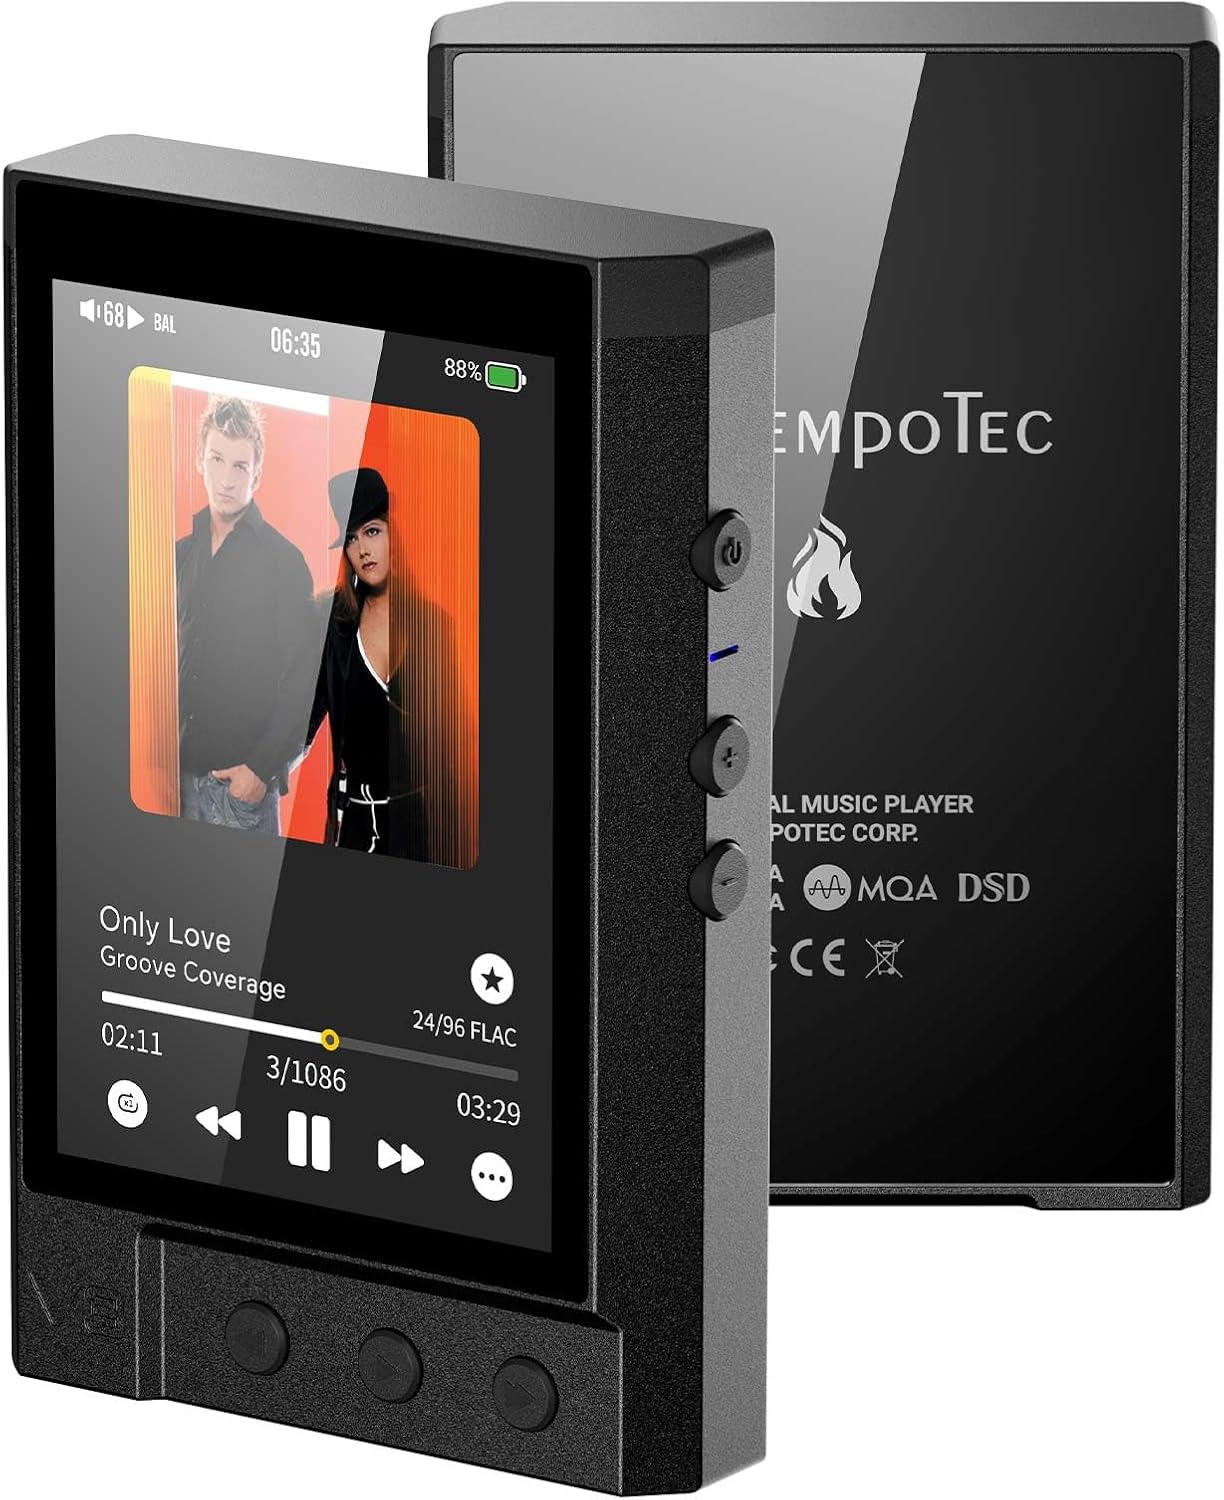
Image 1.1: Front and back view of the TempoTec Variations V3 Blaze Digital Audio Player, showcasing its compact design and physical controls.
2. Package Contents
Verify that all items are present in the package:

Image 2.1: Visual representation of the TempoTec Variations V3 Blaze packaging and included accessories.
- TempoTec Variations V3 Blaze Digital Audio Player
- Protective Case (x1)
- 64GB TF card
- USB A to USB C cable (x1)
- User Manual (this document)
- Warranty Card
3. Product Features
The TempoTec Variations V3 Blaze is designed for high-fidelity audio playback, incorporating advanced components and features:

Image 3.1: Overview of the nine primary advantages of the V3 Blaze, including DSD512, MQA, and high output power.
- Dual DAC Chip: Features 2*AK4493SEQ DAC chips for precise audio decoding.
- High-Performance Amplifier: Utilizes 4*SGM8262 amplifier chips.
- Powerful Output: Up to 1650mW@32Ω via the 4.4mm balanced headphone output.
- Audio Format Support: Supports DSD512, MQA 8X, DXD, and PCM up to 32bit/768kHz.
- Wireless Connectivity: Two-way Bluetooth 5.1, 2.4GHz WiFi, HIBYLINK, AirPlay, and DLNA.
- Streaming Services: Integrated support for TIDAL and Qobuz.
- Digital Circuitry: High-performance digital circuit with FPGA.
- Analog Circuitry: Pyramid analog circuit design.
- Battery: 3500mAh capacity for extended playback.
- Output Ports: Includes 4.4mm balanced and 3.5mm single-ended headphone output ports.
- User Interface: Touch screen with physical control buttons.
3.1. Decoding Circuitry
The device incorporates a full balance dual-chip DSD512 decoding circuit, providing high signal-to-noise ratio (SNR 124dB) and low total harmonic distortion plus noise (THD+N 0.00026%).

Image 3.2: Diagram illustrating the dual AK4493SEQ DAC chips and their role in DSD512 and PCM 32Bit/768kHz decoding.
3.2. Amplifier Circuitry
An independent pyramid analog amplifier circuit is designed for each channel, enhancing channel separation and soundstage for the headphone system. The high-fidelity headphone amplifier circuit delivers substantial power to both 4.4mm balanced and 3.5mm single-ended outputs.

Image 3.3: Detailed view of the pyramid analog amplifier circuit, showing the SGM8262 chips and signal paths.

Image 3.4: Illustration of the headphone amplifier circuit, highlighting the SGM8262 chips and output power for 4.4mm and 3.5mm ports.
3.3. Digital Circuitry
The device features an FPGA (Field-Programmable Gate Array) for high-performance digital signal processing, ensuring accurate and stable audio reproduction.

Image 3.5: Close-up of the FPGA chip and associated components within the digital circuit.
4. Setup
4.1. Charging the Device
- Connect the provided USB A to USB C cable to the device's USB-C port.
- Connect the other end of the cable to a USB power adapter (not included) or a computer's USB port.
- The LED indicator will show a red light during charging.
- Charging is complete when the LED light turns off.
4.2. Inserting a Micro SD Card
The device supports Micro SD cards up to 1TB for local music storage.
- Locate the Micro SD card slot on the side of the device.
- Gently insert the Micro SD card into the slot until it clicks into place. Ensure the card is oriented correctly.
- To remove, press the card inward until it springs out.
4.3. Initial Power On
- Press and hold the power button located on the side of the device until the screen illuminates.
- Follow the on-screen prompts for initial setup, including language selection and Wi-Fi configuration.
5. Operating Instructions
5.1. Basic Navigation
The V3 Blaze features both a touch screen and physical buttons for navigation:
- Touch Screen: Swipe and tap to navigate menus, select tracks, and adjust settings.
- Physical Buttons: Dedicated buttons for Play/Pause, Next Track, Previous Track, and Volume Up/Down are located on the device.
5.2. Playing Music
- From Micro SD: Navigate to the 'Local Music' or 'Files' section on the device, browse your folders, and select a track to play.
- Streaming Services: Access pre-installed apps like TIDAL or Qobuz. Log in with your account credentials to stream music.

Image 5.1: The V3 Blaze displaying album art and playback controls while connected to wired in-ear monitors.
5.3. Bluetooth Connectivity
The V3 Blaze supports two-way Bluetooth 5.1, allowing it to transmit audio to Bluetooth headphones/speakers or receive audio from a smartphone.
- Pairing with Headphones/Speakers: Go to 'Settings' > 'Bluetooth', turn on Bluetooth, and select your device from the list to pair.
- Receiving Audio (Bluetooth DAC mode): Enable Bluetooth receiver mode in settings. Your smartphone can then connect to the V3 Blaze to use it as a Bluetooth DAC.
5.4. Wi-Fi and Network Features
Connect to a 2.4GHz Wi-Fi network for streaming services and firmware updates.
- Connecting to Wi-Fi: Go to 'Settings' > 'Wi-Fi', select your network, and enter the password.
- HIBYLINK: Download the HIBY Music app on your smartphone to remotely control the V3 Blaze.
- AirPlay/DLNA: Use these protocols to stream audio from compatible devices on the same network.

Image 5.2: A smartphone screen showing the HIBYLINK interface controlling the V3 Blaze, which displays the same album art.
5.5. LO&PO Switch and Gain Settings
The device features a Line Out (LO) and Phone Out (PO) switch, along with adjustable gain settings (High/Low) to match various headphones and audio setups.
- LO (Line Out): Provides a fixed, unfiltered audio output suitable for connecting to external amplifiers or active speakers.
- PO (Phone Out): Provides a variable audio output suitable for headphones, with volume control.
- Gain Settings: Adjust the gain (High/Low) in the settings menu to optimize output power for your headphones. Use 'Low' for sensitive in-ear monitors and 'High' for demanding over-ear headphones.
5.6. LED Indicator Lights
The LED light on the device indicates various operational states and audio sample rates:

Image 5.3: Chart illustrating the different LED light colors and their corresponding device status or audio sample rate.
- Red: Charging
- Light off: Standby
- Light blue: No playback
- Yellow: Sample Rate (SR) ≤ 48kHz
- Cyan: Sample Rate (SR) 88.2kHz ~ 192kHz
- Orange: Sample Rate (SR) ≥ 352.8kHz
- White: DSD64 ~ DSD512
- Blue: MQA
6. Maintenance
6.1. Cleaning
Use a soft, dry, lint-free cloth to clean the device. Avoid using harsh chemicals, cleaning solvents, or strong detergents, as these may damage the finish or internal components.
6.2. Battery Care
- Avoid fully discharging the battery frequently.
- Do not expose the device to extreme temperatures (hot or cold) for prolonged periods, as this can degrade battery life.
- If storing the device for an extended period, charge it to approximately 50% before storage.
6.3. Storage
Store the device in a cool, dry place away from direct sunlight and moisture. Use the provided protective case to prevent scratches and minor impacts.
7. Troubleshooting
If you encounter issues with your V3 Blaze, refer to the following common solutions:
| Problem | Possible Cause | Solution |
|---|---|---|
| Device does not power on | Low battery; System crash | Charge the device for at least 30 minutes. If unresponsive, perform a hard reset (refer to manufacturer support for specific instructions if available). |
| No sound output | Volume too low; Incorrect output mode (LO/PO); Faulty headphones; Corrupt audio file | Increase volume. Ensure LO/PO switch is set to PO. Test with different headphones. Verify audio file integrity. |
| Bluetooth pairing issues | Device not in pairing mode; Interference; Already connected to another device | Ensure both devices are in pairing mode. Move closer to the Bluetooth device. Disconnect from other Bluetooth connections. |
| Wi-Fi connection unstable | Weak signal; Incorrect password; Router issues | Move closer to the Wi-Fi router. Re-enter Wi-Fi password. Restart your Wi-Fi router. |
| Device freezes or lags | Too many background processes; Software bug | Restart the device. Check for and install any available firmware updates (OTA). |
8. Specifications
Detailed technical specifications for the TempoTec Variations V3 Blaze:

Image 8.1: Visual table summarizing the key specifications of the TempoTec V3 Blaze.
| Feature | Detail |
|---|---|
| Model Name | TempoTec V3 Blaze |
| Operating System | Customized HiFi Audio System |
| DAC Chip | 2*AK4493SEQ |
| Amplifier Chip | 4*SGM8262 |
| Output Power (4.4mm) | 1650mW+1650mW@32Ω |
| Output Power (3.5mm) | 490mW+490mW@32Ω |
| Supported Formats | DSD512, MQA 8X, DXD, PCM 32bit/768kHz |
| Wireless Connectivity | Two-way Bluetooth 5.1 (LDAC, AAC, APTX, APTX-HD, SBC), 2.4GHz WiFi, HIBYLINK, AirPlay, DLNA |
| Screen Size | 3.2 Inches (HD) |
| Storage | Micro SD (up to 1TB) |
| Battery Capacity | 3500mAh |
| Dimensions | 10cm x 6.5cm x 1.7cm (4 x 0.6 x 2.5 inches) |
| Item Weight | 166.5g (5.87 ounces) |
| Firmware Update | OTA (Over-The-Air) |
9. Warranty and Support
Your TempoTec Variations V3 Blaze Digital Audio Player comes with a limited manufacturer's warranty. Please refer to the included warranty card for specific terms and conditions, including warranty period and coverage details.
For technical support, firmware updates, or further assistance, please visit the official TempoTec website or contact their customer service directly. Contact information can typically be found on the warranty card or the manufacturer's website.