1. Introduction
This manual provides essential instructions for the safe and efficient setup, operation, and maintenance of your Generic Non-Inflatable Stand Pool, model PBEDEDAAB-2.6M/8.5FT. Please read this manual thoroughly before assembly and use to ensure proper functionality and safety.
2. Safety Information
Always prioritize safety when using any swimming pool. Failure to follow these instructions can result in serious injury or death.
- Adult supervision is required at all times for children and pets in or near the pool.
- Do not dive or jump into the pool. The water depth is not sufficient for diving.
- Ensure the pool is placed on a level, stable surface free from sharp objects.
- Keep electrical devices away from the pool area.
- Do not overfill the pool. Adhere to the maximum water level line.
- Regularly inspect the pool for damage or wear. Do not use if damaged.
- Empty and clean the pool regularly to maintain hygiene.
- Secure the pool area to prevent unsupervised access by children or pets.
3. Package Contents
Verify that all components are present before beginning setup:
- Frame Swimming Pool
- Repair Parts
- Swimming Rings (quantity may vary)
- Ocean Balls (quantity may vary)
- Toy Water Guns (quantity may vary)
4. Setup Instructions
The Generic Non-Inflatable Stand Pool is designed for quick and easy setup.
- Choose a Location: Select a flat, stable, and clear area in your backyard, garden, or balcony. Ensure there are no sharp objects or debris that could damage the pool liner.
- Unfold the Pool: Carefully unfold the pool structure. The design allows for easy expansion.
- Assemble Support Structure: The pool features an upgraded steel pipe support system. Ensure all support pipes are securely attached and positioned to provide maximum stability. The triangular support structure is designed for enhanced stability.
- Inspect the Liner: Before filling, check the interior of the pool for any wrinkles or folds. Smooth them out to prevent uneven stress on the material.
- Fill with Water: Begin filling the pool with water. Do not exceed the designated water level line marked on the inside of the pool. Overfilling can compromise stability and lead to spills.
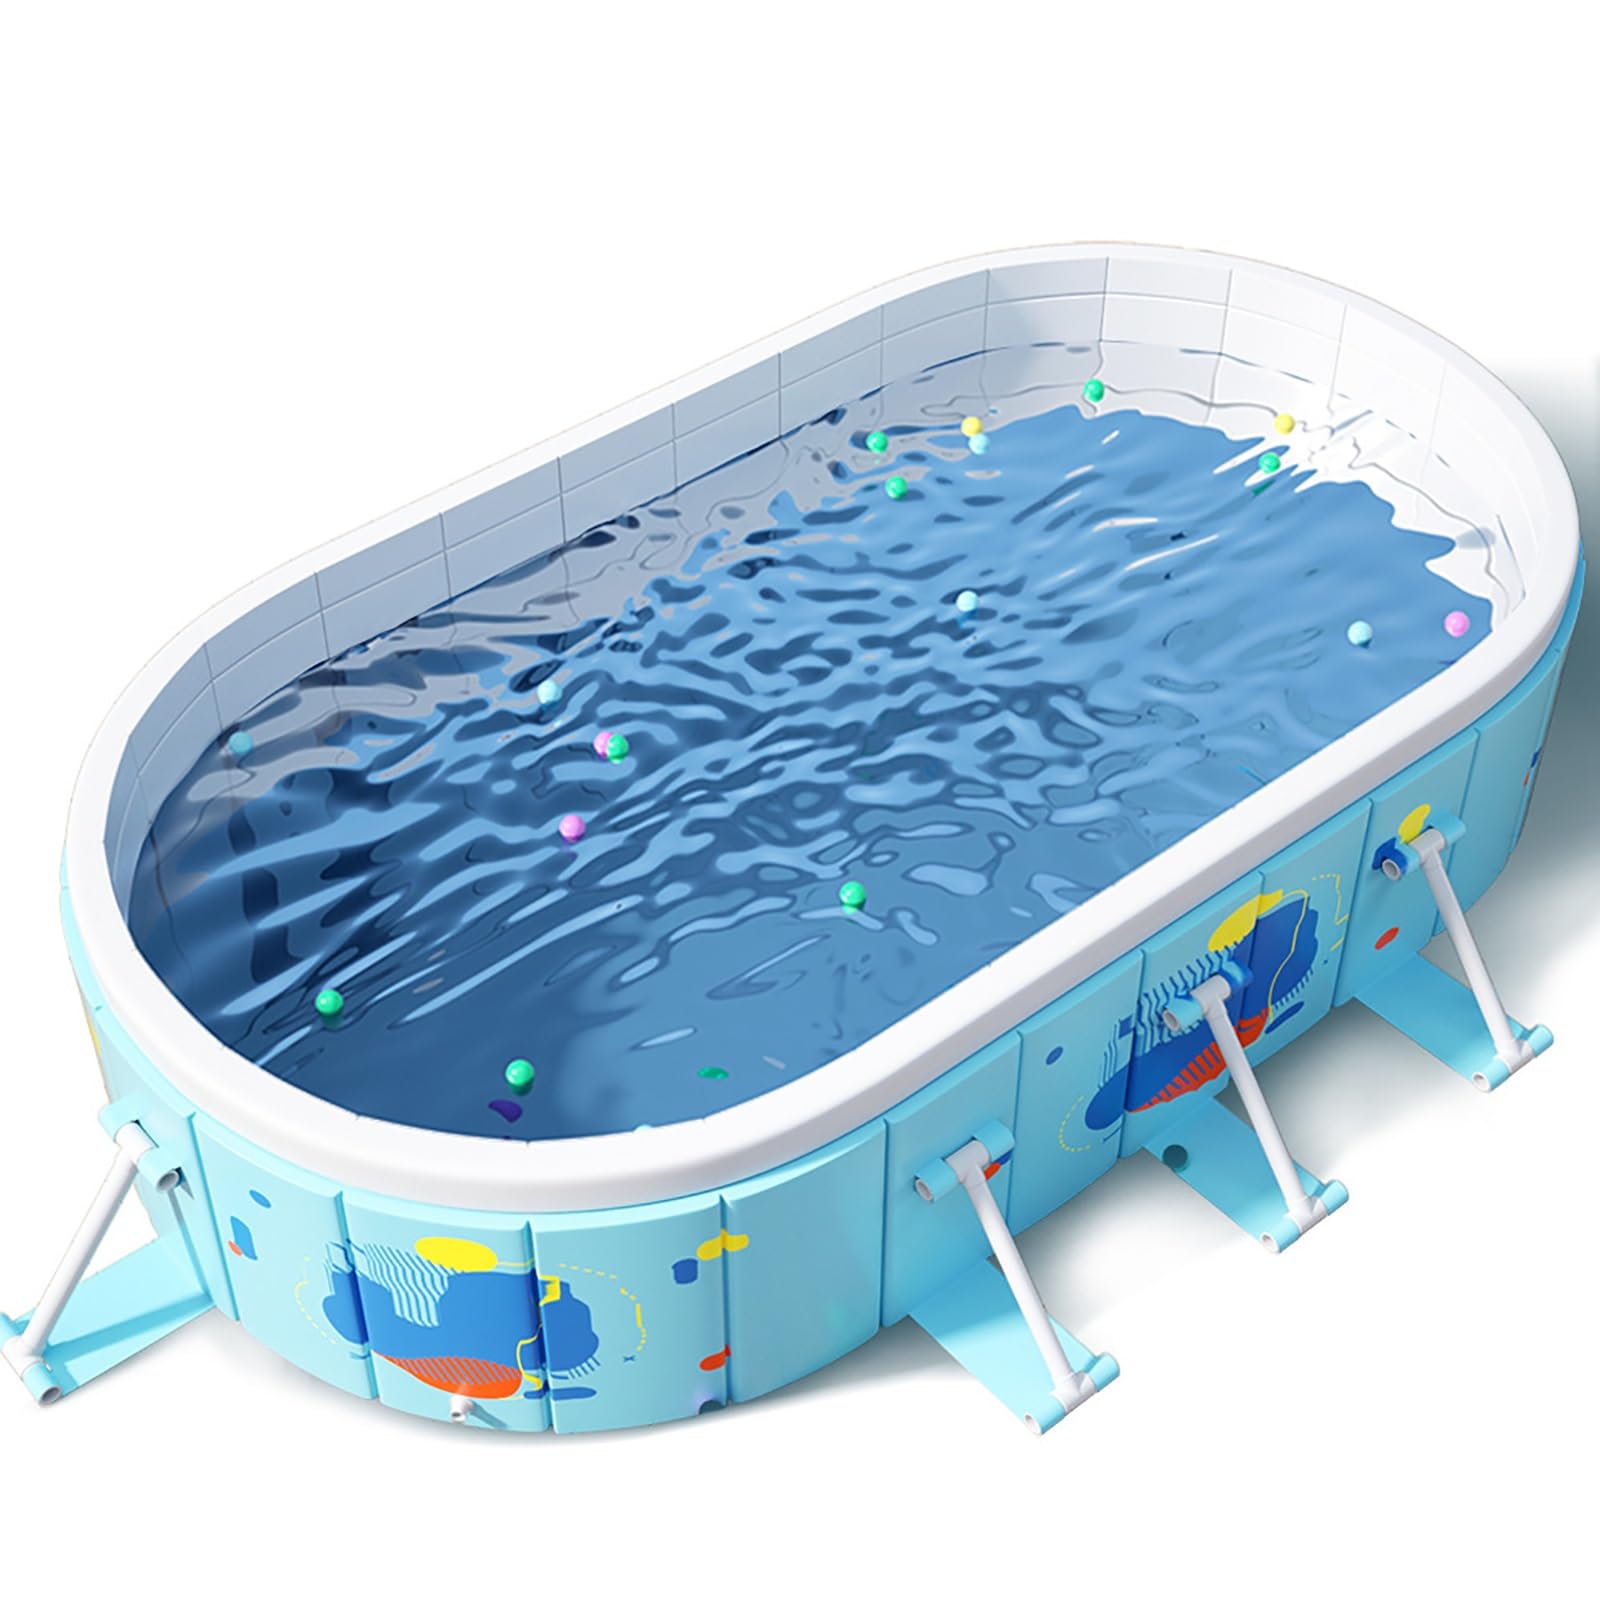
Figure 4.1: Illustration of the stable triangular support structure.

Figure 4.2: The pool fully set up and in use.
5. Operating Instructions
Once set up, the pool is ready for use. Always ensure adult supervision.
- Water Level: Maintain the water level below the maximum fill line to prevent overflow and maintain structural integrity.
- Draining: To drain the pool, locate the two drain ports on the bottom and sides of the pool. Open these ports to allow water to flow out quickly. Ensure the drainage area can handle the volume of water.

Figure 5.1: Water draining from the pool's side port.
6. Maintenance
Proper maintenance ensures the longevity and hygiene of your pool.
- Cleaning: After draining, clean the interior surfaces of the pool with mild soap and water. Rinse thoroughly to remove any residue.
- Inspection: Regularly inspect the PVC material and support frame for any signs of wear, tears, or damage. Use the provided repair parts for minor punctures if necessary.
- Water Quality: For prolonged use, consider using appropriate pool chemicals to maintain water quality, following the chemical manufacturer's instructions.

Figure 6.1: Multi-layer PVC material construction for durability.
7. Storage
When not in use, proper storage will extend the life of your pool.
- Drain Completely: Ensure all water is drained from the pool.
- Clean and Dry: Thoroughly clean the pool and allow it to dry completely to prevent mold and mildew.
- Fold: Once dry, carefully fold the pool. Its collapsible design makes it easy to fold into a compact size.
- Store: Store the folded pool in a cool, dry place, away from direct sunlight and extreme temperatures.

Figure 7.1: The pool folded for compact storage.
8. Troubleshooting
This section addresses common issues you might encounter.
- Pool Not Stable: Ensure the pool is on a completely flat surface. Verify that all support pipes are correctly assembled and locked into place. Do not overfill the pool.
- Slow Draining: Check if the drain ports are fully open and clear of debris. Ensure the ground around the drain is not obstructing water flow.
- Minor Leaks: For small punctures, use the provided repair patches. Clean and dry the area around the leak thoroughly before applying the patch according to its instructions.
- Water Quality Issues: If water becomes cloudy or develops an odor, drain, clean, and refill the pool. Consider using appropriate pool treatment chemicals for continuous use.
9. Specifications
| Feature | Detail |
|---|---|
| Product Name | Frame Swimming Pool / Non-Inflatable Swimming Pool |
| Model Number | PBEDEDAAB-2.6M/8.5FT |
| Material | 3-layer composite laminated mesh PVC |
| Heat-resistant Temperature | Up to 70℃ (158℉) |
| Features | Foldable, No installation required (easy setup), Sturdy Support |
| Package Dimensions | 1.18 x 0.79 x 0.39 inches |
| Item Weight | 15.43 pounds |
| Assembly Required | No (refers to complex assembly, simple unfolding is implied) |

Figure 9.1: Structural details of the pool.
10. Customer Support
For any questions regarding your purchase, service, or product operation, please contact the seller or manufacturer directly. We are committed to ensuring your satisfaction.