1. Introduction
This manual provides essential information for the safe and correct installation, operation, and maintenance of the sdgkjfgh replacement circuit board, model 1550982.B / PCB05-415-V02. This control board is designed for compatibility with Hisense KFR-35G/29FZBp-A3 air conditioning units. Please read this manual thoroughly before proceeding with any installation or service to ensure proper functionality and safety.
2. Safety Information
WARNING: Electrical shock hazard. Always disconnect power to the air conditioning unit before installing, servicing, or removing the control board. Failure to do so can result in serious injury or death.
- Installation should only be performed by a qualified and certified technician.
- Wear appropriate personal protective equipment (PPE), including insulated gloves and safety glasses.
- Ensure the replacement board matches the original board's specifications (model number, voltage, etc.) before installation.
- Handle the circuit board by its edges to avoid damaging components or introducing static discharge.
- Do not operate the air conditioning unit with exposed wiring or components.
3. Package Contents
Verify that all items are present and undamaged upon opening the package.
- 1 x sdgkjfgh AC Control Board (Model 1550982.B / PCB05-415-V02)
- (No other accessories are typically included with this component.)
4. Installation Guide
This section provides a general guide for replacing the control board. Due to the complexity and electrical nature of air conditioning units, professional installation is strongly recommended.
4.1. Tools Required
- Screwdriver set (Phillips and flathead)
- Needle-nose pliers
- Multimeter (for testing)
- Anti-static wrist strap (recommended)
4.2. Installation Steps
- Disconnect Power: Locate the circuit breaker for the air conditioning unit and turn it OFF. Verify power is disconnected using a multimeter.
- Access the Control Board: Open the air conditioning unit's access panel to expose the existing control board. Refer to your AC unit's service manual for specific instructions on accessing internal components.
- Document Connections: Before disconnecting any wires, take clear photographs or make detailed diagrams of all wire connections to the old control board. This is crucial for correct reassembly.
- Disconnect Wires: Carefully disconnect all wires and connectors from the old control board. Note the position and type of each connection (e.g., L-IN, N-IN, HEAT-L, FLAP, DISPLAY).
- Remove Old Board: Unscrew or unclip the old control board from its mounting points.
- Install New Board: Position the new sdgkjfgh 1550982.B / PCB05-415-V02 control board in the same location as the old one and secure it with screws or clips.
- Reconnect Wires: Using your photographs or diagrams, carefully reconnect all wires and connectors to the corresponding terminals on the new board. Ensure all connections are secure and correctly seated. Pay attention to labels like "L-IN", "N-IN", "HEAT-L", "FLAP", and "DISPLAY".
- Inspect Installation: Double-check all connections for accuracy and security. Ensure no wires are pinched or loose.
- Close Access Panel: Securely close the air conditioning unit's access panel.
- Restore Power: Turn the circuit breaker for the air conditioning unit back ON.
- Test Functionality: Power on the air conditioning unit and test its various functions (cooling, heating, fan, etc.) to ensure the new control board is operating correctly.
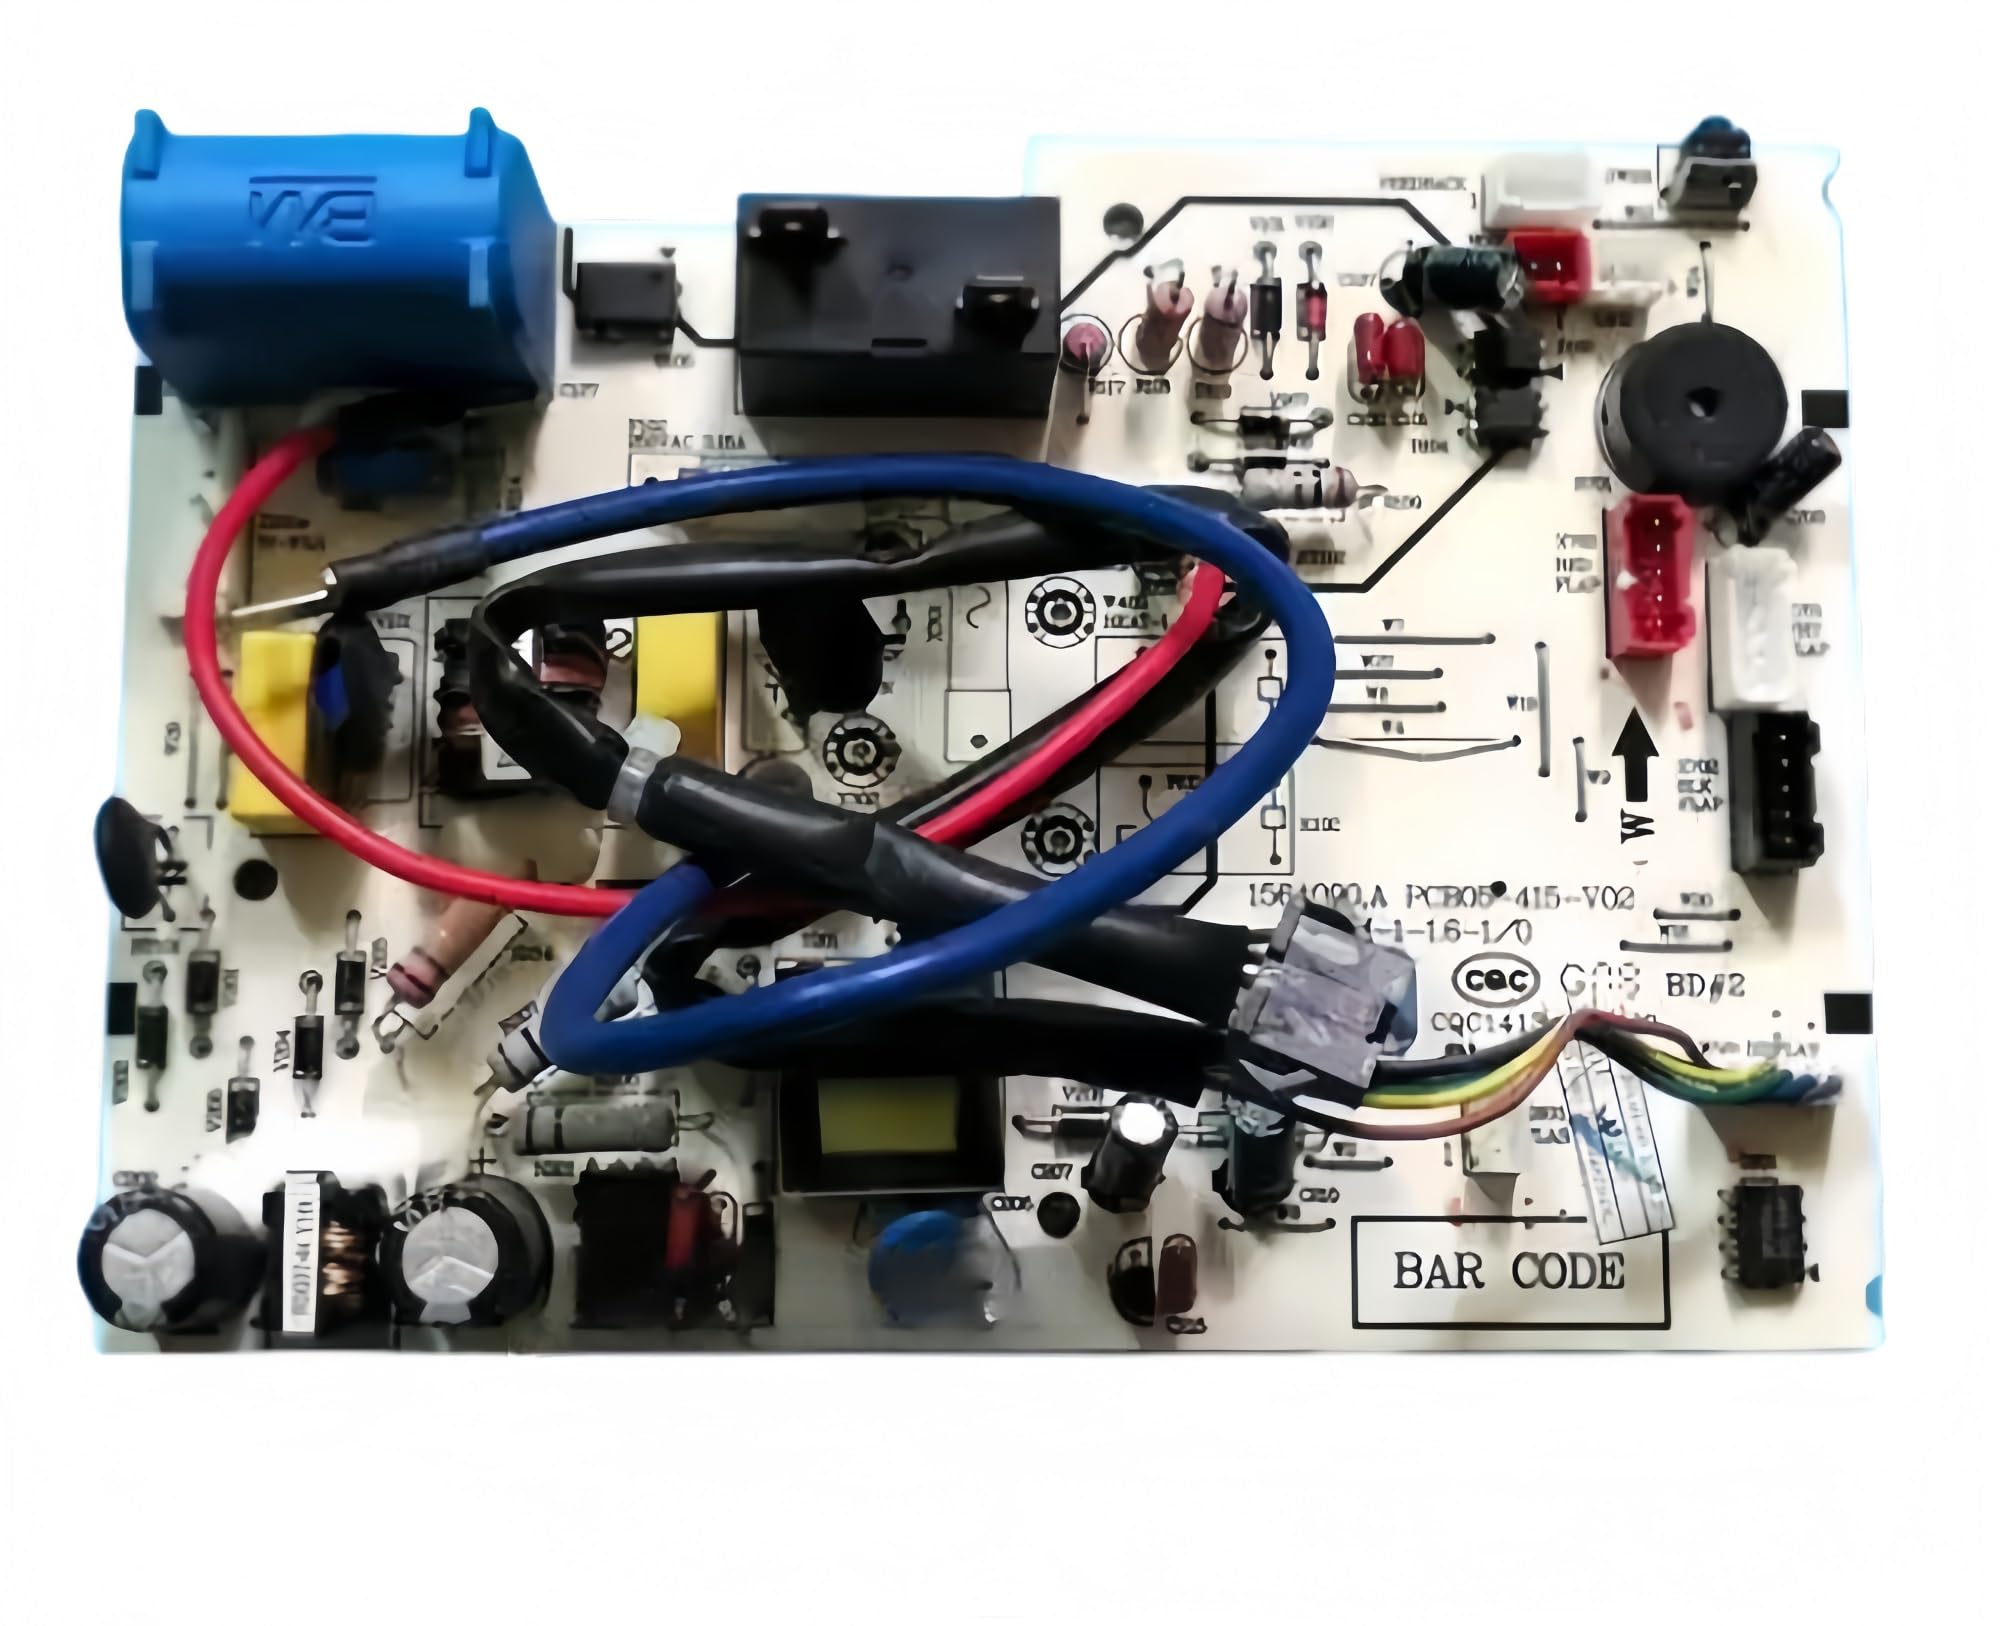
Figure 1: Overview of the sdgkjfgh Hisense AC Control Board 1550982.B PCB05-415-V02. This image displays the various components and connection points on the circuit board, including power inputs (L-IN, N-IN), heat control, feedback, and display connectors. Key identifiers like "1550982.B" and "20130727" are visible on the board.
5. Operation
The sdgkjfgh 1550982.B / PCB05-415-V02 control board is a core component of your Hisense KFR-35G/29FZBp-A3 air conditioning unit. Once correctly installed, it operates automatically to manage the various functions of the AC unit, including temperature regulation, fan speed, mode selection (cooling, heating, fan), and flap control, based on inputs from the user interface and internal sensors. No direct user interaction with the board itself is required or recommended after installation.
6. Maintenance
The control board itself requires minimal maintenance. To ensure its longevity and proper function:
- Keep Dry: Ensure the air conditioning unit's internal environment remains dry and free from moisture to prevent damage to electronic components.
- Cleanliness: Periodically, and only when the unit is completely powered off, inspect the area around the control board for dust or debris accumulation. Use a soft brush or compressed air to gently clean if necessary. Avoid using liquids.
- Professional Inspection: During routine air conditioner maintenance by a qualified technician, the control board's condition should be part of the inspection.
7. Troubleshooting
If your air conditioning unit experiences issues after the control board replacement, consider the following common troubleshooting steps. Always disconnect power before inspecting internal components.
| Problem | Possible Cause | Solution |
|---|---|---|
| AC unit does not power on. |
|
|
| AC unit functions incorrectly (e.g., wrong mode, fan issues). |
|
|
| Unit displays error codes. |
|
|
For complex issues or if you are unsure, always contact a qualified HVAC technician.
8. Specifications
| Feature | Detail |
|---|---|
| Model Numbers | 1550982.B, PCB05-415-V02 |
| Compatibility | Hisense KFR-35G/29FZBp-A3 Air Conditioner |
| Voltage Rating | 220-240V (as per typical AC unit requirements) |
| Material | PCB materials, 2oz copper foil PCB substrate |
| Durability | Industrial-grade, withstands -25°C to 85°C |
| Protection | Anti-static protection, heat-resistant components |
| Dimensions (Approx.) | Based on product image, typical circuit board size for AC units. |
| Item Weight | 1.76 ounces (50 grams) |
9. Warranty and Support
For warranty information and technical support, please refer to the seller's policies or contact the point of purchase. Keep your purchase receipt as proof of purchase.