1. Introduction
Thank you for choosing the BSNANCA Automatic Egg Incubator. This device is designed to provide an optimal environment for hatching various poultry eggs, including chicken, duck, and pigeon eggs. This manual provides essential information for the safe and efficient operation, setup, maintenance, and troubleshooting of your incubator. Please read it thoroughly before use.
2. Safety Instructions
- Always connect the incubator to a grounded power outlet.
- Do not immerse the incubator or its electrical components in water or other liquids.
- Keep the incubator away from direct sunlight, drafts, and extreme temperature fluctuations.
- Ensure proper ventilation around the incubator.
- Unplug the incubator from the power source before cleaning or performing any maintenance.
- This product does not include a hydration bottle or a battery. These must be supplied separately if needed for 12V DC operation.
3. Product Overview
The BSNANCA Automatic Egg Incubator features an intelligent design for efficient egg hatching.
Key Features:
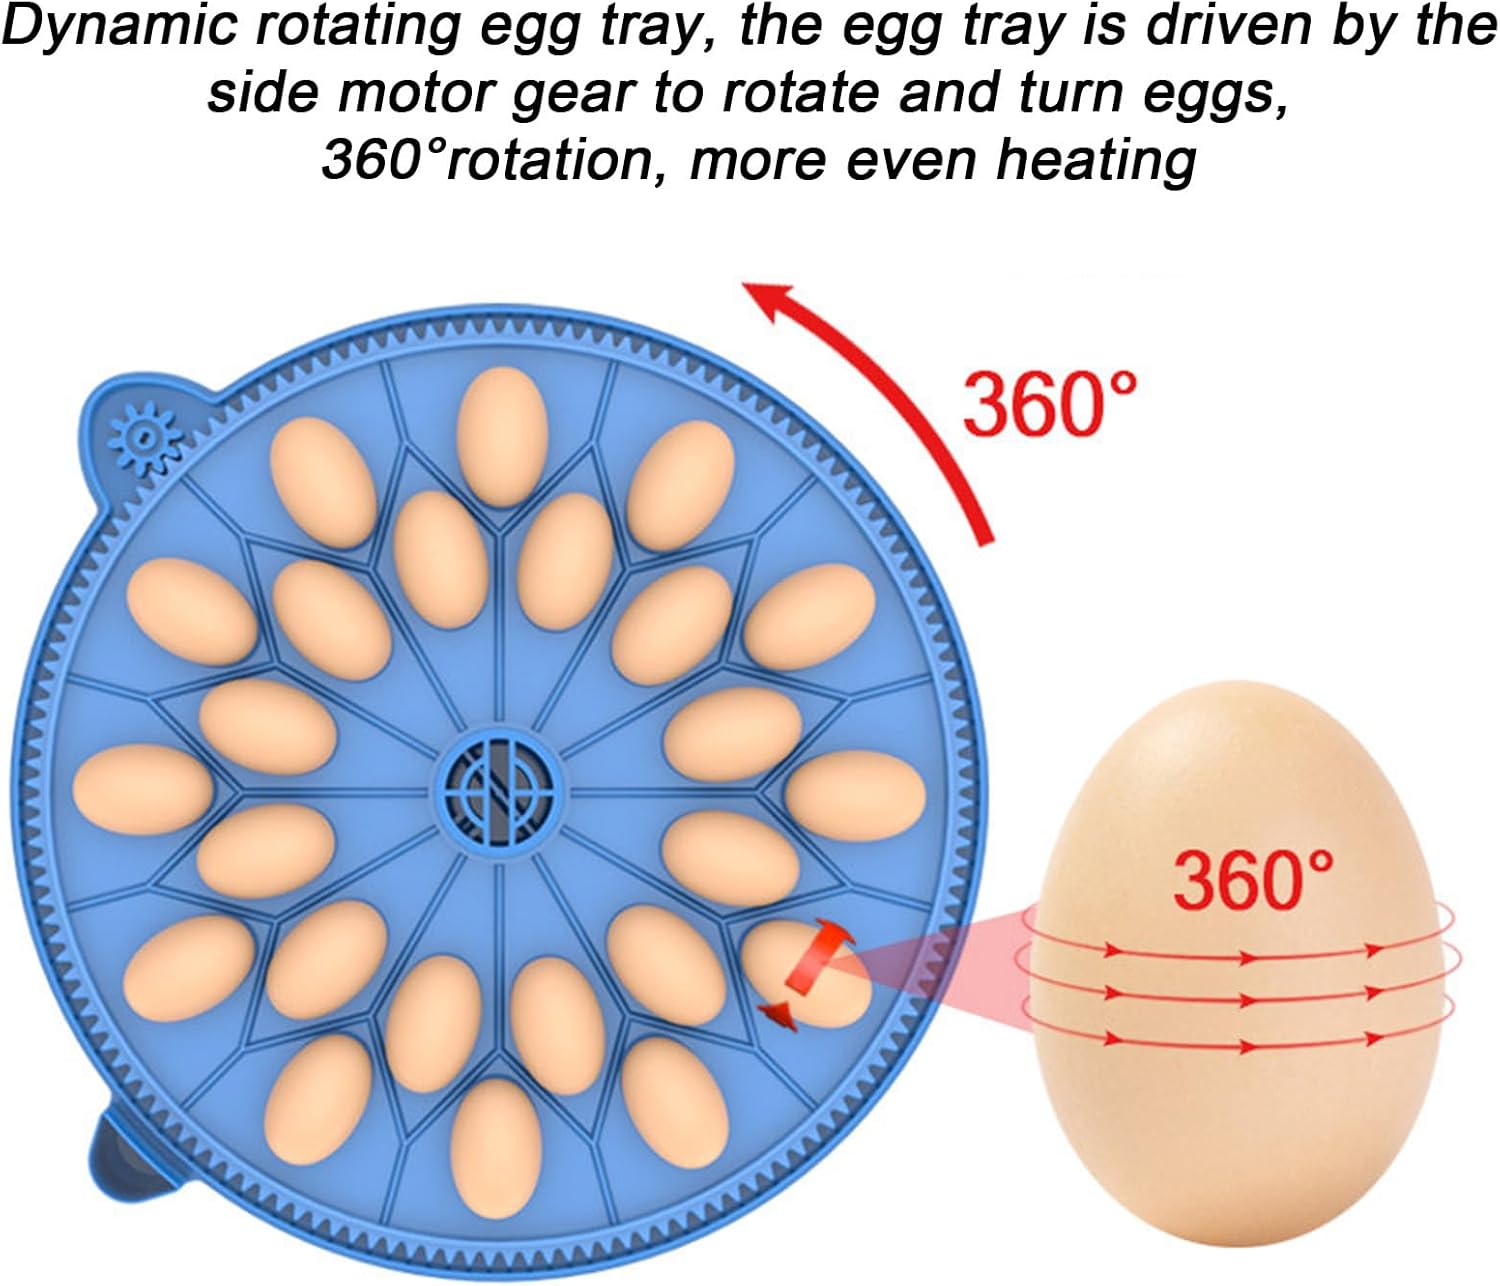
- Automatic Egg Turning: Equipped with a dynamic rotating egg tray that turns eggs 360° for even heating.
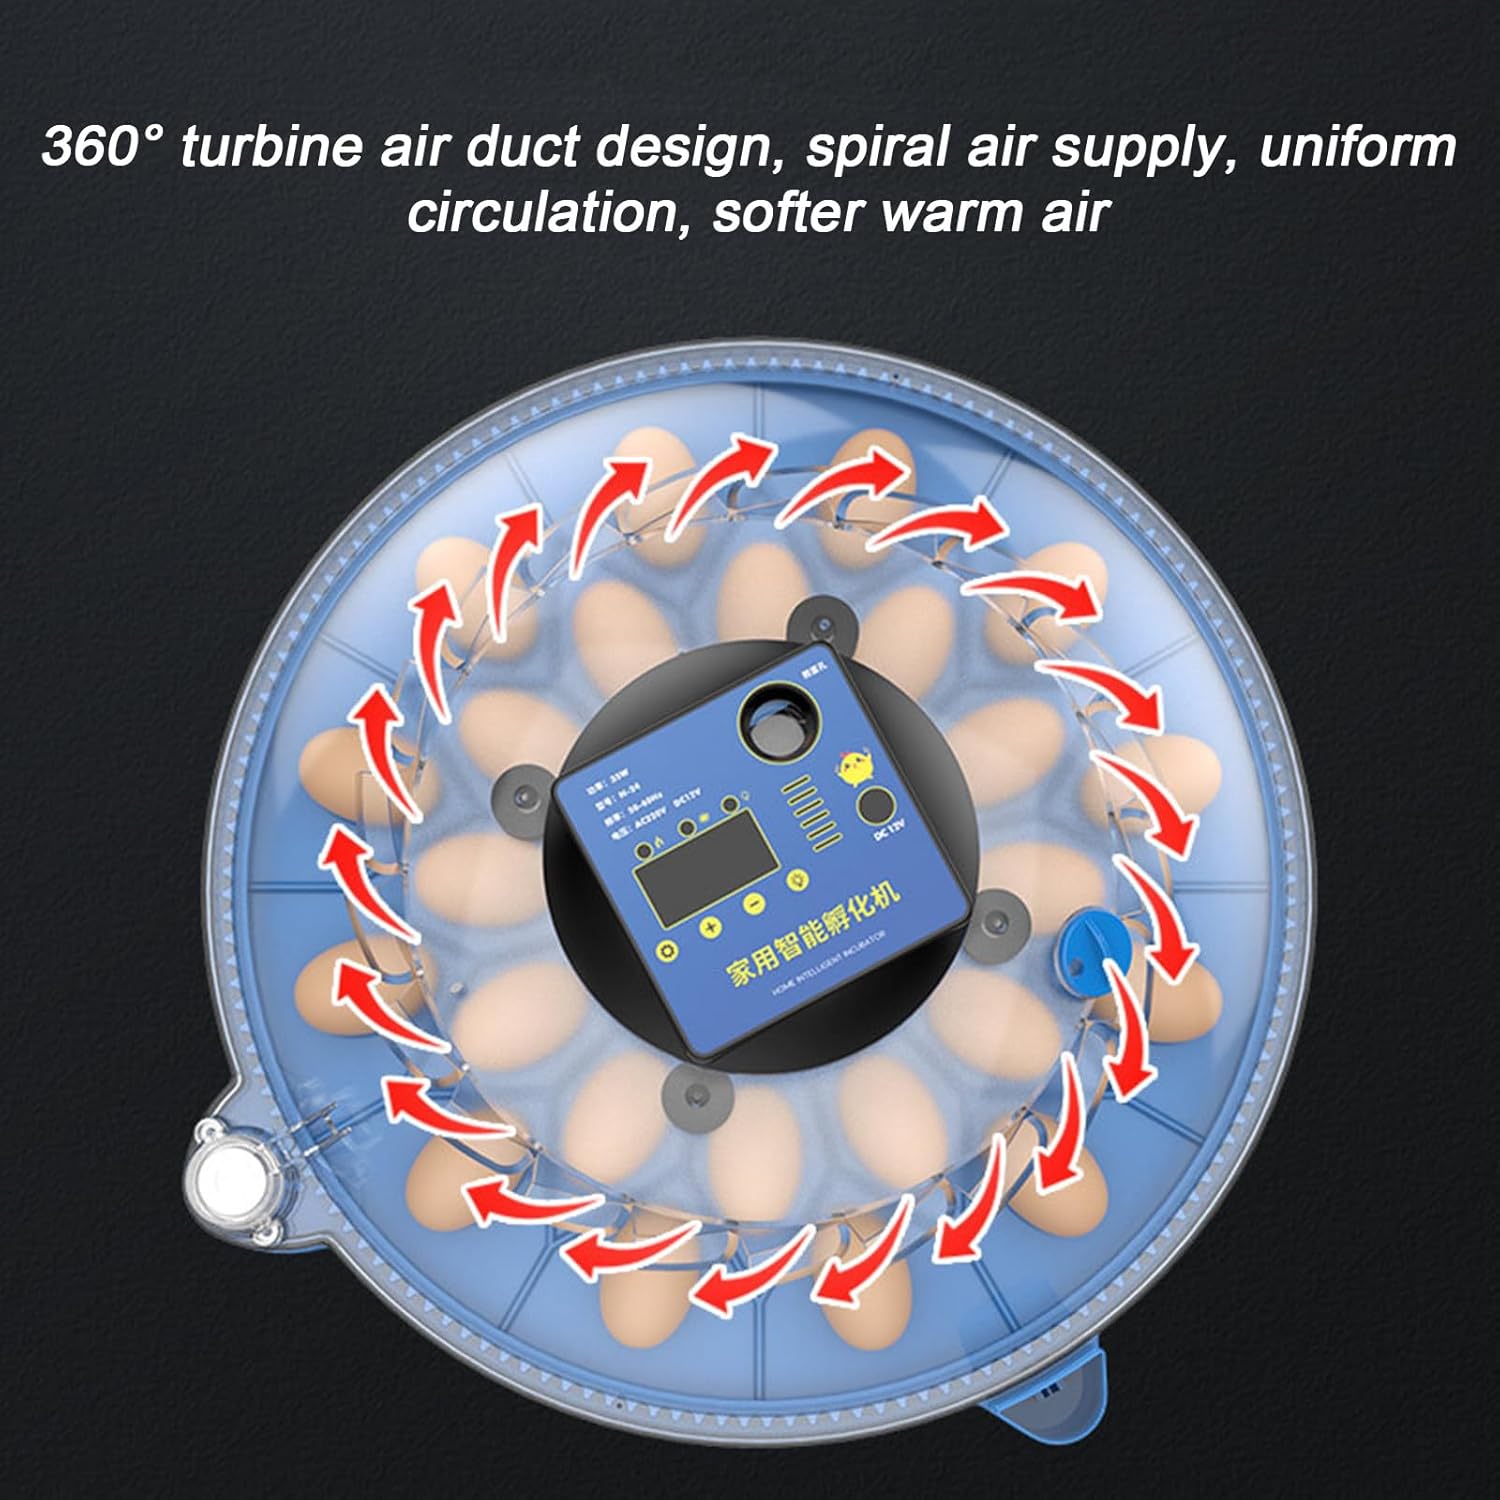
- Turbine Air Duct Design: Features a 360° turbine air duct for uniform circulation of soft, warm air, preventing direct airflow onto eggs.
- Dual Power Supply: Supports both household AC (220V) and 12V DC battery connection for uninterrupted operation during power outages (battery not included, requires 12V, 50AH or more).
- LCD Intelligent Control Panel: Provides clear display of hatching information for easy monitoring and control.
- LED Egg Candler: Integrated LED light for observing egg development and identifying non-viable eggs.
- External Water Filling Port: Allows for easy water replenishment without opening the incubator, maintaining stable humidity.
Components:


4. Setup
- Unpacking: Carefully remove all components from the packaging. Inspect for any damage.
- Placement: Place the incubator on a stable, level surface in a room with a consistent ambient temperature (ideally 20-25°C / 68-77°F) and away from direct sunlight or drafts.
- Water Filling: Locate the external water filling port. Using a hydration bottle (not included), carefully add water to the internal humidification channel until the water level is visible. Do not overfill. This maintains the necessary humidity for hatching.
- Power Connection:
- AC Power: Connect the provided power cord to the incubator and then to a standard 220V AC grounded electrical outlet.
- DC Power (Backup): For backup power during outages, connect a 12V battery (50AH or more, not included) to the DC input terminals on the incubator. Ensure correct polarity.
- Pre-heating: Allow the incubator to run for at least 2-3 hours before placing eggs inside. This stabilizes the internal temperature and humidity.
5. Operating Instructions
- Setting Temperature: The LCD panel displays the current temperature. Refer to the specific requirements for the type of eggs you are incubating. Use the '+' and '-' buttons on the control panel to adjust the target temperature. Press the 'Set' button to confirm.
- Humidity Monitoring: The LCD panel also displays the current humidity. Maintain appropriate humidity levels by adding water to the external filling port as needed.
- Egg Placement: Once the incubator has reached stable temperature and humidity, carefully place fertile eggs into the egg tray. Ensure eggs are positioned correctly for the automatic turning mechanism.
- Automatic Egg Turning: The incubator's automatic egg turning feature will activate periodically. This ensures even heating and prevents the embryo from sticking to the shell. No manual intervention is required for turning.
- Egg Candling: To check the development of the embryos, use the integrated LED egg candler. Press the dedicated candler button on the control panel to activate the light. Hold an egg over the light to observe its contents. Remove any infertile or non-developing eggs.
- Hatching Period: Monitor the incubation period according to the specific egg type. Towards the end of the incubation period (typically the last 3 days), it is recommended to stop the automatic turning function and increase humidity slightly to aid hatching.
6. Maintenance
- Cleaning: After each hatch, unplug the incubator and allow it to cool. Disassemble the egg tray and clean all internal surfaces with a mild disinfectant solution. Rinse thoroughly and dry completely before reassembly or storage.
- Water Tray: Regularly clean the water channels to prevent algae or bacterial growth.
- Storage: Store the incubator in a clean, dry place when not in use.
7. Troubleshooting
- Incubator Not Powering On: Check power connections. Ensure the AC cord is securely plugged in or the 12V DC battery is properly connected and charged.
- Temperature Fluctuations: Ensure the incubator is placed in a stable environment away from drafts. Verify the fan is operating correctly.
- Humidity Too Low: Add more water to the external filling port. Ensure the water channels are not blocked.
- Eggs Not Turning: Check if the egg turning motor is connected and the egg tray is properly seated. If the issue persists, contact customer support.
- Poor Hatch Rate: Review your incubation parameters (temperature, humidity, turning frequency) against recommended values for your specific egg type. Ensure eggs are fertile and stored correctly before incubation.
8. Specifications
| Parameter | Value |
|---|---|
| Product Name | Automatic Incubator |
| Material | Polypropylene |
| Hatching Capacity | 12, 24, or 48 eggs (depending on model) |
| Rated Voltage | 220V AC / 12V DC |
| Power | 35W |
| Frequency | 50-60Hz |
| Application | Chicken, Duck, Goose, Pigeon, and other poultry eggs |
9. Warranty and Support
For warranty information or technical support, please refer to the documentation provided with your purchase or contact the seller directly. Keep your purchase receipt as proof of purchase.